Pontiac Wiki Pontiac Wiki

Creating & Managing Line Items

Creating & Managing Line Items

  • Line Item Parameters
    • Active Box
    • Basic & Advanced Setup
    • Inventory Type
    • KPIs
    • Creative Type
    • Budget Parameters
    • Frequency Parameters
    • Daily Pacing
    • Allow for Cookieless Users
    • Set as Remarketing
    • Bid Data
    • Optimization Schedule
    • CPA Weighting
    • Enable Foot Traffic Reporting
  • Targeting Menu
    • Exchanges
    • Deals
    • Geo
    • Day Parting
    • Site Lists & App Lists
    • Zip Codes
    • Inventory
    • Video
    • Viewability Threshold
    • Operating System
    • Device Models
    • Ads.txt
    • Deal Lists
  • Associate Creatives
  • Associate Conversion Pixels
  • Associate Audiences
  • Managing Line Items
    • Edit a Line Item
    • Clone a Line
    • De-activate a Line Item
    • Lines with Expired Segments or Deals
  1. Home
  2. Origin Documentation
  3. Creating & Managing Line Items

Active Box

Activating or Pausing a New Line Item:

When creating a new Line Item, open the Advertiser under which the Line will fall under and select ‘New Line’. Next to the KPI selection, you will see the ‘Active’ checkbox. To activate the campaign immediately, check this box. To keep it inactive, leave the box unchecked. You can return to these settings at any time to update the activation status.

Activating or Pausing an Existing Line Item:

If your Line Item has already been created and you would like to pause or re-activate the campaign, click on the name of the Line Item to open the Line Item Settings. If you are at the Advertiser level and do not see the Line Item you are looking for, toggle the ‘Active’ dropdown to ‘Inactive’. Then click on the name of the Line Item to open the Line Item Settings. Click the ‘Edit’ button in the top right corner of the screen and select the ‘Active’ box. To pause a campaign, un-check the ‘Active’ box. To re-activate a campaign, check the ‘Active’ box.

Basic & Advanced Setup

When creating a new Line Item, open the Advertiser under which it will be placed and select ‘New Line’. Choose between ‘Basic’ or ‘Advanced’ setup by selecting the corresponding option. Basic mode limits the modifiable parameters for a simplified setup, while Advanced mode provides full customization options.
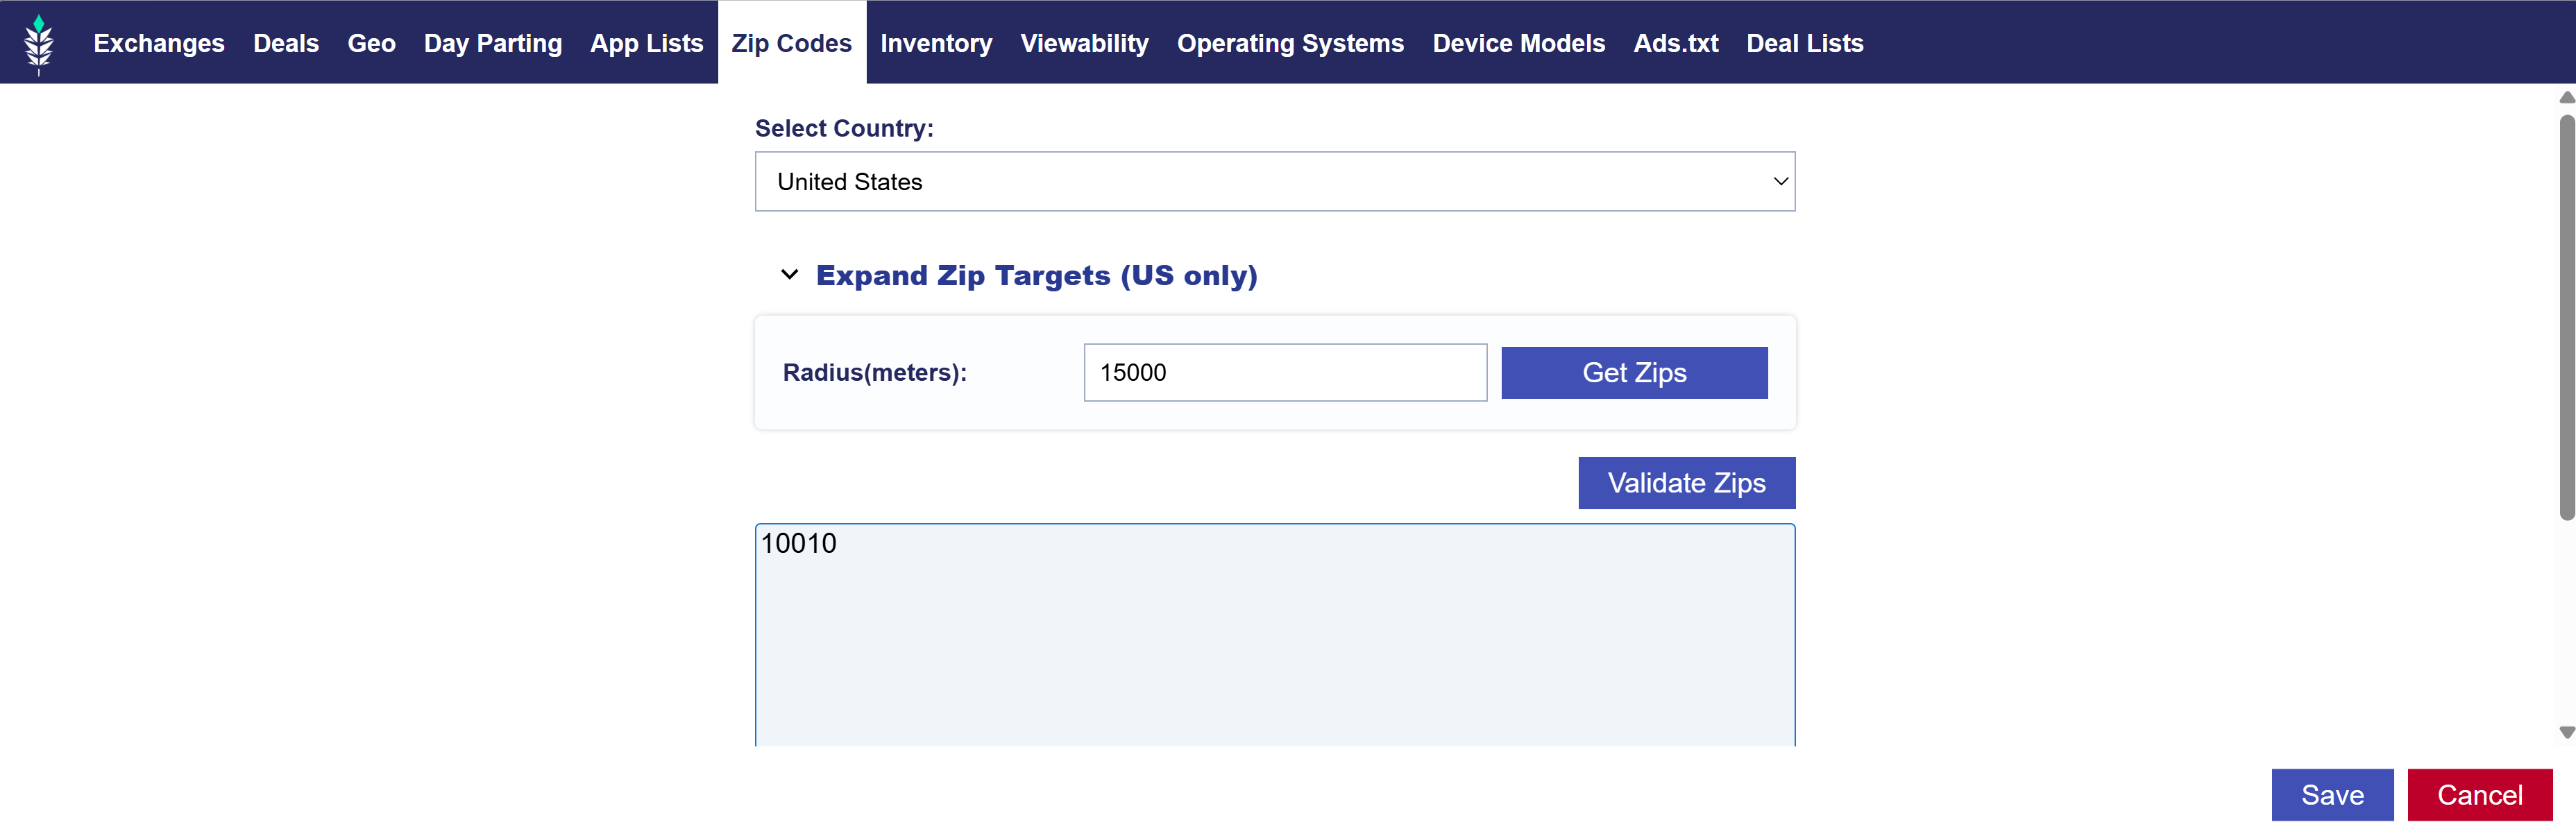
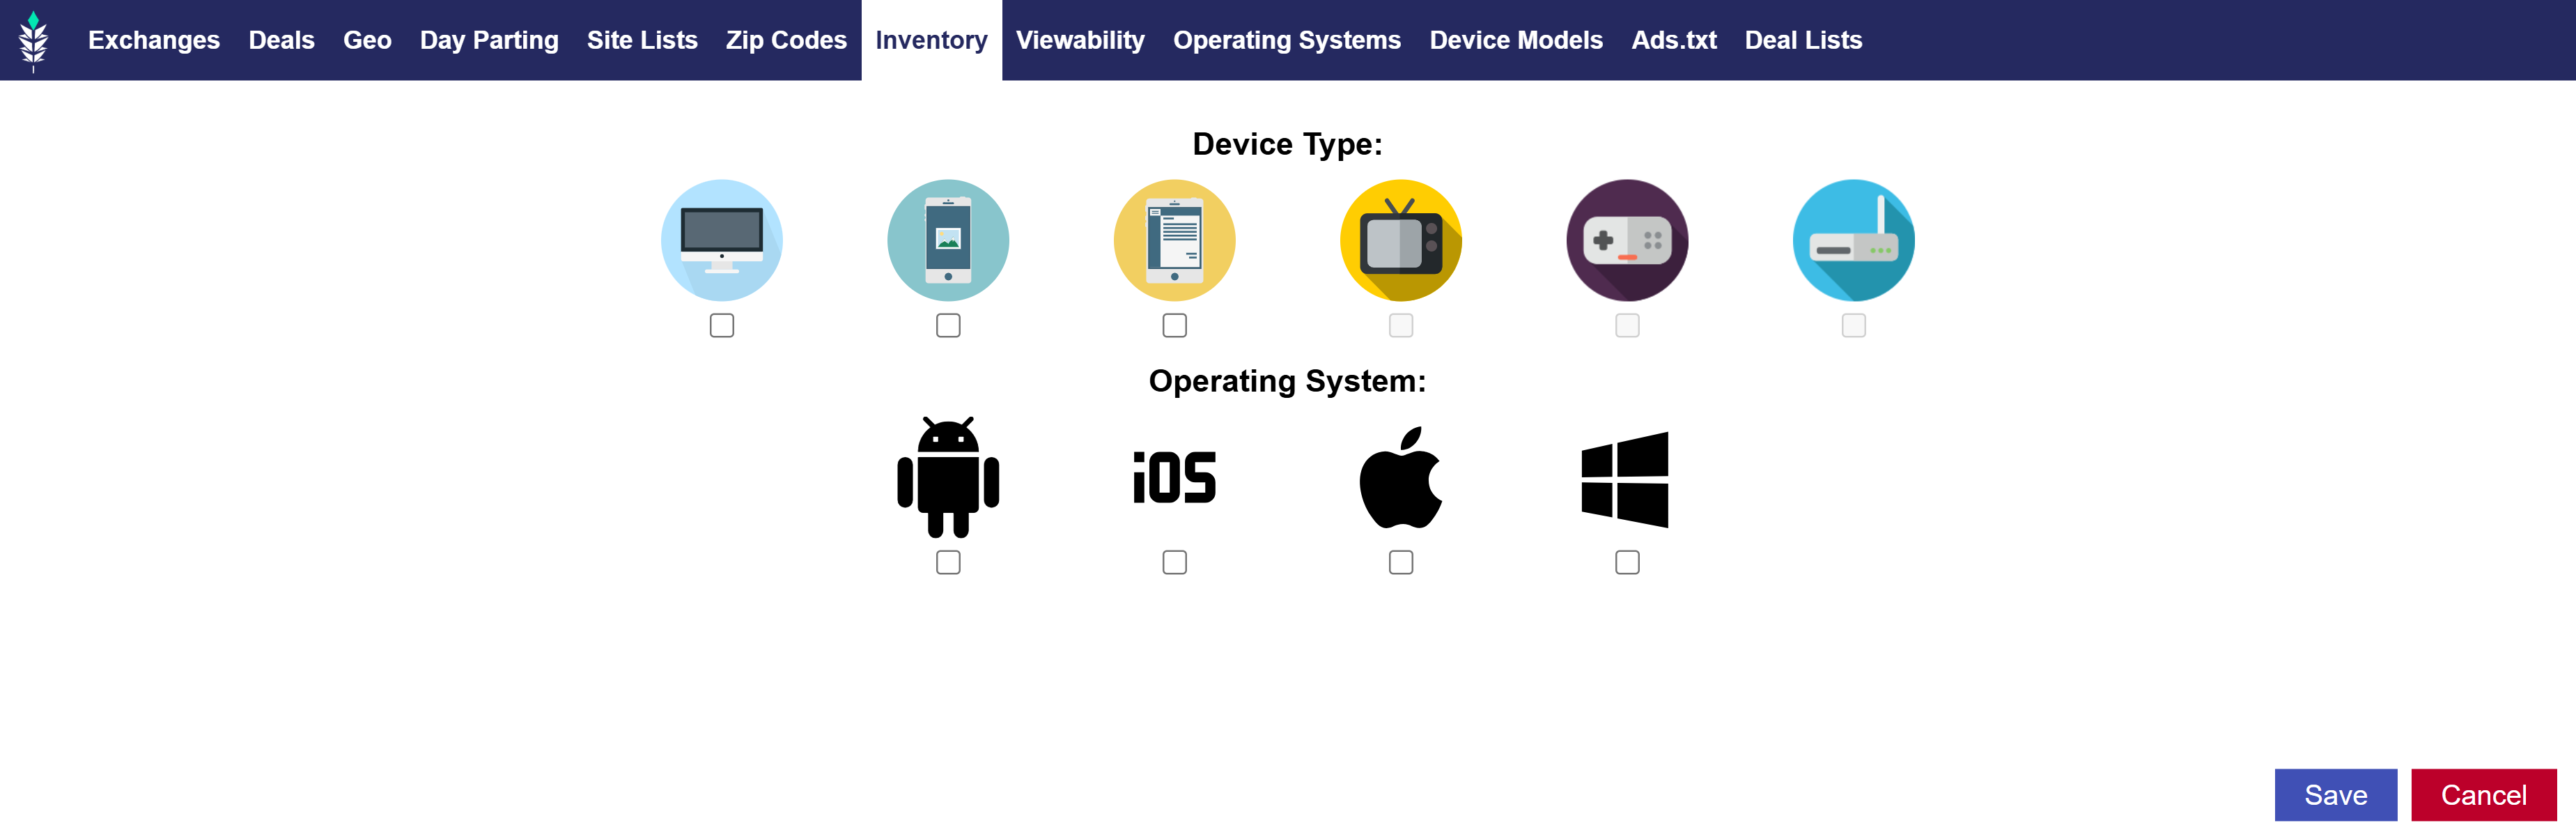
Inventory Type

When setting up a Line Item, select from the following Inventory Types:

  • Web: This includes desktop & mobile web
  • In-app: This runs on mobile applications
  • CTV: CTV is a specific subset of OTT, defined as premium video content streamed only on televisions that are connected to the internet via Smart TV apps, Game Consoles and Set Top boxes.
  • OTT: OTT is defined here as premium TV content delivered via an internet connection that is streamed on Mobile, Desktop, and Tablet devices ONLY.
  • Open: Open allows for all inventory types and should only be used by advanced programmatic buyers. Exercise caution when using this inventory type to ensure you are getting the desired results. For example, if you apply a Site List, but do not specify ‘Web’ inventory, this will serve on these whitelisted sites and ANY app unless an App List is also applied.

Once Inventory Type is selected and the Line is submitted this cannot be changed.

KPIs

The Pontiac algorithm optimizes your campaign based on the selected Key Performance Indicator (KPI):

  • CTR (Click Through Rate): Select this KPI if your goal is to increase clicks and drive more traffic to a site. Calculation: Clicks ÷ Total Impressions.
  • CPA (Cost Per Acquisition): Select this KPI if you are trying to decrease the cost per conversion on the campaign. Calculation: Campaign Cost ÷ Number of Conversions.
  • vCTR (Viewable Click Through Rate): Select this KPI to increase the number of clicks on viewable ads. Calculation: Clicks ÷ Viewable Impressions.
  • Viewability: Select this KPI to maximize the viewability of your campaign. Per IAB guidelines, an ad is considered Viewable if 50% of the pixels are in-view for 1 second or more. Calculation: Viewable Impressions ÷ Total Impressions Served.
  • VCR (Video Completion Rate): Select this KPI for video campaigns to optimize for completed video views. Calculation: Video Completions ÷ Total Videos Served.
  • Reach: Select this KPI to attempt to spend the entire allocated budget without optimizing to a specific performance metric.

For KPI recommendations by Product see here: Product Offerings & Targeting Strategies.
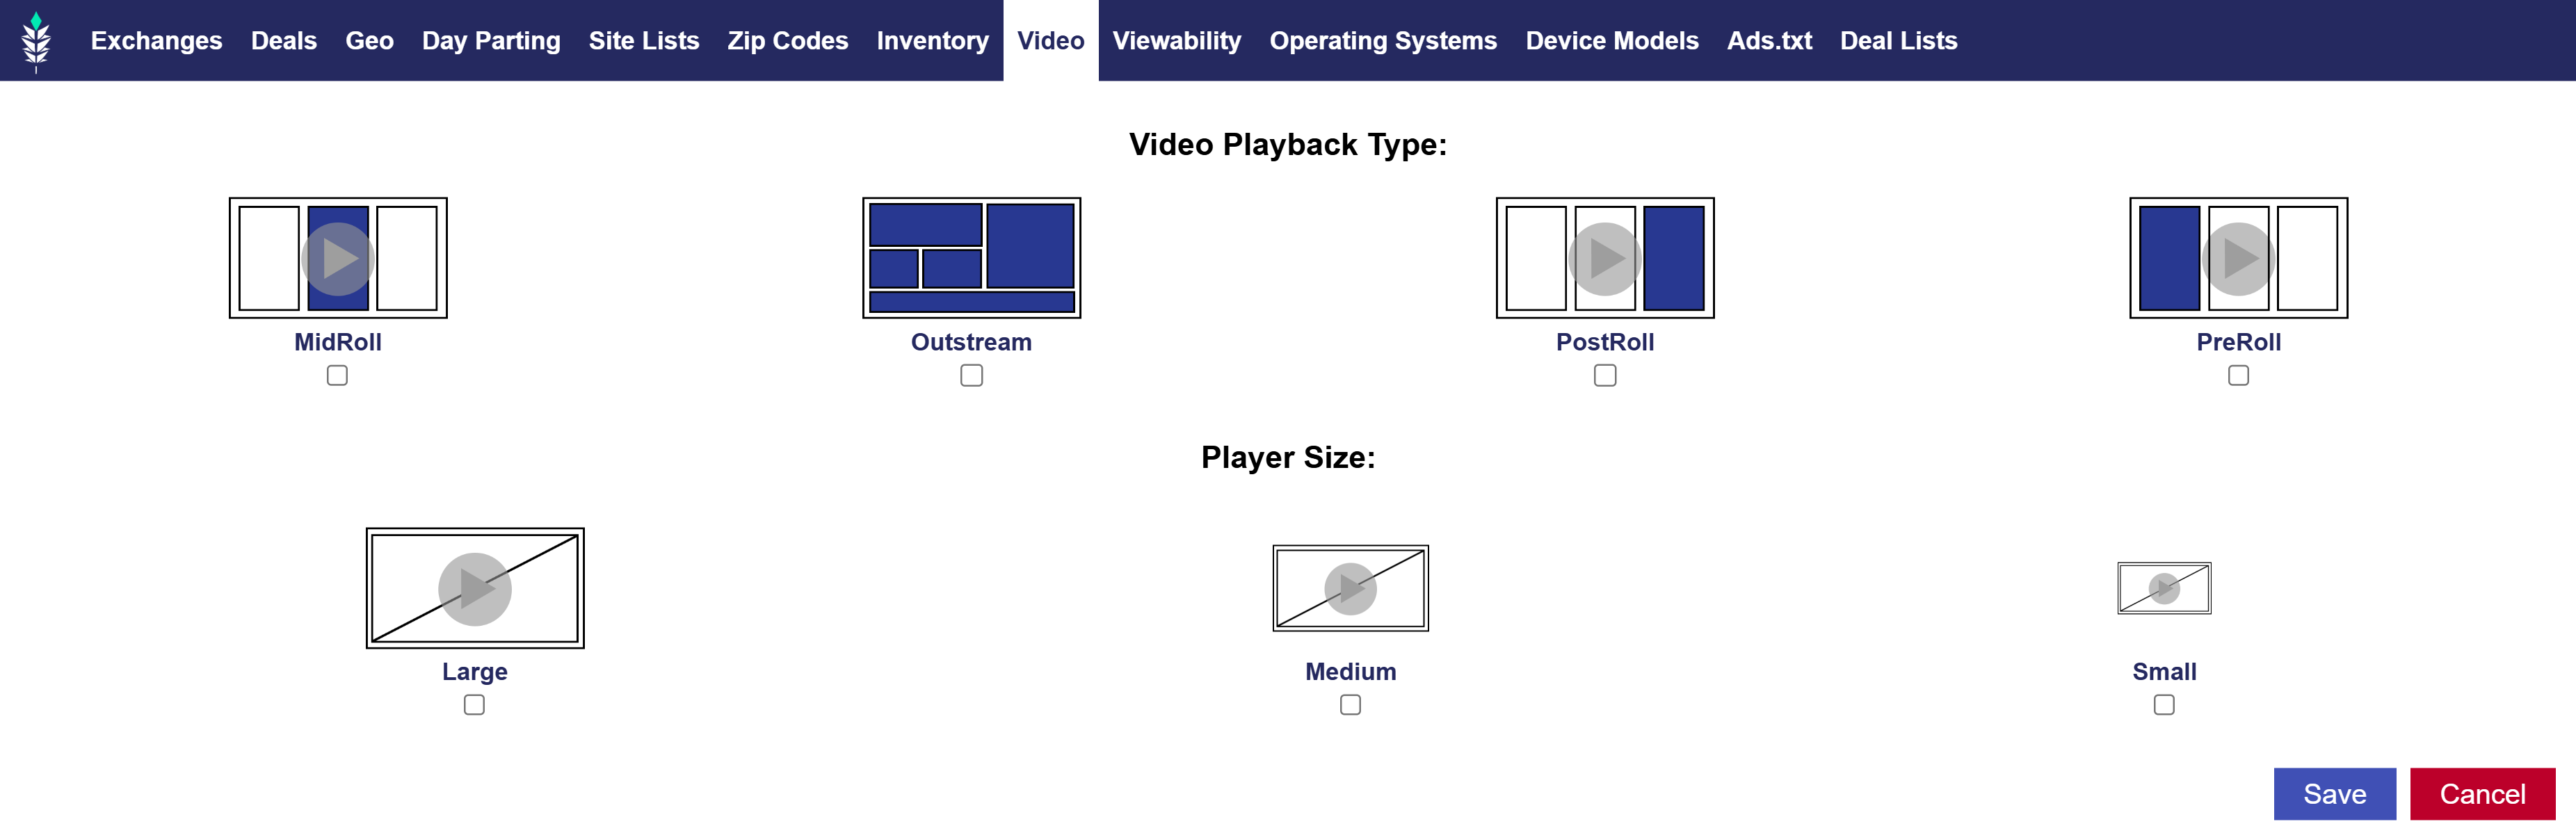
Creative Type

Each Line Item is limited to serving only one Creative Type, and this selection cannot be changed once the Line is submitted. The available Creative Types are:

  • Banner
  • Video
  • Native
  • Audio

Budget Parameters

  • Budget by Spend: Select ‘Budget by Spend’ and enter the total budget under ‘Lifetime Cost’. Pontiac will automatically calculate and populate the ‘Lifetime Impressions’, ‘Est. Daily Cost’ and ‘Est. Daily Imps’ fields based on the total cost and bid data. You can also enter a daily budget under ‘Est. Daily Cost’ and Pontiac will automatically fill the ‘Lifetime Cost’, ‘Lifetime Impressions’, and ‘Est. Daily Imps’ fields based on the daily cost and bid data.
  • Budget by Impressions: Select ‘Budget by Impressions’ and enter the total number of impressions desired. Pontiac will automatically calculate and populate the ‘Lifetime Cost’, ‘Est. Daily Cost’ and ‘Est. Daily Imps’ fields based on the number of impressions and bid data. You can also enter a daily impression budget under ‘Est. Daily Imps’ and Pontiac will automatically fill the ‘Lifetime Cost’, ‘Lifetime Impressions’, and ‘Est. Daily Cost’ fields based on the daily impressions and bid data.
  • Dynamic Budget Multiplier: This is built in as a pacing function to ensure campaigns stay on target. It allows Pontiac to adjust the daily spend to either catch the campaign back up to perfect pacing, or slow down spend to keep the campaign from spending out too early. This will adjust daily.
  • Budget Multiplier: If you do not utilize the dynamic budget multiplier, you can set your own budget multiplier that will pace out your campaign by multiplying your budget by this number. For example: a $100 budget with a 1.1 budget multiplier, the campaign will pace out to $110. If you are measuring your success of billings via a DoubleClick third-party tag, we recommend using 1.05 or 1.1 as the multiplier. This means you will serve 1.05x or (1.1x) your goal to ensure that you cover the discrepancy against the third-party tag.
  • Soft Cap Budget: This function allows you to remove dynamic budget features to try to maintain stricter daily spend. The platform will attempt to spend the ‘Est Daily Cost’ each day, as opposed to spending to maintain pacing based on the lifetime budget. Actual spend may still exceed the soft cap budget and this function may not work if using ASAP pacing or targeting is too open. 

Frequency Parameters

  • Daily Frequency Cap: The daily frequency cap controls the maximum number of times an individual can be served an ad in a single day. 
  • Lifetime Frequency Cap: The lifetime frequency cap controls the maximum number of times an individual can be served an ad in the lifetime of the campaign. 
  • Dynamic Frequency: The dynamic frequency function allows the platform to adjust frequency caps based on the campaign’s pacing. If a campaign is pacing behind, this will increase the number of times a user can be served an ad. If the campaign is pacing ahead, this will decrease the number of times a user can be served an ad.
  • 2 min Frequency: This will only allow ads to serve once every 2 minutes to an individual user to avoid publishing your ad to a user multiple times on the same site.

Daily Pacing

  • Even Pacing: Impressions will be paced out evenly throughout the day.
  • ASAP Pacing: The campaign will attempt to spend the daily budget as quickly as possible. This will double your bid price and may cause your Line to pace ahead of schedule. Because ASAP pacing will remove the performance focus of the campaign, we only recommend using ASAP pacing for campaigns that are extremely behind on budget and/or nearing the end of the campaign, or for single-day campaigns. 

Set as Remarketing

This box can only be checked when CPA is selected as the KPI. If the campaign is a remarketing campaign select this option, which will require a segment pixel to be attached. 

Allow for Cookieless Users

The ‘Allow for Cookieless Users’ feature ensures that impressions are served to users who may have cookies disabled or in cases where no cookie is shared by the publisher. This allows campaigns to continue running even in environments where cookies are unavailable for targeting. This feature is automatically applied to all CTV, OTT, and In-App Line Items, as requiring cookies in these environments may prevent the campaign from serving.

It is also recommended to enable this feature for streaming Audio campaigns since cookies are often not available for targeting in these environments. For Mobile Web campaigns, enabling the ‘Allow for Cookieless Users’ feature is essential to serve impressions to Safari users, as Safari blocks third-party cookies by default.

Please note that while this feature ensures broader targeting, including users without cookies may impact the accuracy of frequency caps and conversion tracking when cookies are unavailable.

Bid Data

This is where you can control the CPM (cost per 1000 ads) of the campaign. Higher bids will help win more auctions and access higher quality inventory. Closing bids are an ‘all-in’ price and include the Pontiac 20% Software User Licensing Fee and any other relevant fees. 

  • Min Bid: The minimum CPM you are willing to enter auctions at. This sets a floor price, preventing lower-quality inventory from being targeted, as the campaign will not attempt to serve impressions below this threshold.
  • Base Bid: The initial bid submitted in an auction. If the final clearing price is lower than the base bid, the system will adjust and bid one cent above the next highest bid to secure the impression efficiently.
  • Max Bid: The maximum CPM you are willing to pay for an impression. If the auction price reaches this threshold, the system will stop bidding on that placement.

For general bid recommendations see here: Bid Recommendations. 

Optimization Schedule

The optimization schedule allows you to select the days of the week and the frequency at which the Pontiac algorithm will make optimizations to your campaign. To allow the algorithm to learn effectively, it is recommend to start with optimizing only once per week. 

Once your campaign reaches 35-50 clicks per day (if your KPI is CTR) or 35-50 conversions per day (if your KPI is CPA), you can increase the optimization frequency to two to three times a week. This helps the algorithm refine its approach based on more data and improve performance.

CPA Weighting

When CPA is selected as the KPI, a sliding bar labeled ‘CPA Weighting’ will appear next to the optimization schedule. This allows you to adjust the optimization focus between post-click or post-view conversions.

If your conversion pixel uses a hybrid trigger (both click and view), it is recommended to set the weighting to 50/50 to balance the optimization between both types of conversions. This ensures that the algorithm optimizes for both post-click and post-view actions effectively.

Enable Foot Traffic Reporting

Foot Traffic Attribution is a type of Conversion reporting powered by OnSpot, that allows advertisers to track how many users were served an ad unit through Pontiac and then visited a commercial location. When this box is checked the campaign will receive Foot Traffic Attribution Reports. Once selected, the ‘Foot Traffic Reporting’ section will become available to add the addresses that you would like to track. Use the ‘Add Location button’ then follow the steps here to add each location that you would like to track: Adding Locations for Foot Traffic Attribution

Foot Traffic Attribution is only available in the United States at this time. The cost for Foot Traffic Attribution is as follows:

  • $1.50 CPM for Banner, Native, Audio & Video creatives
  • $4.00 CPM for CTV creatives

For campaigns receiving Foot Traffic reports, we recommend adding the associated CPM to the bid recommendations for the media type of the campaign.

Foot Traffic Attribution Reports can be found in the Reporting tab in the ‘Foot Traffic Studies’ section and metrics will also be available in the ‘Foot Traffic Reporting’ and ‘Performance’ sections of the Line Item. Foot Traffic metrics and reports will be updated once daily, on a 3-5 day delay.

See additional information on Foot Traffic Attribution here: Foot Traffic Attribution

Exchanges

Select the exchanges that you wish to buy media through. These are inventory sources that your ad will run through (also known as Supply Side Platforms). You can select as many or as few exchanges as you would like. As a starting point, we recommend you run on ALL exchanges, so you have access to the most inventory. To target an exchange, click the green plus button next to the name of the exchange in the list on the left-hand side. This will add this exchange to the campaign. To remove an exchange, click the red minus button next to the name of the exchange in the list on the right-hand side.

Recommended Exchanges by Creative Type:

  • Audio: Use Deals and remove all Exchanges, or use Spotify, Adswizz, Triton Digital Exchanges.
  • Banner: Use all Exchanges, and remove as needed based to performance.
  • CTV: Use Deals and remove all Exchanges.
  • Native A: Use Triplelift, Sharethrough, Microsoft.
  • Native B: Use Taboola.
  • Native C: Use Outbrain.
  • Native D: Use Microsoft.
  • OTT: Use Deals and remove all Exchanges.
  • Online Video: Use all Exchanges, and remove as needed based on performance. Deals are also available.

For more information on how the ad exchange works, see here: How the Ad Exchange Works
See the full list of available exchanges here: Exchanges

Deals

These are private marketplace deals, or PMPs, are a method through which publishers privately grant access to premium inventory to a specific Advertiser or group of Advertisers. These PMPs are still real-time bidding environments in which the highest bid will win the impression, but the bidding will start at a specified price floor as defined by the publisher. You can see the full list of available PMPs in the ‘Inventory’ tab. This Deals list includes the Inventory Type, Media Type, App Type, Content Category, Price Floor and more. The targeted Deals on a Line should match the Inventory Type and Media Type (Creative Type) of the Line Item. For more information on what each column means, see here: Open Exchange vs. Deal Inventory

To request access to a specific PMP, use the ‘Request Access’ button next to the name of the desired PMP. Please allow at least 2 business days for access, with longer turnaround times if many Deals are requested. Once access is granted, the PMP will appear in the ‘Deal’ section of the Targeting Menu on the Line Item. Remove all exchanges from the Line Item targeting and associate the selected Deals using the green plus sign next to the name of the Deal. The Price Floor provides guidance for bidding, but it’s recommended to add at least $5-10 to the price floor for your Max Bid. Since this is still an RTB environment, competitive bids are necessary to achieve scale with premium inventory.

Download a list of PMP Publishers here:

Pontiac-PMP-Publisher-ListDownload

To review the complete details for all available PMPs, please review the ‘Deals’ table in the ‘Inventory’ tab of the platform.

Geo

In the ‘Geo’ tab of the ‘Edit Targeting’ section on the Line Item, you can select Countries, Regions, DMAs, and Cities for where your campaign will be targeted. Below are the key points to setting up Geo targeting:

  • Country Selection: At least one Country must be selected to begin targeting. Once a country is chosen, you can further refine your targeting by adding secondary geographic layers such as Regions, Designated Marketing Areas (DMAs), or Cities. Note that Regions refer to states, provinces, or municipalities.
  • Targeting Funnel: Geo targeting works like a funnel, where the most granular targeting condition must ALWAYS be met for an impression to be served. For instance, if you select a zip code in Miami, along with the Miami DMA and United States as the country, your campaign will only serve in that specific zip code since it’s the most granular level of targeting.
  • Layer Consistency: Each layer of Geo targeting must coincide with the previous layers. If there are conflicts, such as selecting the United States, a New York City DMA, and a Florida zip code, the campaign will not be able to serve because the DMA and zip code are geographically inconsistent.
  • Available DMAs: The following countries support DMAs for targeting.
    • Aland Islands
    • Australia
    • Canada
    • China (Diji Shi cities)
    • Finland
    • France (Departments)
    • Germany (German Nielsen Metro Codes)
    • Korea, Republic of (Si/Gun/Gu)
    • New Zealand
    • Norway
    • Russian Federation (Federal Districts)
    • United Kingdom (ITV Regions)
    • United States (DMAs)

Day Parting

In the ‘Edit Targeting’ section of the Line Item, under the ‘Day Parting’ section, you can select specific times of day and days of the week you would like your campaign to serve.

  • Time Zone Consideration: Day parts target users according to the time zone they are located in when the ad is served. For example, a Line set to serve from 9am to 9pm in the U.S., will start serving at 9am EST to users on the eastern coast, and will start serving to users on the western coast at 9am PST.
  • Multiple Time Zones: To serve ads across the U.S. at the same time in every time zone, you will need to create a separate Line for each time zone and set the day parts accordingly.
  • Selecting Days: If you wish to serve ads on a specific day, check the box next to that day of the week. To stop serving ads on a particular day, simply uncheck the box next to that day.

Site Lists & App Lists

If no site list is attached to your campaign, domain targeting will be open by default.

  • Create Custom Lists:
    • Navigate to the ‘Inventory’ tab.
    • Select ‘New Site List’ or ‘New App List’.
    • Once a list is saved, it will automatically appear under the ‘Site Lists’ or ‘App Lists’ section in the ‘Targeting’ menu of the Line Item.
  • Premade Lists:
    • Pontiac also provides premade site lists and app lists for various categories that you can choose from.
  • Allow List vs. Block List:
    • Allow List (Target): Use this to target specific sites or apps.
    • Block List (Avoid): Use this to avoid specific sites or apps.
  • How to Associate Site or App Lists:
    • Go to ‘Edit Targeting’ within your Line Item.
    • In the ‘Sites Lists’ or ‘App Lists’ tab, select the ‘Allow List’ or ‘Block List’ bubble, depending on your targeting needs.
    • Click the green plus sign next to the list you want to target or avoid,
    • The associated lists will appear on the right side of the screen.

The following are definitions of the default Pontiac Site Lists:

  • Arts and Performance –  Sites of various branches of creative activity, such as painting, music, literature, and dance.
  • Auto – Sites in the automotive industry or sites for people interested in auto.
  • Beauty and Fitness – Sites for inner and outer beauty and health.
  • Books and Literature – Sites for book/literature lovers.
  • Business and Industry – Sites for business minded people.
  • Finance – Sites for financial information, trends, and advice.
  • Food and Drink – Sites for foodies, recipes, and restaurants.
  • Gaming – Sites to play entertaining games on.
  • Health – Sites for fitness, general health, and health trends.
  • Hobbies and Interests – Sites for people who interested in popular extracurricular activities.
  • Home and Garden – Sites for home décor, home maintenance, and sites for outdoor gardening.
  • Internet and Telecom – Includes mostly tech sites and sites for people interested in tech, internet, and telcom.
  • Job and Education – Sites for people who are looking for new jobs or want to further their education.
  • Law and Government – Sites for legal advice or for government information.
  • News – Includes major national news sites.
  • Online Communities – Sites for communities whose members interact with each other primarily via the Internet. Members of the community usually share common interests.
  • People and Society – Includes world culture and pop culture sites.
  • Performance – High performing sites: Premium inventory and High CTRs.
  • Pets and Animals – Sites for pet lovers, pet information, animal lovers, and animal information.
  • Real Estate – Sites for rentals, house listings, and people interested in real estate/market.
  • Reference – Sites for people who are looking for further information. Some sample sites from this list are dictonary.com, usingenglish.com, and howstuffworks.com.
  • Science – Sites for scientists or people interested in science or doing scientific research/experiments.
  • Shopping – Sites for clothing stores, fashion, and fashion trends.
  • Sports – Sites on information on national sport games and sport news.
  • Travel – Sites for vacations and travel tips.
  • World Localities – Sites for local and world news.

The following are the definitions of the default Pontiac App Lists:

  • Auto – Apps for car shopping & reviews.
  • Business & Finance – Apps for business news, finance news, stocks, trading, budgeting tools, currency converters, and crypto.
  • Entertainment – Apps for literature, cinema review, pop culture, and celebrity news & trends.
  • Fitness & Health – Apps for workout plans, fitness guides, meal planning, calorie counters, and step trackers.
  • Food – Apps for food delivery, recipes, cookbooks, and nutrition.
  • Games – Apps for trivia, word search, puzzles, poker & card games, chess, and sudoku.
  • Lifestyle & Shopping – Apps for style, fashion, shopping, and home & garden.
  • Music – Apps for radio, music downloaders, and instruments.
  • News – Apps for national & local news.
  • OTT/CTV – Apps for premium streaming TV for OTT and CTV.
  • Premium – Apps for tier 1 publishers.
  • Sports – Apps for sports news and scores & streaming.
  • Tools & Reference – Apps for weather, calculators, dictionaries, translators, and maps.
  • Travel – Apps for hotels, flights, and travel guides.

Zip Codes

You can target specific zip codes in the United States or other countries through their regional postal code system. By targeting a set of zip codes, a client’s ads will only serve in the most relevant areas. You can use as few zip codes as needed, but keep in mind that a small set of zip codes will limit delivery. These zip codes can be created in either the ‘Audiences’ tab through the custom zip code audience or in the Line Item targeting menu.

To create a list of zip codes in the Line Item targeting menu, follow the below steps:

  • Select the Country: From the dropdown menu, choose the country you want to target.
  • Enter Zip Codes: Paste the zip codes you wish to target into the textbox, separated by commas.
  • Add a Country: To add a country to the dropdown menu, contact your Account Manager via email.

Tip for Better Scale:

  • Expand Zip Targets: If your zip code targeting isn’t scaling effectively, use the ‘Expand Zip Targets’ feature. In the Targeting menu, open the zip code tab, enter a radius in meters, and select ‘Get Zips’. This will find zip codes within this radius from the center point of the zip code/s entered. A window will open showing you the list of zip codes found within this radius. Select ‘Add Zips’ to add the new zip codes to the targeting on the Line Item.

Inventory

When setting up a Line Item, you will select the Inventory Type in the Line Item settings. In the Inventory Targeting tab, you will see the selected Inventory Type appear with a checkbox. Return to the Line Item parameters to change the Inventory type.

Web Inventory: If you selected Web, you can specify the devices you want to target:

  • Desktop
  • Mobile-Web
  • Tablets
  • Or any combination of these

CTV Inventory: If you selected CTV, you can specify the devices to target:

  • TV
  • Game Consoles
  • Set-Top Boxes
  • Or any combination of these

Web & Mobile Operating System:

  • Android
  • Apple iOS
  • Apple Mac
  • Microsoft Windows

CTV Operating System:

  • Roku OS
  • Samsung OS
  • Apple TV
  • Chrome OS
  • Life is Good OS
  • PlayStation OS
  • Unknown

More specific Operating Systems can be chosen in the ‘Operating Systems’ tab.

Video

When Video is selected as the Creative type, a Video tab will appear in the Targeting menu to select Playback Type and Player Size.

Playback Type

  • MidRoll: An instream placement where ad plays during streaming video content.
  • Outstream: An outstream video is placed in non-video environments among other content.
  • PostRoll: An instream placement where ad plays after streaming video content.
  • PreRoll: An instream placement where ad plays before streaming video content.

Player Size

These sizes are publisher defined and do not have exact specifications, however, there are examples of each below for reference.
Large Player Size:


Medium Player Size:

Small Player Size:

Viewability Threshold

If you want your Line item to aim for a specific viewability threshold, check the ‘Enable Viewability Targeting’ box, and enter the viewability threshold you wish to target in the ‘Viewability Target’ area. Note that it is not recommended to deploy this feature for CTV or In-App campaigns as this targeting is not typically available in these environments, and it can prevent the Line from serving.

The viewability is not a guarantee, but rather a benchmark. The platform will determine how likely an impression is to be viewable through pre-bidding technology. Per IAB guidelines, an ad is considered viewable if 50% of the pixels are in-view for 1 second or more. Using a high threshold may limit delivery of the Line. While the IAB benchmark for viewability is 70%, this may limit the number of impressions that can be won causing the campaign to under pace. If using a strict viewability threshold, consider increasing your bid to stay competitive and maintain scale. Balancing viewability and delivery is crucial. Higher thresholds reduce available inventory, potentially leading to under-pacing.

Operating System

Choose from over 200 specific Operating Systems to target. See the full list here: Operating Systems

Operating System targeting can be used, but does come with some limitations. Due to inconsistent naming conventions used by app providers and mobile carriers, OS targeting methods for mobile apps are only available for a small portion of inventory, so targeting these may significantly limit scale. A significant portion of impressions are also from unknown browsers and operating systems, so it is recommended to include ‘Unknown’ to avoid excluding these impressions.

Device Models

Choose to target specific Device Models from over 14,000 offerings. See the full list of Device Models that you can target here: Device Models

Device Model targeting can be used, but comes with some limitations. Due to inconsistent naming conventions used by app providers and mobile carriers, the device type and device make/model targeting methods for mobile apps are only available for a small portion of inventory and may significantly reduce potential scale.

A significant portion of impressions are also from unknown browsers and operating systems, so it is recommended to include ‘Unknown’ to avoid excluding these impressions.

Ads.txt

The Ads.txt filter is a feature that can be used to restrict domains purchased through the platform to only come from sellers which are defined in the publisher’s Ads.txt file. Ads.txt stands for Authorized Digital Sellers and is a project that aims to create transparency in the programmatic advertising ecosystem. In the Ads.txt file, publishers can declare the authorized sellers for their inventory. Ensuring that domains can only be purchased through this list of sellers defined by the publisher, this increases protections against fraudulent inventory and authenticates that the URL passed in the ad call is an accurate representation of the inventory being bought and the seller it is coming from. You can see an example of an ads.txt file here: cnn.com/ads.txt

For more information on the Ads.txt project, visit the IAB website here: https://iabtechlab.com/ads-txt-about

To enable the Ads.txt feature, open the ‘Edit Targeting’ section of a Line Item. In the ‘Ads.txt’ tab, check the box, then ‘Save’ and submit the Line. This feature can only be applied to ‘Web’ inventory and will not affect targeting for Deal inventory or In-App inventory. The Ads.txt file is only applicable to domains sold through the Open Exchange.

Deal Lists

Select from Pontiac Curated Deal Lists, or create your own custom list that can be used across all Advertisers and Lines for a quick and easy set-up process. In the ‘Inventory’ tab under ‘Deal Lists’, you will see the existing Pontiac curated lists. To review the Deals included in these lists, click on the name of the list. Deals included will be listed on the right-hand side of the screen. These lists cannot be edited. You will only be able to see and target the Deals in this list that you have access to. To request access to Deals, use the ‘Request Access’ button where the Deal is listed in the ‘Deal’ table above.

To create your own custom list, go to the ‘Inventory’ tab and select, ‘New Deal List’, then use the green plus button to add Deals to the list. Give the list a name, and ‘Save’. This list will then become available in the ‘Targeting’ menu of all of your Line Items to quickly associate all included Deals.

Associate Creatives

Once you have selected the targeting parameters for your Line Item, you will see a section to associate your Creatives to the Line. Click the ‘Associate Creatives’ button and it will open a window where you should see the names or your Creatives uploaded to this Advertiser on the left-hand side. (For steps to upload Creatives see here: Creative Upload). We recommend associating multiple Creative sizes to the Line when possible to increase access to inventory. To associate a Creative, click on the green plus sign next to the name of the Creative. The Creative will pass from the left-hand side of the screen to the right-hand side to indicate that the Creative is associated.

Associate Conversion Pixels

To track conversions resulting from your advertisement, you must create and place a conversion pixel then associate it to the Line Item. To create and place a conversion pixel see here: Conversion Pixels. Once a Conversion pixel is created at the Advertiser level, it will appear at the Line Item level. To associate the conversion pixel to the Line, select ‘Associate Pixels’ and a window will appear with a list of the conversion pixels under the Advertiser. Click the green plus sign next to the pixel name to associate the pixel to the Line.

Associate Audiences


To associate an Audience to a Line Item follow these steps:

  1. Create or select a Line Item and open the Line Item configuration menu.
  2. Scroll down to the ‘Audiences’ dropdown and choose the ‘Associate Segments’ button on the right-hand side.
  3. Choose the red ‘Add New Group’ button on the right-hand side of the window. A box should appear with the words ‘drag and drop segments to add new group’.
  4. Choose to target ‘Any’ or ‘All’ between groups. See the ‘Boolean Logic’ section below for an explanation of these functions.
  5. Find the segments you wish to add on the left-hand side and drag them into the box on the right-hand side.
    • ‘Audiences’: Audiences created with a remarketing pixel under this Advertiser will appear here.
    • ‘Custom Audiences’: Custom Audiences can be created in the ‘Audiences’ tab and will automatically be available to all Advertisers in the seat. Certain custom Audiences will only be available to associate when the correct ‘Inventory Type’ is selected. For example, Lat/Long Audiences can only be used when ‘In-app’ or ‘Open’ is selected as the inventory type.
    • ‘Third-Party Audiences’: For Third-Party Audiences to appear here, open the ‘Audience’ tab and use the blue ‘Associate’ button to associate the selected Audience segment to the Advertiser.
    • ‘Onboarded Audiences’: For Onboarded Audiences to appear here, open the ‘Audience’ tab and use the blue ‘Associate’ button to associate the selected Audience segment to the Advertiser.
  6. These Audiences can be ‘targeted’, or ‘anti-targeted’. To switch to ‘exclude’ or ‘anti-target’ an Audience, select the gray minus sign next to the name of the segment. When you click on the minus symbol it will change from gray to red, indicating that the Audience is now being ‘anti-targeted’. This Line Item will now serve to any user that is NOT in this Audience. In the example below, the Line will serve to anyone who is not in this segment of politically conservative users. If you are only using one Audience, there is no difference in the exclusion feature between ‘any’ and ‘all’. See the Boolean logic section below if you are using multiple Audience segments.
  7. Select the red ‘Add New Segments’ button at the bottom of the window to save the changes and then submit or save the Line Item.
  8. Add the average cost (CPM) for all associated segments to the Bid Data for the Line Item.

Edit a Line Item

To edit a Line Item, enter the Advertiser tab and find the Line Item in question. Click on the name of the Line Item to open the Line Item menu, then click the ‘Edit’ button in the upper right. Make the changes to the Line Item parameters or targeting, then click ‘Submit’ to save the changes.

The following settings cannot be changed once the Line Item is submitted – Inventory Type, Creative Type, Budget type (by spend or by impressions), and Foot Traffic Reporting. The Start Date for the campaign cannot be changed once that date has passed.

Clone a Line

To clone, or create copy, of an existing Line Item, open the Line Item and select ‘Clone’ in the upper right-hand side of the screen. This will create a copy of the Line Item, where you can then edit the settings or make changes to the existing set-up. Give the new version of the Line a name, verify the budgets and the flight dates. Change any other parameters that need to be adjusted, then ‘Submit’ to save the new Line Item.

De-activate a Line Item

To turn ‘off’ or de-activate a Line Item, open the Line Item and select ‘Edit’. Un-check the ‘Active’ box, then click ‘Submit’. A de-activated Line Item will not be eligible to spend or serve impressions. In order to maintain the integrity of the data in the platform, Line Items cannot be deleted, they must be de-activated instead.

Lines with Expired Segments or Deals

At times, Audience Segments and Deals will expire or will no longer be available for use. If you are targeting an Audience segment or Deal on an active Line, the Line will be flagged with a yellow caution symbol as the status. Hover over this symbol to read the caution message. This will indicate whether it is an audience segment or a deal that is expired as well as the ID number for the expired object.

When a Line contains an expired object, the Line will no longer be able to optimize. This includes system updates to daily budgets, frequencies, and other dynamic controls for pacing as well as the optimization splits made by the Pontiac algorithm. You will also be unable to make any edits or changes to the Line item until the expired object is removed. It is recommended whenever you see this flag to immediately remove the expired object.

In the case of custom audiences, these expire 180 days after creation. However, the data within the audience may still be usable. For example, zip codes are data that will not expire. To continue using this audience, you will need to ‘Force Refresh’ the audience to extend the expiration date. To do this, go to the Audiences tab and filter the ‘Status’ to ‘Inactive’. Find the expired Audience, open it, and click the ‘Force Refresh’ button. This will extend the expiration date for another 180 days. In this case you will not need to remove the Audience from the Line, it will automatically update the status.

For Third Party Audiences that expire, it is recommended to look for other audiences in the category to replace the expired audience.

If you are targeting an expired Deal, look through the Deals table for a similar option to replace the expired Deal. New Deals are added to the table each month and Publishers frequently push us new versions of their Deals, so you may be able to find the same Deal with a higher ‘Deal ID’ that can be utilized to replace the expired version.

© 2025 Pontiac Wiki Sec · All Rights Reserved · Developed by RDK

  • Contact Us
  • Privacy Policy
  • Terms & Conditions
  • Pontiac.media