Pontiac Wiki Pontiac Wiki

CTV Documentation

CTV Documentation

  • Overview
    • Terminology
    • Hierarchy
    • Best Practices
      • Overview of CTV Best Practices
      • How to Setup CTV with Deals
      • How to Setup CTV with Exchanges
    • Inventory & Planning
      • Deals
      • CTV Landscape Tool
      • Inventory Availability Tool
    • CTV Strategy Guide
    • CTV Bid Recommendations
  • Seats
    • Seat Settings
      • Users
      • Addendums
      • Preferences
  • Advertisers
    • Create an Advertiser
    • Edit an Advertiser
    • Navigating the Advertiser Tab
      • Filter Advertisers
      • Advertiser Level Metrics
      • Advertiser Setup Tab
      • Advertiser Performance Tab
  • Inventory
    • Inventory Lists
      • Site Lists
      • App Lists
      • Deal Lists
    • Deals
    • Negotiated Deals
  • Audiences
    • ART Audiences
    • Contextual AI
    • Custom Audiences
    • Onboarded Audiences
    • Third Party Audiences
  • Templates
    • Overview
    • Campaign Templates
      • Create a Campaign Template
      • Edit a Campaign Template
      • Clone a Campaign Template
    • Line Templates
      • Create a Line Template
      • Edit a Line Template
      • Clone a Line Template
  • Reporting
    • Standard Reporting
      • Overview
      • Summary
      • Inventory
      • Creatives
      • Device Type
      • Network
      • Deal
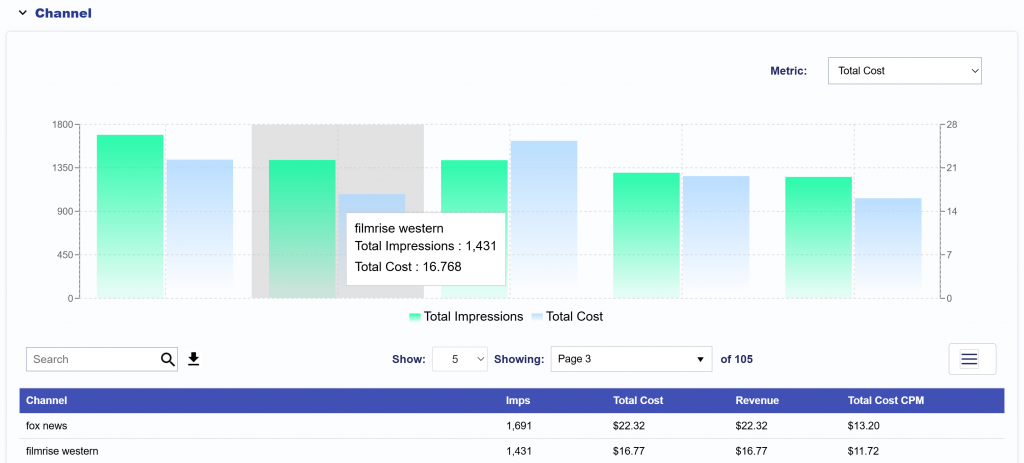
      • Channel
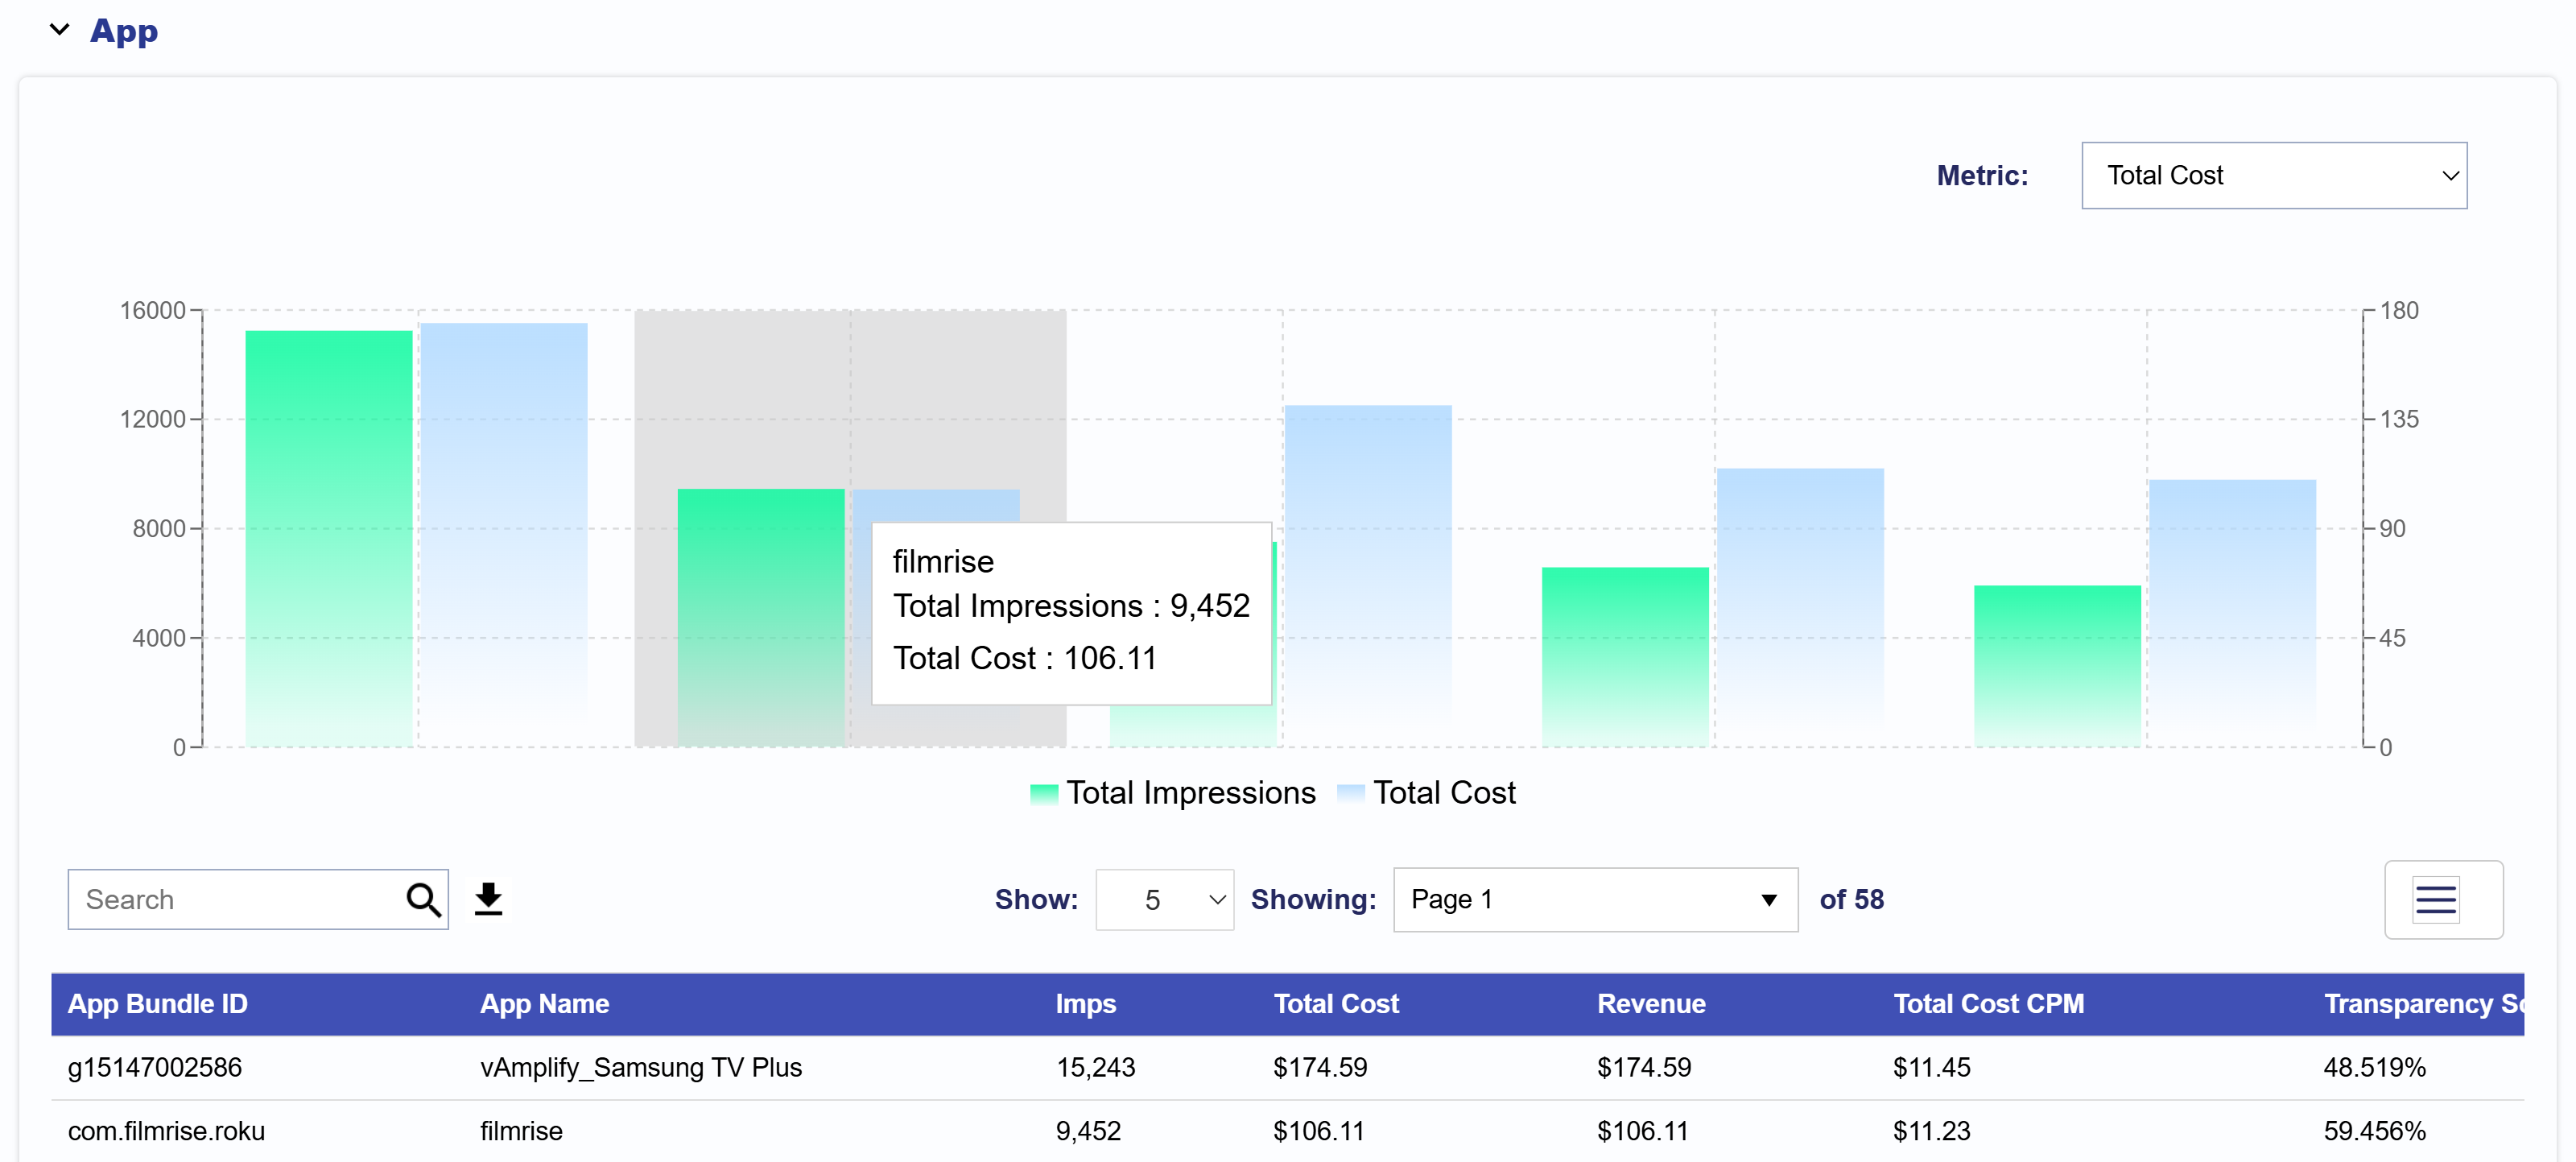
      • App
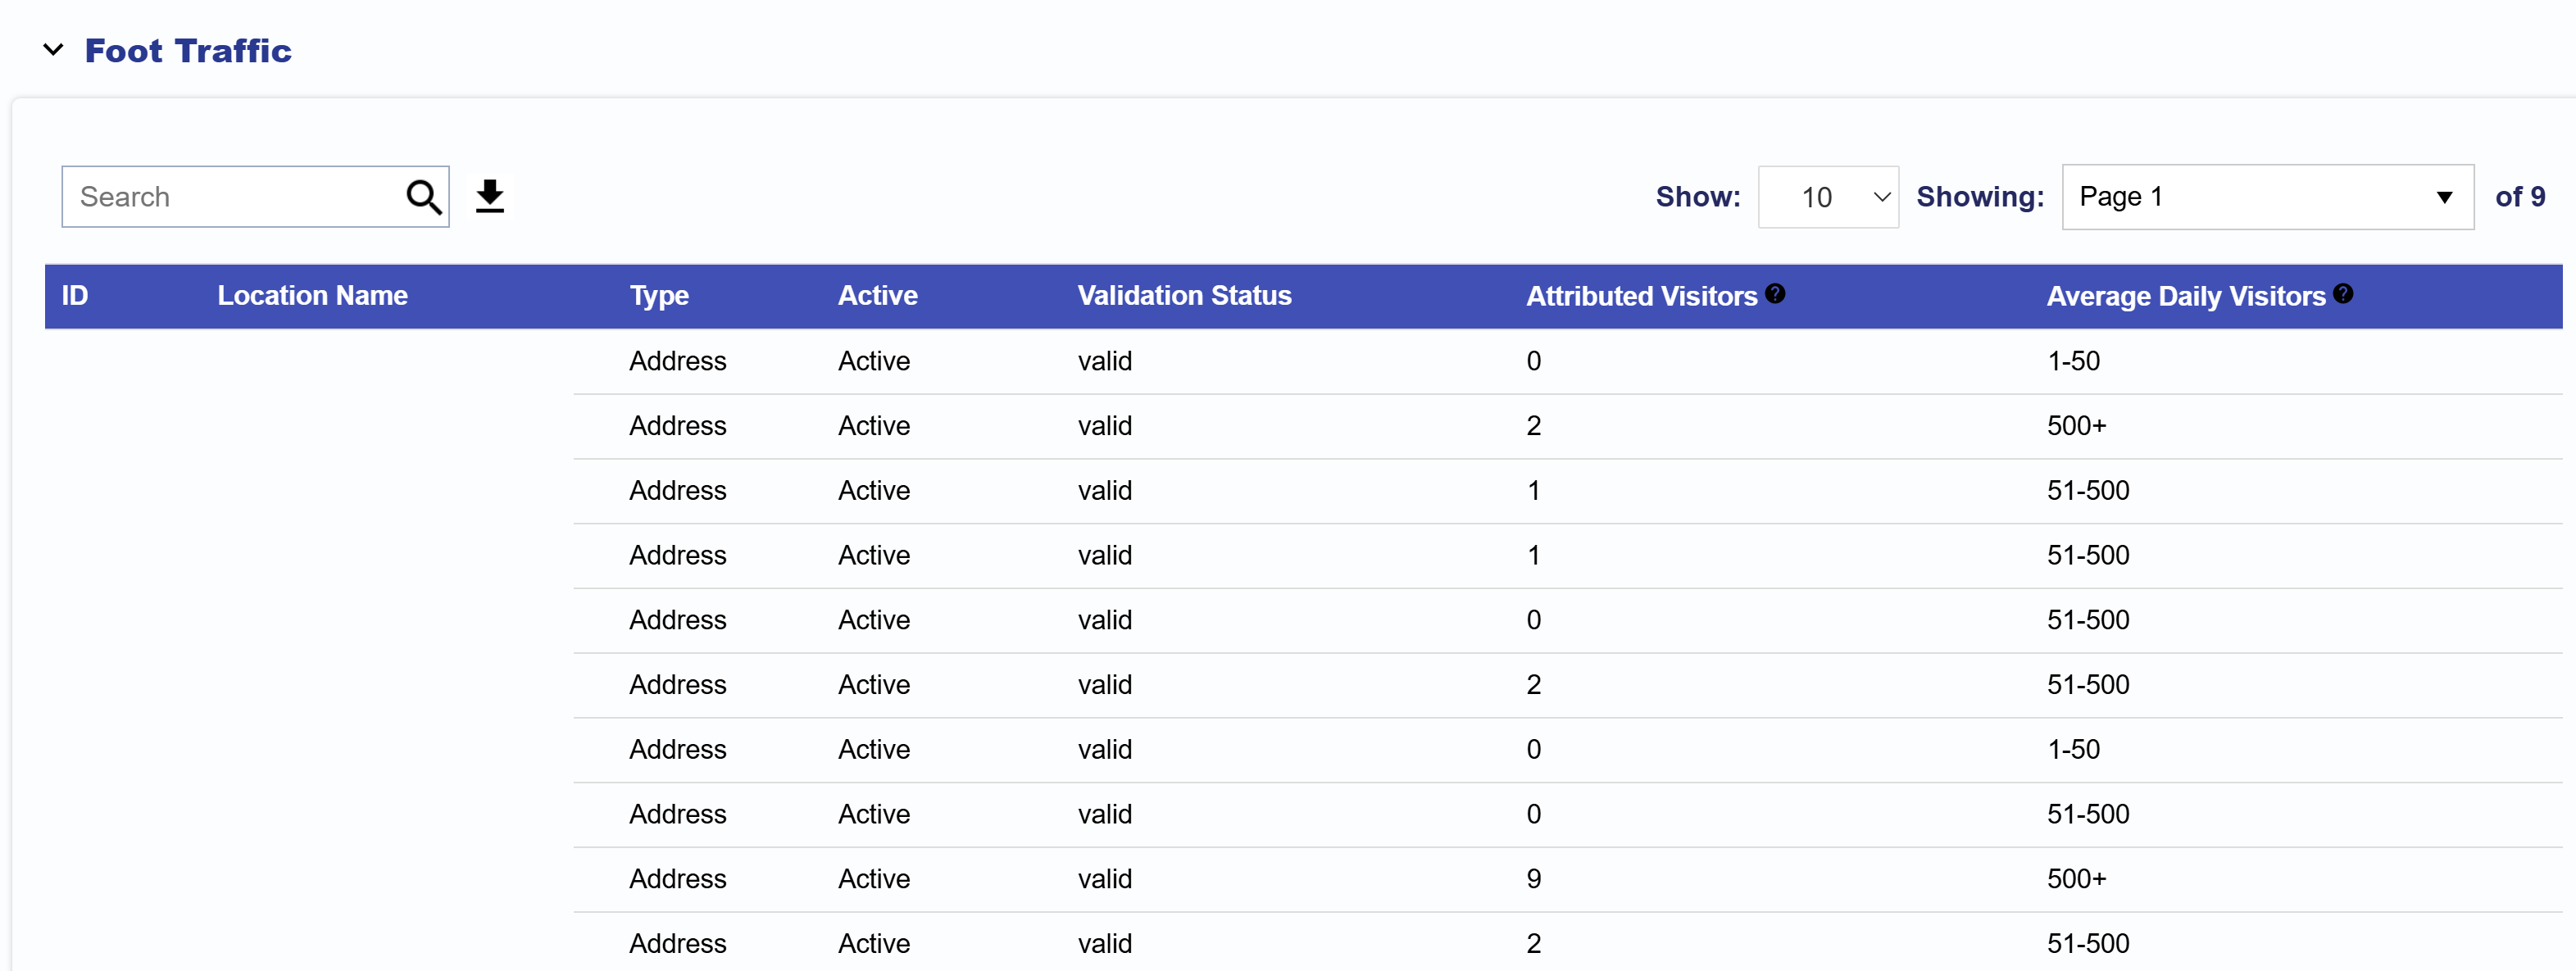
      • Foot Traffic
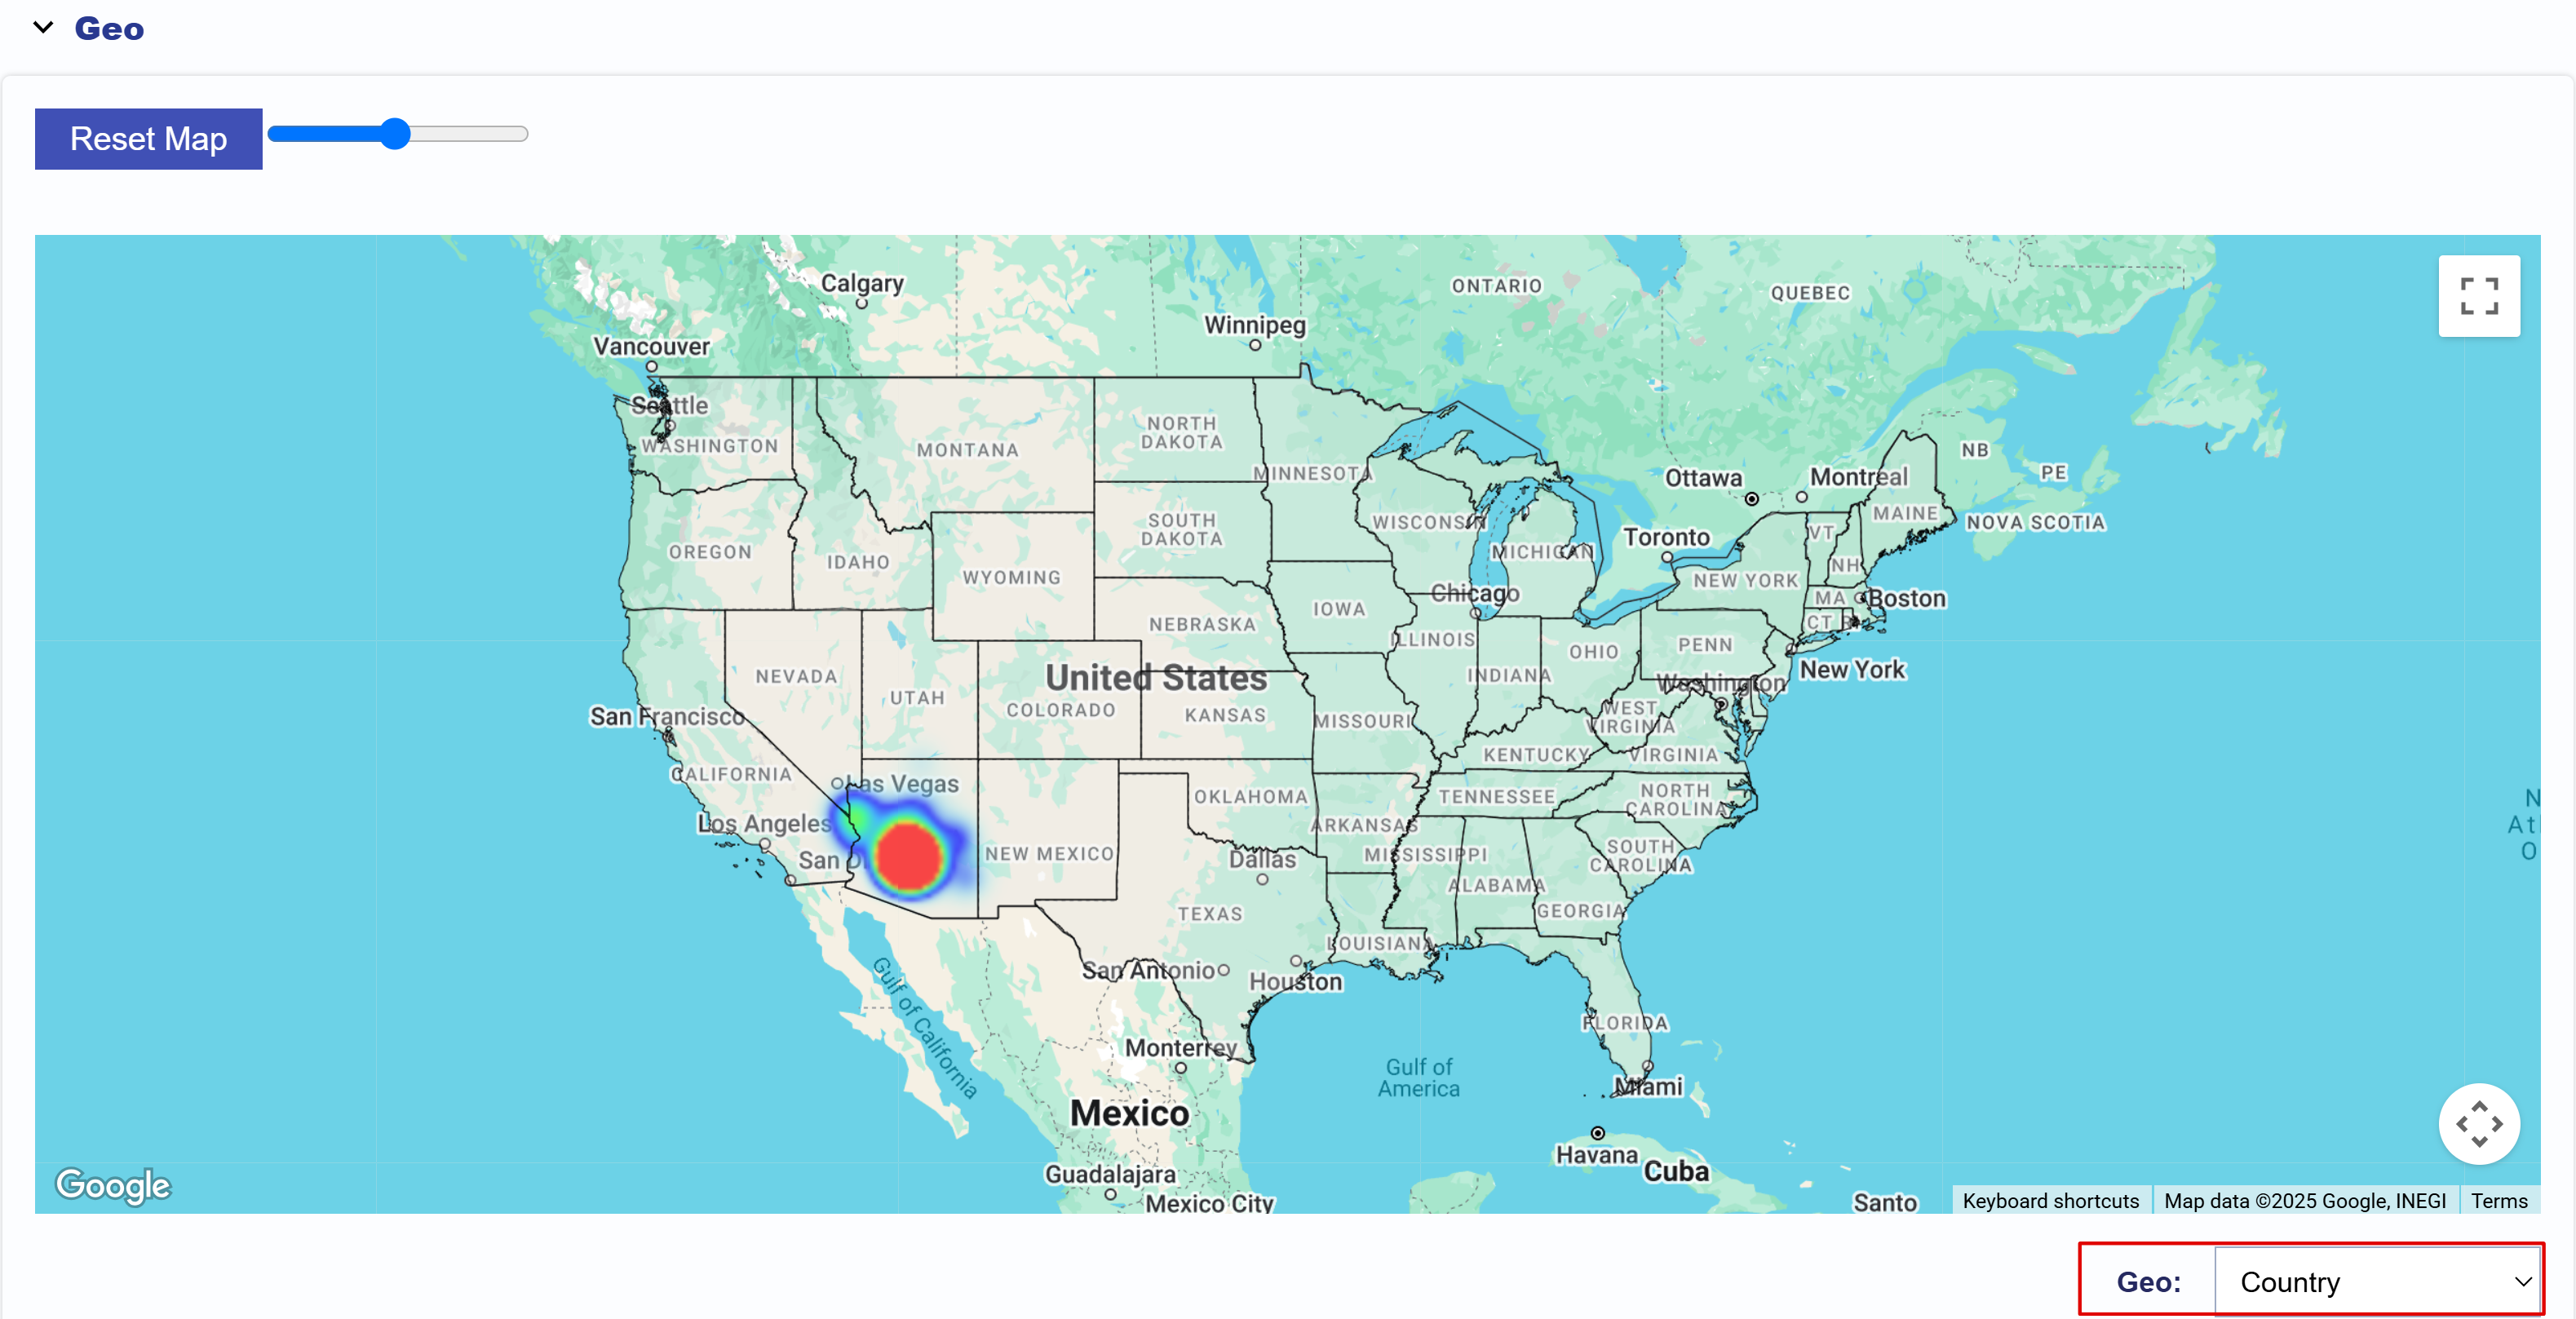
      • Geo
    • Custom Reporting
      • Overview
      • Scheduled Reports
      • Custom Report
      • IP Conversion Pixel: Path To Conversion
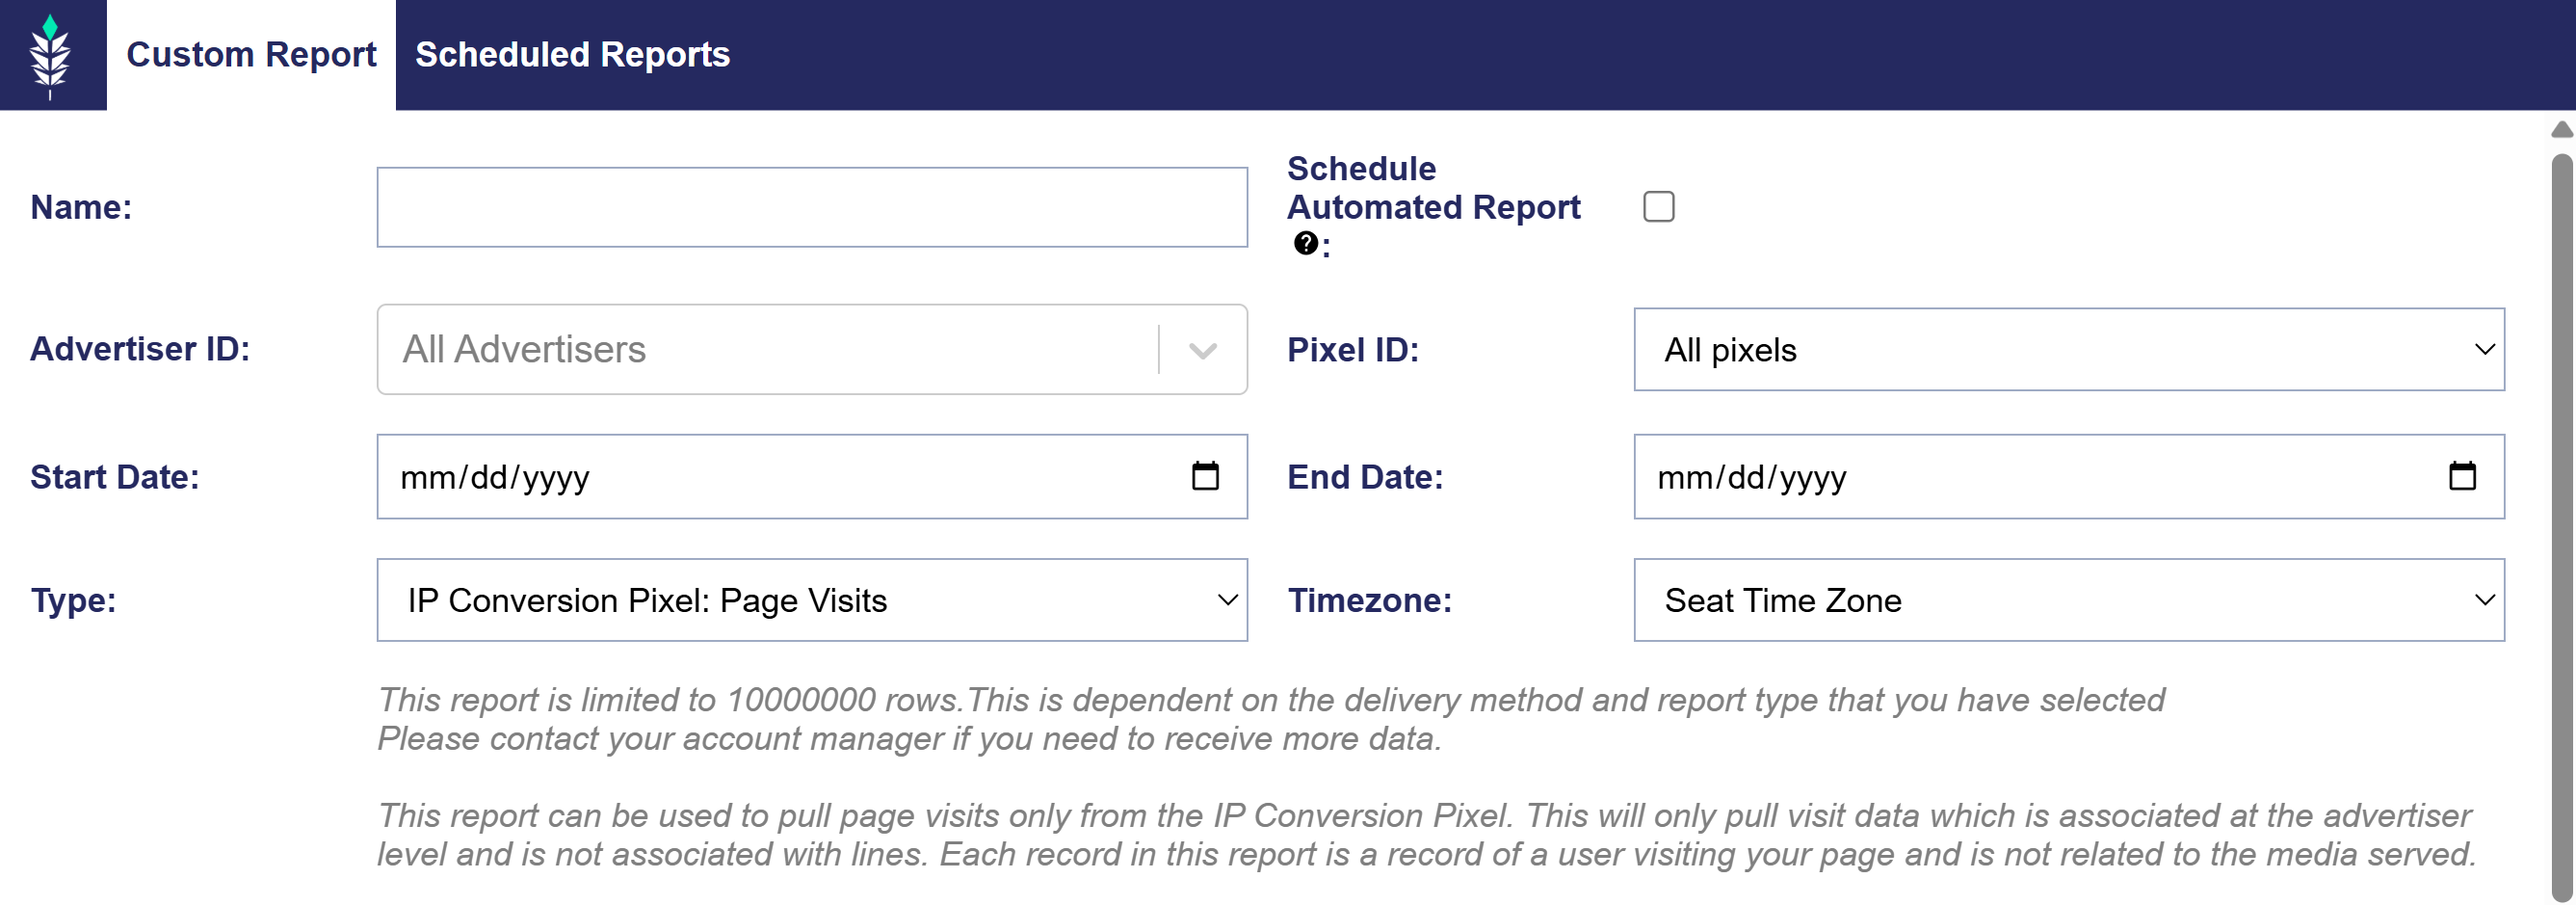
      • IP Conversion Pixel: Page Visits
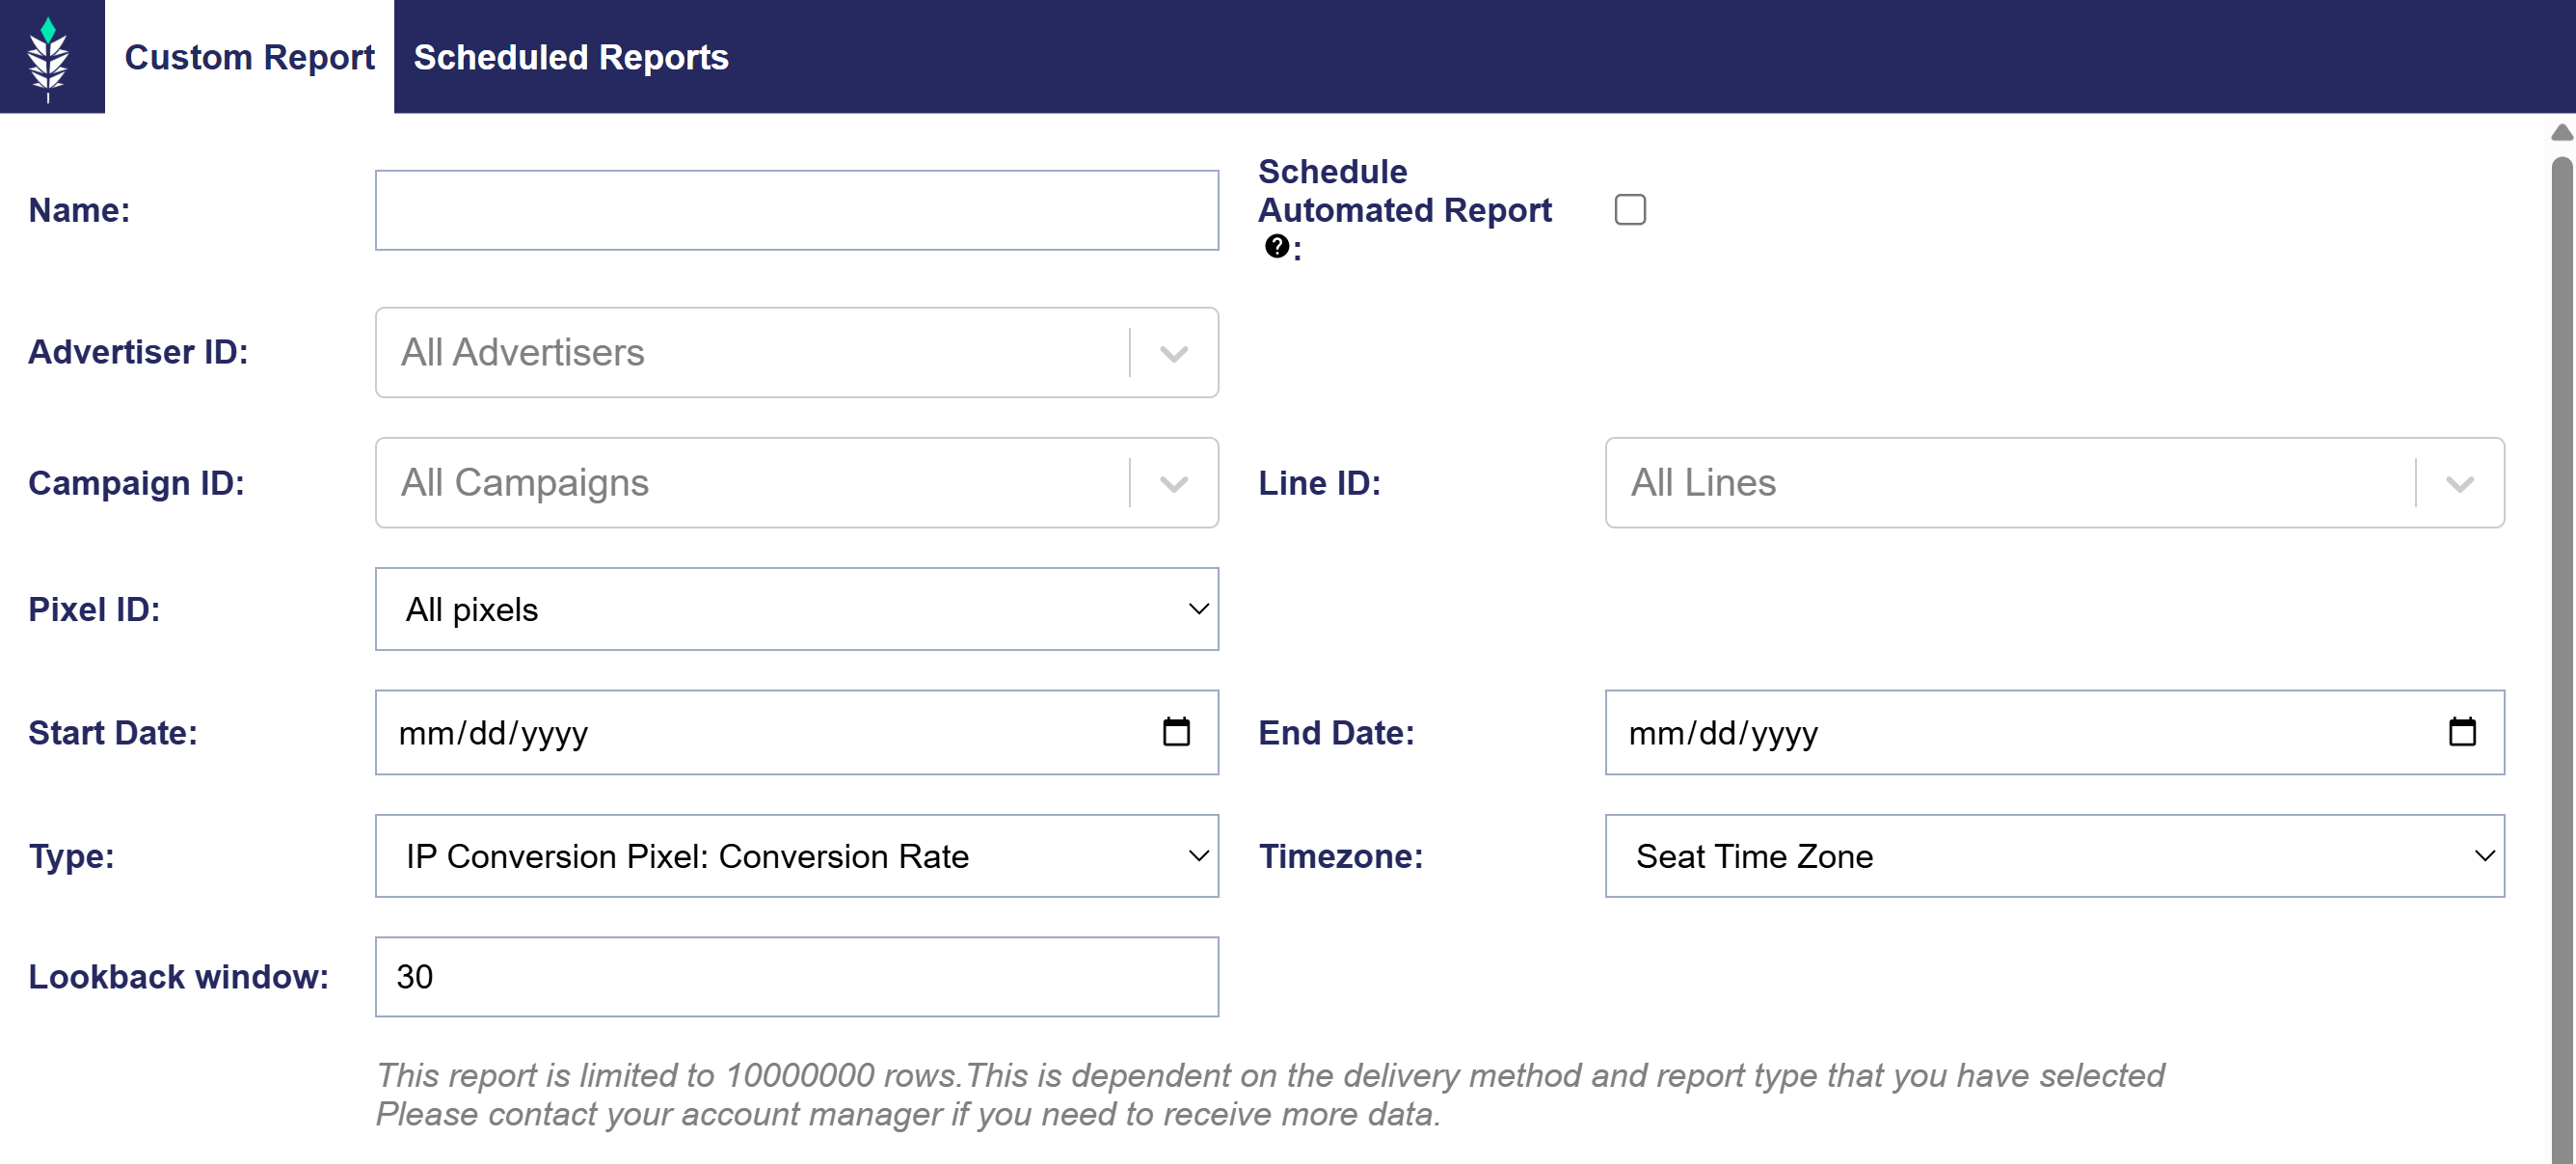
      • IP Conversion Pixel: Conversion Rate
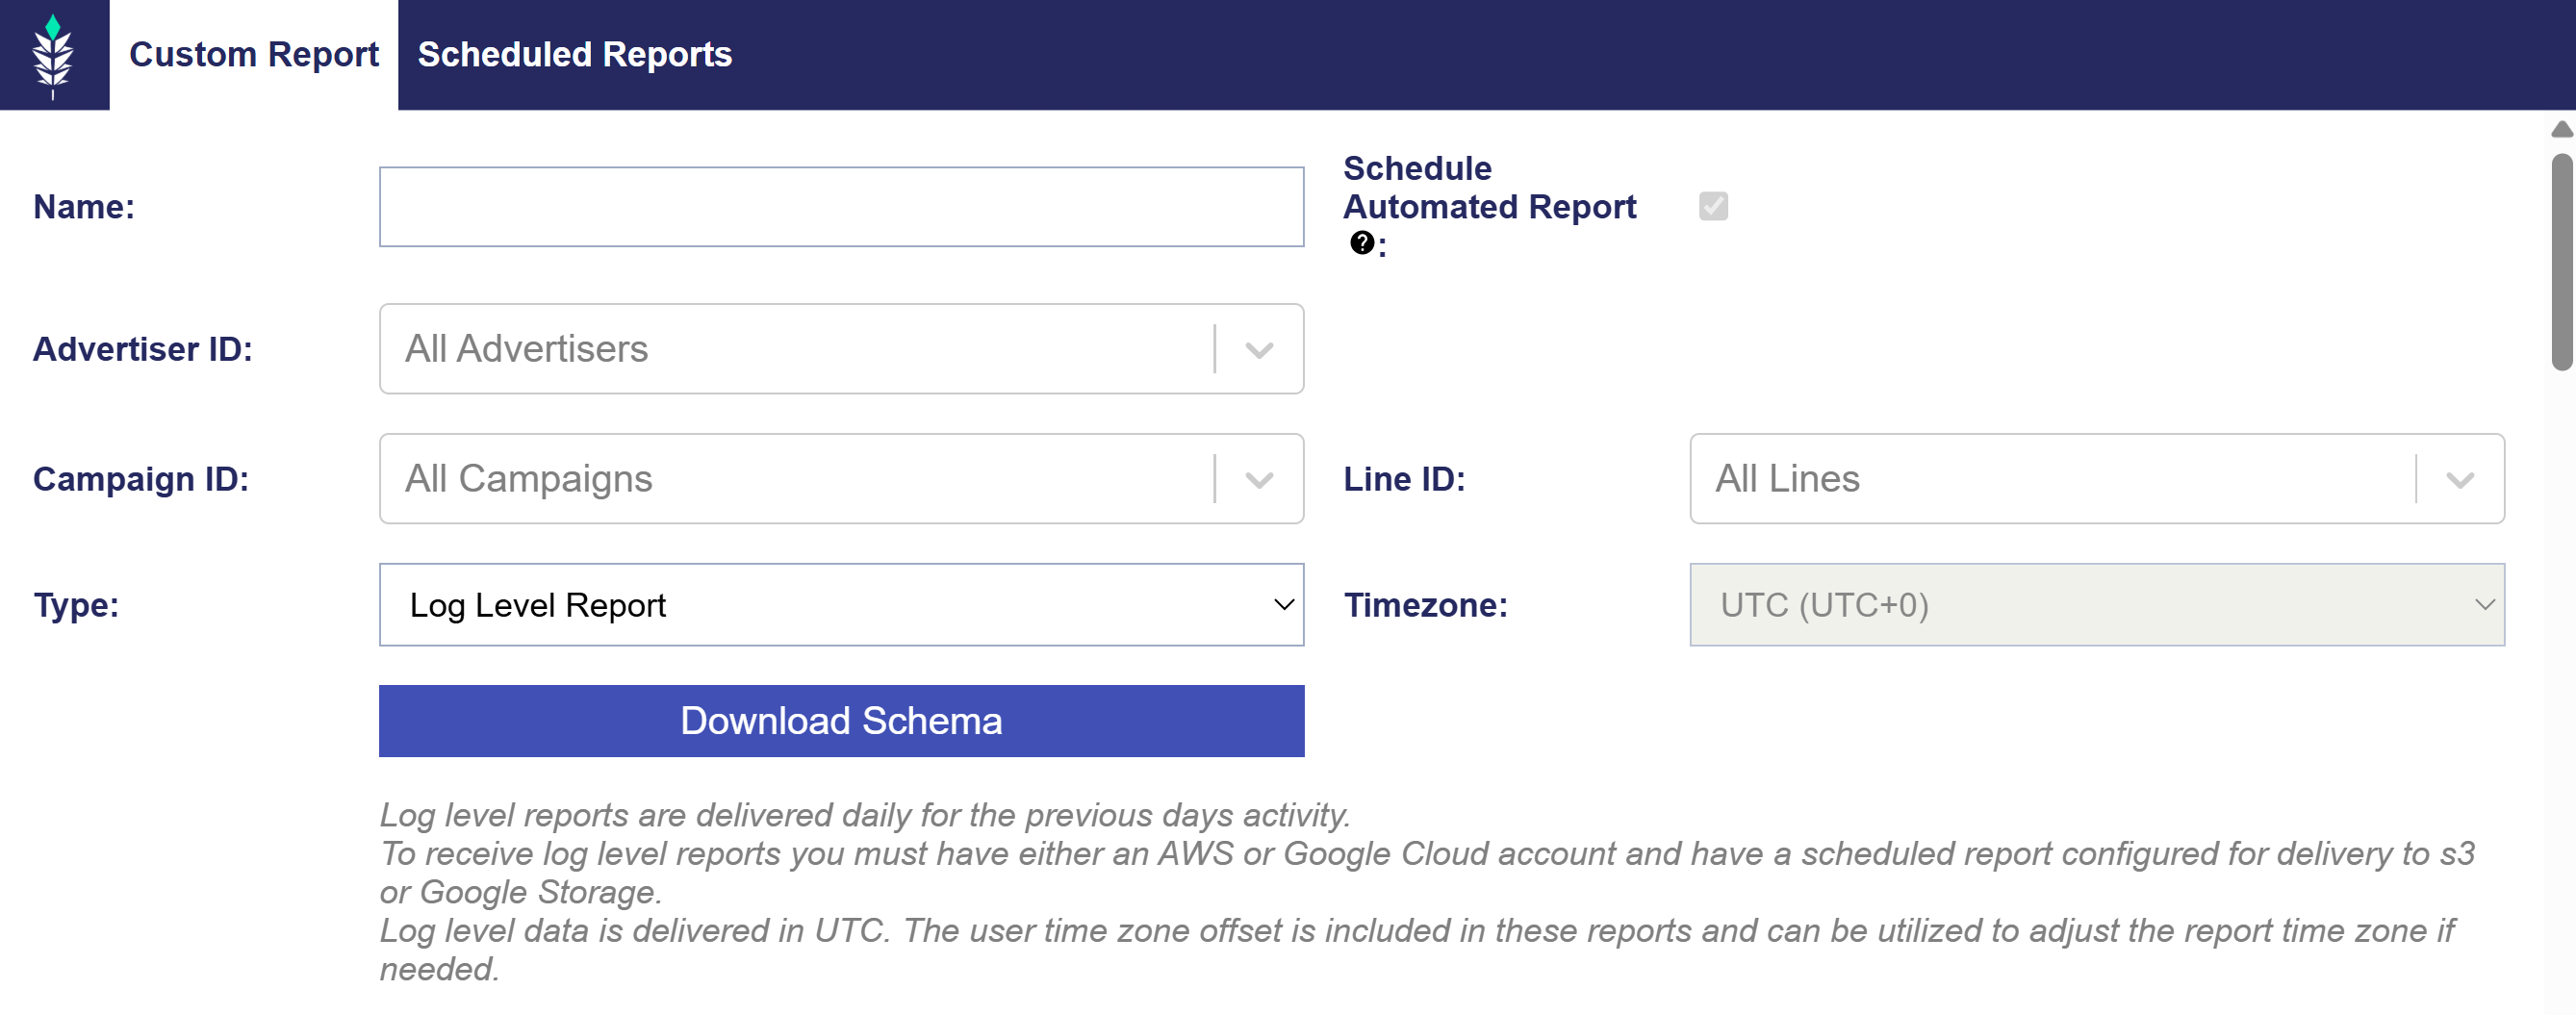
      • Log Level Reporting
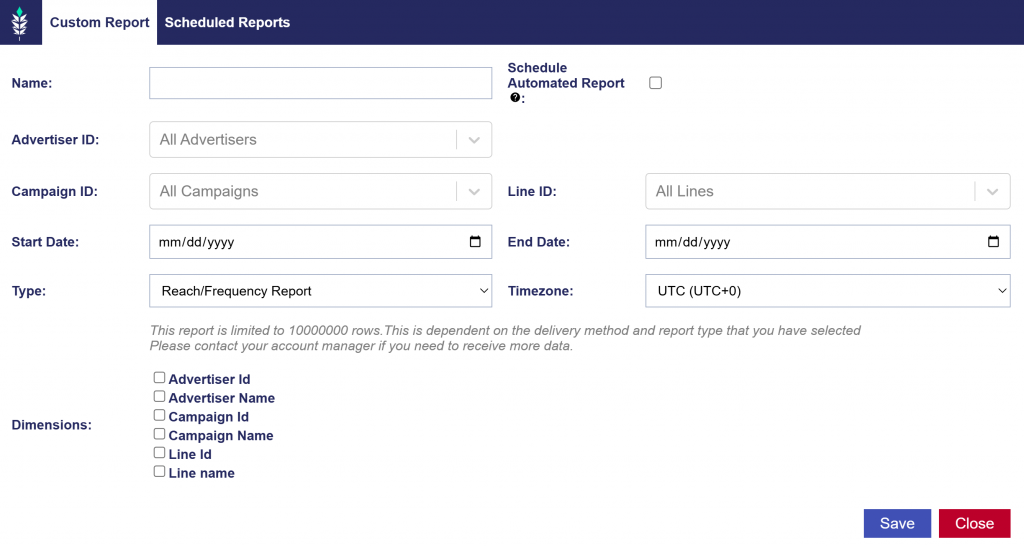
      • Reach/Frequency Report
    • Conversion Tracking
    • Foot Traffic Studies
      • Overview
  • Pixels
    • IP Conversion Pixels
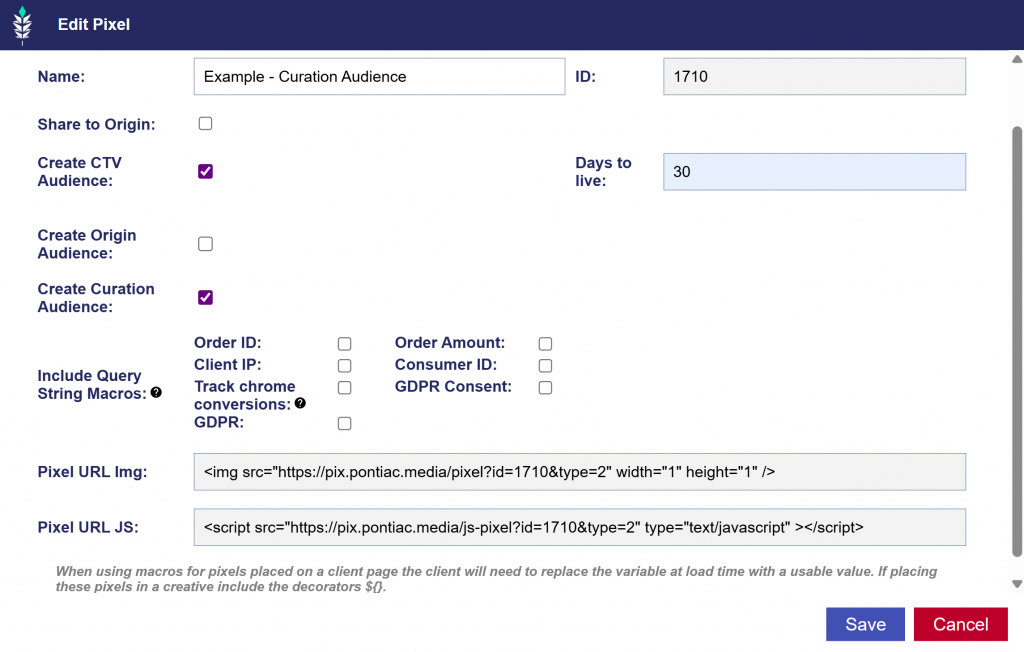
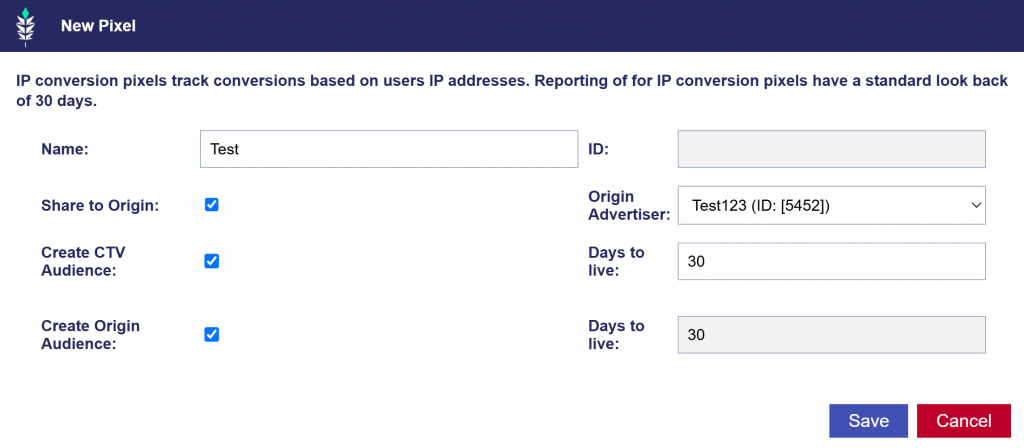
    • Create an IP Conversion Pixel
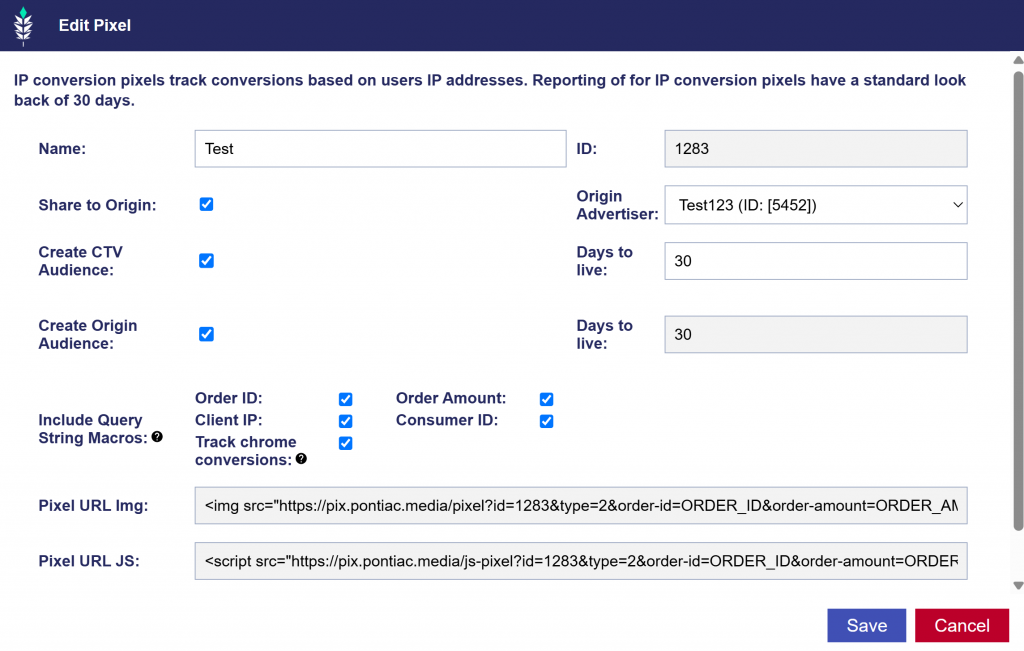
    • Edit an IP Conversion Pixel
    • Query String Parameters
    • Chrome Conversions
  • Creatives
    • Creative Upload Process
      • Overview
      • Creative Acceptance Policy
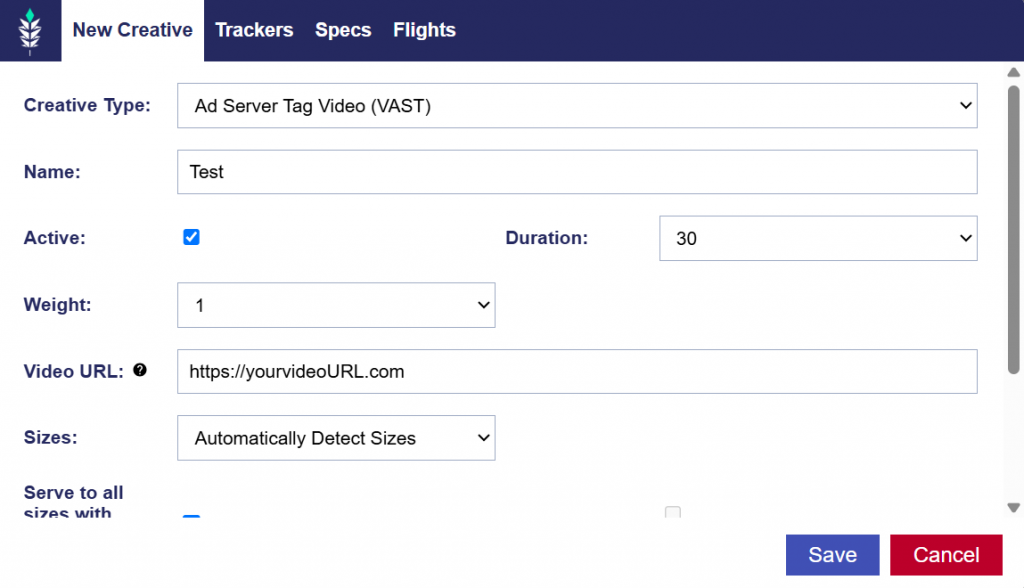
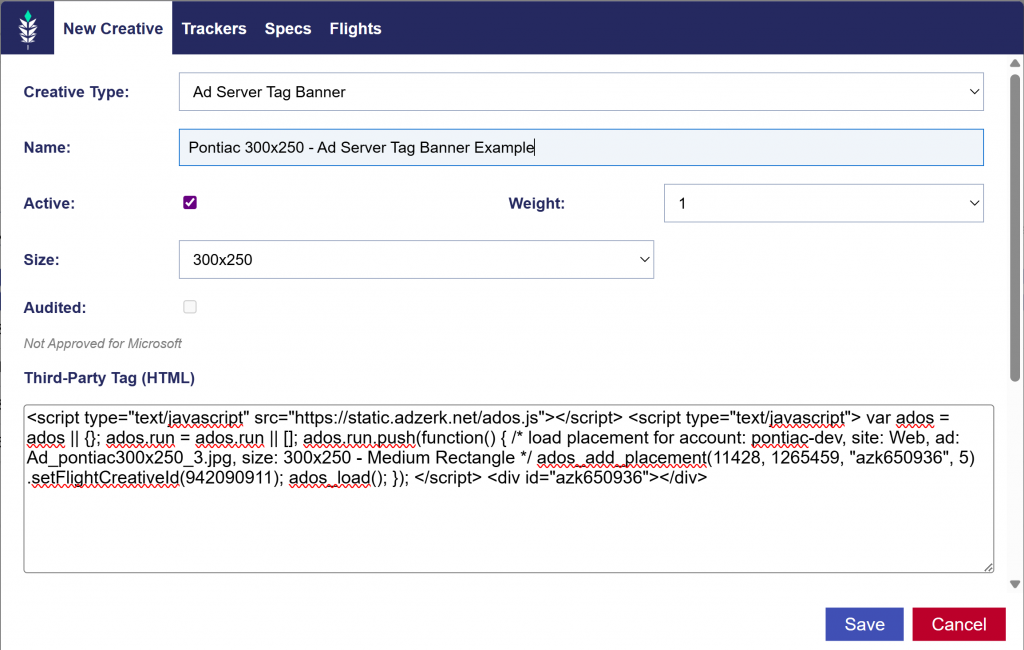
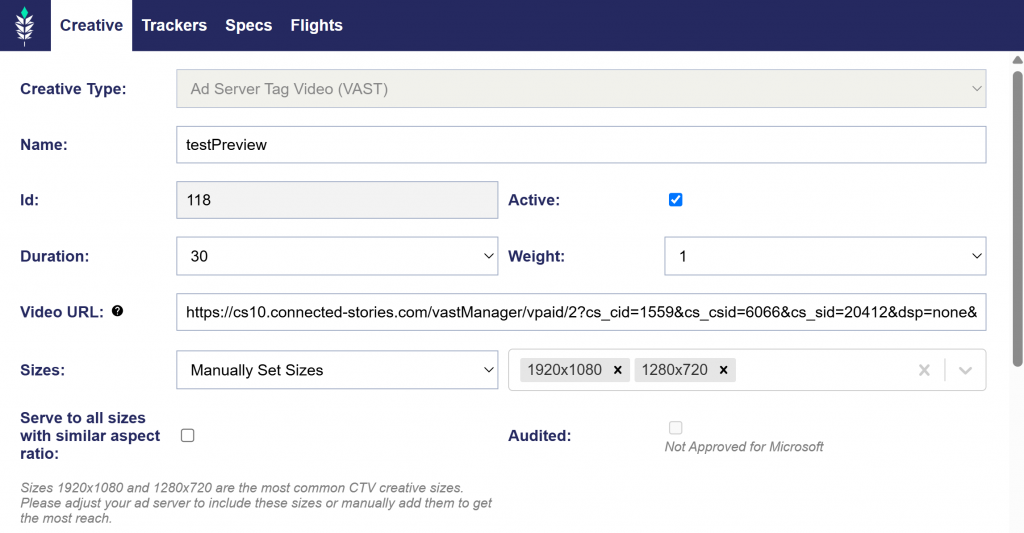
      • New Creative Tab
      • Trackers Tab
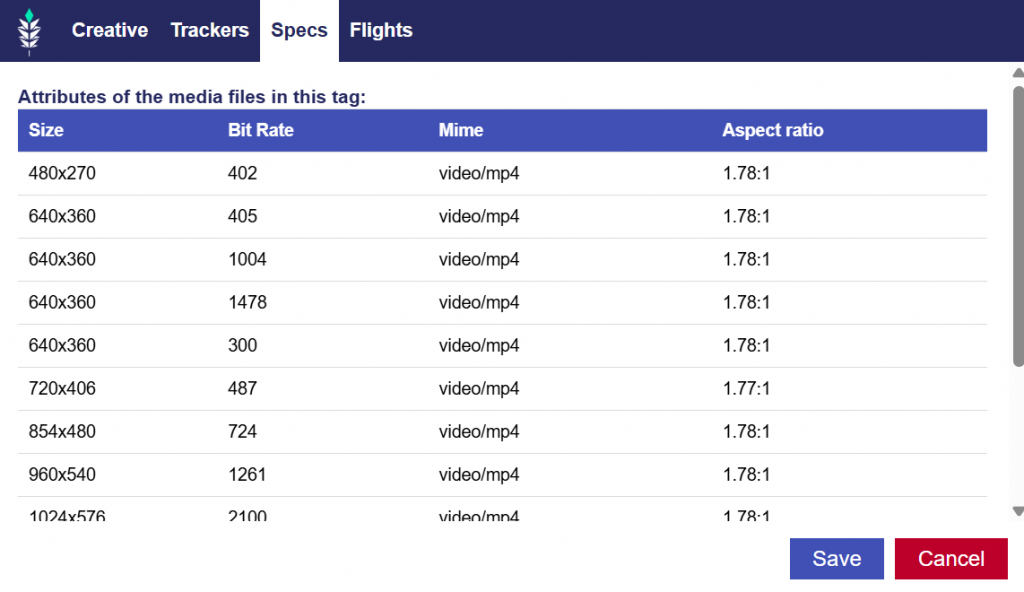
      • Specs Tab
      • Flights Tab
    • Edit Creatives
    • Creative Specs
    • Creative Audit
      • Overview
      • Creative Brand & IAB Category
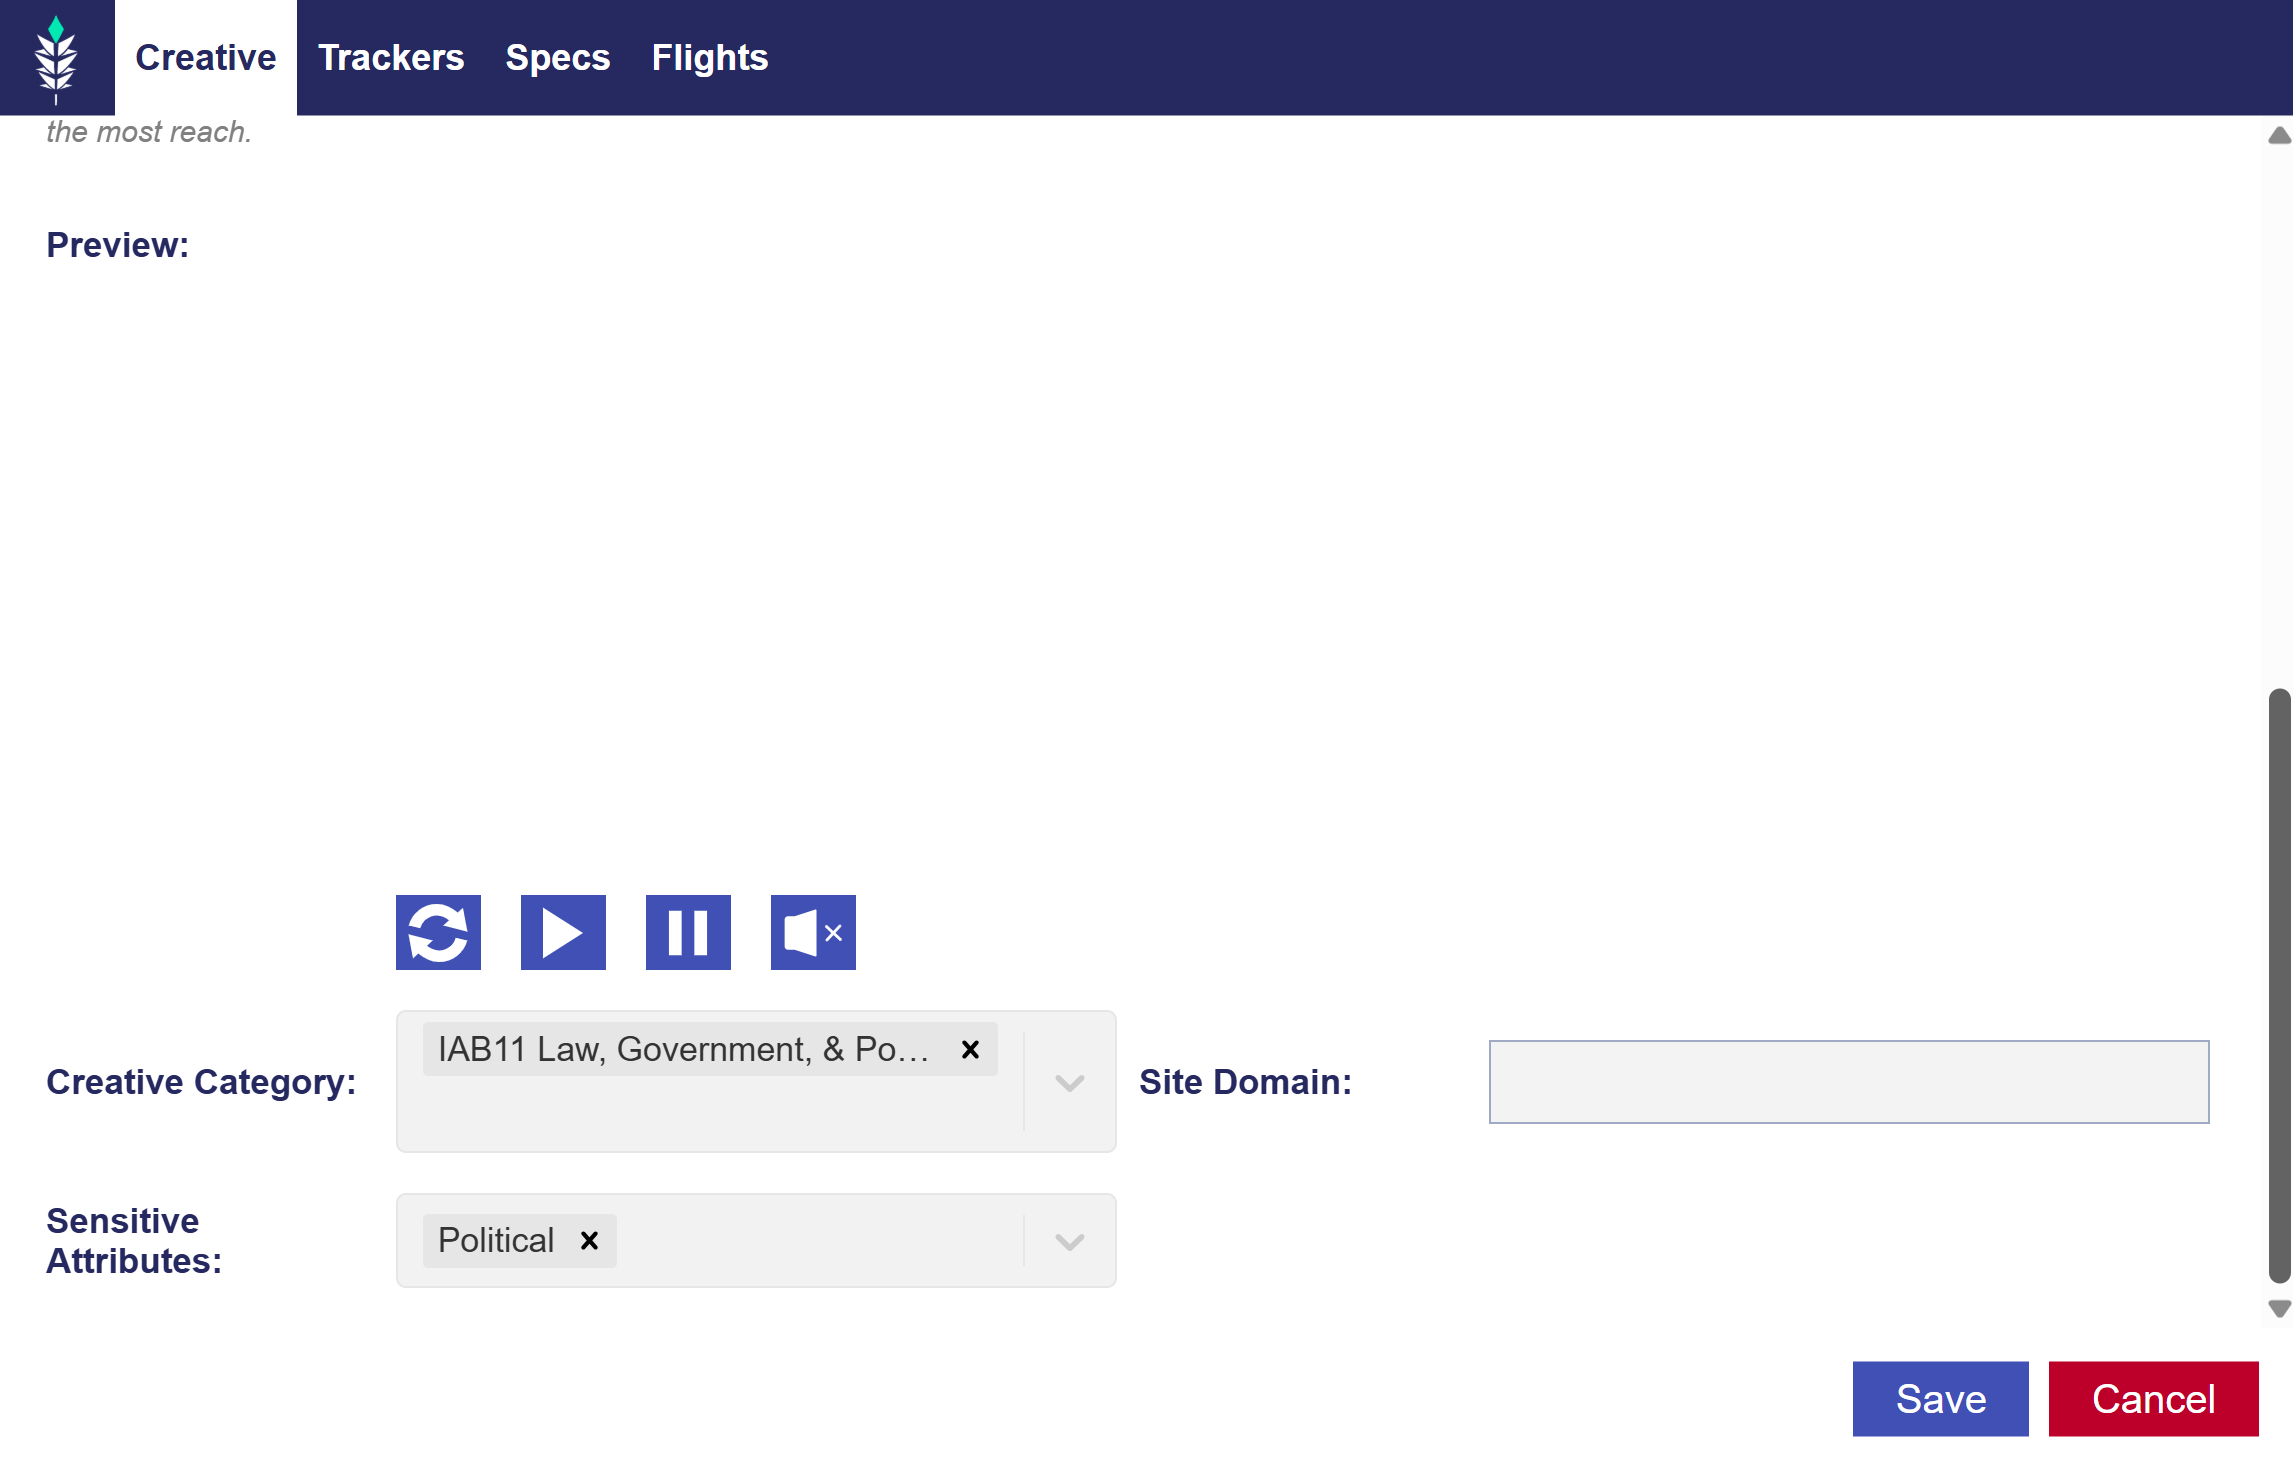
      • Political Creatives
      • Sensitive Creatives
      • Prohibited Content
    • Creative Macros
    • Publisher Specs & Approval Process
  • Campaigns
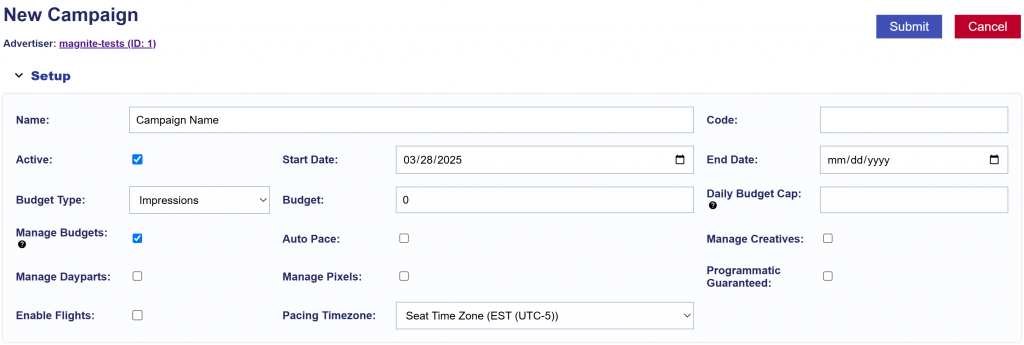
    • Create a Campaign
      • Campaign Setup
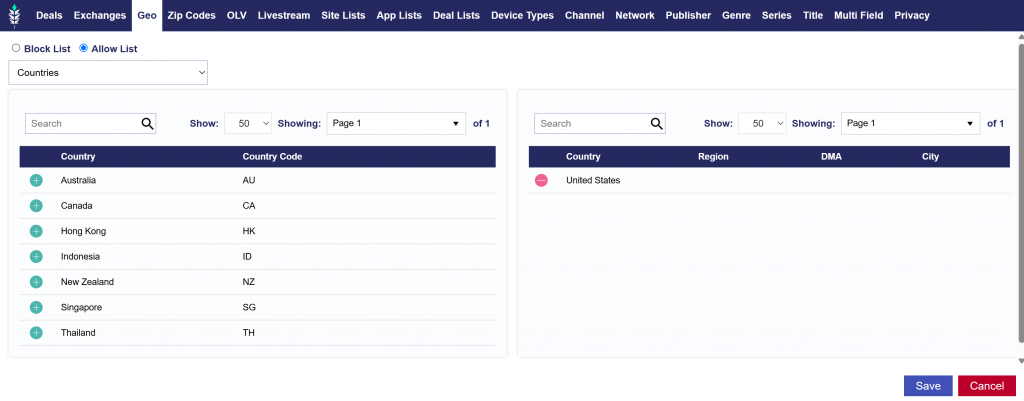
      • Campaign Targeting
      • Campaign Audiences
      • Campaign Creatives
      • Campaign Pixels
      • Campaign Pacing & Dayparts
      • Campaign Flights
      • Campaign Frequency & Recency
    • Create Campaign from Template
    • Edit a Campaign
    • Clone a Campaign
    • Create a New Template
    • Campaign Flights Tab
      • Flight Metrics
      • Manage Flights
      • Manage Lines
      • Edit Flights
    • Campaign Performance Tab
      • Campaign Metrics
      • Bid Data
      • Line Performance
      • Campaign Daily Performance
      • Video Events
    • Line Management
      • Create a New Line
      • Edit a Line
  • Lines
    • Create a Line
      • Line Setup
      • Line Pacing & Dayparts
      • Line Frequency & Recency
      • Line Foot Traffic Reporting
      • Line Targeting
      • Line Creatives
      • Line Audiences
      • Line Pixels
    • Create Line from Template
    • Edit a Line
    • Clone a Line
    • Create a New Template
    • Line Performance Tab
      • Line Metrics
      • Bid Data
      • Line Daily Performance
      • Video Events
  • Troubleshooting
    • Campaign Delivery
    • Incorrect IAB Creative Category
    • Rejected Creatives
  1. Home
  2. CTV Documentation

Overview

Pontiac Intelligence provides access to top-tier CTV inventory, including Netflix, Disney+/Hulu, NBCU, and other major publishers, platforms, and FAST (Free Ad-Supported TV) providers like Philo, Tubi, Samsung, and Vizio. This ensures broad reach and strong performance across premium and emerging inventory sources.

Our platform supports both online and linear TV advertisers, offering 100% access to CTV and OLV inventory with precise audience targeting. With flexible dayparting and budget controls, advertisers can plan campaigns like linear TV—but with greater transparency and efficiency.

Pontiac allows buyers to target inventory at a granular level, including title, series, channel, publisher, and genre, while optimizing performance with IP-based tracking. Additionally, advertisers can control their buys based on supplier transparency levels and optimize towards online engagement metrics.

We help agencies and advertisers navigate CTV with full control over where their brand appears, ensuring better targeting, better performance, and better results.

Continue reading to learn more about setting up and achieving CTV success with Pontiac Intelligence.

Terminology

As streaming services have become widely adopted and methods for consuming TV content have drastically changed, the terms OTT and CTV have become exceedingly popular in the advertising world. But with this growing popularity the terms have become ambiguous as players in the industry began to use them interchangeably and the lines between them became blurred. This guide is intended to provide clarity into the industry definitions, Pontiac terminology, and best practices for implementing both CTV and OTT campaigns through the Pontiac Platform.

CTV vs OTT vs Video

  • OTT (Over-the-Top) is TV content delivered to a device via an internet connection. OTT is defined as a delivery method and content type (premium TV content delivered via internet) and can be streamed on any device (TVs or mobile devices or desktops). OTT is considered premium digital video, and it is the highest-quality format available programmatically, with completion rates as high as 90%. For example, this could be a user watching Hulu on their phone, desktop, OR on their Smart TV.
  • CTV (Connected TV) is a sub-set of OTT Video, where the OTT content is delivered specifically on TELEVISIONS connected to the internet. CTV is defined by the device type and includes – smart TVs, gaming consoles, and set-top boxes. An example of this would be a user watching Hulu on their TV.
  • Video is the creative type for all OTT and CTV. All OTT and CTV campaigns are Video, but not all Video is OTT or CTV. Online Video (OLV) can also run across other websites and apps within content that is not considered OTT and on Devices that are not considered CTV. For example, a video ad in the Candy Crush app on a mobile device.

Despite the technical definitions above, it is commonly understood in the industry that CTV refers to any OTT across TVs, and ‘OTT’ is typically used to refer to other ‘non-CTV’ OTT content. For this reason and for the purposes of the Pontiac Platform, ‘CTV’ as an ‘Inventory Type’ refers to OTT content that runs across connected television devices – Smart TVs, Game Consoles, and Set Top Boxes. The ‘Inventory Type’ ‘OTT’ will refer to all other OTT content that is not CTV, that being content streamed on other devices – Mobile Phones, Tablets, Desktops and Laptops.

Please see the following page for more information: CTV & OTT Guide

Hierarchy

LevelFeatures
SeatSeat Settings (Users, Addendum, Preferences)
Create & Edit Advertisers
Inventory Management (Site, App, & Deal Lists, Deals, Negotiated Deals)
Audiences Management (Custom, Contextual AI, ART Audiences, Third Party Audiences, On Boarded)
Templates Management
Reporting Management
AdvertiserEdit Advertisers
Set Advertiser Margin
Campaign Management (Create, Edit, Clone, Save as Template)
Creative Management
Pixel Management
Performance Overview (Bid Data, Campaign Performance, Advertiser Daily Performance, Video Events)
CampaignManage Budget
Manage Pacing & Dayparts
Enable & Manage Flights
Enable Campaign Frequency & Recency
Associate Creatives
Associate Audiences
Associate Pixels
Line Management (Create, Edit)
Performance Overview (Bid Data, Line Performance, Campaign Daily Performance, Video Events)
LineLine Management (Create, Edit, Clone, Save as Template)
Inventory Type
Manage Bidding
Manage Budget
Budget Multiplier & Allocation Weight
Manage Pacing & Dayparts
Enable Line Frequency & Recency
Enable & Manage Foot Traffic Reporting
Enable Custom Model
Targeting
Associate Creatives
Associate Audiences
Associate Pixels

Best Practices

Overview of CTV Best Practices

CTV is a specific subset of OTT, defined as content streamed only on televisions that are connected to the internet via Smart TV apps, Game Consoles, and Set Top Boxes.

The following is an overview of the best practices for setting up a successful CTV campaign on the Pontiac platform:

  1. Run through Deals as opposed to the Open Exchange, as this will allow for premium, fraud free placements.
    • Deal access can be requested in the ‘Inventory’ tab, then associated to the Line under ‘Targeting’. Select Deals with ‘Inventory Types’ that are ‘CTV’ or ‘OTT/CTV’.
  2. To ensure the Line only serves through selected Deals, DO NOT associate any exchanges.
  3. Do not add frequency caps. Although Frequency Capping is available for CTV Lines, it is often inaccurate and will severely limit scale as many CTV publishers do not consistently pass device IDs and user IDs across platforms.
  4. Target ‘Instream’ Inventory by selecting ‘PreRoll’, ‘MidRoll’ and ‘PostRoll’ video playback types.
  5. Only use audience segments from Tru Optik, as these are IP based audiences. While these audiences are intended for CTV, they may still limit scale.

Below is an explanation of the key differences and why we recommend using Deal Inventory over Open Exchange Inventory.

Deal Inventory vs Open Exchange Inventory
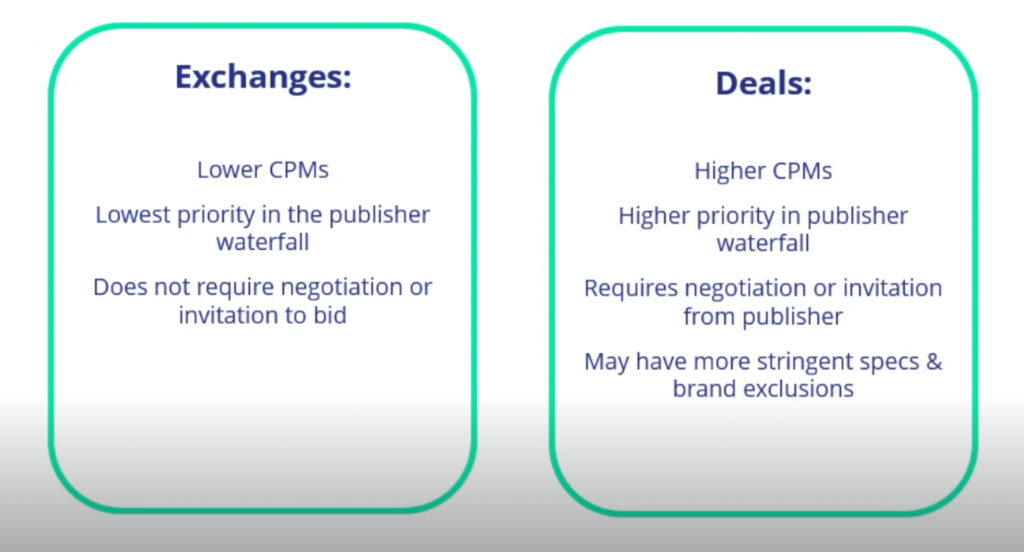
On the Pontiac platform, CTV/OTT Ads can be purchased through two inventory sources: Private Marketplace Deals (PMPs) and the Open Exchange.

  • PMPs allow publishers to offer premium inventory exclusively to a specific advertiser or group of advertisers in a private auction.
  • The Open Exchange provides access to inventory monetized through supply-side platforms (SSPs), where all buyers and advertisers have an equal opportunity to bid in a competitive marketplace.

Deal (PMPs) Inventory

Pontiac makes over 2,000 Deals from a wide variety of Publishers and content categories available directly in the platform. Pontiac strongly recommends running all OTT and CTV campaigns through PMPs as they provide exclusive access to premium, fraud-free inventory. To browse available Deals, open the Pontiac Platform and navigate to the ‘Inventory’ tab. Under ‘Deals’ you will see the full list of available public deals. The ‘Network’, ‘App/Channel’ and ‘Programming’ will give you an idea of where the ad will serve and what the content type is. These PMPs are still real-time bidding environments in which the highest bid will win the impression, but the bidding will start at a specified price floor as defined by the publisher, this can also be seen in the ‘Inventory’ tab for each Deal. Select from Pontiac’s curated Deal lists, or create a custom Deal list with all of the relevant Deals to your Advertiser, easily allowing you to create many Lines with the same list of Deals.

The following information will be available for each Deal in the ‘Inventory’ tab:

Inventory Type

  • OTT: The Deal can be used for OTT Inventory, with Mobile, Desktop, and Tablets as the device types.
  • CTV: The Deal can be used for CTV Inventory, with TVs, Game Consoles and Set Top Boxes as the device types.
  • OTT/CTV: The Deal can be used for OTT or CTV Inventory, with Mobile, Desktop, Tablet, TVs, Game Consoles and Set Top Boxes as the device types.
  • OLV: ‘Online Video’, these are ‘non-OTT’, ‘non-CTV’ video placements. They may be outstream, or instream, across websites and applications that are not considered OTT content. See Device Type column for additional guidance.

Device Type

  • CTV: Can be used for Smart TVs, Game Consoles & Set-top boxes.
  • Mobile & Desktop: Can be used for Mobile Devices, Tablets, & Desktop.
  • Mobile: Can only be used for Mobile Devices and Tablets.
  • Desktop: Can only be used for Desktop or Laptop Devices.
  • All: Can be used for any OTT including Smart TVs, Game Consoles & Set-top boxes, Mobile Devices, Tablets, & Desktop.

App Types

  • SVOD (Subscription Based Video on Demand)
    • The user enters into an agreement for subscription that grants them access to the service, typically this allows them to watch with no limits until the agreement or subscription is cancelled. The best example of an SVOD service is Hulu.
  • AVOD (Advertisement Based Video on Demand)
    • Ad-based video on demand is a free service that allows users to log in and watch videos that contain ads. YouTube is the best example of AVOD.
  • TVE (TV Everywhere)
    • TV Everywhere requires a cable or satellite subscription to access the on-demand content. This is both SVOD and AVOD. CBS Now, AMC Networks, A&E are examples.
  • vMVPDs (Virtual Multichannel Video Programming Distributor)
    • (e.g) SlingTV, Pluto, Xumo, etc are Linear OTT services that provides premium programming from multiple channels & some digital pure play channels like Newsy, Cheddar, etc.  These services can be either subscription + advertising supported, or advertising supported only.
  • PPDs (Pure Play Digitals)
    • Apps that have emerged in the OTT space, Newsy, Cheddar, The Roku Channel, etc are apps that originated in the digital space and have no tie to traditional TV. 

Formats

  • Live: The video content is live TV, with no specified duration.
  • Long Form: The video content is equal to 8 mins or longer in duration.
  • Short Form: The video content is shorter than 8 minutes in duration.

Open Exchange Inventory

There are several reasons that Pontiac recommends running CTV and OTV campaigns through Deals as opposed to the Open Exchange. In the publisher waterfall, PMPs will be higher priority, and may also provide access to inventory that may otherwise be inaccessible as many premium publishers for streaming content may choose to monetize exclusively through Deals. Deals also provide additional information as to the type of app, format of the content, the channels included, etc. Open Exchange inventory is also at a much higher risk for fraud, including CTV App or Inventory spoofing.

If you would like to run through the Open Exchange, we strongly recommend targeting an App List to qualify the inventory as ‘premium streaming TV content’. Without a specified App List, the Line can run through any apps on the device types selected and there is no guarantee that those apps are for premium streaming content. To qualify the inventory as OTT or CTV, you need to target a list of apps with OTT/CTV content (for example, targeting the Hulu App), OR select CTV and OTT Deals from the Inventory tab.

To create a custom App List, go to the ‘Inventory’ tab and enter the app domains you would like to target. For example, in the Custom App List box enter ‘com.slingtv.ctv.aetv.roku’ to target the A&E Network on Roku devices. You must then add the App List to the Line and include ‘Roku’ in the targeted Operating Systems.

How to Setup CTV with Deals

  1. Request Access to Deals and Create or Select a Deal List:
    • The first step in setting up a successful CTV campaign is to select the PMPs or ‘Deals’ that the Line will target. Read more on Deal Inventory here: Open Exchange vs. Deal Inventory
    • For CTV Campaign and Lines, select Deals with the Inventory Type ‘CTV’ or ‘OTT/CTV’. As a best practice we recommend selecting and targeting every Deal that fits your campaign’s needs. There is no limit to the number of Deals that can be associated to the Campaign and Line and due to the premium nature of this inventory the auctions can be very competitive. Selecting many Deals will increase the ability of the Campaign and Line to scale. Additionally, for content that most closely mimics a linear TV experience, we recommend focusing on Deals with the formats ‘Live’ and ‘Long Form’ as this will display your ad either during live shows or full episodes. You can also select from pre-set ‘CTV’, ‘Long Form CTV’ and ‘CTV – Full Episode’ Deals lists or create your own custom Deal List that can easily be added to multiple Campaigns and Lines. In the ‘Inventory’ tab, request access to the Deals you would like to use. Deal access will be approved in 1-2 business days and from there the Deals can be associated with a Campaign or Line Item for targeting.
  2. Upload Creative:
    • If you do not yet have an Advertiser created for this Campaign, first create the Advertiser. Then open the Advertiser and upload one or more Creatives that meet the OTT/CTV Specs, see here: Pontiac CTV & OTT Specs
    • The Creative will need to pass the Creative Audit which may take up to 24 hours.
  3. Set-up a Campaign and/or Line Item:
    • Under the Advertiser, create a Line Item following these recommendations:
    • Inventory Type: CTV
    • Platform KPIs: Reach or VCR
    • Frequency Caps: Because device IDs and user IDs are not always available, frequency-capped CTV video campaigns can be more challenging to scale than desktop and mobile campaigns. For this reason, we recommend setting caps to 0.
    • Bid Strategy: The PMPs are real-time bidding environments with a specified price floor as defined by the publisher. This is the minimum CPM bid required to enter the auction. These auctions can be very competitive and typically, PMPs will clear somewhere between 40-80% higher than the Deal Price Floor. Closing CPMs are on average in the $30-60 range, with the most premium inventory running between $60-100 CPMs. Closing CPMs will vary greatly according to the caliber of publishers and inventory selected, where the PMP falls in the publisher waterfall, the level of competition, the format (Live, Short Form etc), the time of year and more. In general, we recommend using the price floors for guidance and adding an additional 40-50% to start the bidding. If you are not achieving the desired scale, continue to increase bids.
    • Allow for Cookieless Users: Enable this feature, Cookies are not typically available across CTV devices, and requiring them may prevent lines from serving.
    • Foot Traffic Attribution: This is available for CTV at a $4 CPM, add this additional cost to your bid CPM.
    • Exchanges: Remove ALL Exchanges.
    • Deals: Select the CTV Deals that you would like to purchase inventory through, or in the ‘Deal List’ tab, add Pontiac Curated Deal Lists or your own Custom Deal List to associated all Deals within that list.
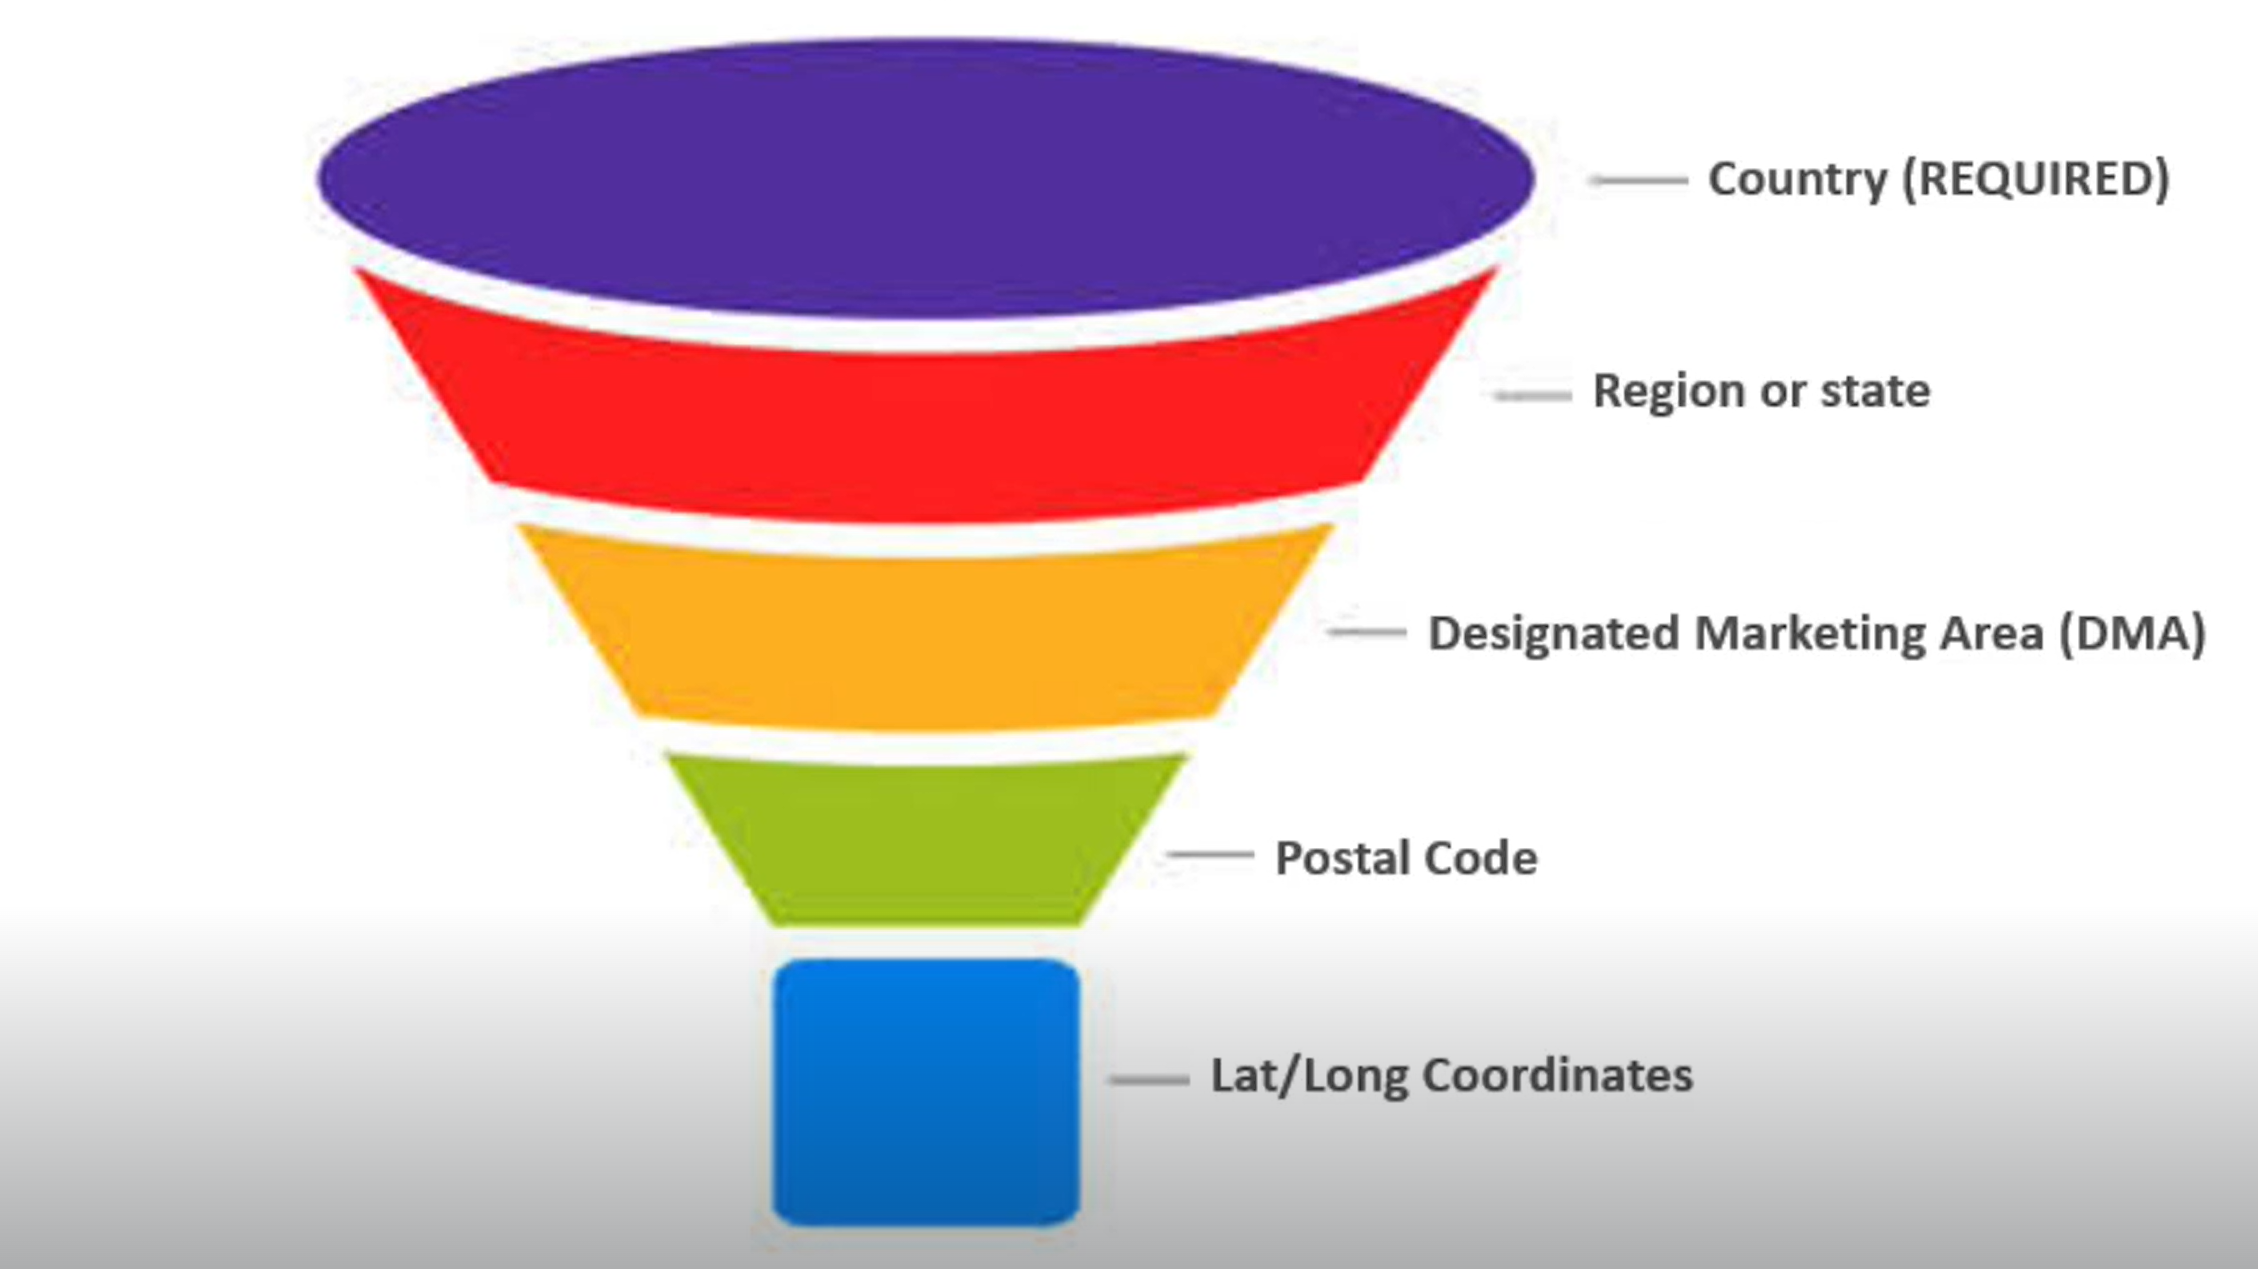
    • Geo Targeting: Zip Code, DMA, State, or Country
    • Device Types: Leave the Device Types set to ‘TVs’, ‘Game Consoles’ and ‘Set Top Boxes’.
    • Operating Systems: Leave all operating systems selected
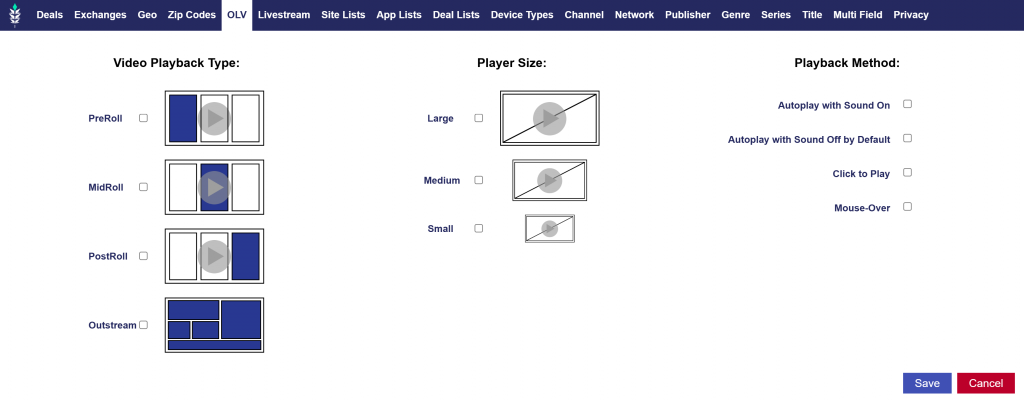
    • Video Playback: Select from ‘PreRoll’, ‘MidRoll’, and ‘PostRoll’, recommended to include all three. Do NOT select ‘Outstream’.
    • Video Size: Do not select a size.
    • Viewability Threshold: NOT AVAILABLE
    • Ads.txt: NOT AVAILABLE
    • Creative: Associate a Creative that meets the OTT/CTV Specs.
    • Audience Targeting: It is only recommended to use audiences from the providers TruAudience (Tru Optik), Lotame and Comscore. These can be found by filtering by ‘Provider’ in the Audience tab. Associate the selected audience to the Advertiser, then to the Line Item under ‘Associate Segments’. Keep in mind that these audiences are intended for CTV, but they may still limit scale.
    • Conversion Pixels: The standard ‘Conversion Pixel’ cannot be used. To track online conversions driven by a CTV Line, you can use an IP Conversion pixel. Read more here: IP Conversion Pixels

How to Setup CTV with Exchanges

  1. Create an App List (Optional)
    • If you would like to run through the Open Exchange, it is highly recommended that you target an app list to specify the apps/channels where you would like the Line to run. For CTV, if you do not supply an app list, the Line will run may be able to run on TV apps that are not strictly for streaming TV content. For example, TV Weather apps.
    • To create a custom CTV app list, go to the ‘Inventory’ tab and enter the app domains you would like to target. For example, in the Custom App List box enter ‘com.slingtv.ctv.aetv.roku’ to target the Roku A&E app. You must then add the App List to the Line.
  2. Upload Creative
    • If you do not yet have an Advertiser created for this campaign, first create the Advertiser. Then open the Advertiser and upload one or more Creatives that meet the OTT/CTV Specs, see here: Pontiac CTV & OTT Specs
    • The Creative will need to pass the Creative Audit which may take up to 24 hours.
  3. Set-up a Campaign and/or Line Item
    • Under the Advertiser, create a Line Item following these recommendations:
    • Inventory Type: CTV
    • Platform KPIs: Reach or VCR
    • Frequency Caps: Because device IDs and user IDs are not always available, frequency-capped CTV video campaigns can be more challenging to scale than desktop and mobile campaigns. For this reason, we recommend setting caps to 0.
    • Bid Strategy: Closing CPMs are typically in the $20-40 range. However, this will vary greatly according to the caliber of the publishers and inventory being targeted. We recommend starting with bids in this range, and if you are not achieving the desired scale, continue to increase bids.
    • Allow for Cookieless Users: Enable this feature, Cookies are not typically available across CTV devices, and requiring them may prevent lines from serving.
    • Foot Traffic Attribution: This is available for CTV at a $4 CPM, add this additional cost to your bid CPM.
    • Exchanges: Include the Exchanges through which you would like to purchase inventory. Under the ‘CTV/OTT’ Exchange category you will find the predominately CTV based Exchanges. It is recommended to select exchanges from this section.
    • Geo Targeting: Zip Code, DMA, State, or Country
    • App List: If you created an app list to target, associate this list to the Line as an ‘Allow’ list.
    • Device Types: Leave the Device Types set to ‘TVs’, ‘Game Consoles’ and ‘Set Top Boxes’.
    • Operating Systems: Leave all operating systems selected
    • Video Playback: Select from ‘PreRoll’, ‘MidRoll’, and ‘PostRoll’, recommended to include all three. Do NOT select ‘Outstream’.
    • Video Size: Do not select a size.
    • Viewability Threshold: NOT AVAILABLE
    • Ads.txt: NOT AVAILABLE
    • Creative: Associate a Creative that meets the OTT/CTV Specs.
    • Audience Targeting: It is only recommended to use audiences from the providers TruAudience (Tru Optik), Lotame and Comscore. Associate the selected audience to the Advertiser, then to the Line Item under ‘Associate Segments’. Keep in mind that these audiences are intended for CTV, but they may still limit scale.
    • Conversion Pixels: The standard ‘Conversion Pixel’ cannot be used. To track online conversions driven by a CTV Line, you can use an IP Conversion pixel. Read more here: IP Conversion Pixels

Inventory & Planning

Deals

Pontiac Deals

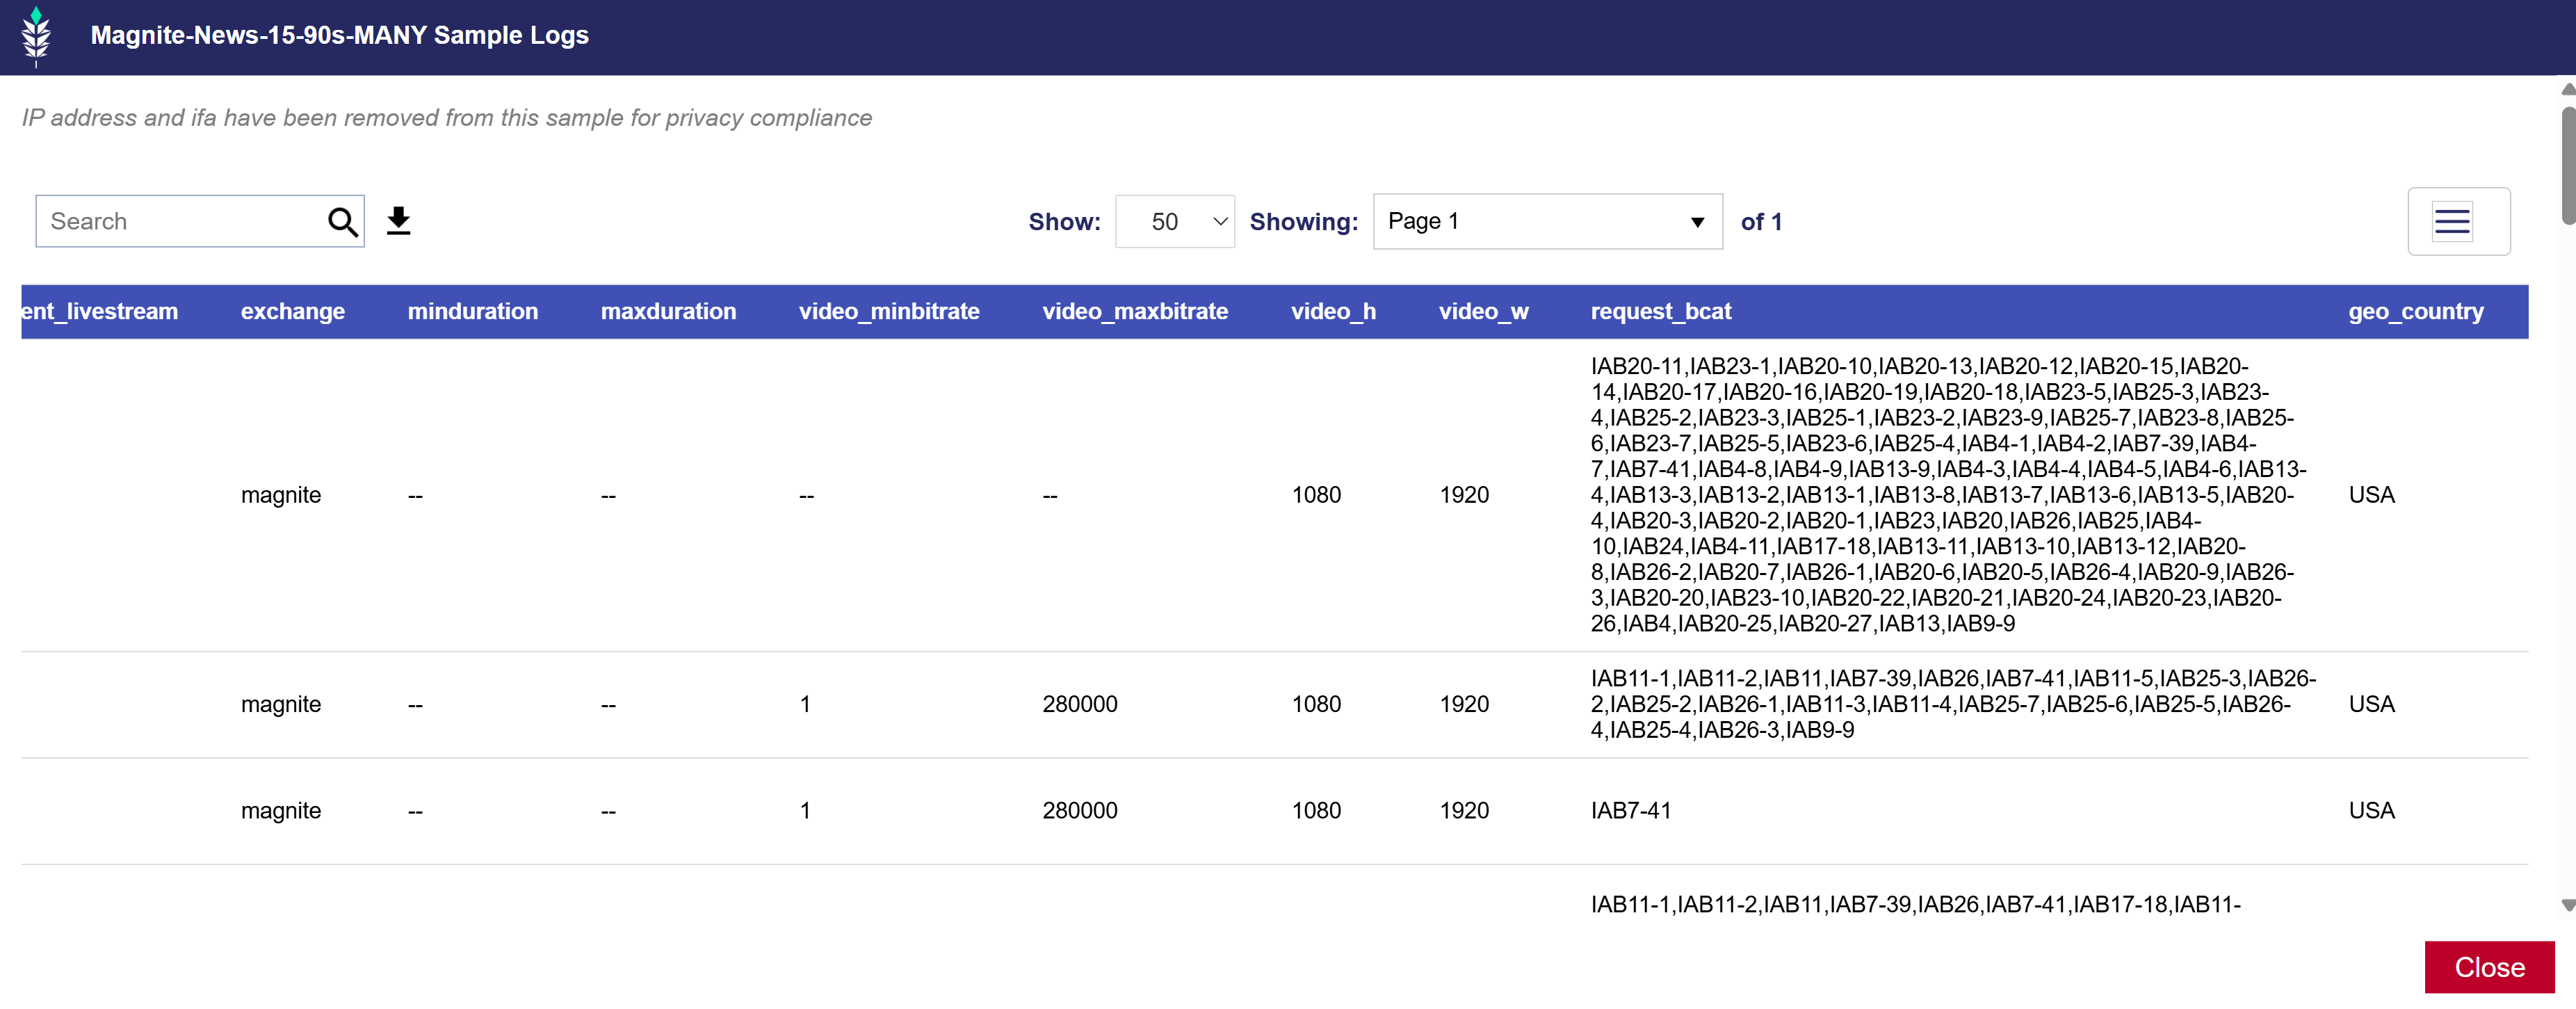
The Pontiac premium video deal catalog can be found in the ‘Inventory’ tab of the platform, under ‘Deals’. When selecting deals that best align with your campaign goals, it is recommended to review all columns in this table to ensure your creatives meet specs, approval processes are completed, and campaigns are correctly configured to drive success. You may also want to review the CTV landscape tool, to understand the level of transparency in data shared by each CTV deal. Sample logs and forecasting reports are also available for each deal in the ‘ART’ tab, for more information see the following documentation: Planning Tools

  • Deal Provider: The entity with a direct relationship with Pontiac and supplies the deal ID.
  • Brand: The brand or publisher of the content in the deal.
  • Content Type: The category of content being streamed when the ad is shown. “Run of Network” (RON) means all inventory from the publisher or deal provider.
  • Media Type: The type of media: Streaming/CTV (TV placements), OLV (online video – in-app/web, not streaming TV).
  • Exchange: The SSP or platform the deal provider uses to send bid requests to Pontiac.
  • Floor Price: The minimum bid price (CPM) required to enter the auction.
  • Recommended Bid: Suggested bids based on factors like inventory variation and competition.
  • Duration: Allowed ad unit durations; multiple durations show the percentage of requests for each.
  • Device Types: The devices where impressions are served, including Connected TV, Set-top box, computers, mobiles, and tablets.
  • Sizes: The allowed ad unit sizes; hovering over the size tool shows request percentages per size.
  • Livestream: The percentage of impressions that are live versus on-demand or undefined.
  • Auction Type:
    • First Price: The winning bid is the price the advertiser pays.
    • Second Price Plus: The advertiser pays $0.01 above the second-highest bid.
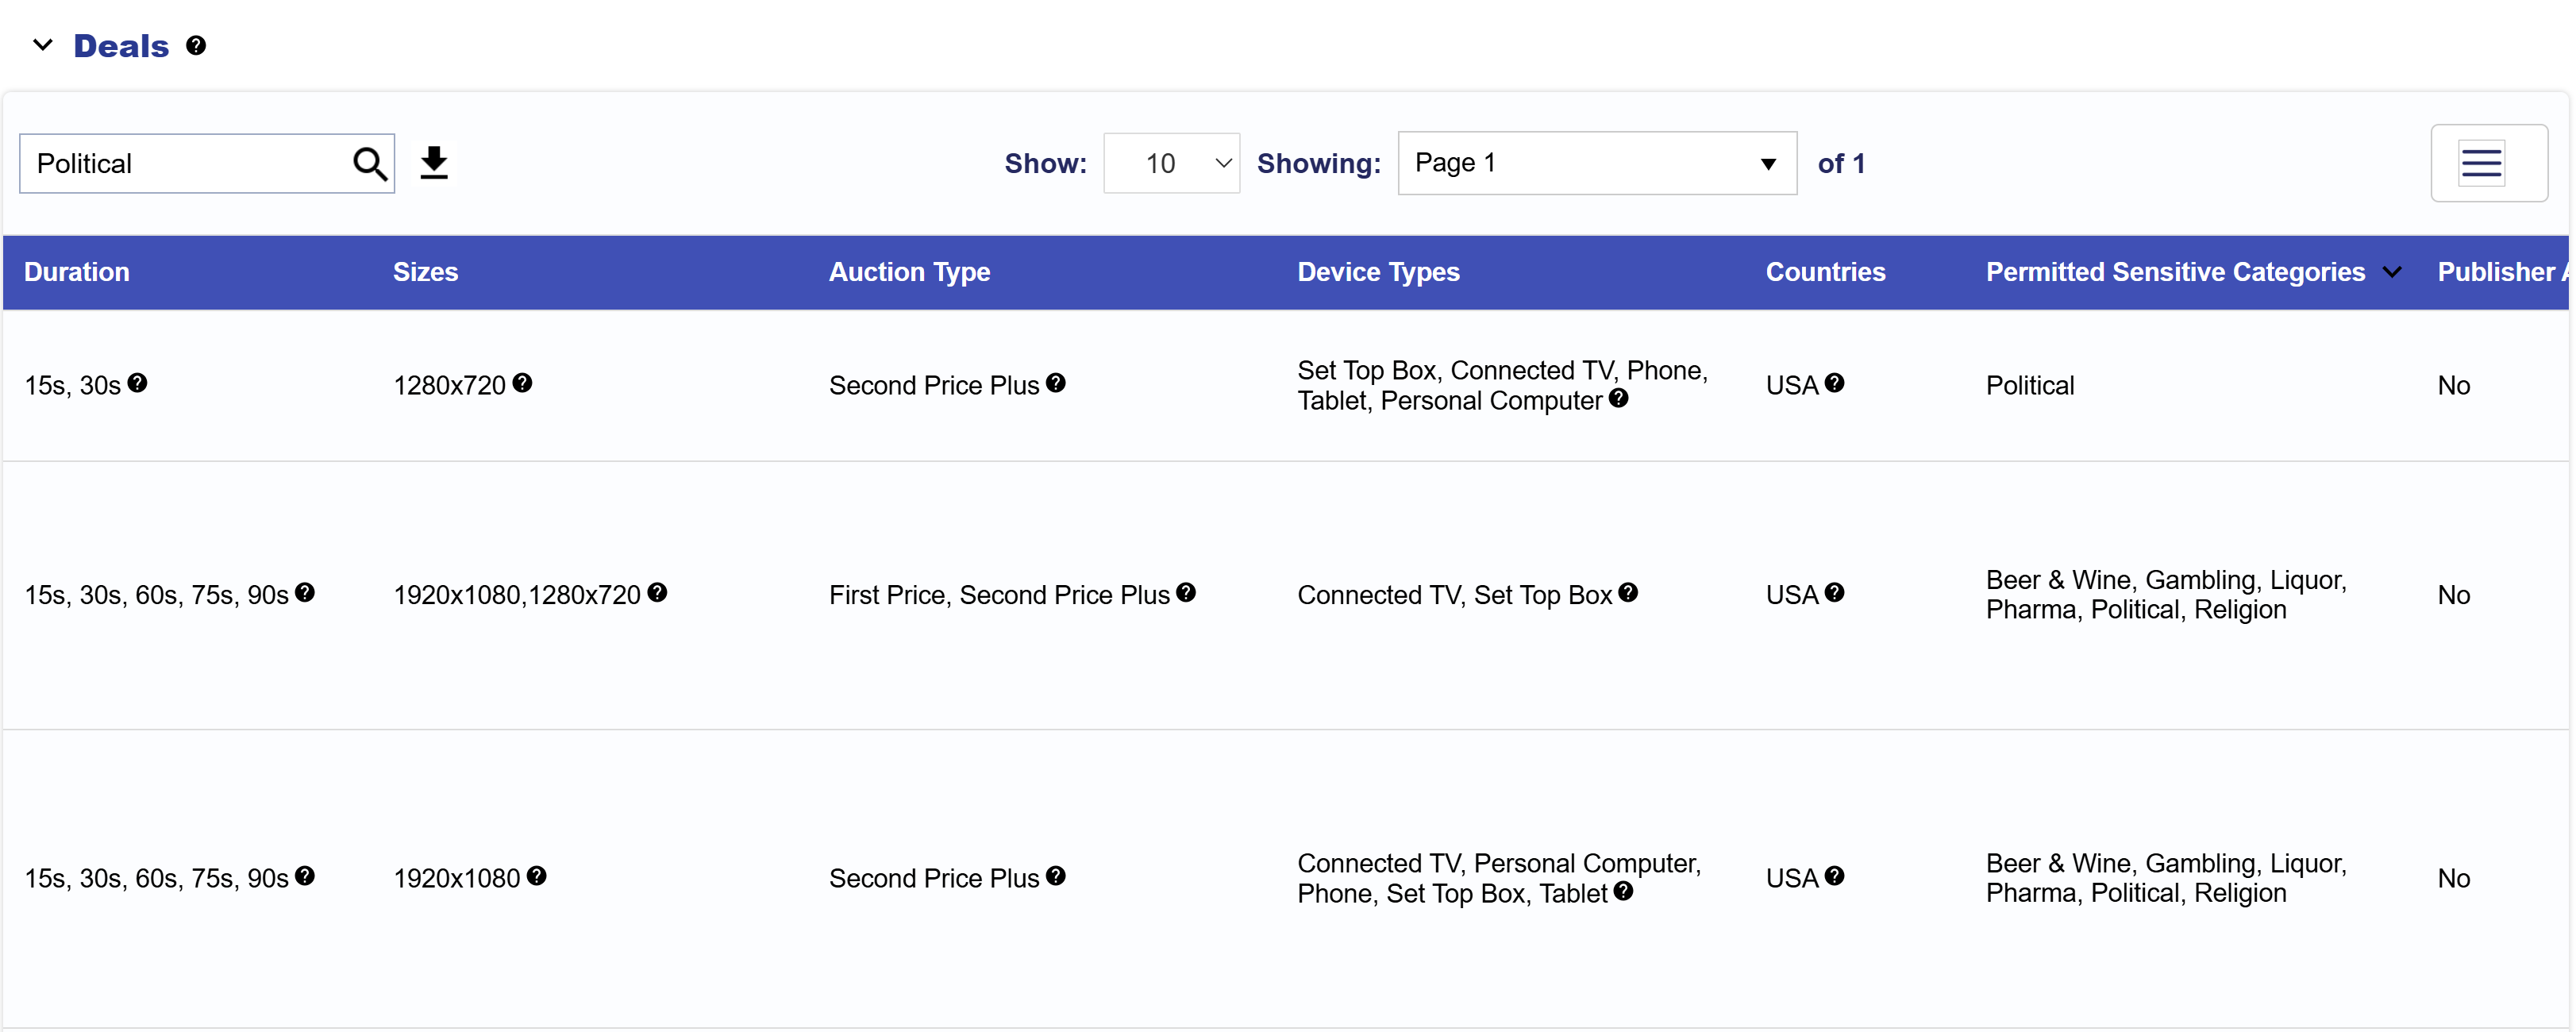
  • Permitted Sensitive Categories: Deals that allow sensitive content to be served.
  • Publisher Approval Required: Deals requiring publisher approval for each ad before launch. Submit ads for approval through the Help Center.
  • Notes: Any additional deal requirements, restrictions, inventory, or targeting.
  • Last Served Date: The most recent date that impressions were served through the deal.

Negotiated Deals

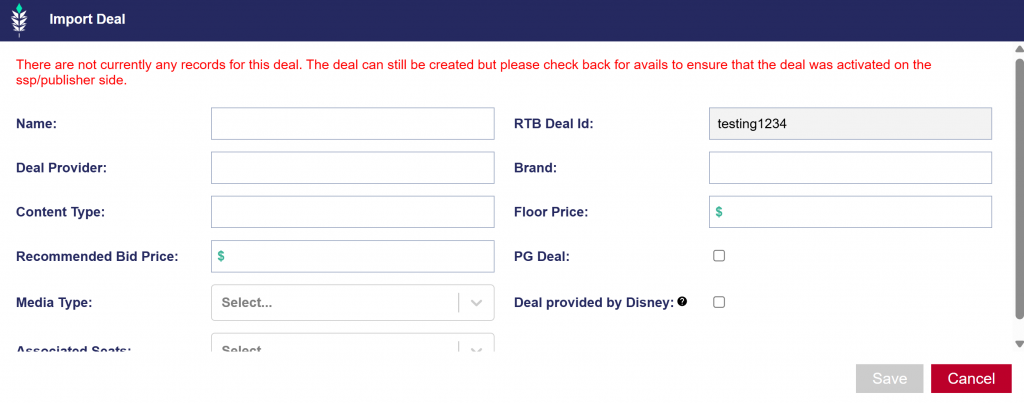
If you can’t find the deal you need in the catalog, reach out through the Help Center. The Pontiac Partnership team may be able to negotiate a deal for you. Any programmatic guaranteed deals or deals negotiated for a specific advertiser will appear under the ‘Negotiated Deals’ section in the ‘Inventory’ tab.

CTV Landscape Tool

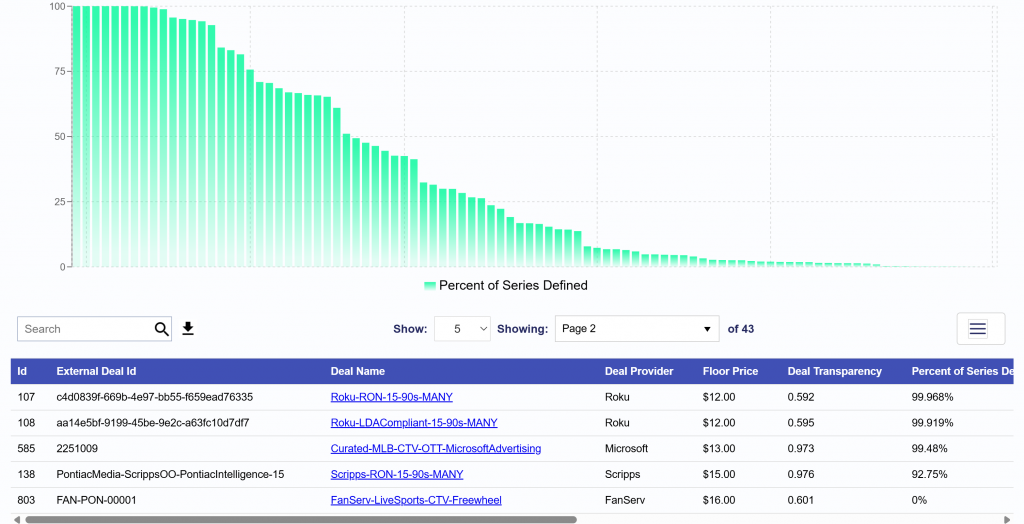
The CTV Landscape tool provides transparent insights into the data available for targeting and reporting across the accessible publishers and deals through the CTV bidder. With great inconsistencies in the information shared by each media owner across the CTV industry, this tool can be leveraged in the research and planning process to align campaign goals and expectations with available targeting and reporting capabilities.

To measure the level of transparency for CTV inventory, we are evaluating the percentage of bid requests (or impressions) that contain the following information:

  • Title
  • Series
  • Channel
  • Network
  • Full IP

By aggregating the data in bid requests from the Pontiac CTV Bidder, we can provide full transparency on the level of data shared by each publisher and by each Deal on the platform so you know exactly what you will get out of your campaigns, no surprises!

Reports are sortable by each field, click on the name of a field to order the report from lowest to highest or vice versa. Assess the inventory available with 100% reported rates on the parameters most important to your brand or search for the publishers and deals of interest to see which information they consistently share. Optimize your campaigns towards full transparency using the transparency scores to choose deals or create publisher targeting lists.

Inventory Availability Tool

The Inventory Availability Tool is a forecasting system that provides advertisers with insights into the inventory accessible through the Pontiac Bidder. By leveraging historical data, delivery trends, sample log data, and Pontiac’s proprietary forecasting formula, the tool helps advertisers:

  • Create and refine Inventory targeting lists.
  • Assess the feasibility of targeting parameters.
  • Optimize bid strategies.
  • Estimate available scale for Campaign planning.

Create an Inventory Availability Report

  1. Switch to the ‘ART’ section using the toggle in the top right corner.
    • If the ‘ART’ button is unavailable, contact Pontiac Support via the Help Center.
  2. Navigate to the ‘Inventory Availability’ tab.
  3. Click ‘New Report’.
  4. Enter a report name and select and end date (the start date will default to 30 days before the selected end date).
  5. Select ‘CTV’ for a CTV forecasting report.
    • Note that you can also create an Origin forecasting report. See the following documentation:
  6. Select Inventory Type: In-App or Web.
  7. Add Targeting parameters by the follow two methods
    • Edit Targeting: Select parameters for forecasting.
      • Available targeting options for In-App include:
        • Deals
        • Exchanges
        • Geo (Country, Regions, DMAs)
        • Zip Codes
        • Livestream
        • App Lists (In-App only)
        • Apps (In-App only)
        • Device Types
        • Channel
        • Network
        • Publisher
        • Genre
        • Series
        • Title
        • Multi Field
      • Available targeting options for Web include:
        • Deals
        • Exchanges
        • Geo
        • Zip Codes
        • Livestream
        • Publisher
        • Site Lists
        • Sites
        • Device Types
    • Inventory Discovery: Due to the inconsistency in how inventory information is structured across the CTV landscape, this tool helps advertisers create well-informed targeting lists and identify variations in formatting for the desired inventory.
      • Search and click to add fields to targeting for the forecast report.
  8. Associate Audience Segments
    • Custom Audiences
    • Third Party Audiences
    • Contextual Audiences
    • ART Audiences
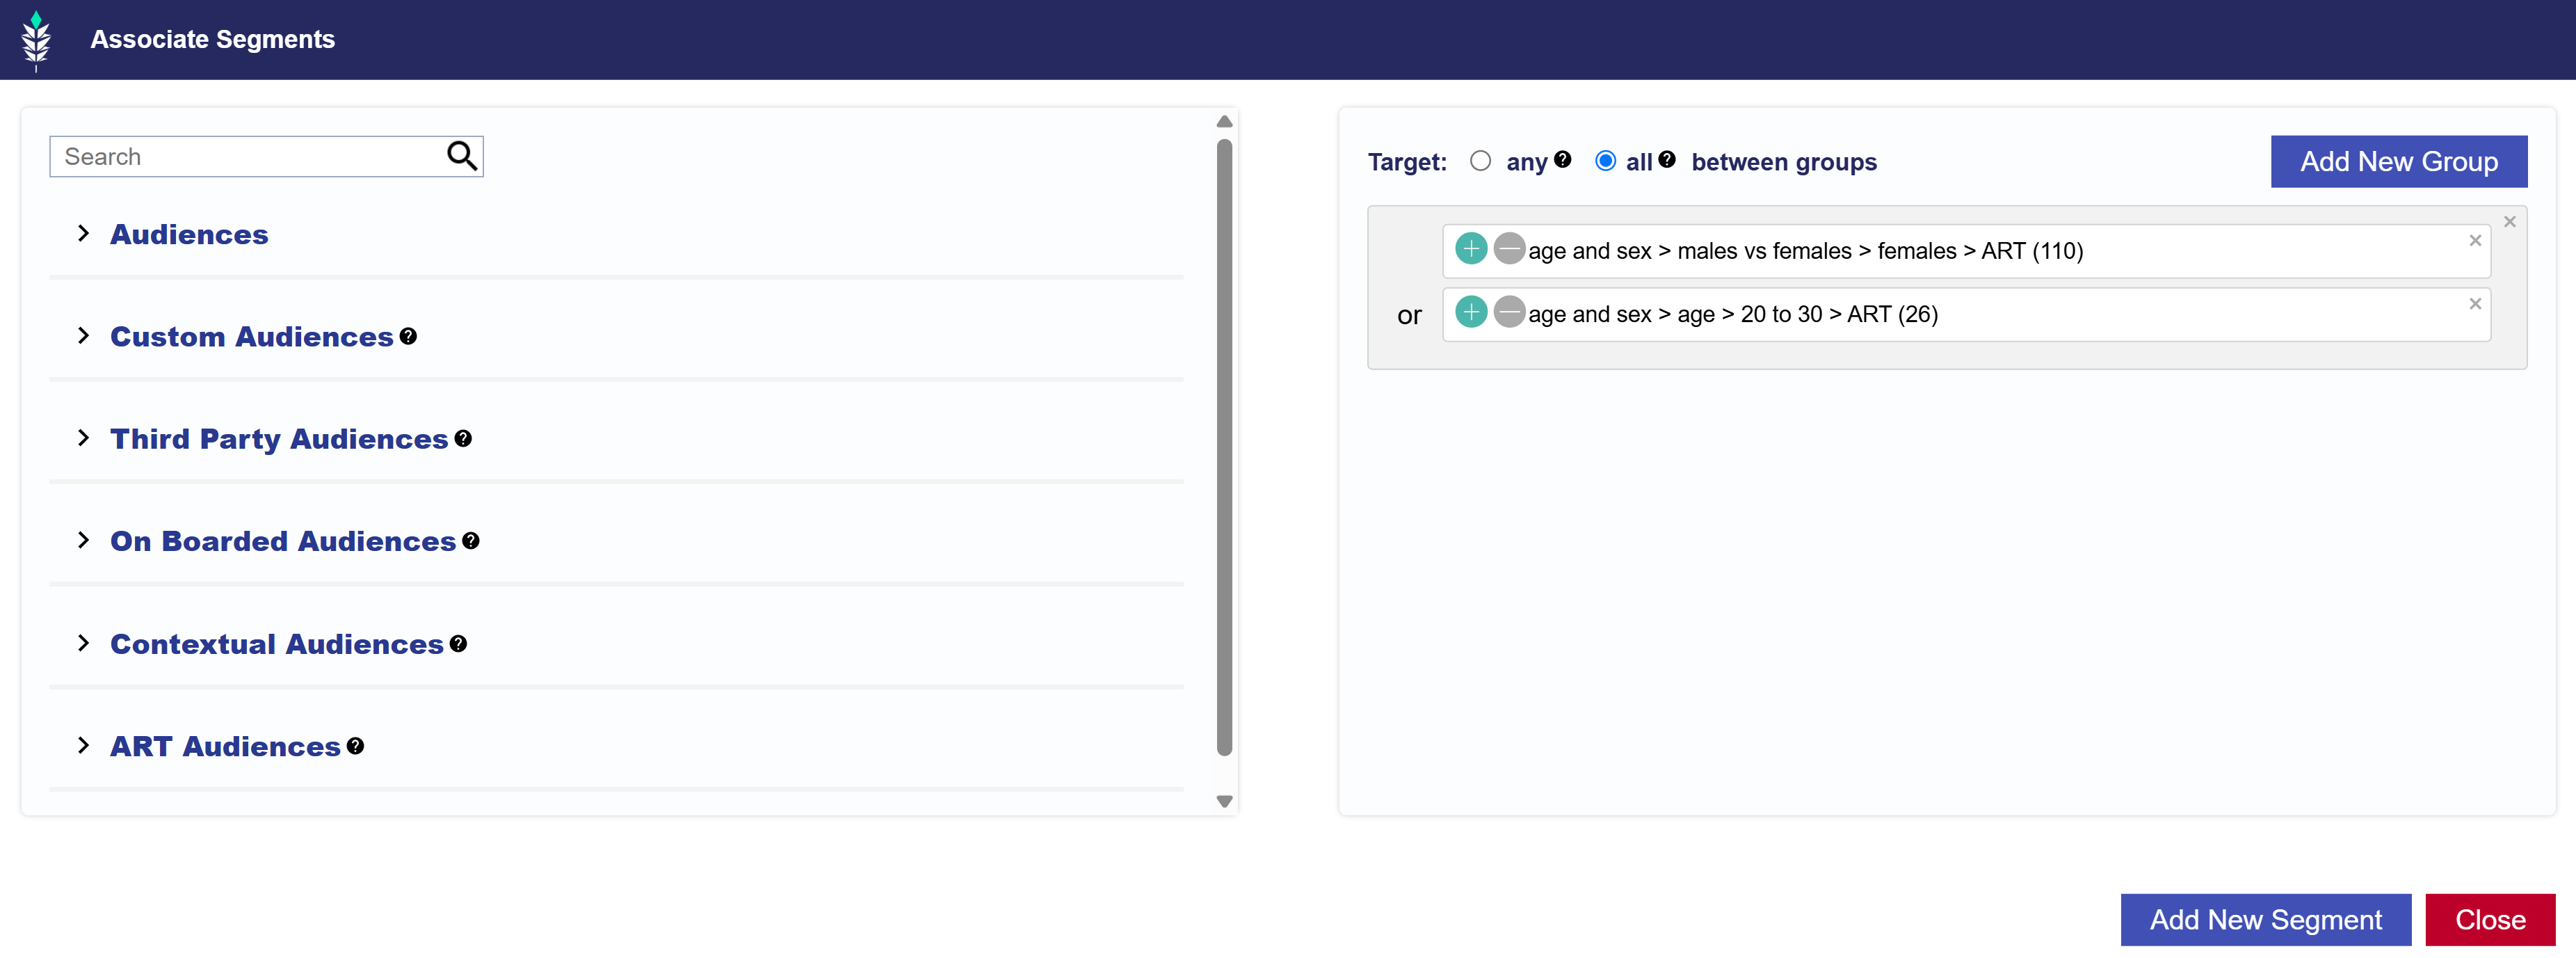
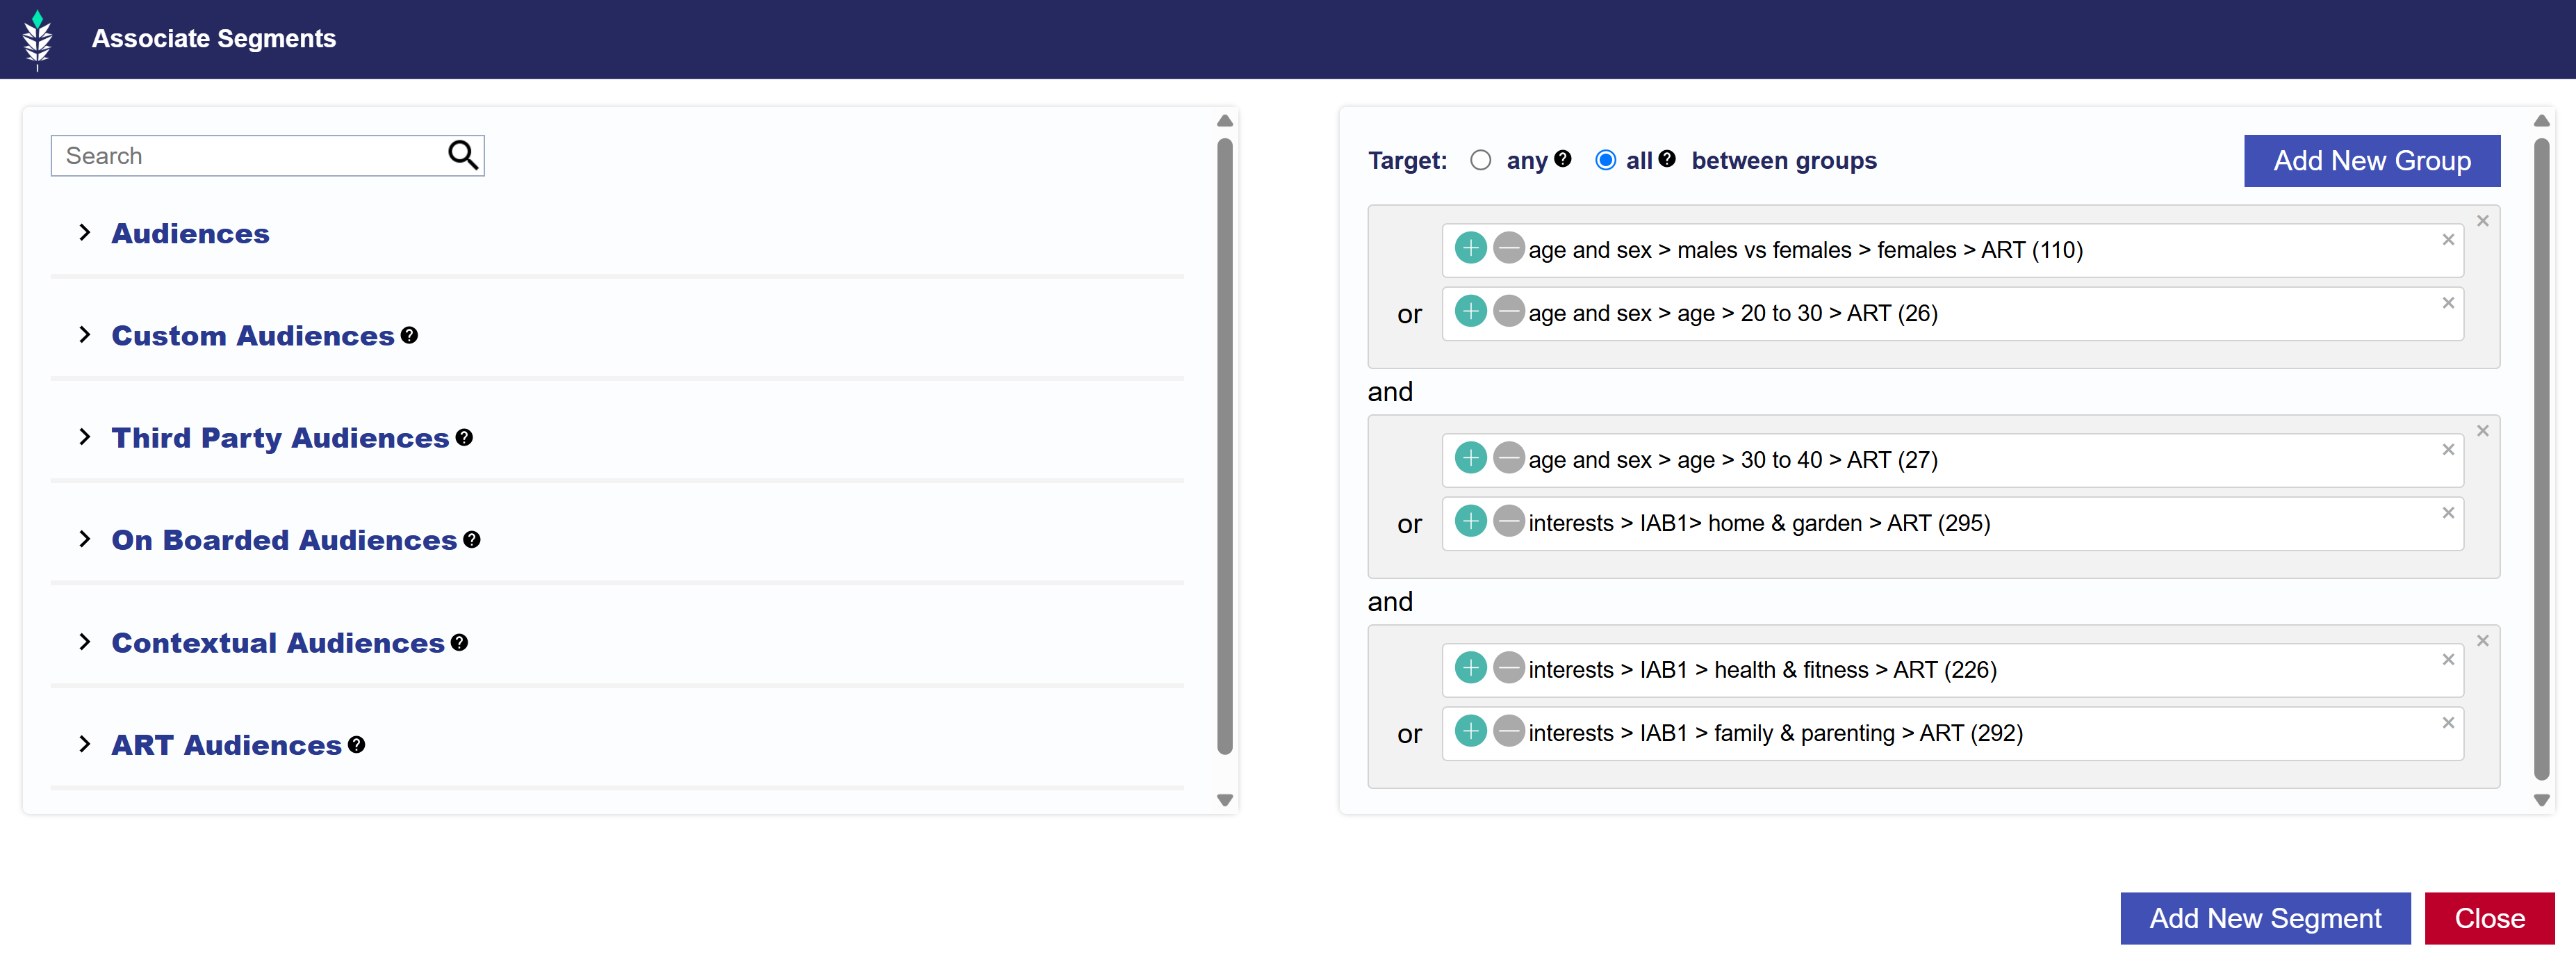
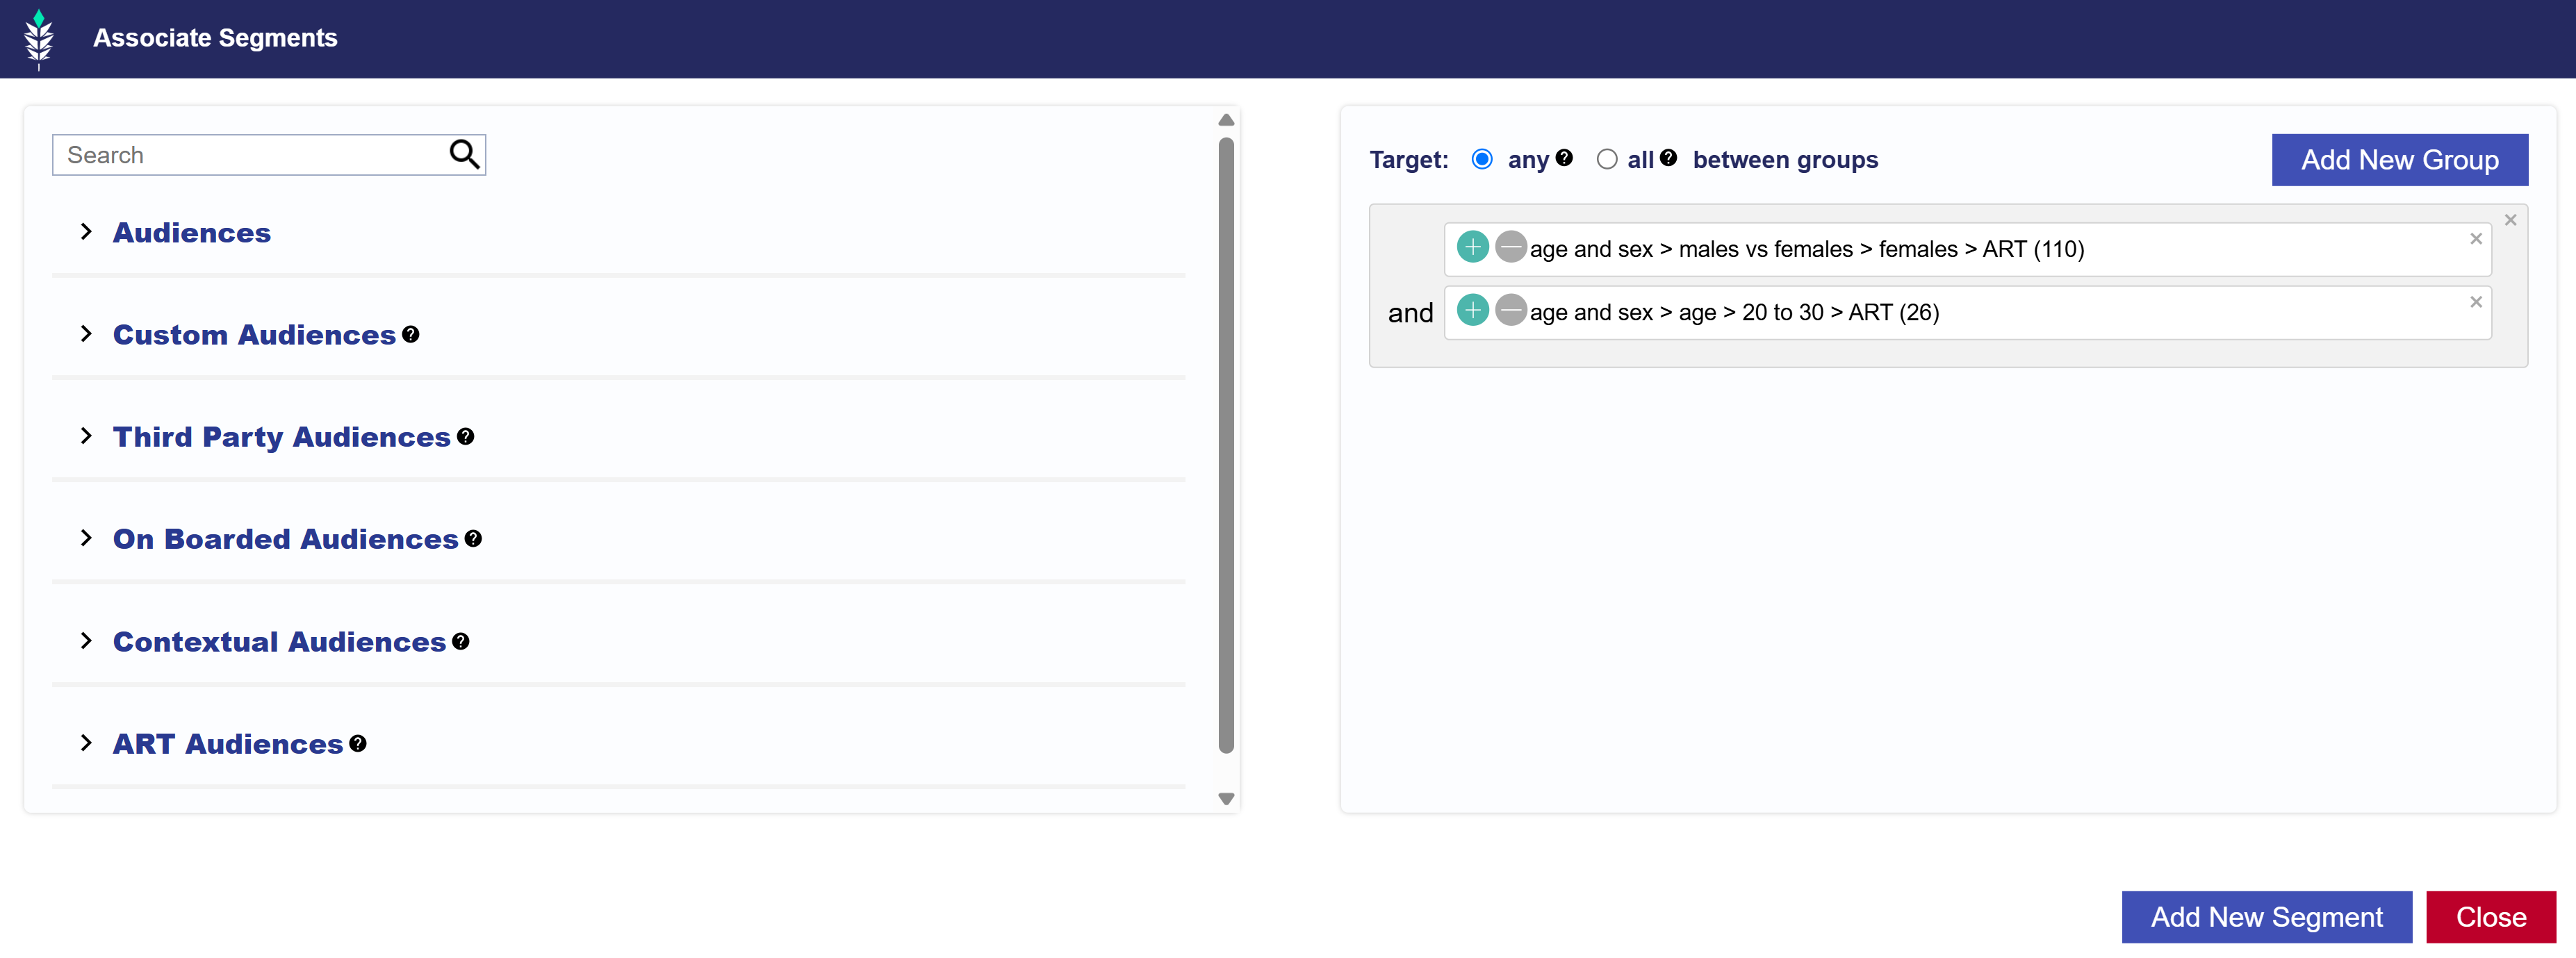
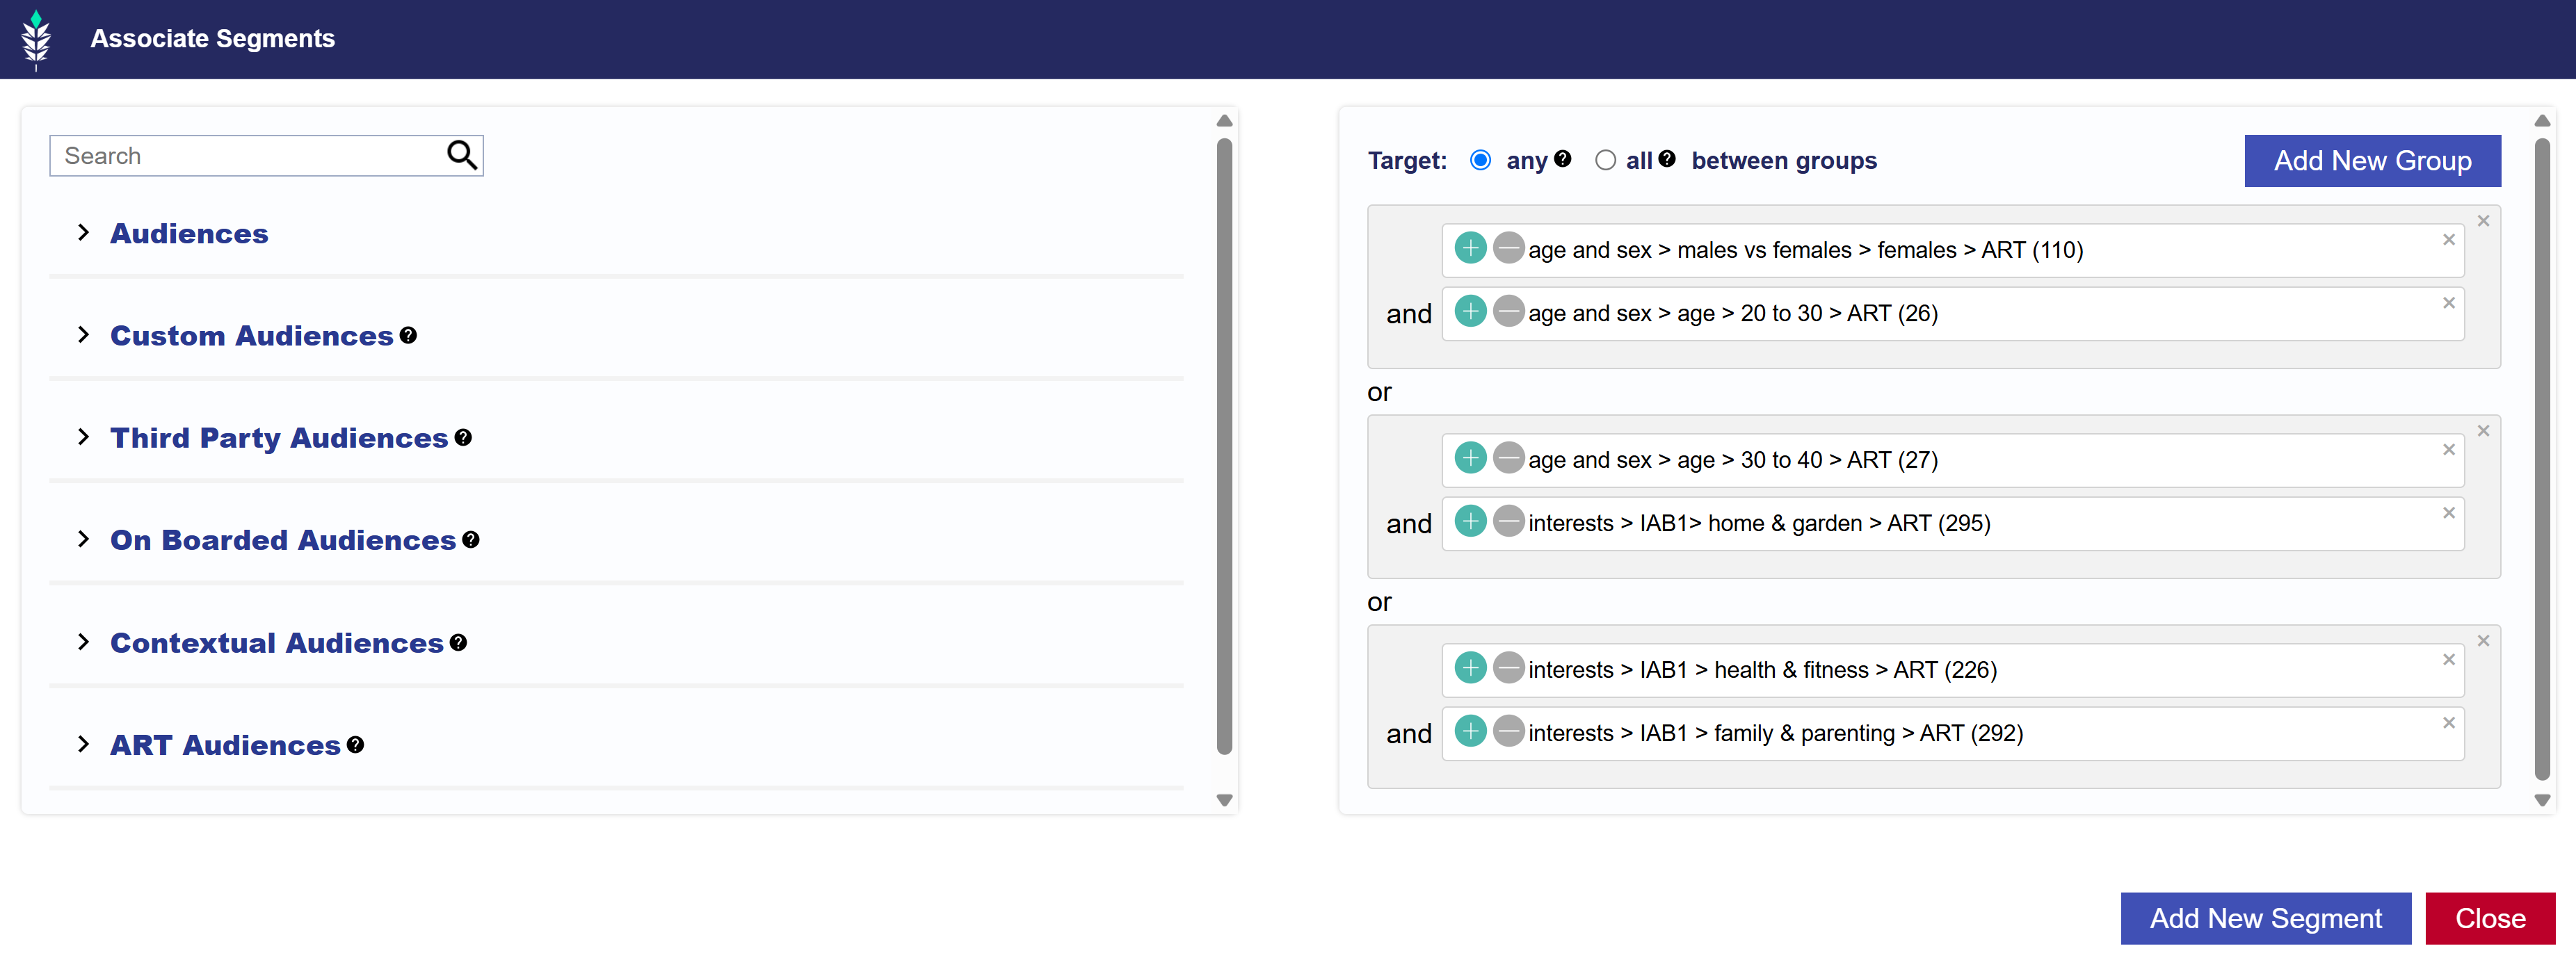
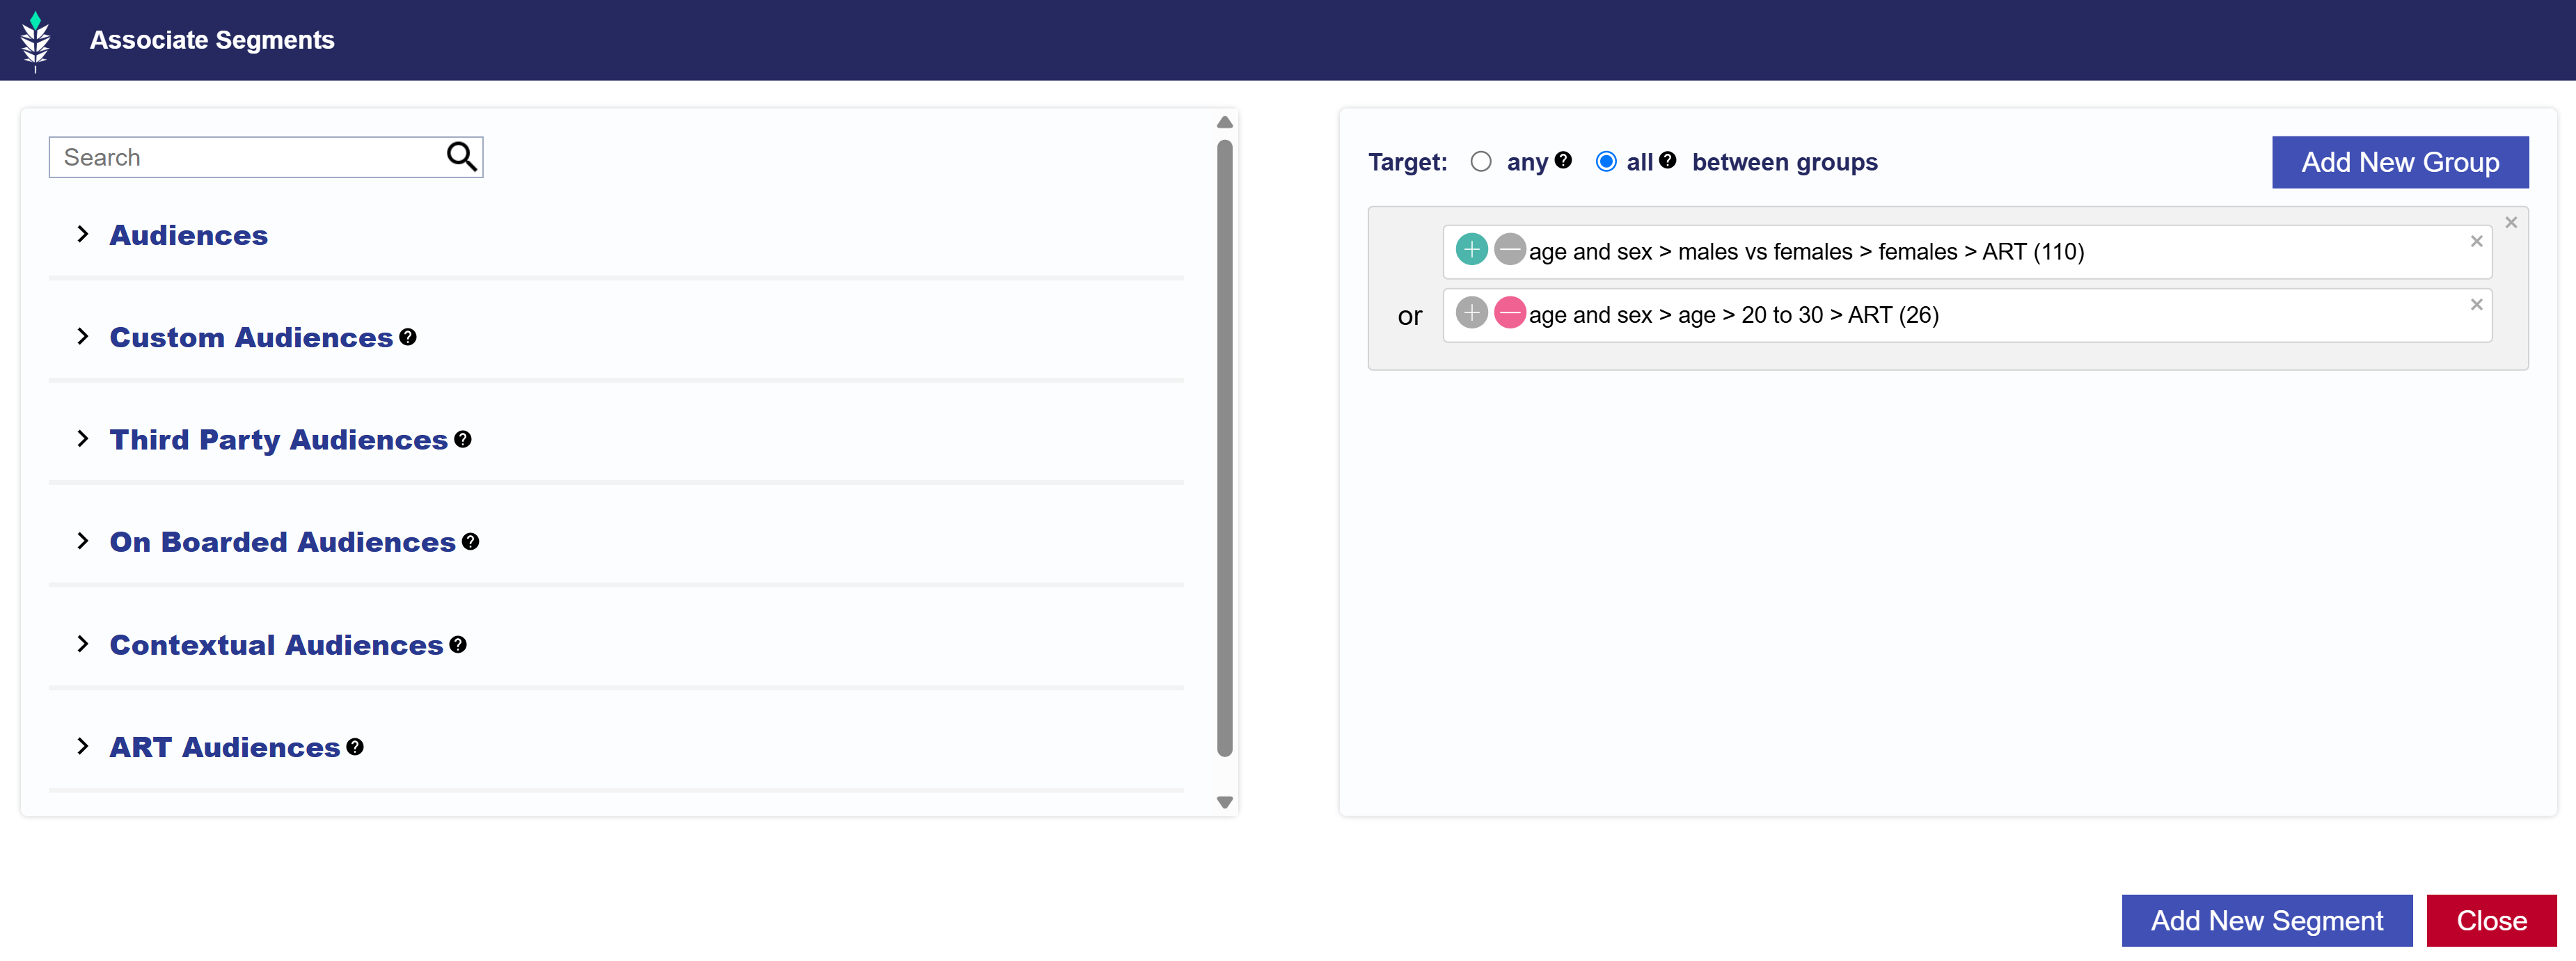
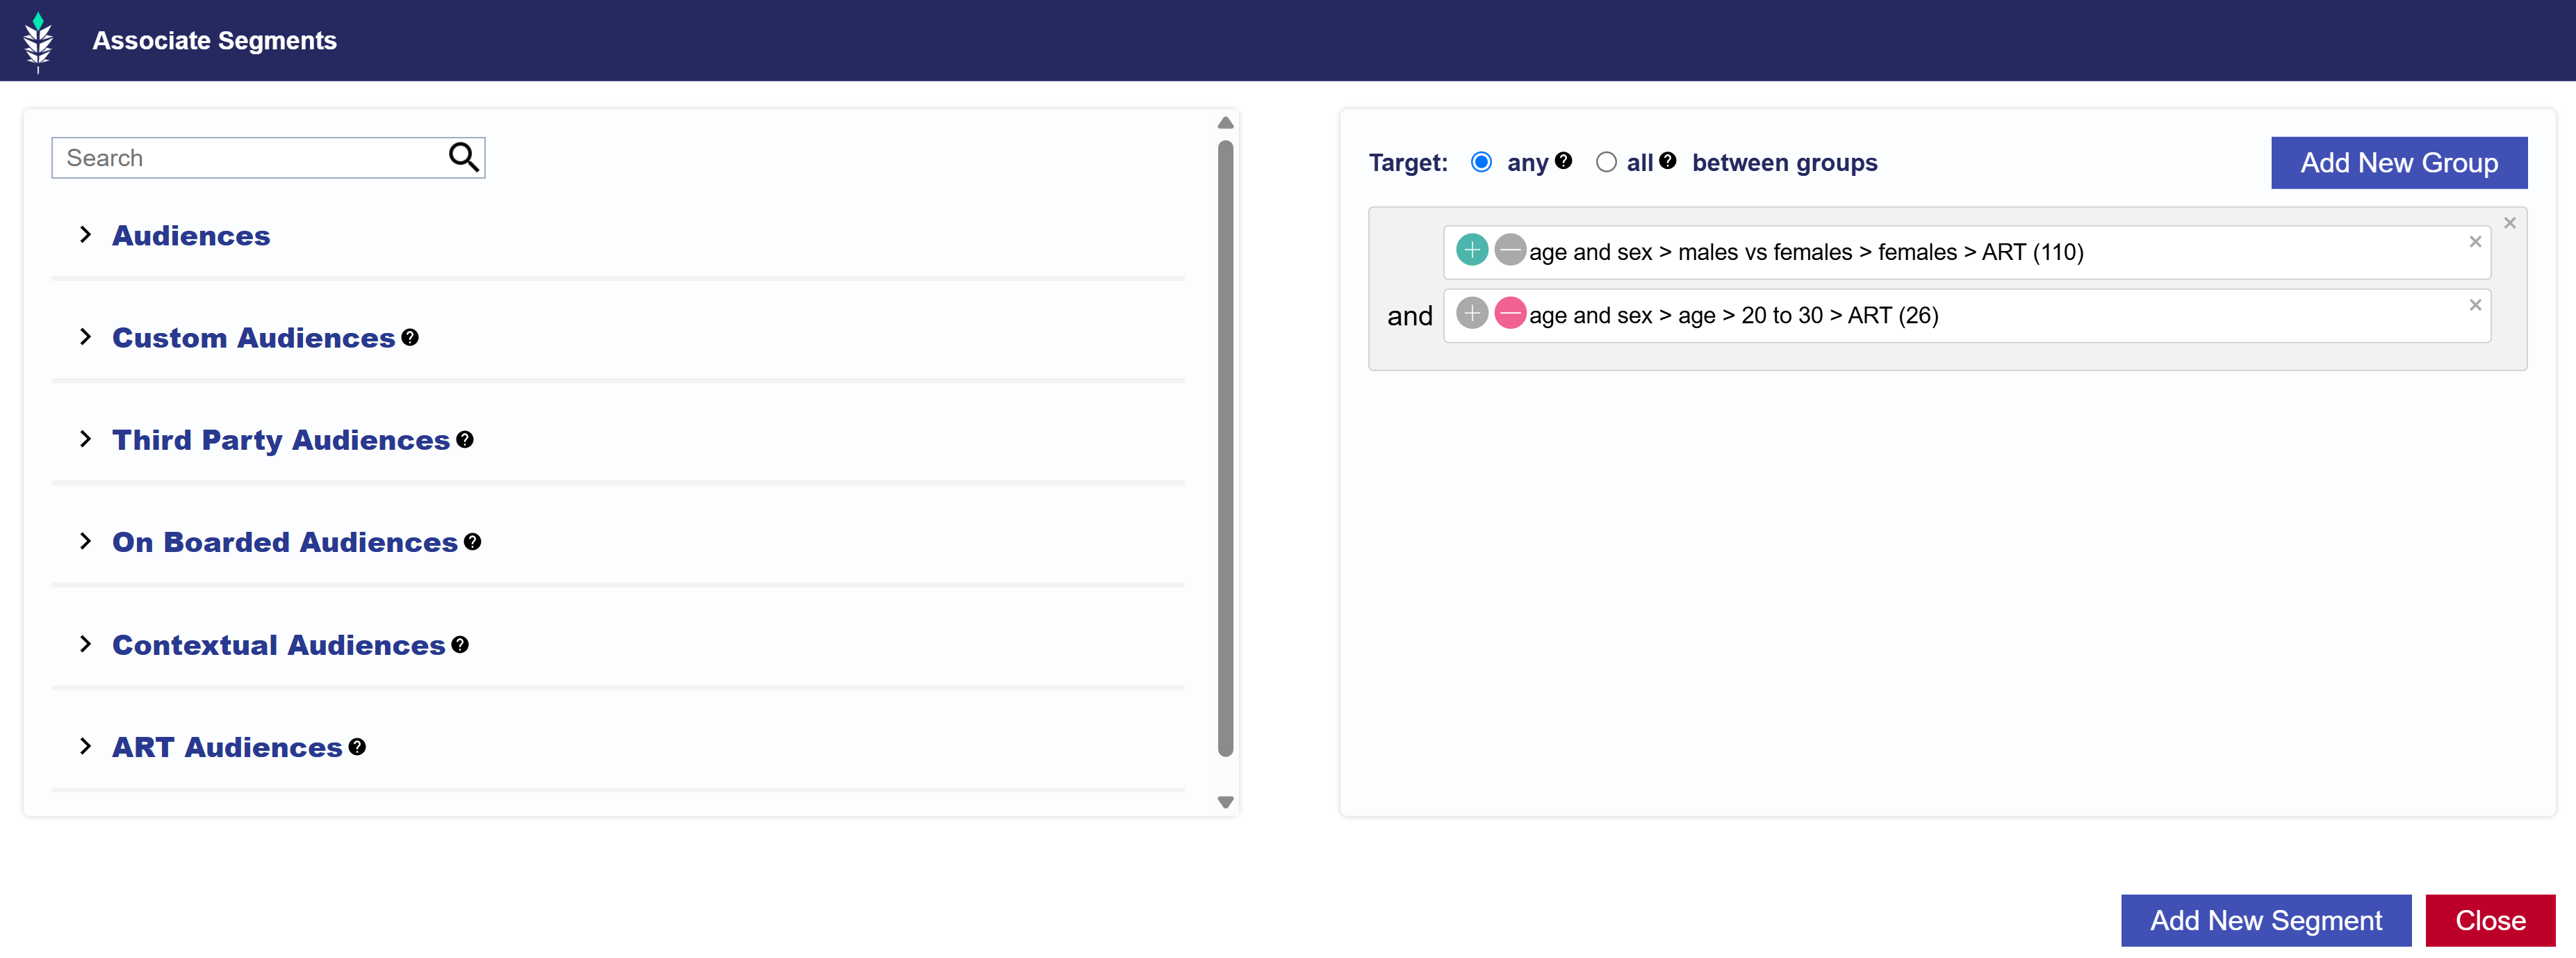
    • See Boolean Logic for more details on any and all logic for targeting between groups.
  9. Run the report and wait a couple of minutes for results to populate.

Understanding the Results

Summary Metrics

  • Estimated Daily Impressions
  • Total Impressions
  • Unique IFAs
  • Unique IPs

Chart Data

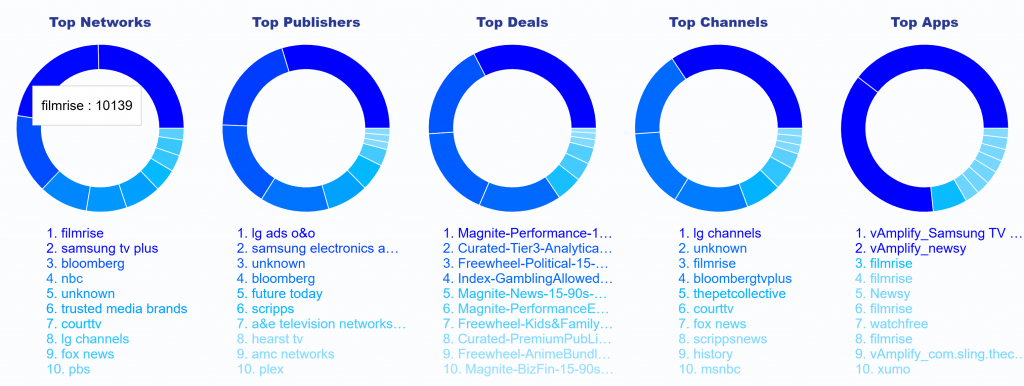
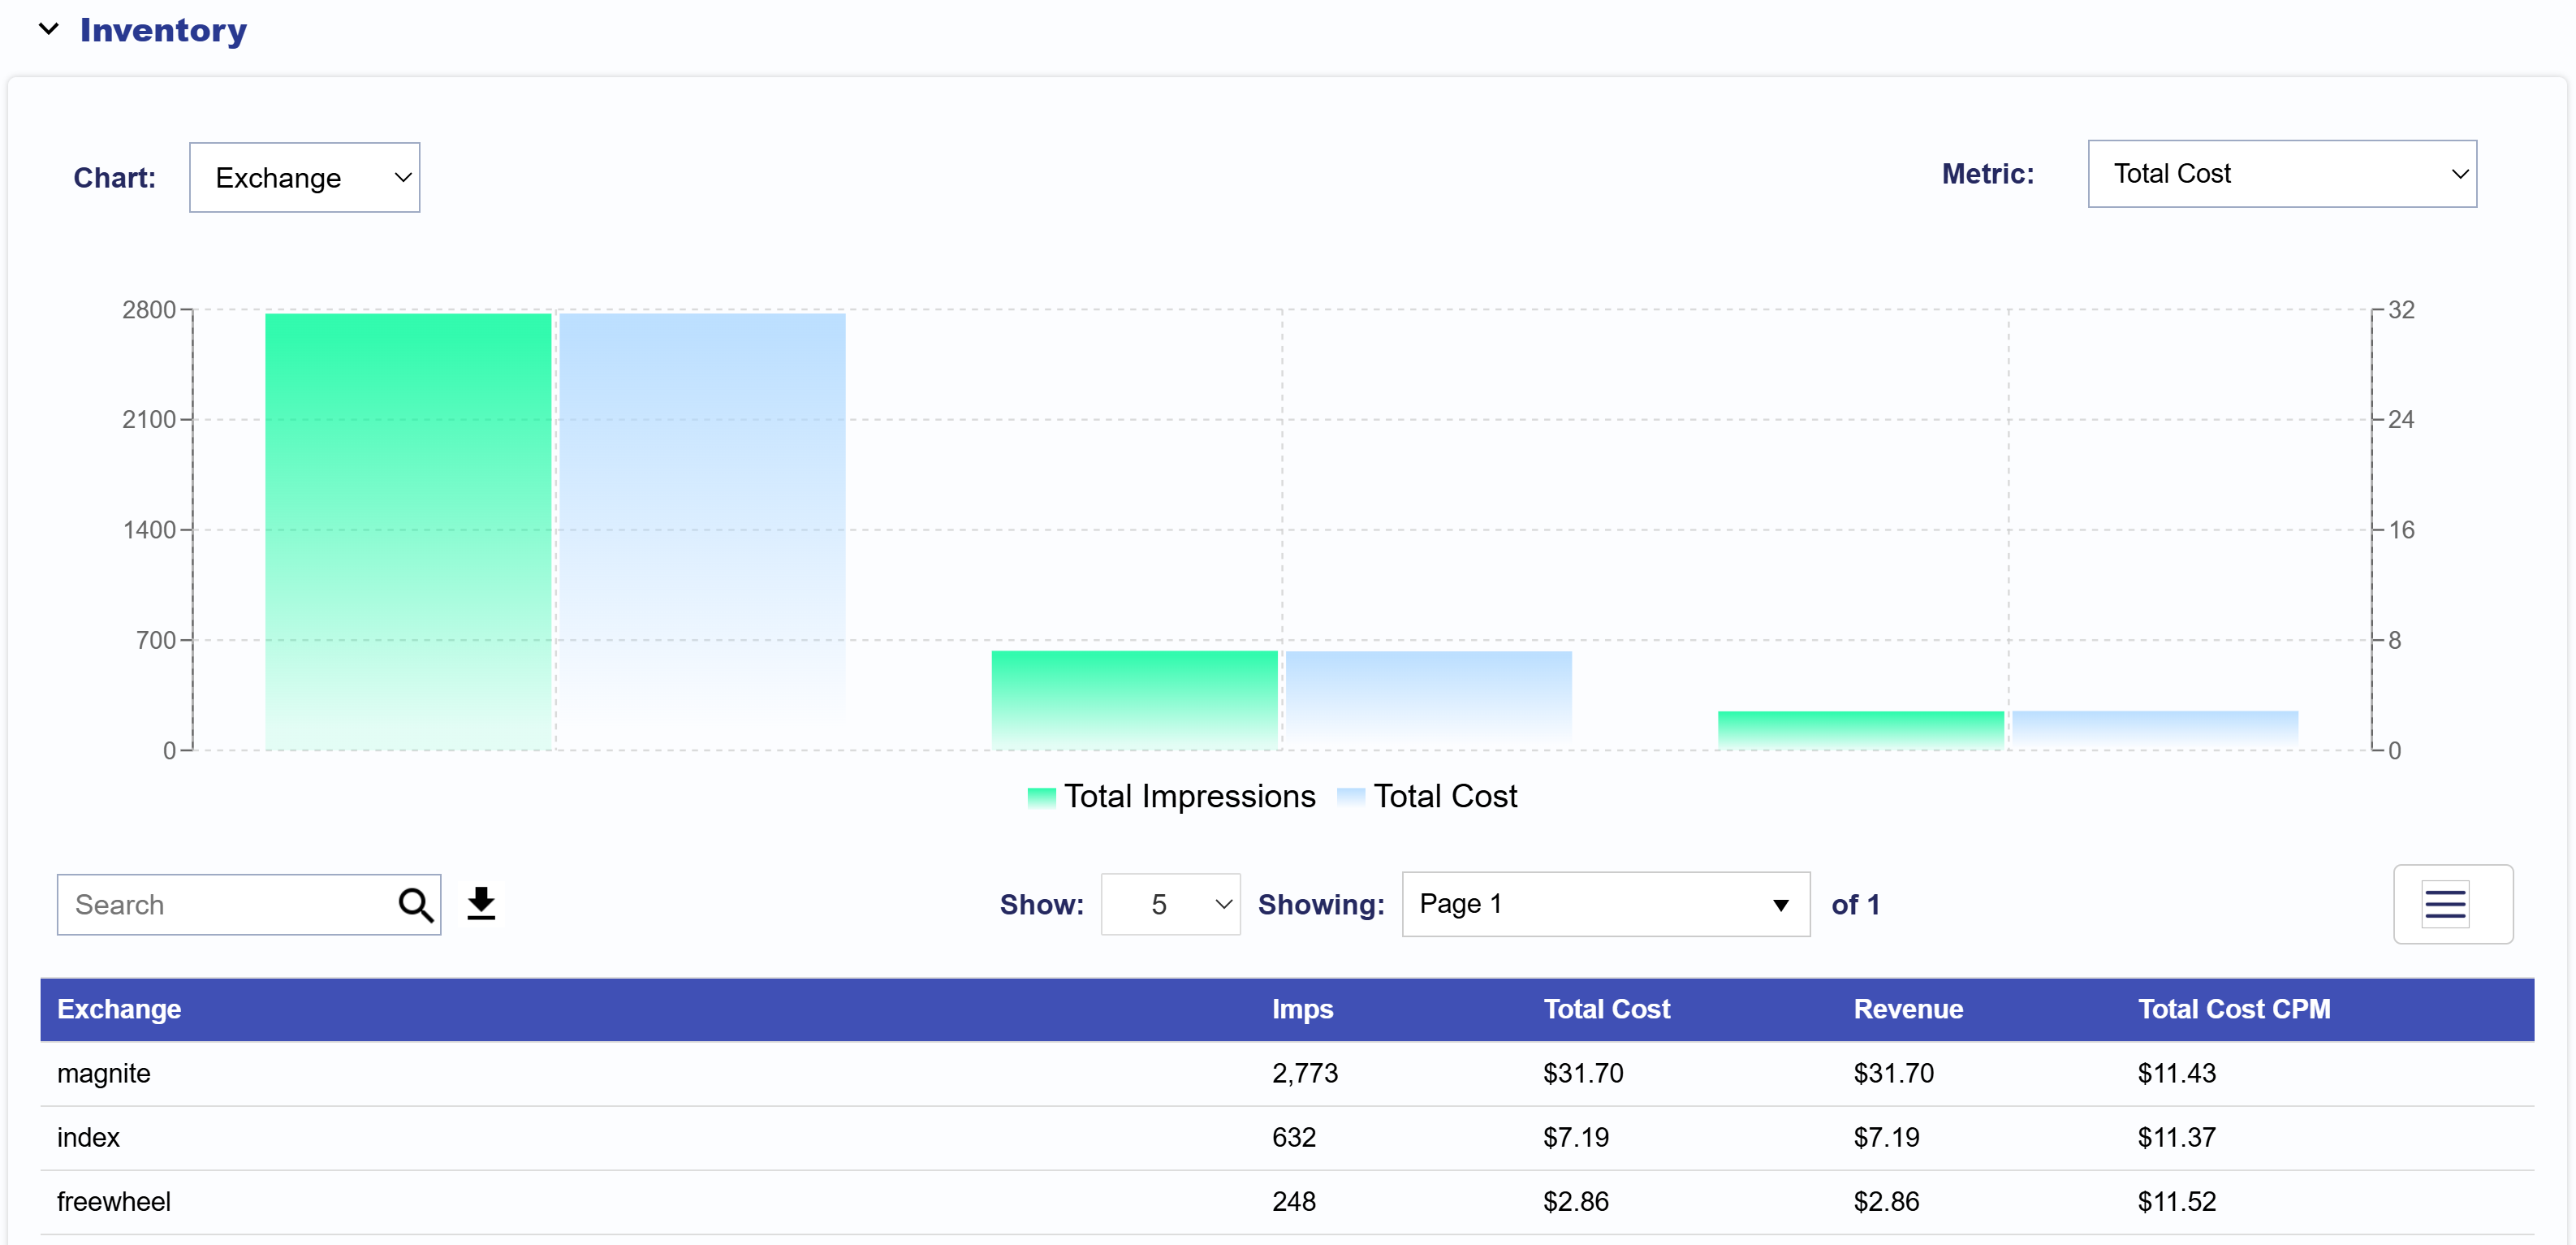
The report includes individual expandables and visualizations for:

  • Deals
  • Exchanges
  • Channel
  • Network
  • Publisher
  • Genre
  • Series
  • Titles
  • Apps
  • Device Types
  • Livestream
  • Zip Codes
  • Sample Requests: Provides deeper insights into impression-level parameter combinations.
    • For example:
      • If a Deal ID is selected, charts will display available Networks and Channels.
      • Sample logs will illustrate how specific networks grant access to certain channels within that deal.

CTV Strategy Guide

Overview

The Pontiac Intelligence DSP offers a wide variety of granular targeting tools that enable Advertisers to better reach their target Audience and subsequently maximize their ad spend. Given how different types of inventories, data, and media interact, there are some complexities as to how targeting parameters and features can be combined and layered on a Campaign and/or Line Item (Inventory, Geo, Audience Targeting). The following Strategies Guide provides insight into creating intelligent and functional targeting on your Line Items according to your media type and KPIs.

Strategy by Media Type

*For OTT/CTV, it is only recommended to use audiences from the providers TruAudience (Tru Optik), Lotame and Comscore.

CTV Bid Recommendations

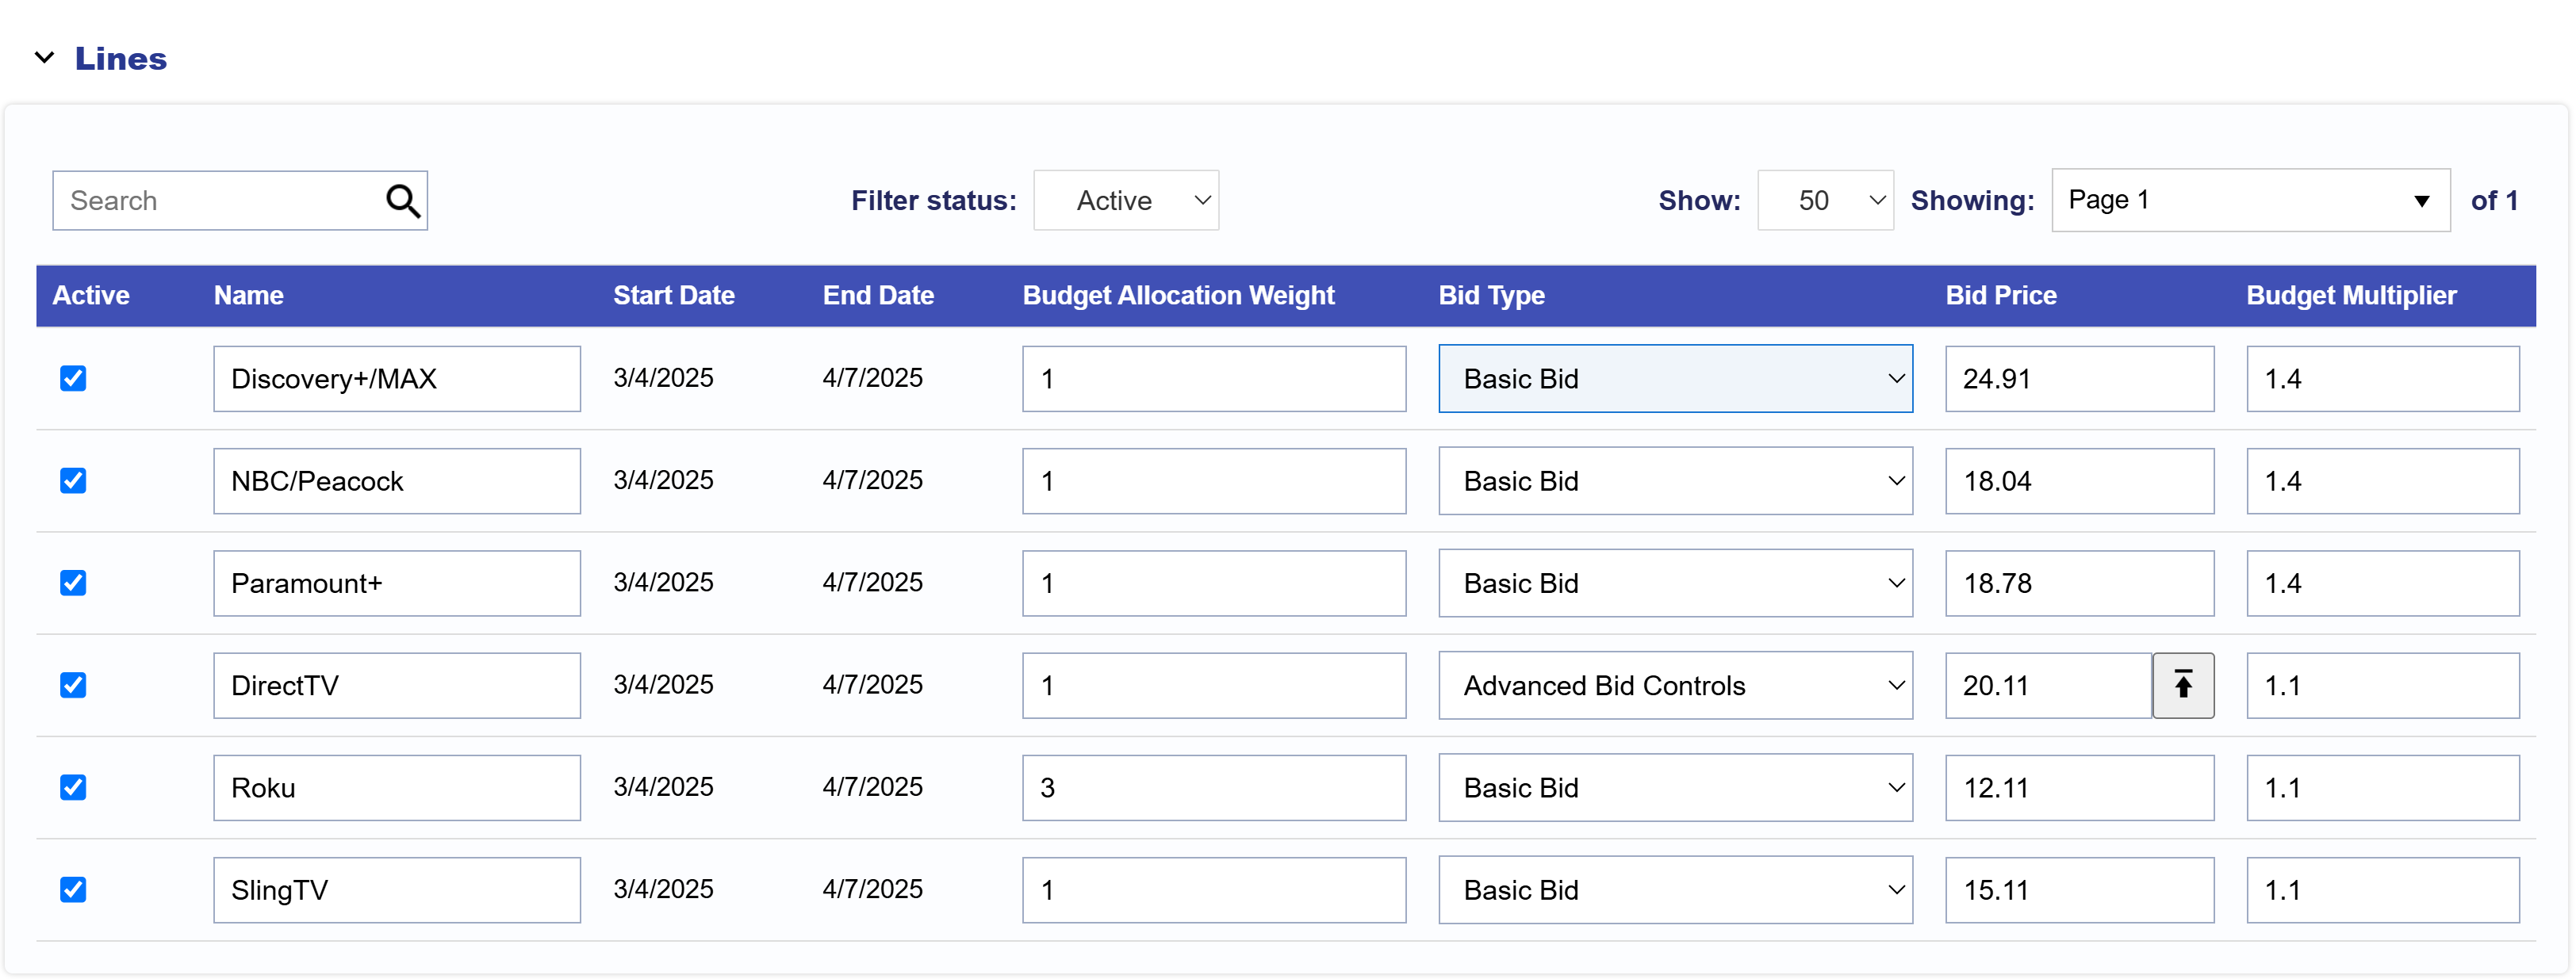
In the Pontiac Platform, you have full control over bidding for all your campaigns. When setting up a Line Item, you can define a Basic Bid, Bid at Floor Price, and Advanced Bid Controls for your media. Closing bids reflect the total cost, including any applicable Audience fees or Foot Traffic fees. 

  • Basic Bid: Standard bid price applied across all inventory. If the final clearing price is lower than the base bid, the system will adjust and bid one cent above the next highest bid to secure the impression efficiently.
  • Bid at Floor Price: The maximum bid price and CPM floor allowed for an auction.
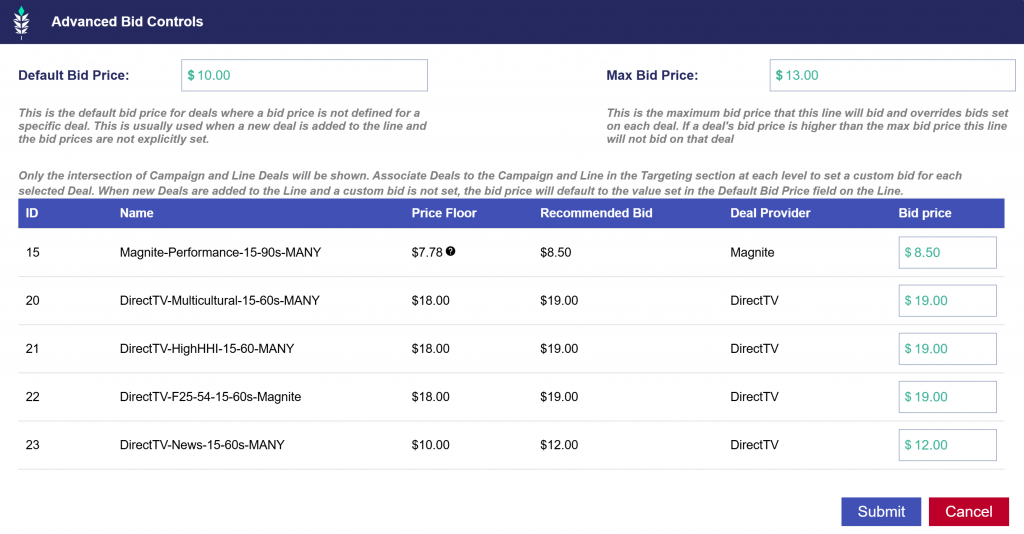
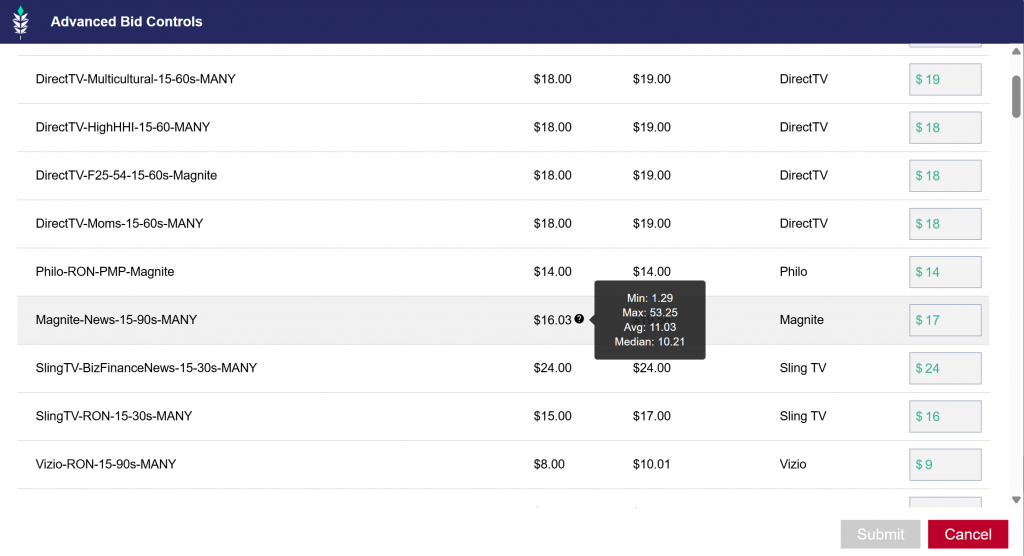
  • Advanced Bid Controls: A feature that allows setting a maximum bid price for Deals, giving more control over bid adjustments and spending limits.
    • Only the intersection of Campaign and Line Deals will be shown.
    • Associate Deals to the Campaign and Line in the Targeting section at each level to set a custom bid for each selected Deal.
    • When new Deals are added to the Line and a custom bid is not set, the bid price will default to the value set in the Default Bid Price field on the Line.
    • See screenshot below of the Advanced Bid Controls popup window.
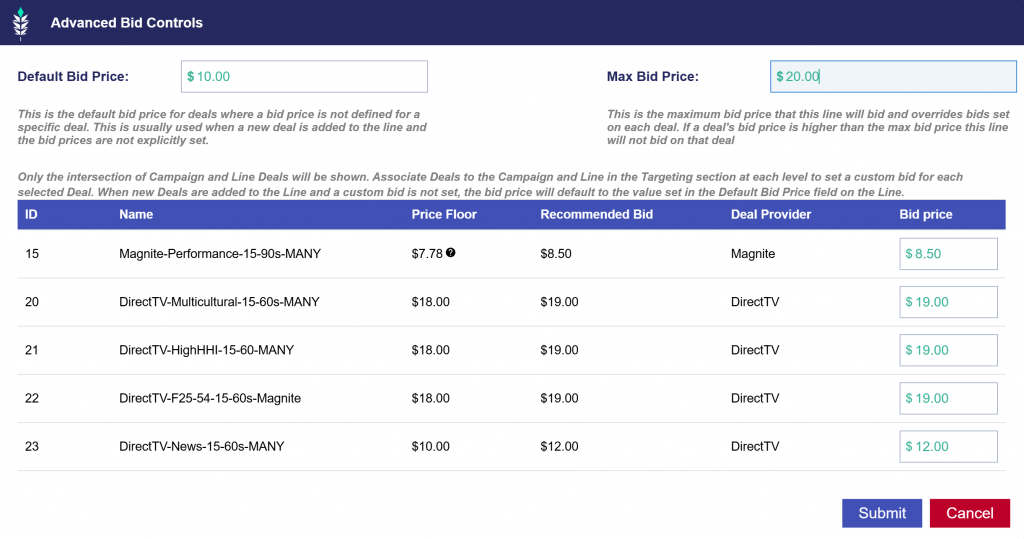
The typical prices for CTV placements range from $28-40, with premium inventory available at prices over $40. If you are targeting a CTV deal you will be given the CPM floor. We recommend setting your maximum bid at least $3-$5 above the minimum. CTV placements on the Open Exchange may sell at a lower CPM, but we recommend using PMP’s as they guarantee fraud-free inventory. 

Seat Settings

Users

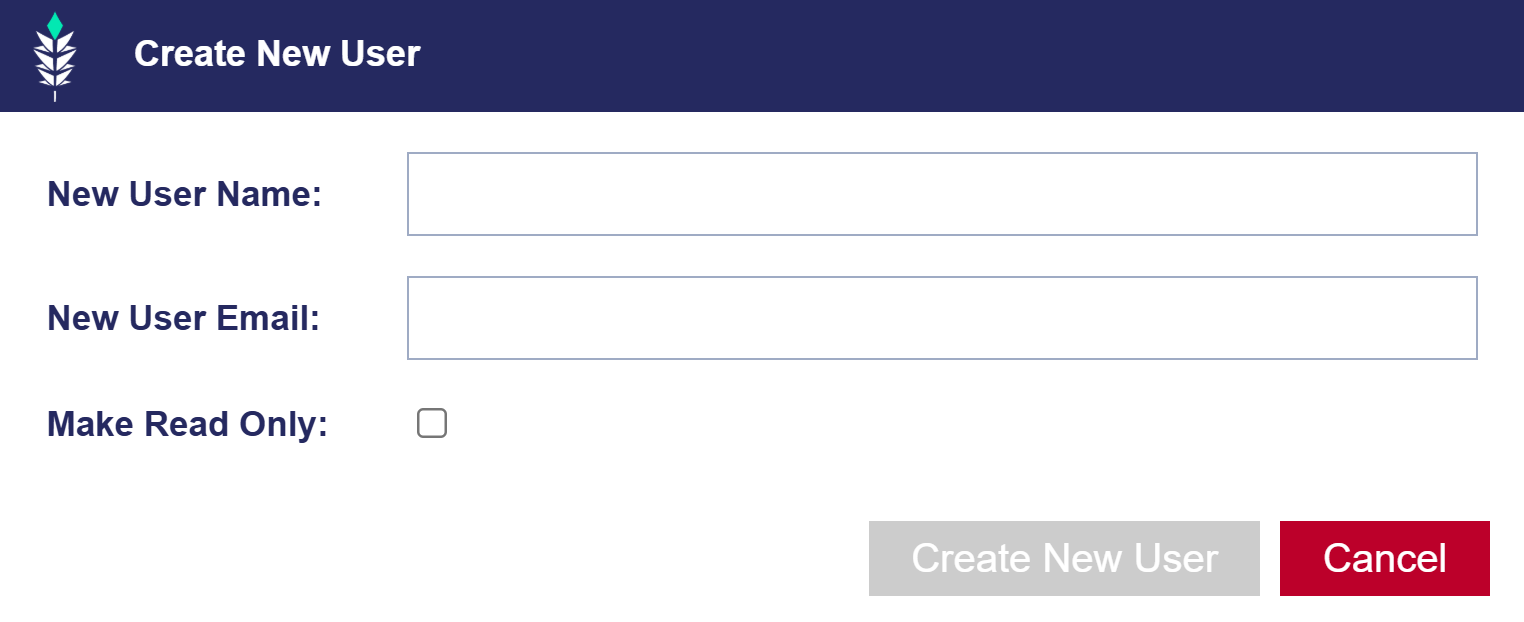
Create New Users

  1. Navigate to Admin and then to the Seat Settings tab.
  2. Click ‘Create New User’ to add a new user.
  3. Input the user’s Name and Email.
  4. Check the Read-Only box to give the user view-only access, or leave it unchecked to grant full access.

Edit Seat Users

  1. Navigate to Admin and then to the Seat Settings tab.
  2. Click the ‘Edit’ button on the far right to edit the user’s role.
  3. Choose the appropriate role:
    • Seat-admin
    • User
    • Read-only.
    • Note that if user roles are changed, the user will have to log out and log back in before the new role changes take effect.

Special Cases

  • If a user is deleted, a new user cannot be added with the same email address as the deleted user.
  • If you need to change a username or re-enable a previously deleted user, please create a ticket in our Help Center, and our engineering team will assist with the request.

Addendums

Accept Live Ramp and TransUnion Addendums here.

Preferences

Choose your Seat’s Timezone. Download all timezones here:

timezonesDownload

Create an Advertiser

The Advertiser level in the Pontiac platform represents an individual brand, product or client. This Advertiser will house all of the Campaigns and Line Items for this brand or product and the associated Creatives, Pixels and Audiences.

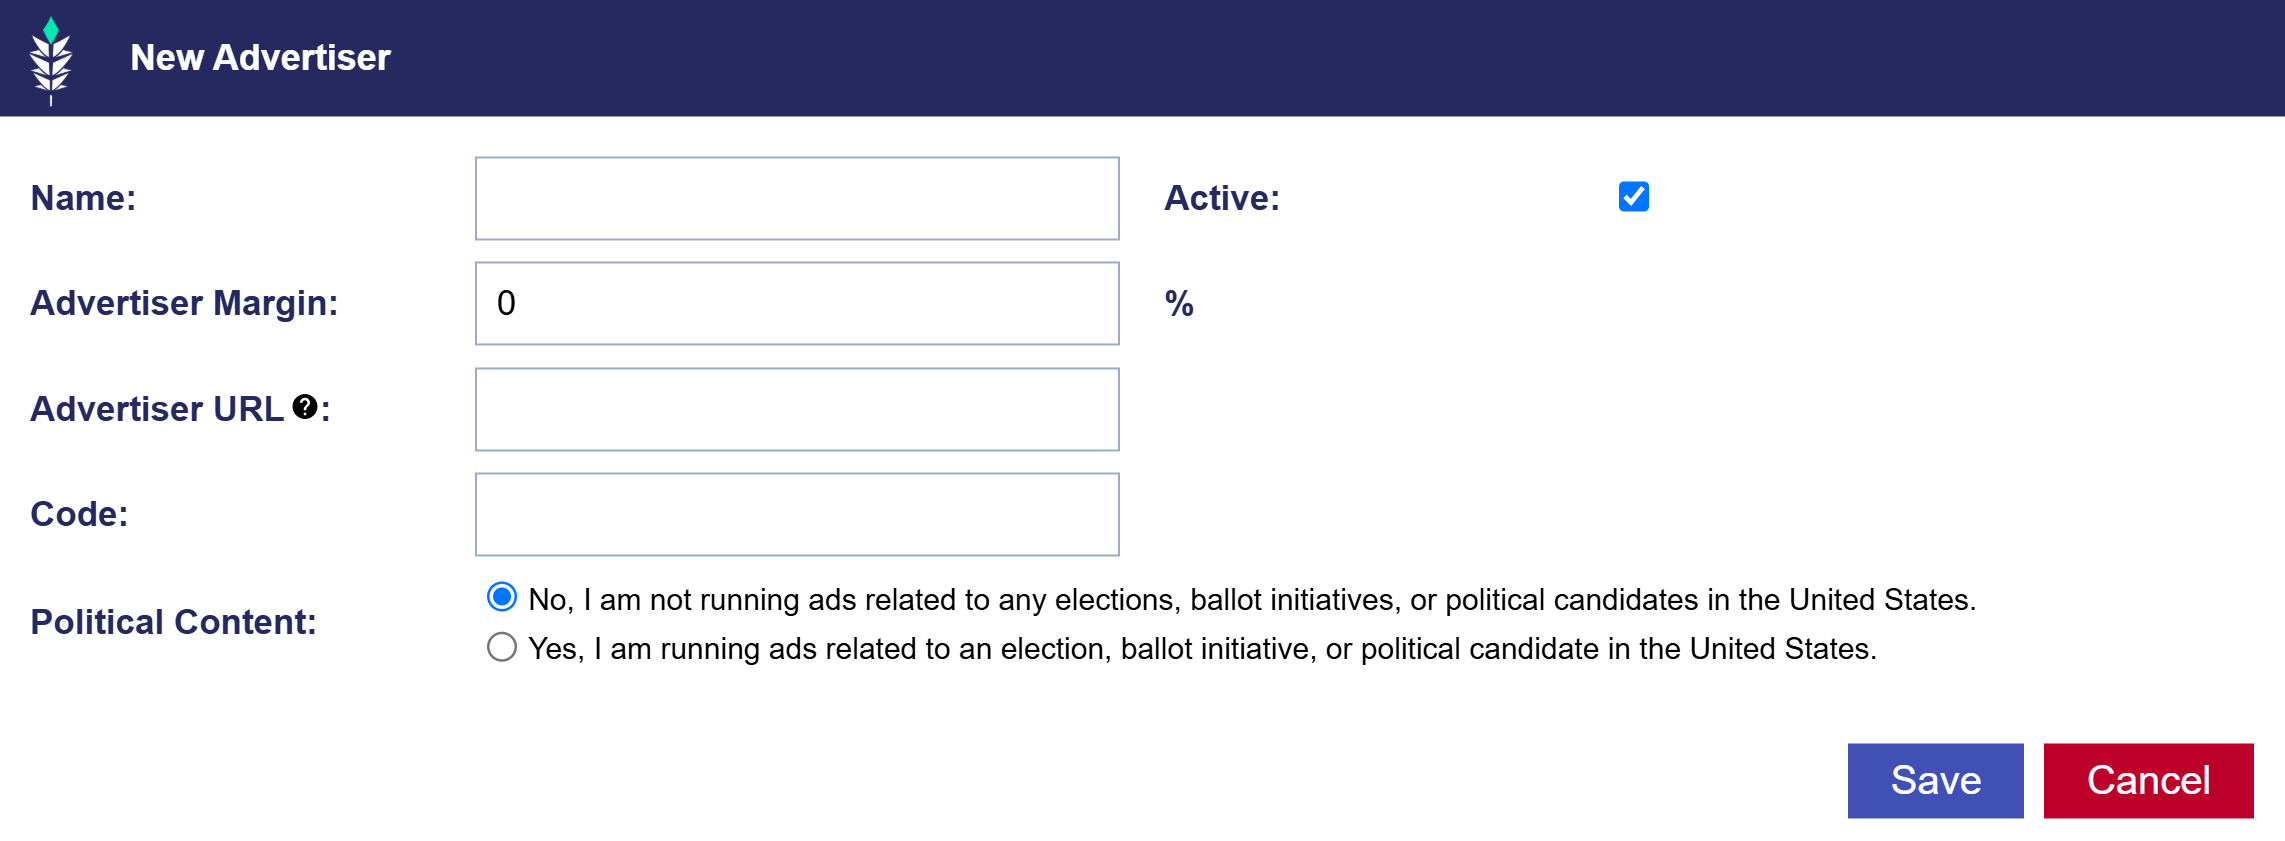
  1. Select ‘New Advertiser’.
  2. Name: Give the Advertiser a name.
  3. Active: The ‘Active’ box will be selected by default, setting the Advertiser as live. Unselect this box if you want to create the Advertiser with an Inactive status.
  4. Advertiser Margin: Enter the desired Advertiser Margin (or fee) percentage at the Advertiser level. This is typically a percentage of the total ad spend to cover costs and profit.
  5. Advertiser URL: Add the URL of the Advertiser’s website. The Google Privacy Sandbox will track visits to this URL if the pixel is implemented on the site.
  6. Code: This is optional and used for reporting purposes only.
  7. Political Content: Choose ‘No’ or ‘Yes’ depending on whether the Advertiser is running ads related to any elections, ballot initiatives, or political candidates in the United States.

Once you have created an Advertiser, you can click on it’s name to open the Advertiser menu. This is where you will be able to upload Creatives, create Pixels, and create Campaigns and Line Items.

See the following links to learn more about these topics: Creatives, Pixels, Campaigns, and Line Items.

Edit an Advertiser

  1. Select the Advertiser’s name that you would like to edit.
  2. Next to Advertiser Details, click the ‘Edit’ button.
  3. Make edits to the following:
    • Name
    • Active Status
    • Advertiser Margin
    • Advertiser URL
    • Code
    • Political Content
  4. Click the ‘Save’ button to apply the edits.

Navigating the Advertiser Tab

Filter Advertisers

By default, the Advertiser tab displays a list of all Active Advertisers, ordered by Advertiser ID. Users can customize their view using the Filter status option to display All, Active, or Inactive Advertisers. The Show filter adjusts the number of rows displayed per page, while the Showing filter allows navigation between pages. The Reporting Interval is set to Yesterday by default and affects the metrics shown in the table. Users can select different time ranges, including Today, Yesterday, 7 Days, 30 Days, or Lifetime. To change the sorting order of the Advertiser list, users can click on any column heading. Clicking once sorts in ascending order, while clicking twice sorts in descending order. This functionality applies to all column headers. For example, to sort Advertisers by number of Lines in descending order, users should click the Lines column heading twice.

Advertiser Level Metrics

Under the ‘Advertiser’ tab you will see a list of all of the ‘Active’ Advertisers in your seat with their associated quick metrics. To see ‘Inactive’ Advertisers filter status to ‘All’ or ‘Inactive’. These metrics are updated hourly, with a 3 hour delay, except for the IP Convs, which are updated once a day for the previous day.

Choose your ‘Reporting Interval’ and evaluate the following metrics at a glance:

  • Lines: The number of Lines associated to the Advertiser.
  • Campaigns: The number of Campaigns associated to the Advertiser.
  • Imps: The number of impressions served under this Advertiser during the selected Reporting Interval.
  • Total Cost: The total dollar amount this Advertiser has spent across all Campaigns and Lines during the selected Reporting Interval.
  • Revenue: The total dollar amount this Advertiser has generated across all Campaigns and Lines during the selected Reporting Interval.
  • IP Convs: The number of conversions registered by the IP Conversion Pixel across all Campaigns and Lines during the selected Reporting Interval. Note that IP Conversion data is not available for the ‘Today’ interval. This metric is updated once a day for the previous day.

Advertiser Setup Tab

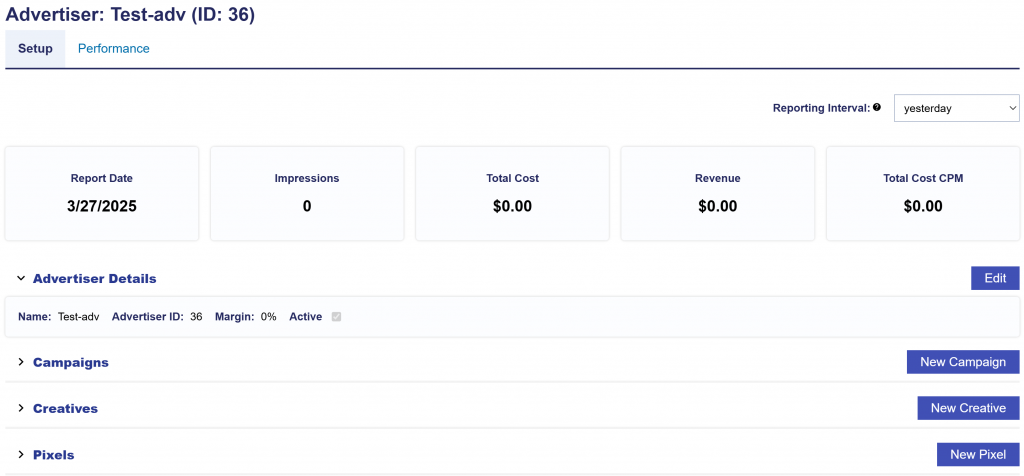
When you click on the desired Advertiser name, you can filter the Reporting Interval to adjust the top tiles section by report date, Impressions, Total Cost, Revenue, and Total Cost CPM. Additionally, you will have the ability to view and edit Advertiser Details, view and create new Campaigns, view and upload Creatives, and view and create Pixels. These actions enable comprehensive management of the Advertiser’s activities.

Advertiser Performance Tab

Overview

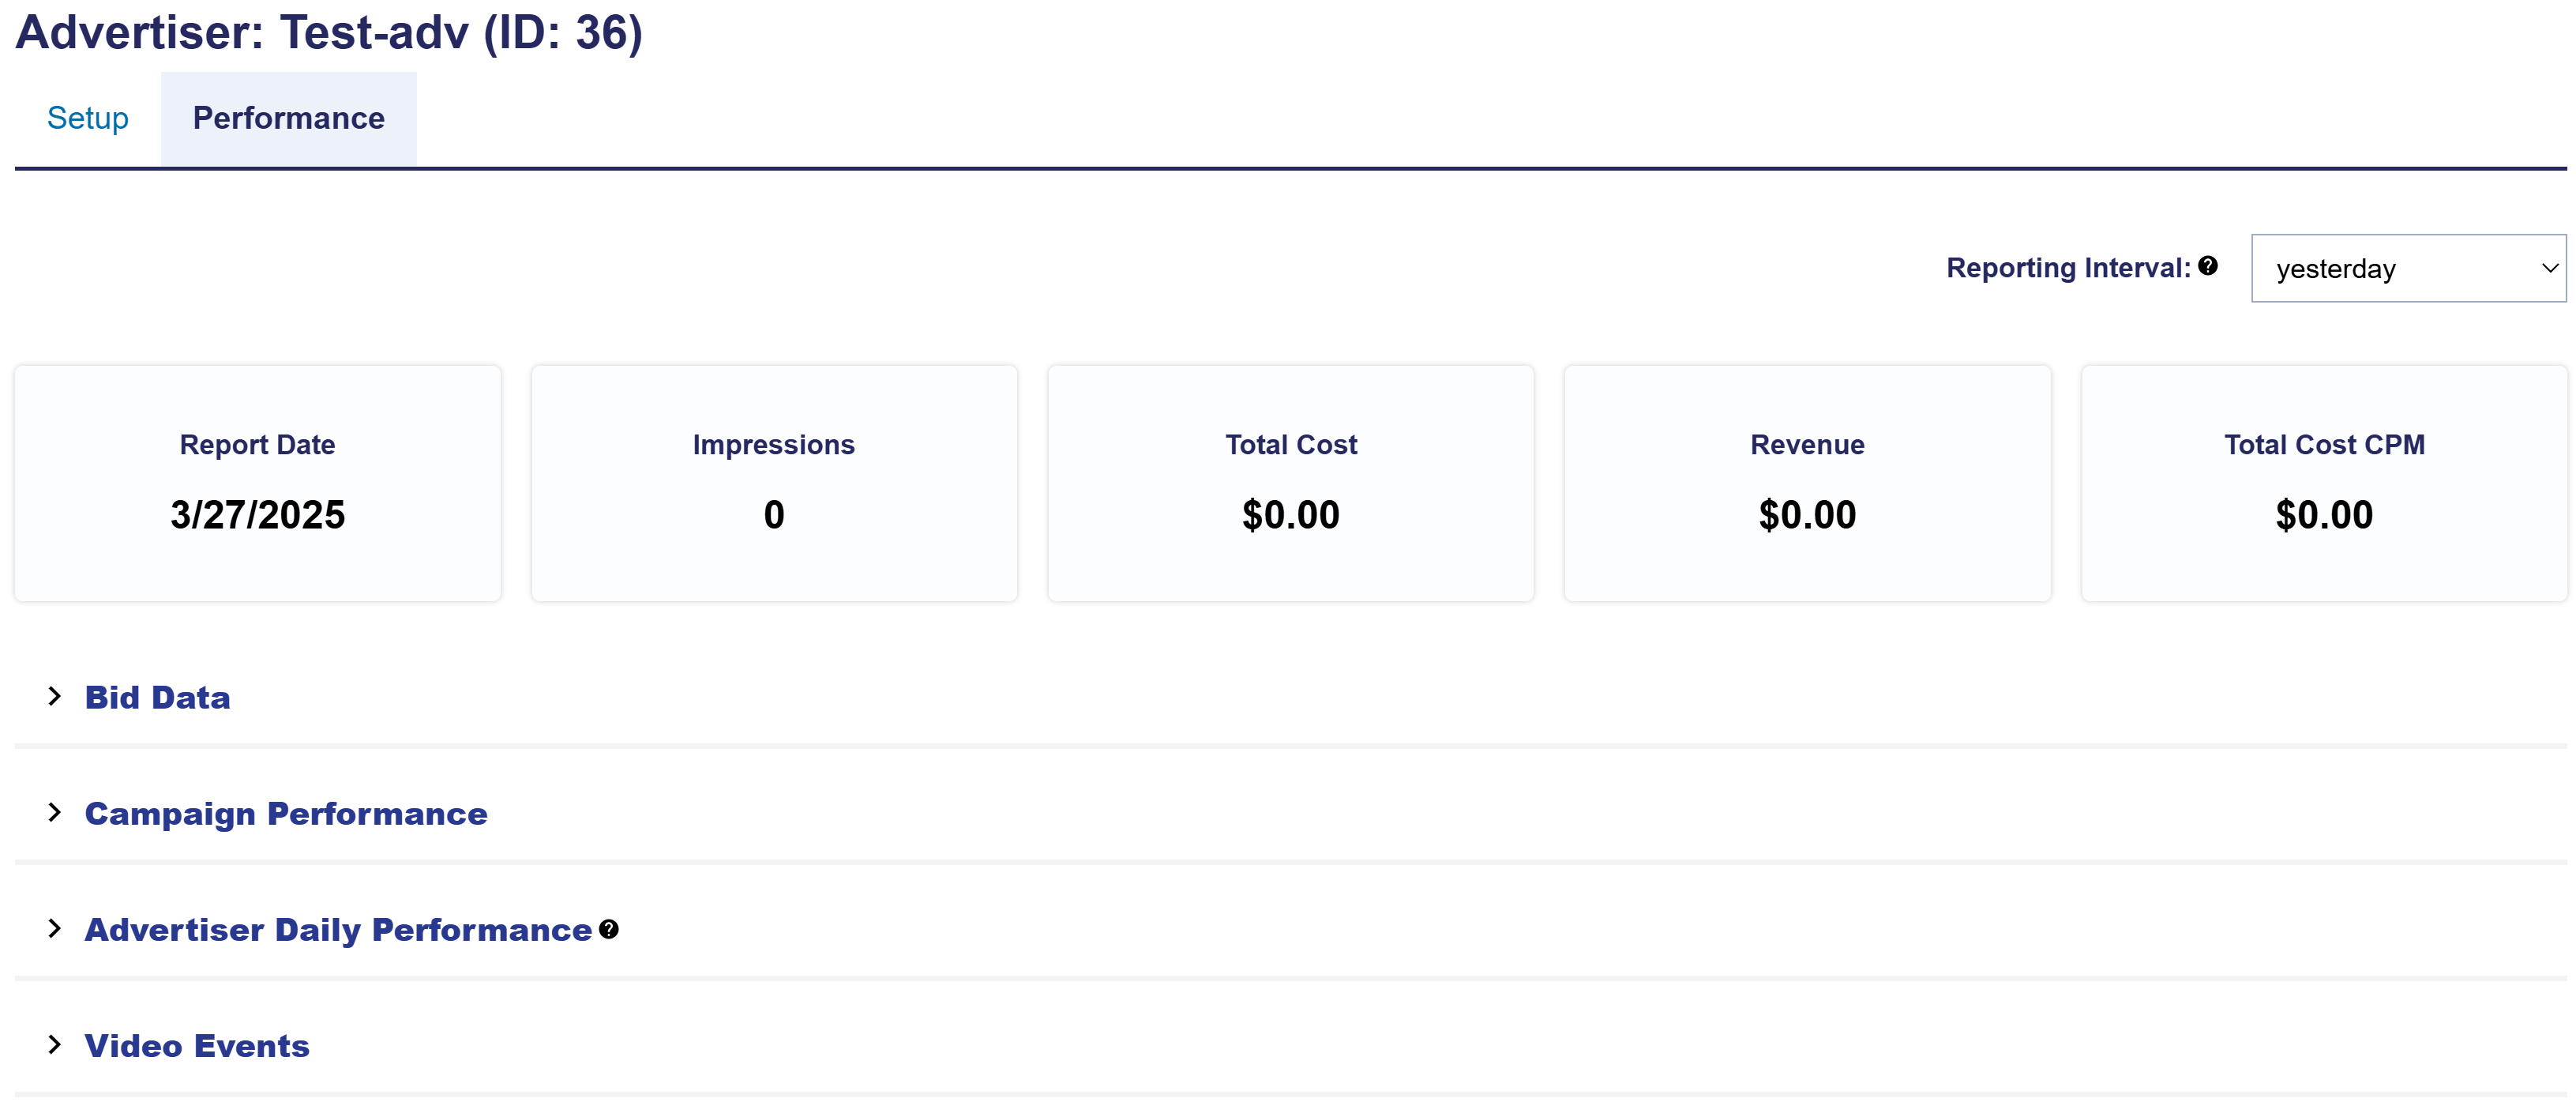
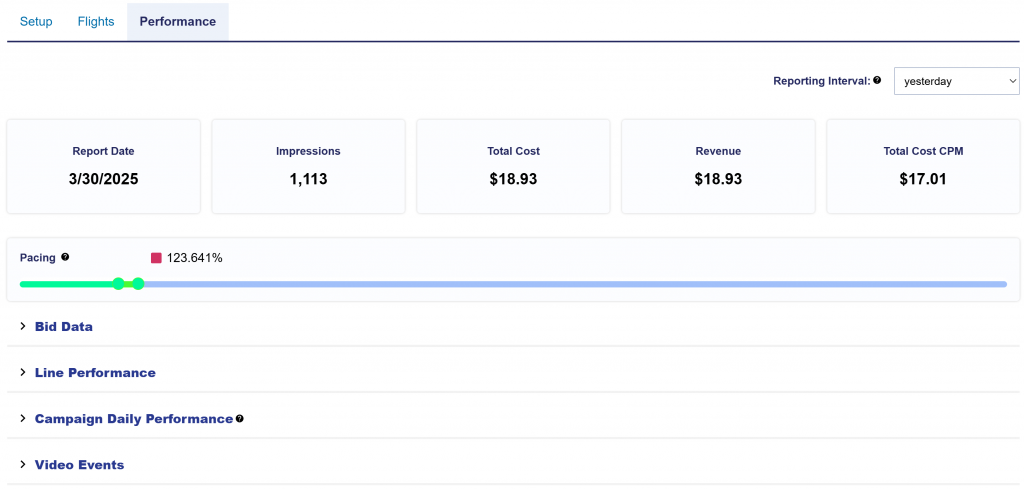
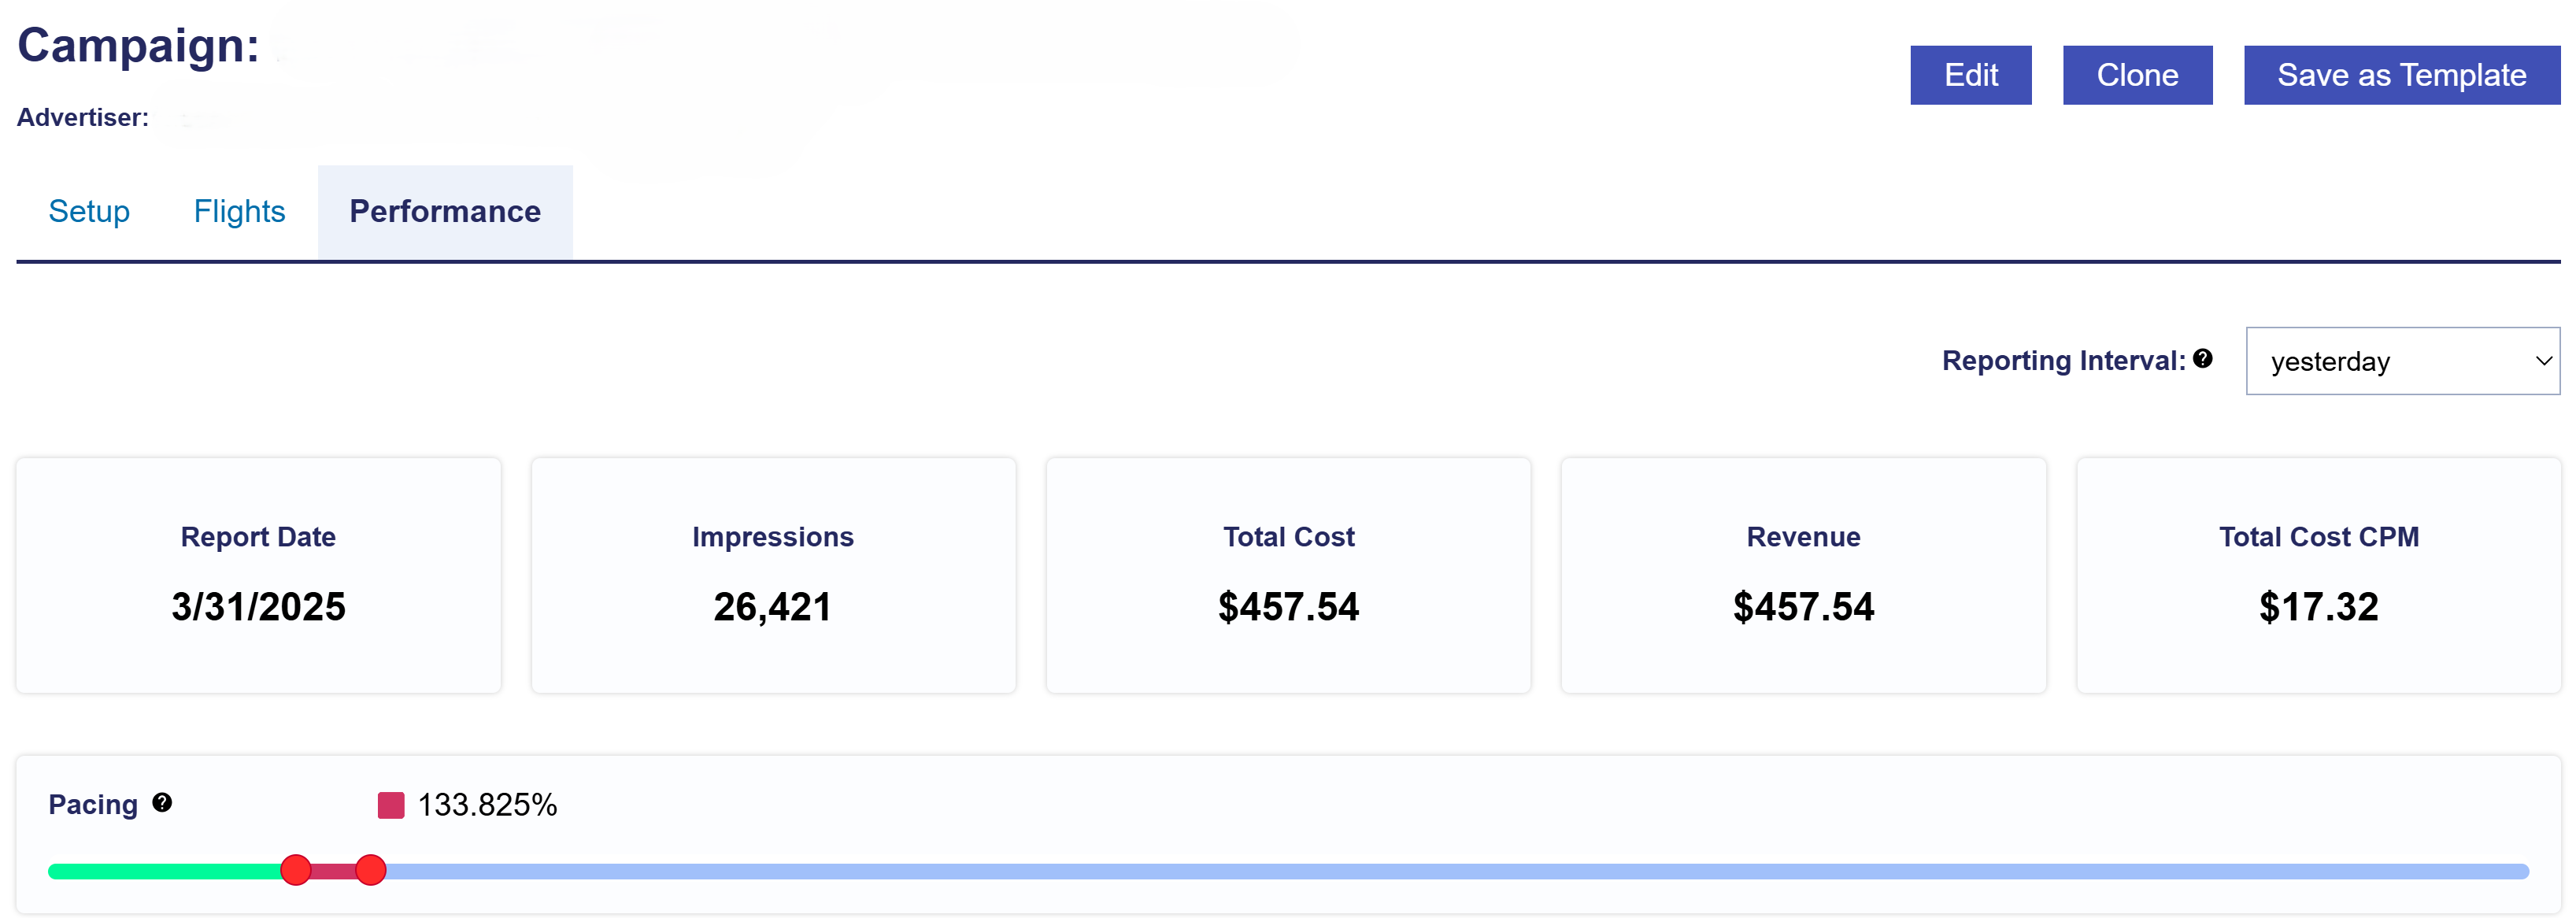
Switching to the Advertiser Performance tab, you can filter the Reporting Interval to adjust the top tiles section. Note that all intervals with the exception of yesterday, include metrics from today. Today’s metrics update hourly and have a 3 hour delay. The metrics include:

  • Report Date: Shows the selected report date or date range.
  • Impressions: The total number of impressions Advertiser served within the selected reporting interval.
  • Total Cost: The total Advertiser spend, including media costs and any applicable margins or fees.
  • Revenue: The total Advertiser revenue.
  • Total Cost CPM: The total cost per thousand impressions for the Advertiser, calculated as (Total Cost / Impressions) x 1,000.

This tab provides dropdown insights into Bid Data, Campaign Performance, Advertiser Daily Performance, and Video Events. See the sections below for more details on each.

Bid Data

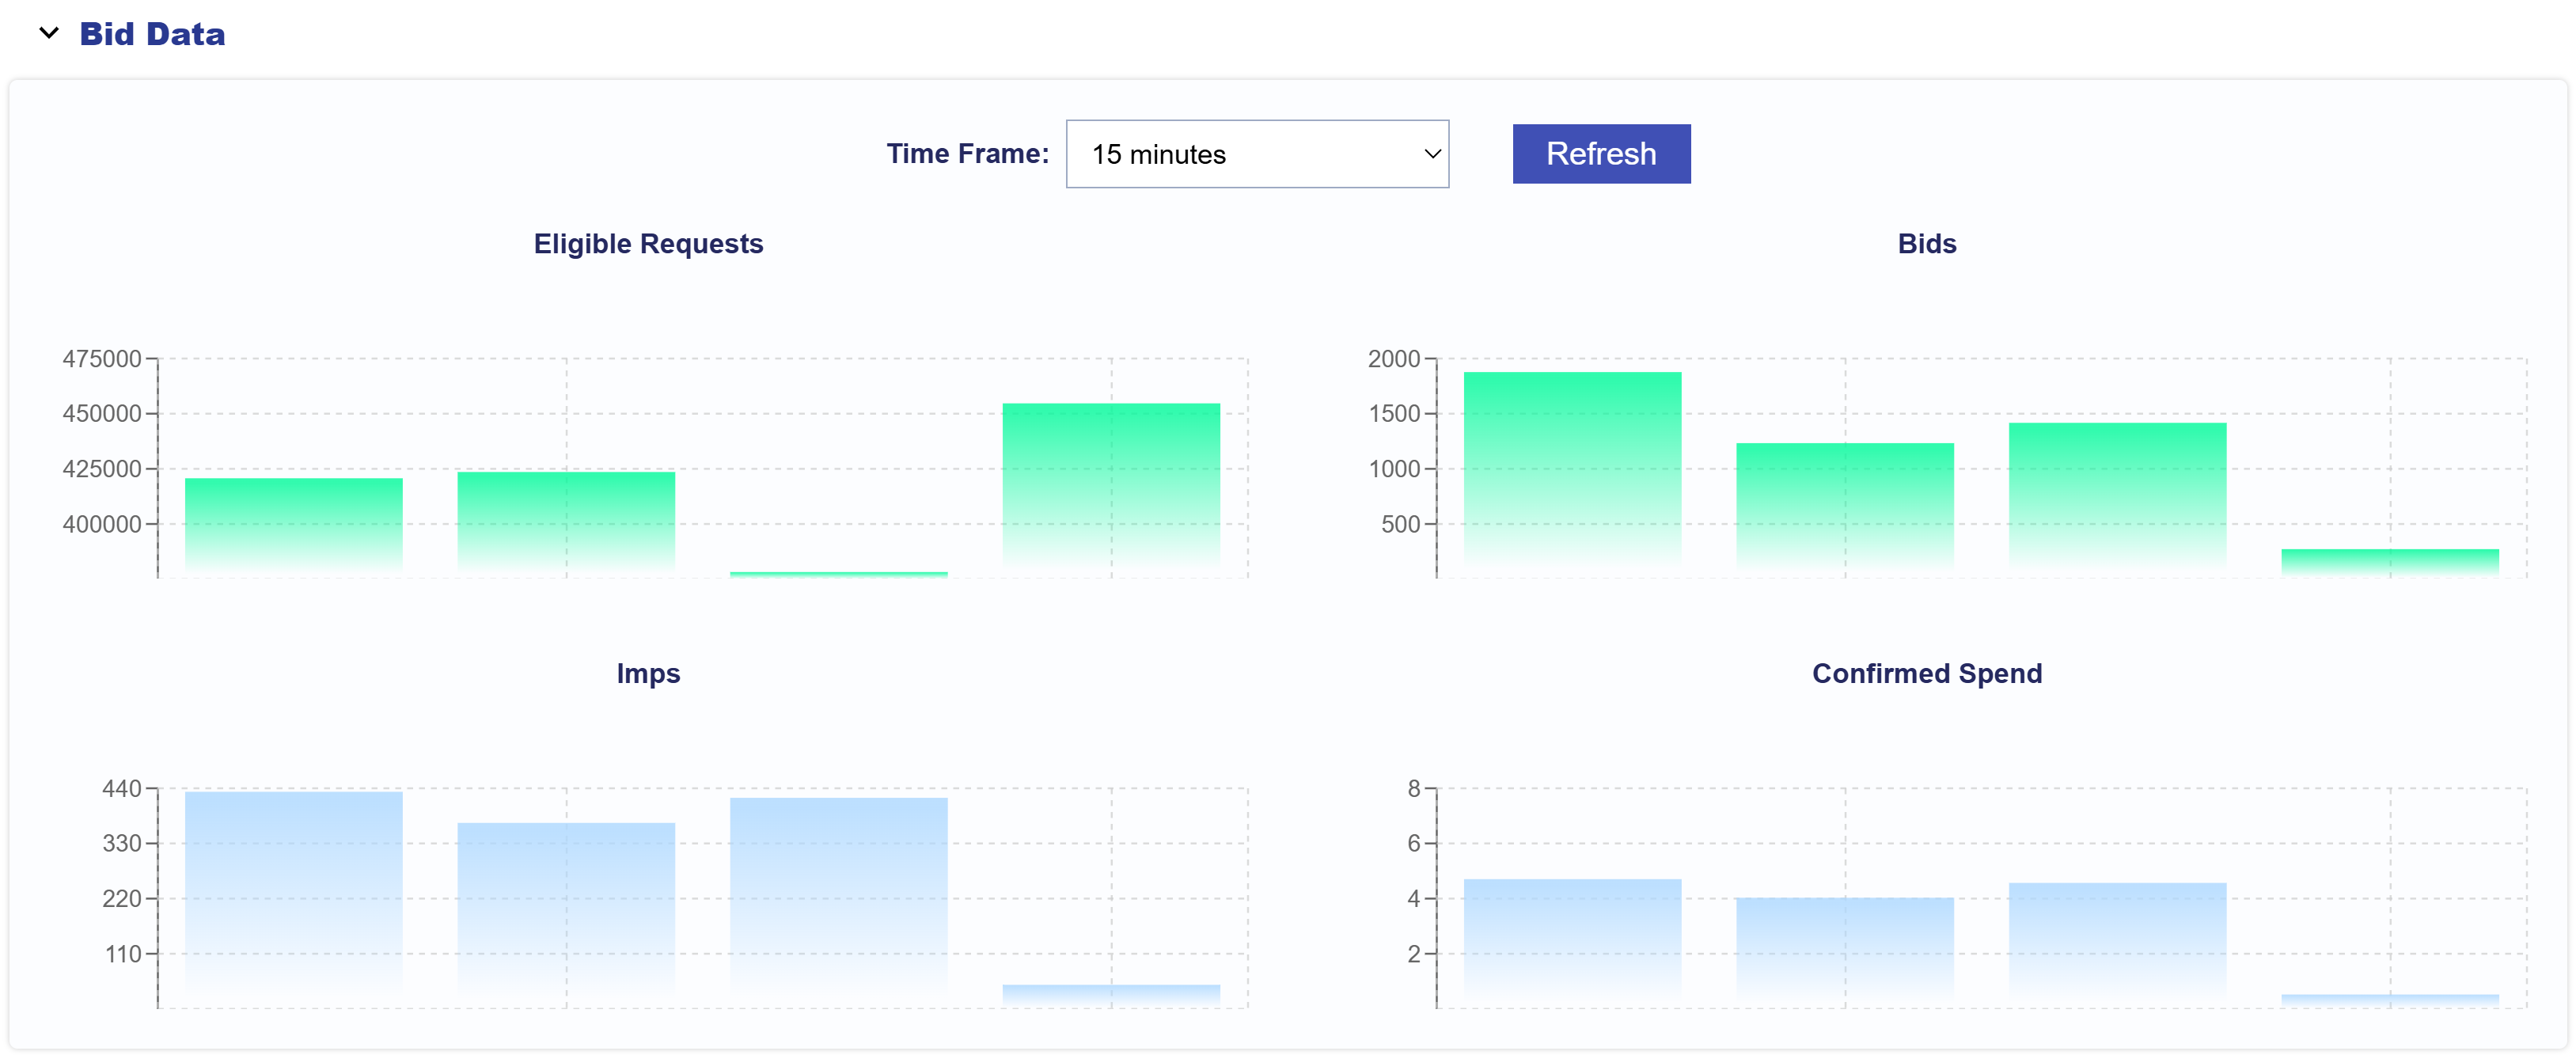
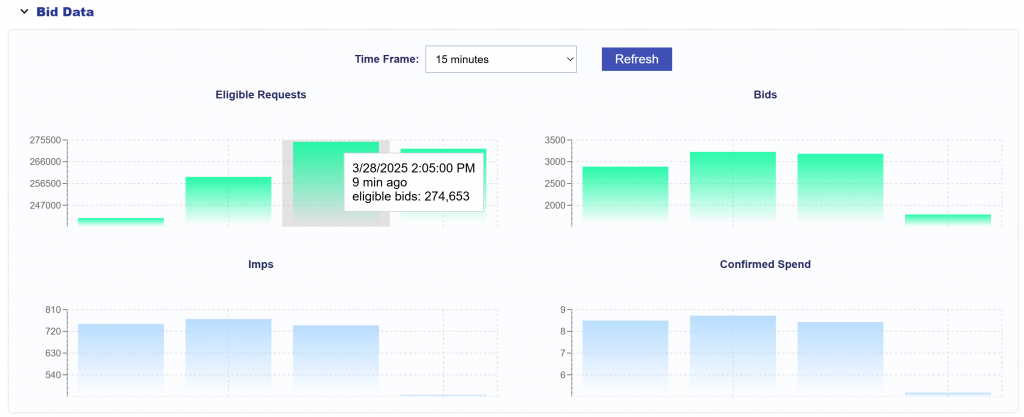
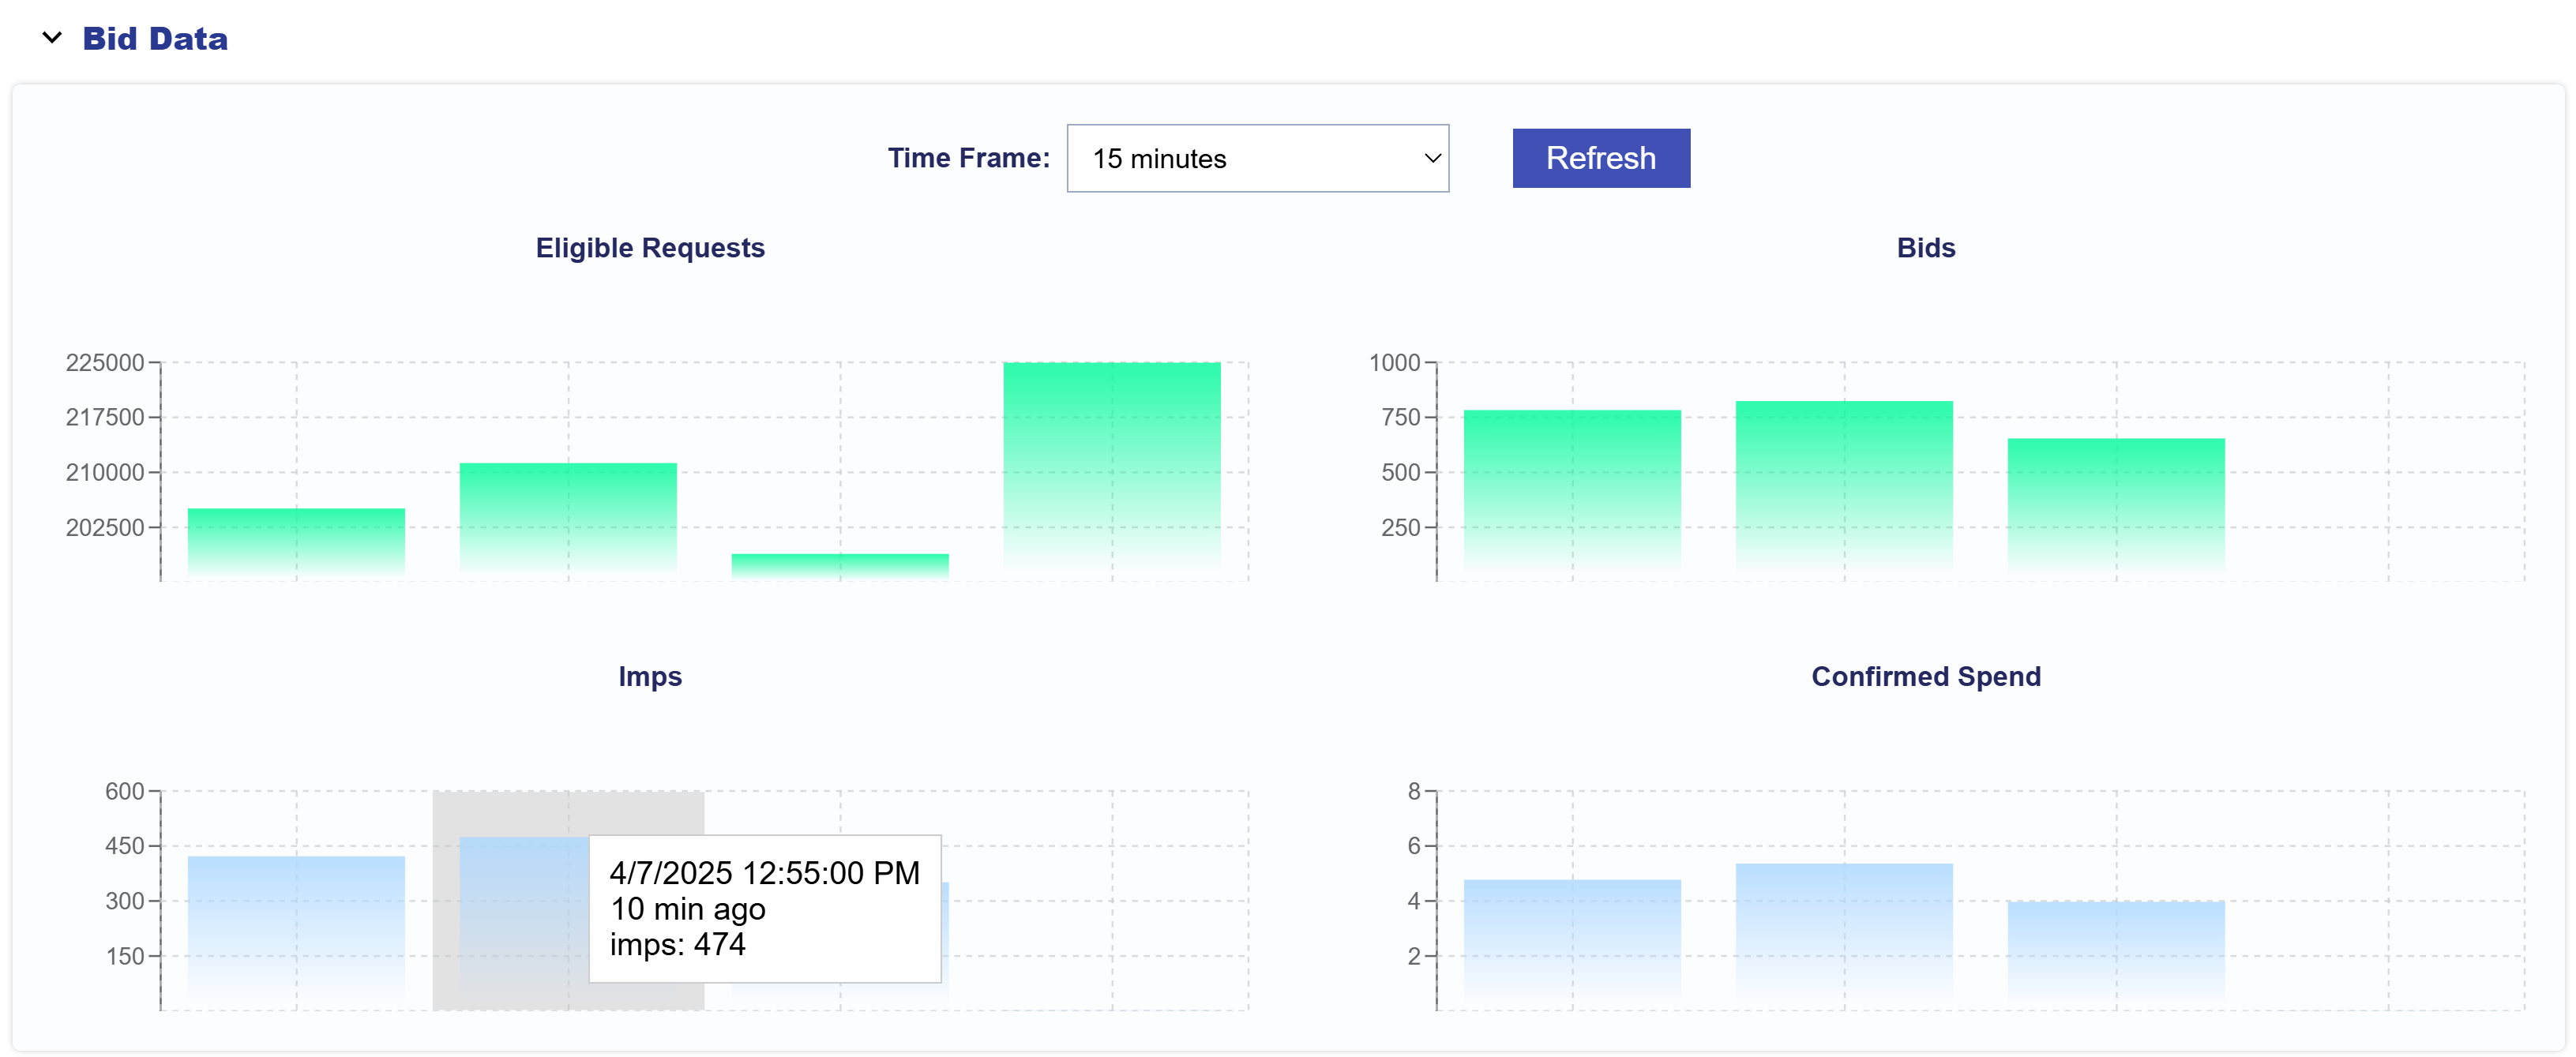
In the Bid Data dropdown section, the Time Frame can be adjusted to display bid data for 15 minutes, 1 hour, 12 hours, or 1 day. This section includes four charts that provide insights into the number of eligible bid requests, bids placed, impressions served, and confirmed spend for the Advertiser. Hover over each bar to view the time of day, time elapsed, and the metric value for more detailed insights.

Campaign Performance

The Campaign Performance dropdown holds Campaign level metrics for the selected Advertiser.

Below are the metrics available in this section:

  • Campaign ID
  • Campaign Name
  • Imps: The total number of impressions the Campaign served within the selected reporting interval.
  • Media Cost: The total dollar amount spent on the Campaign media before additional fees or margins are applied.
  • Total Cost: The total Campaign spend, including media costs and any applicable margins or fees.
  • Total Cost CPM: The total cost per thousand impressions, calculated as (Total Cost / Impressions) x 1,000.
  • IP Conversions: The number of conversions attributed to users by Campaign who were served an ad and later converted based on IP tracking.
  • Note that the bottom row shows the Advertiser Totals for Imps, Media Cost, Total Cost, Avg Cost CPM, and IP Conversions.

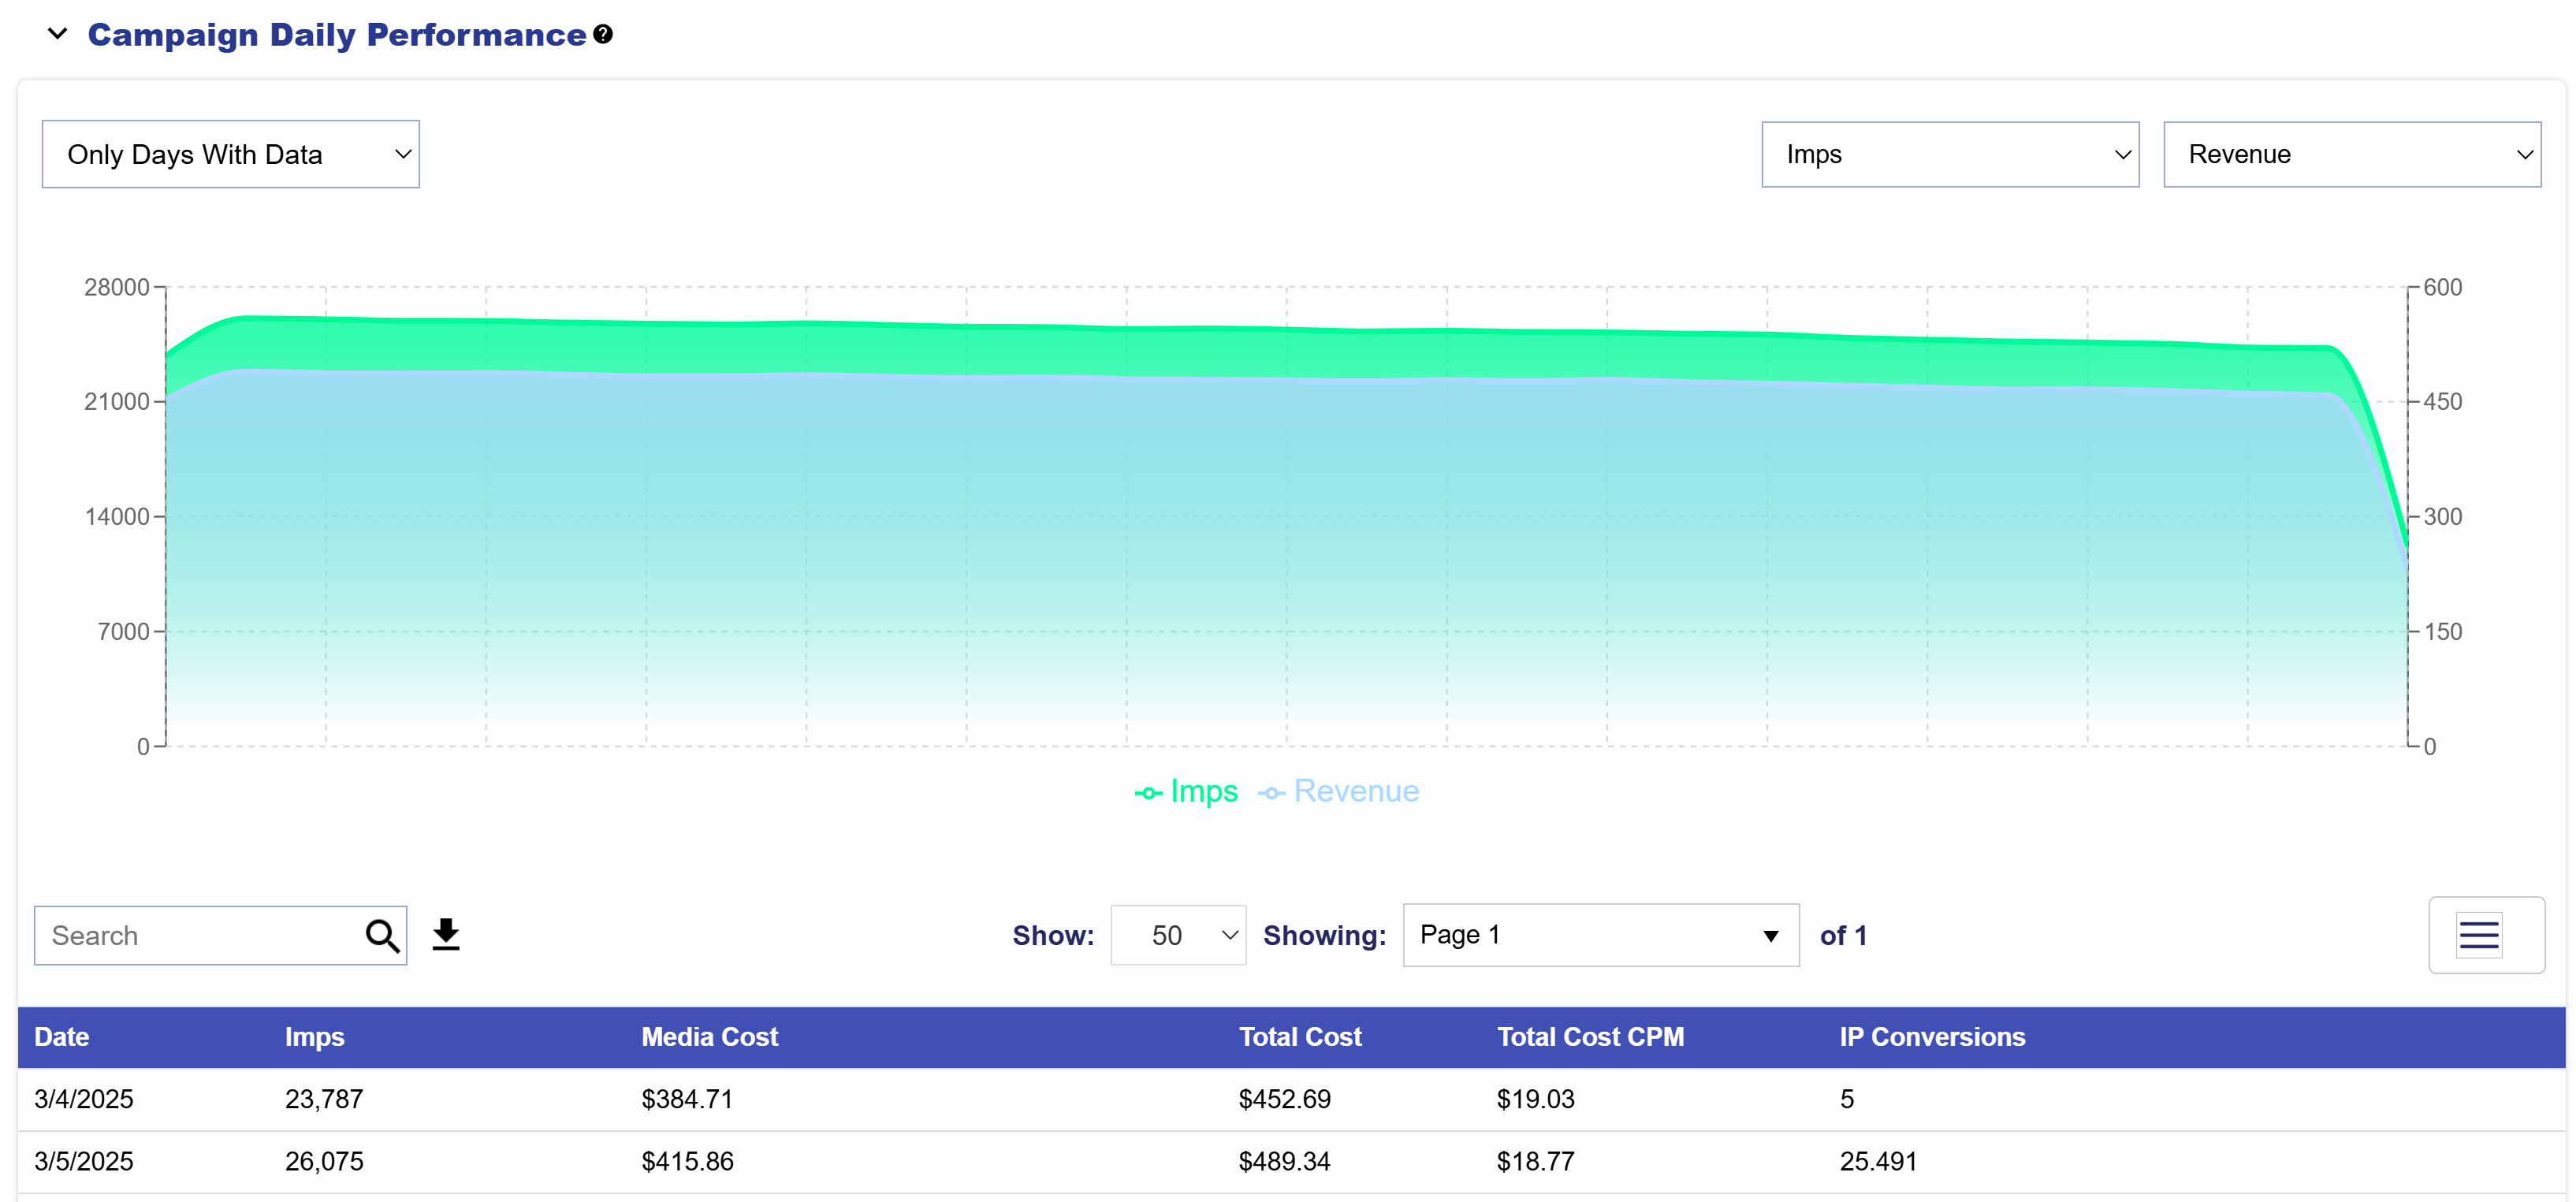
Advertiser Daily Performance

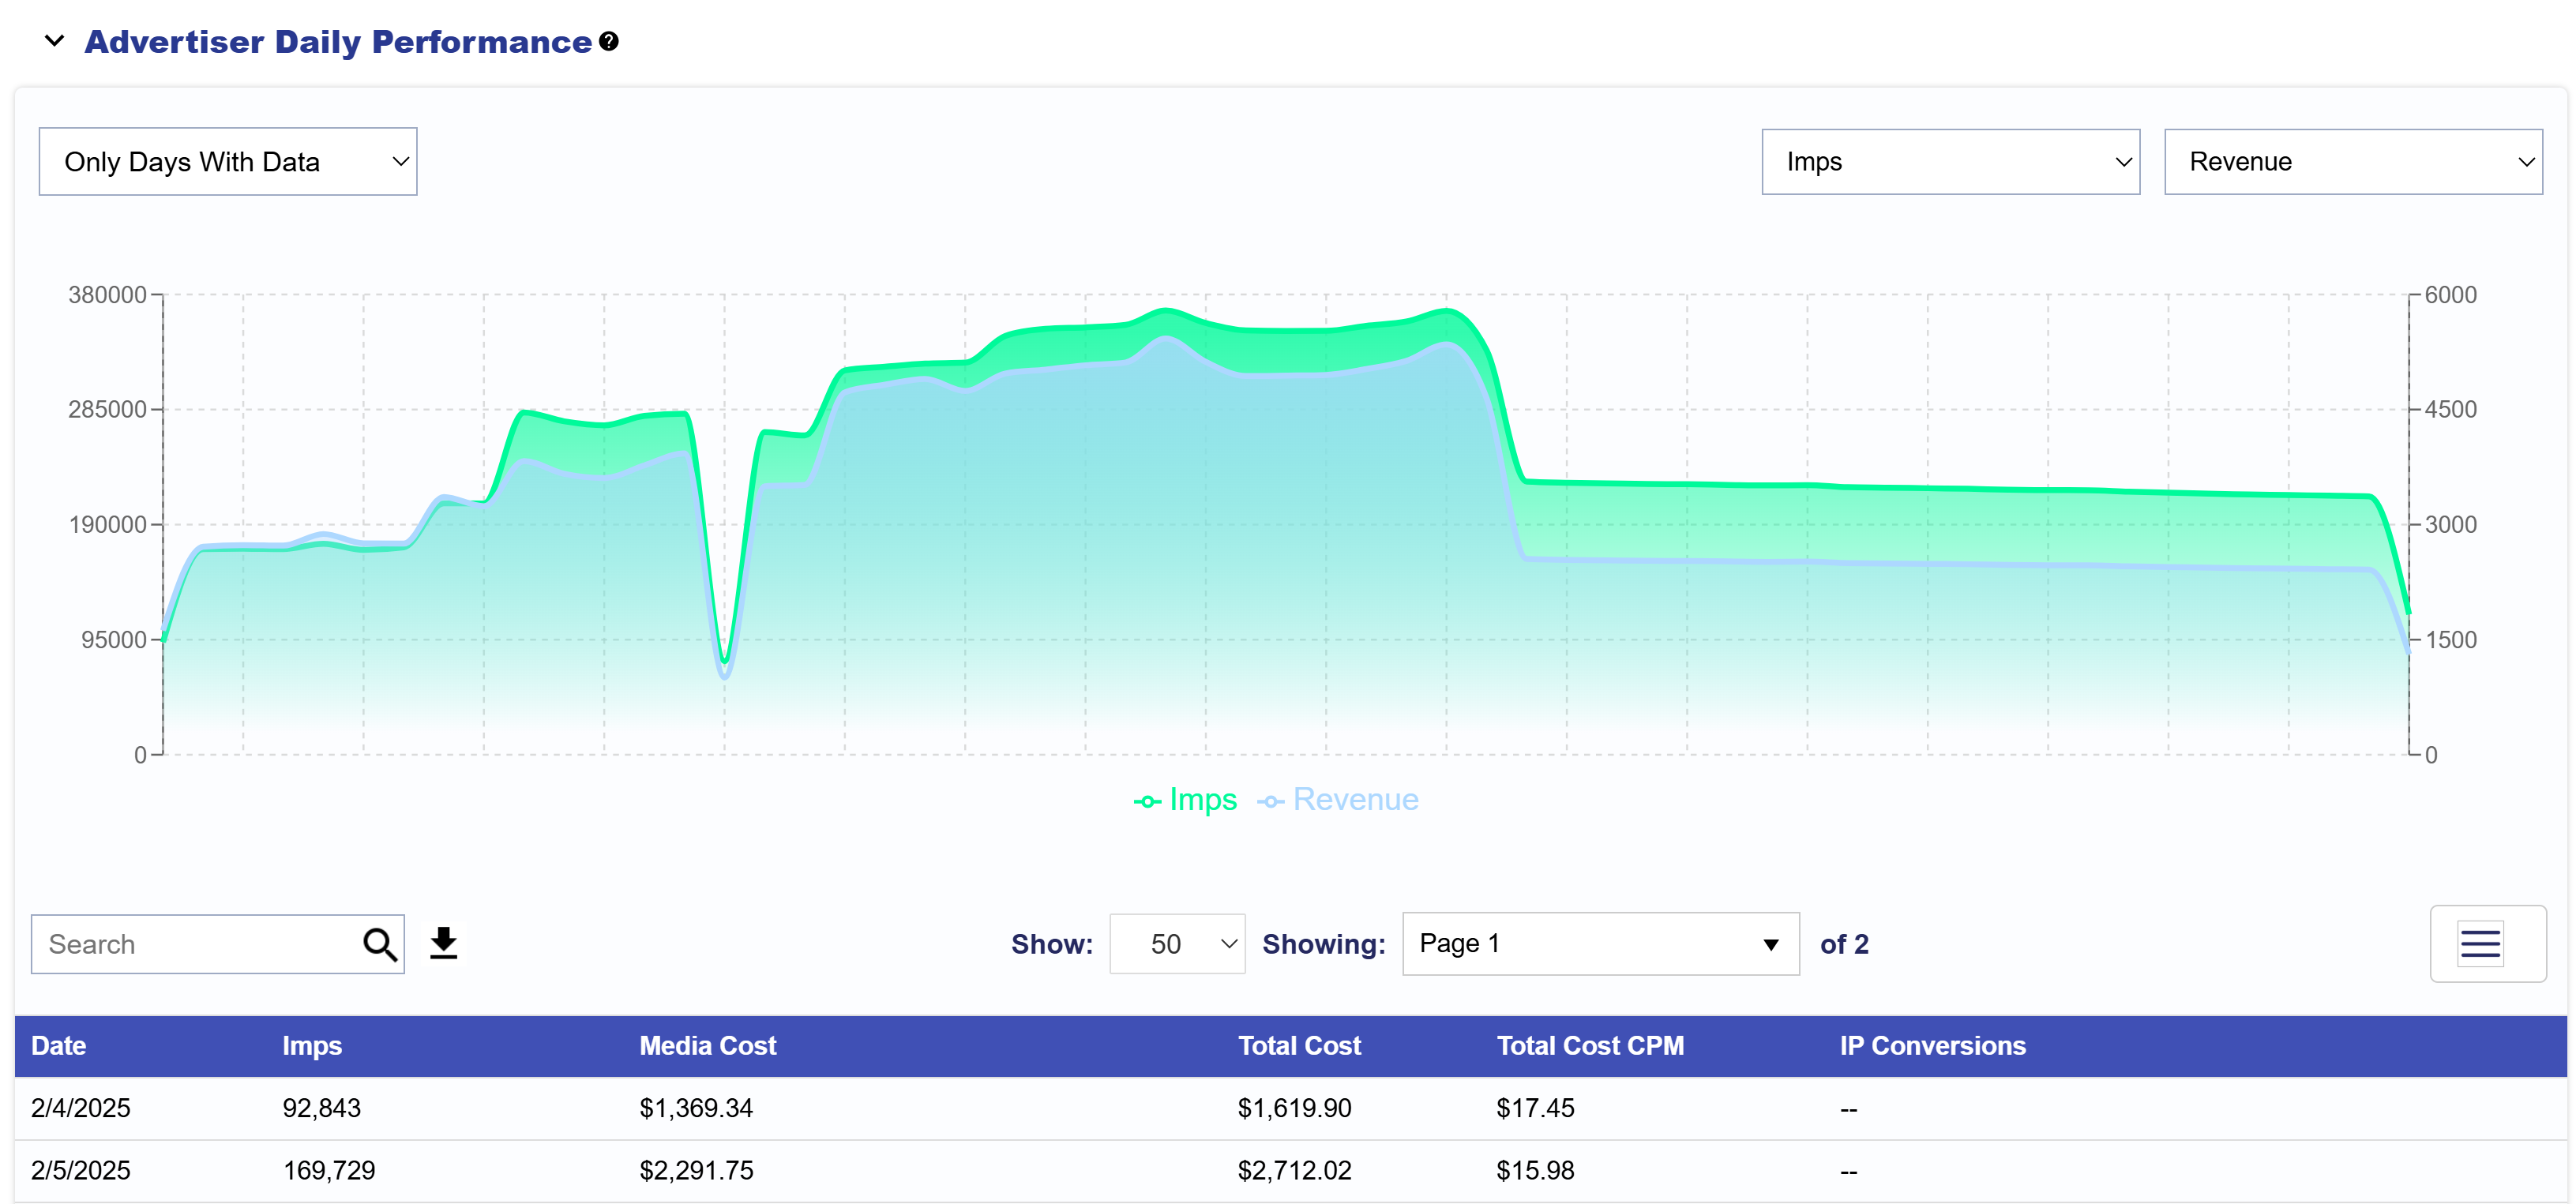
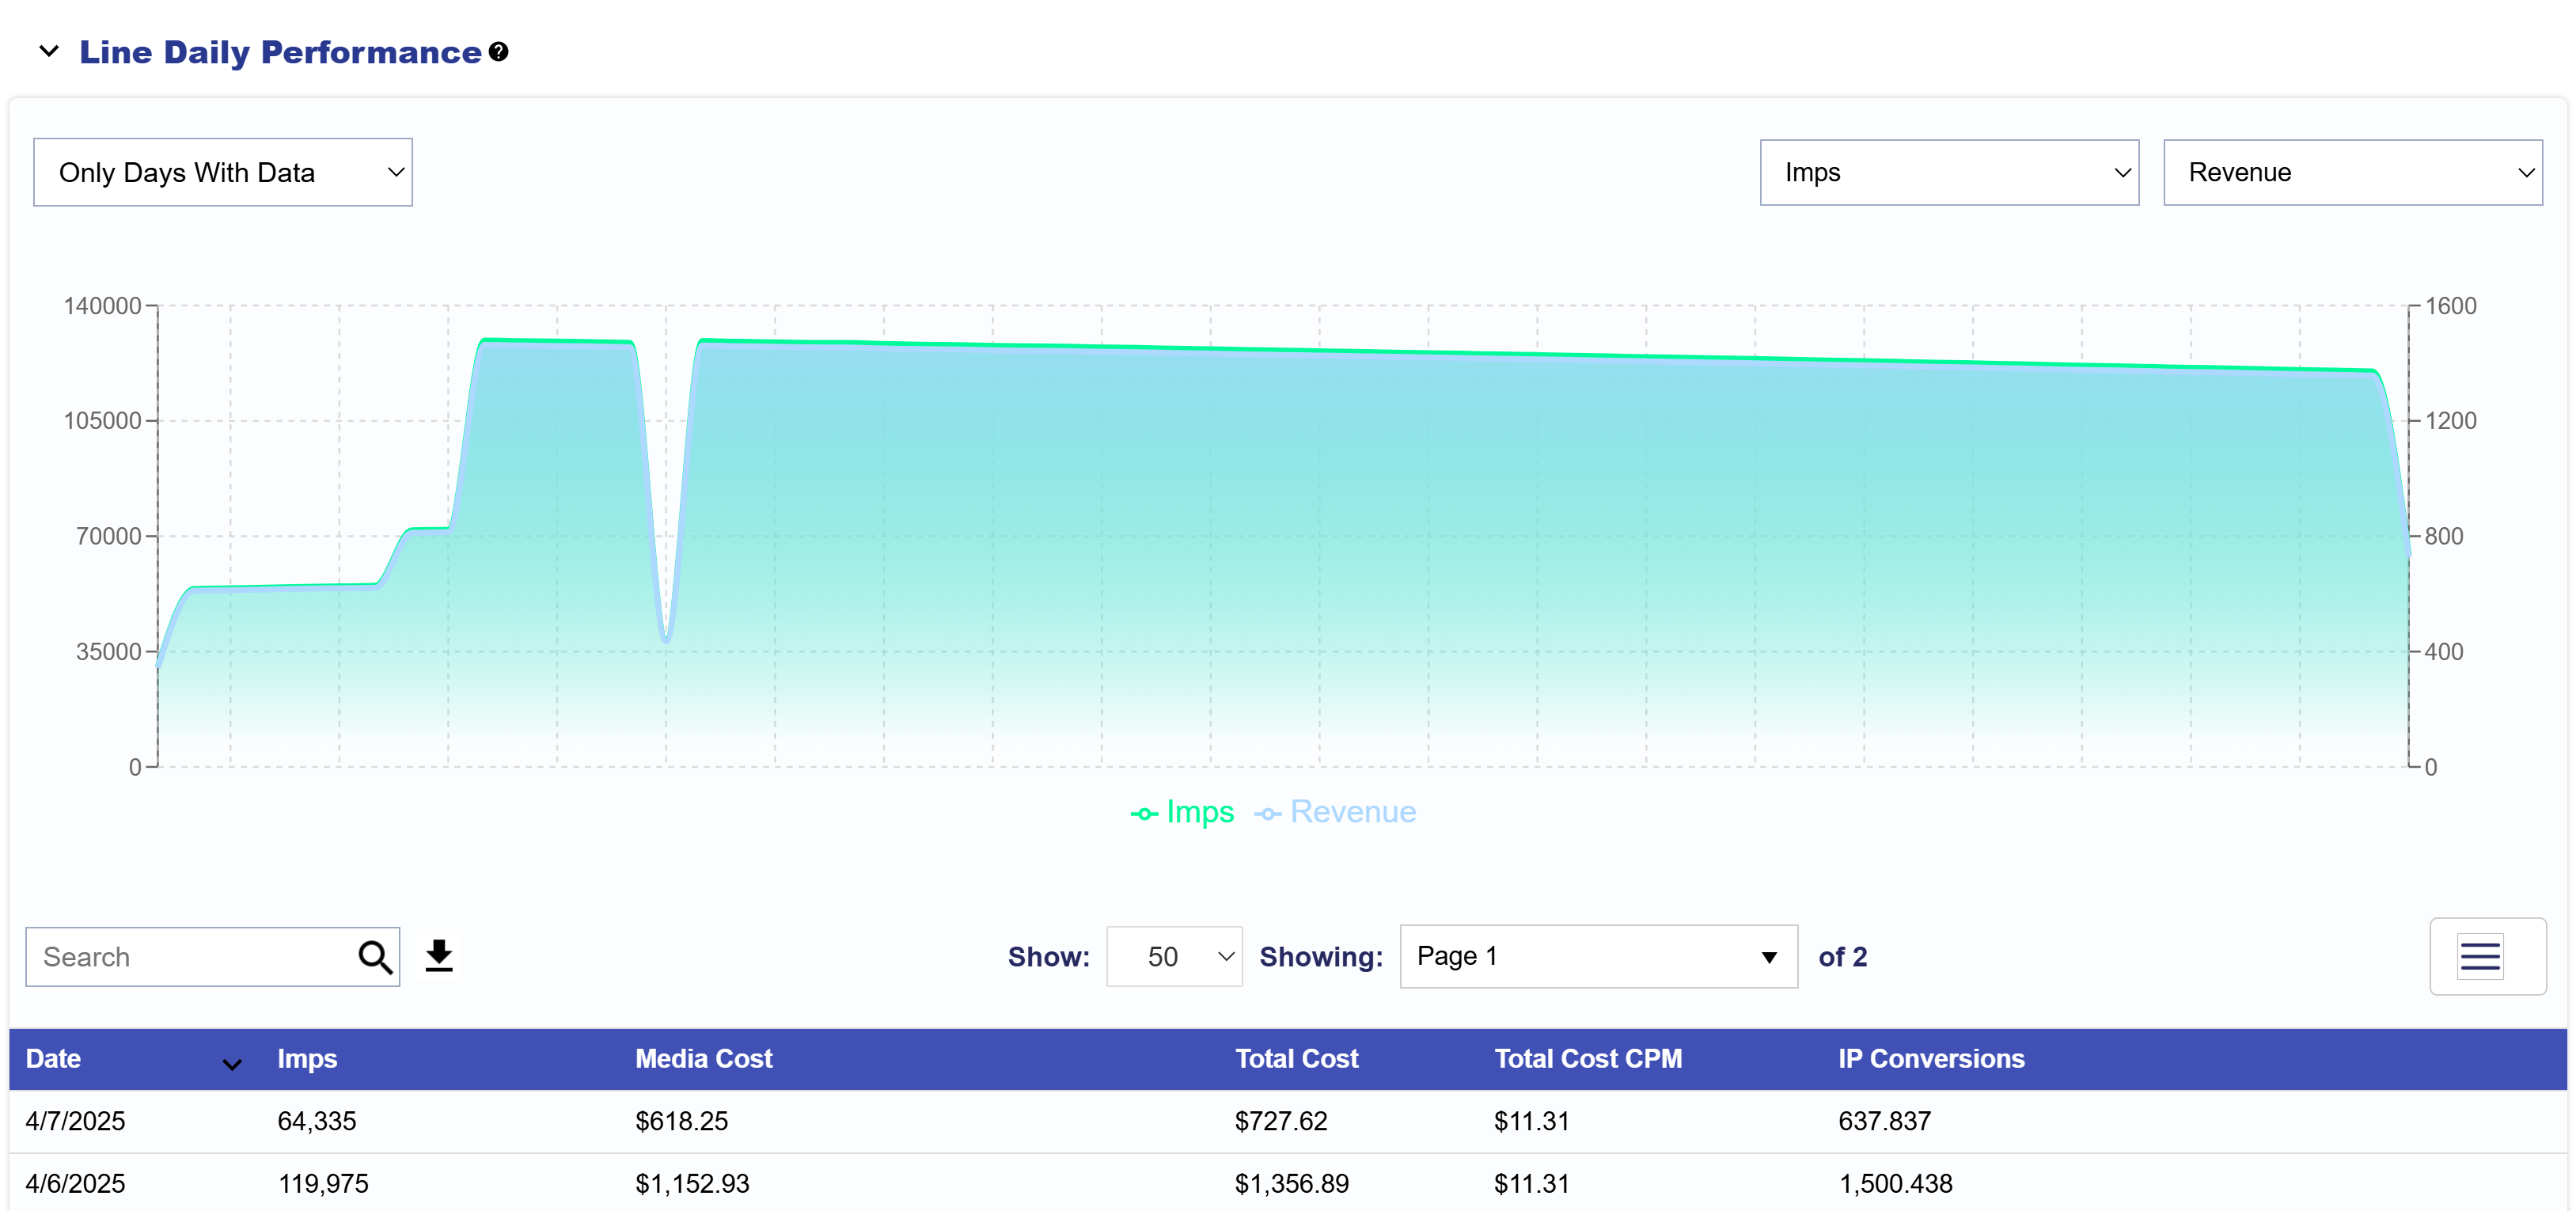
The Advertiser Daily Performance dropdown section includes a chart and table. The Chart can be filtered to show Only Days with Data or All Days. The Chart compares two selected Metrics against each other. Use the dropdowns in the upper right corner to customize view and discover daily metrics about your Advertiser’s performance.

Select from these metrics:

  • Imps: The total number of impressions the Advertiser served within the selected reporting interval.
  • Media Cost: The total dollar amount spent on the Advertiser media before additional fees or margins are applied.
  • Total Cost: The total Advertiser spend, including media costs and any applicable margins or fees.
  • Total Cost CPM: The total cost per thousand impressions, calculated as (Total Cost / Impressions) x 1,000.
  • IP Conversions: The number of conversions attributed to users by Advertiser who were served an ad and later converted based on IP tracking.
  • Chrome Convs: The number of conversions recorded specifically from Chrome users.
  • Clicks: The total number of times users clicked on an ad.
  • CTR: The percentage of impressions that resulted in clicks, calculated as (Clicks / Impressions) × 100.
  • CPC: The average cost per click, calculated as (Total Cost / Clicks).
  • Transparency Score: A score indicating the level of transparency in reporting and data availability.
  • Foot Traffic ‘Attributed Visitors’: The number of users who visited a physical location after viewing an ad from the Advertiser.
  • Revenue: The total revenue generated from the Advertiser.
  • Media Cost CPM: The media cost per thousand impressions for the Advertiser, calculated as (Media Cost / Impressions) × 1,000.
  • Data Cost: The cost associated with audience data usage for targeting.
  • Foot Traffic Cost: The cost incurred for tracking and attributing foot traffic conversions.
  • Credit Card Fee: Any additional fees applied for processing payments via credit card.
  • Hosting Fee: The fees associated with hosting Advertiser assets, such as creative files.
  • ART Fee: A charge related to the ART usage.
  • Contextual Fee: The cost associated with using Contextual AI services.
  • Chalice Fee: A fee related to the Chalice service.

To download a CSV file in the Advertiser Daily Performance table, navigate to the Advertiser Daily Performance dropdown and locate the search bar in the Table section. On the right-hand side of the search bar, click the download button to export the Advertiser’s daily performance data as a CSV file. All metrics listed above are available for export. To customize the metrics included in the CSV file, click the three lines in the top right corner of the table and select or deselect the Advertiser metrics that matter most to you.

Video Events

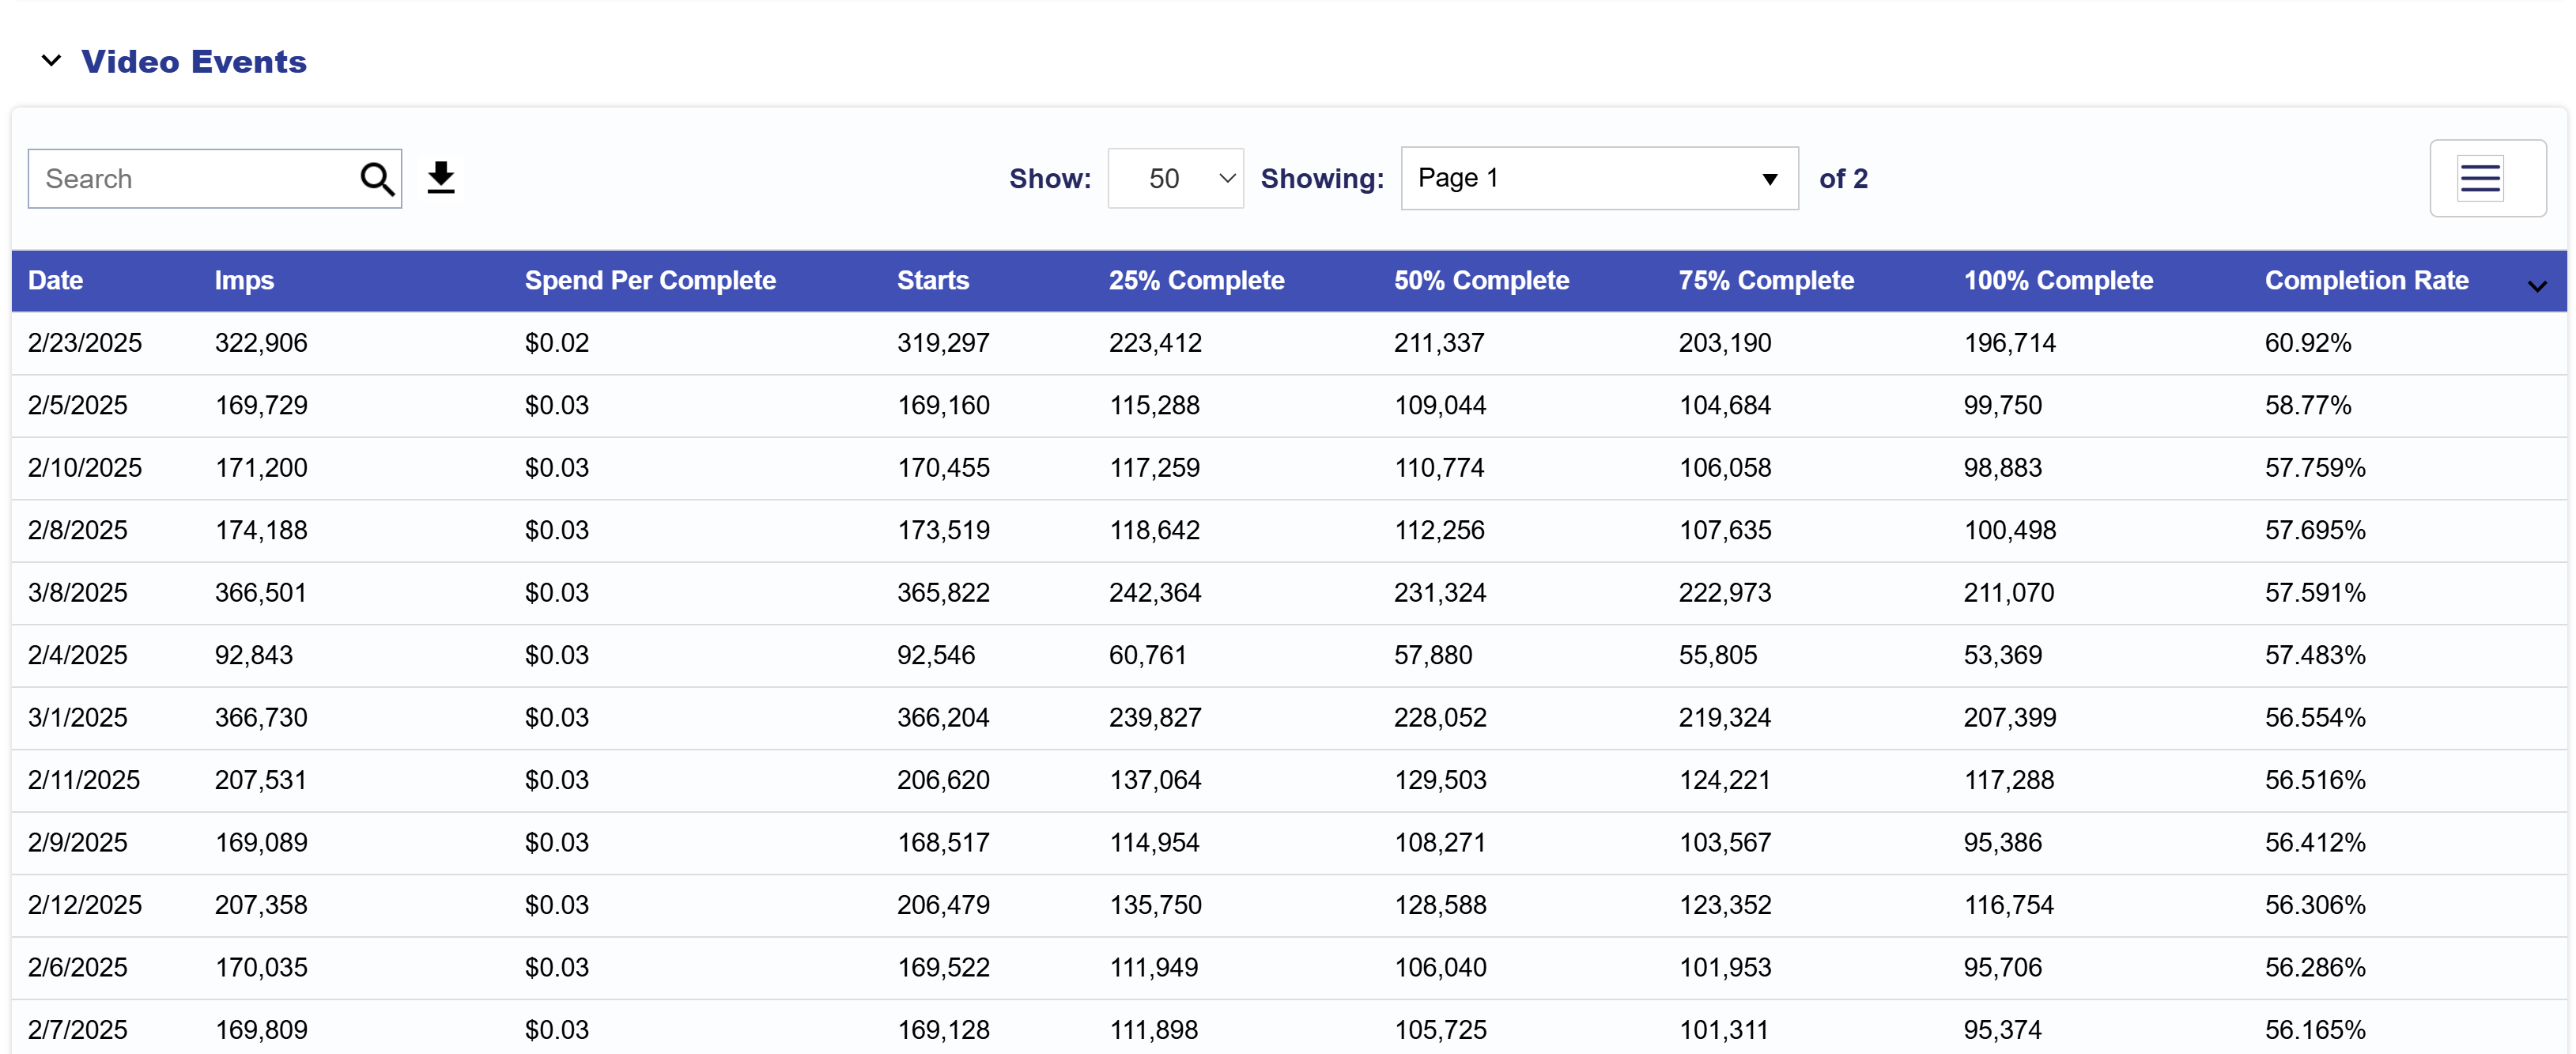
The Video Events dropdown section provides a table with detailed video performance metrics for the Advertiser, which can be downloaded as a CSV file.

Below is a list of all metrics:

  • Date: The reporting date for the video event metrics.
  • Imps: The number of times the video ad was served.
  • Spend Per Complete: The cost incurred for each fully completed video view
  • Starts: The number of times the video ad started.
  • 25% Complete: The number of video ads that were watched at least 25% of the way through.
  • 50% Complete: The number of video ads that were watched at least halfway through.
  • 75% Complete: The number of video ads that were watched at least 75% of the way through.
  • 100% Complete: The number of video ads that were watched entirely.
  • Completion Rate: The percentage of video ads that were fully completed, calculated as (100% Complete ÷ Starts) × 100.

All metrics listed above are available for export. To customize the metrics included in the CSV file, click the three lines in the top right corner of the table and select or deselect the Advertiser metrics that matter most to you.

Inventory Lists

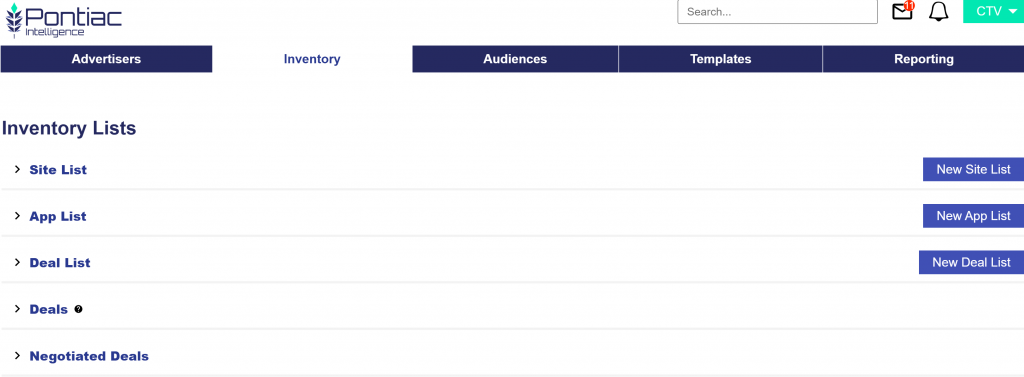
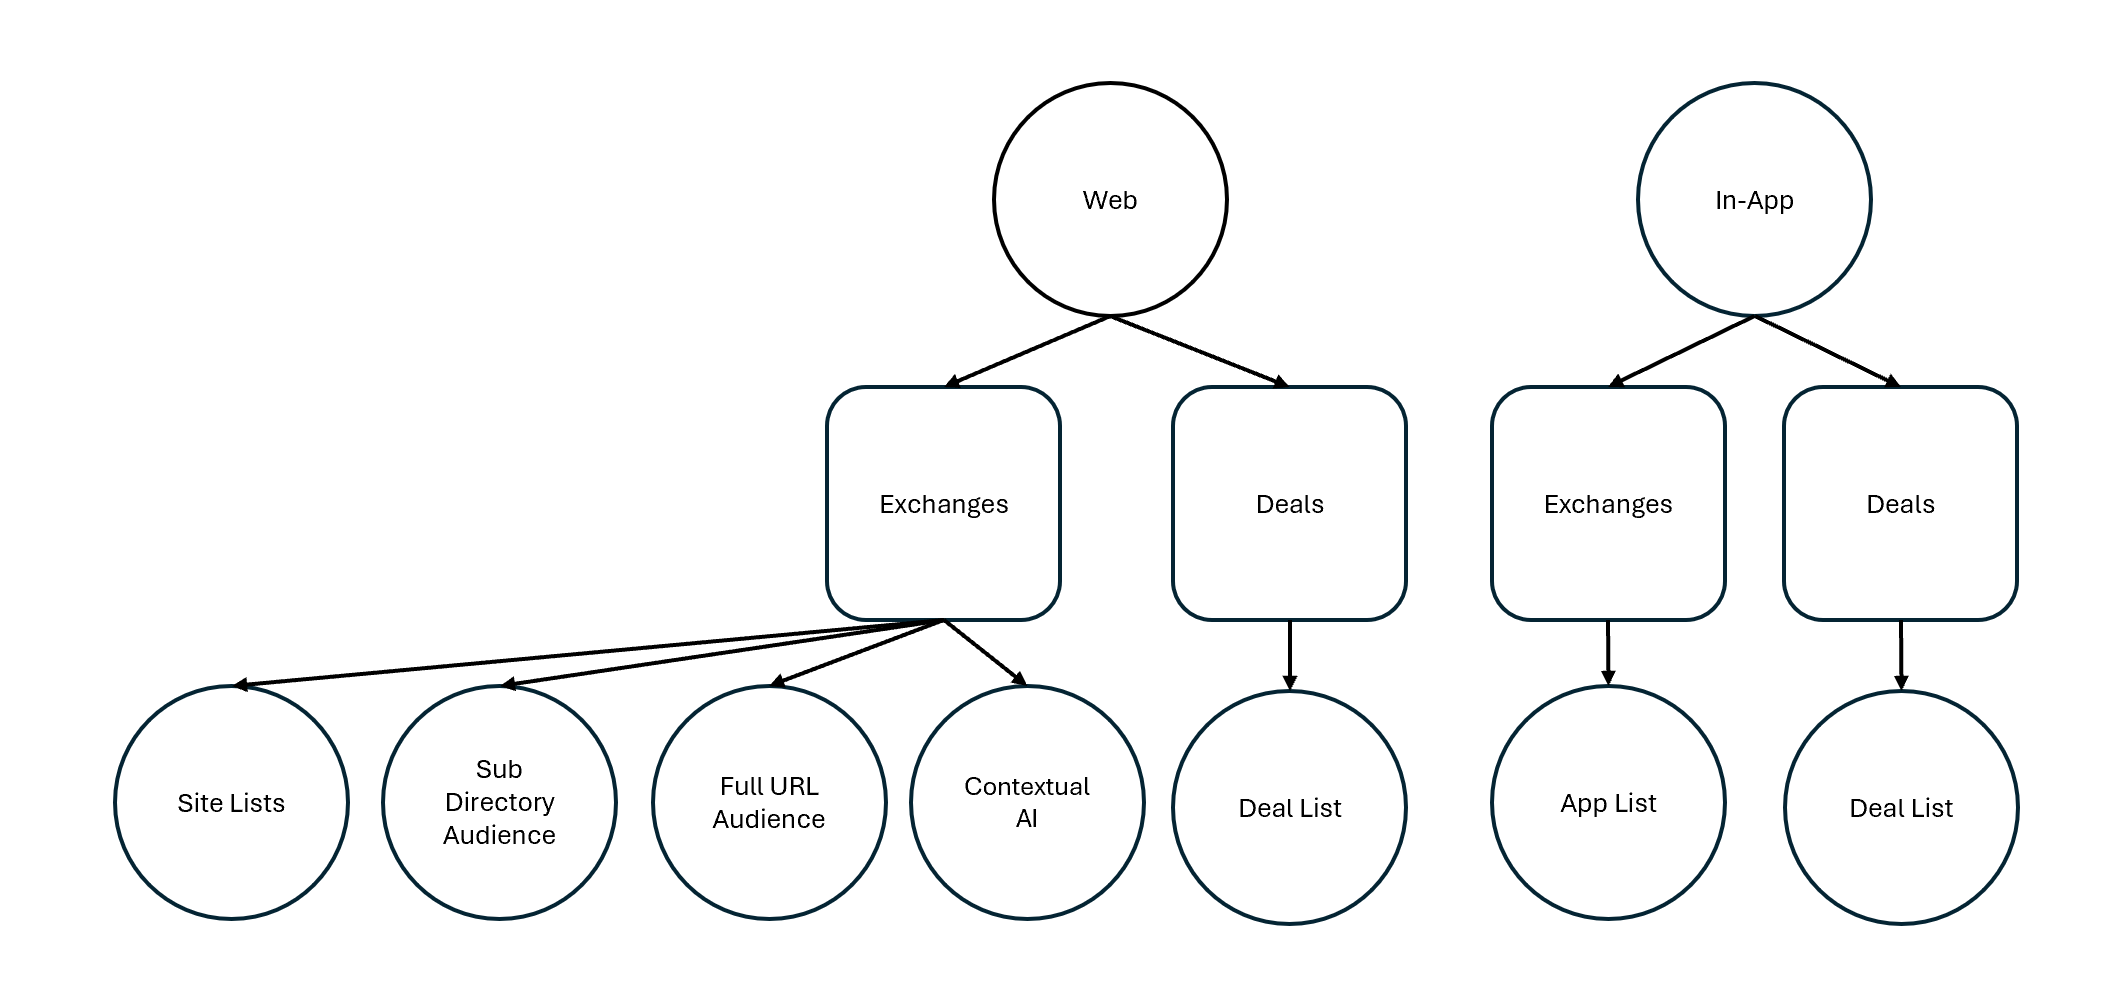
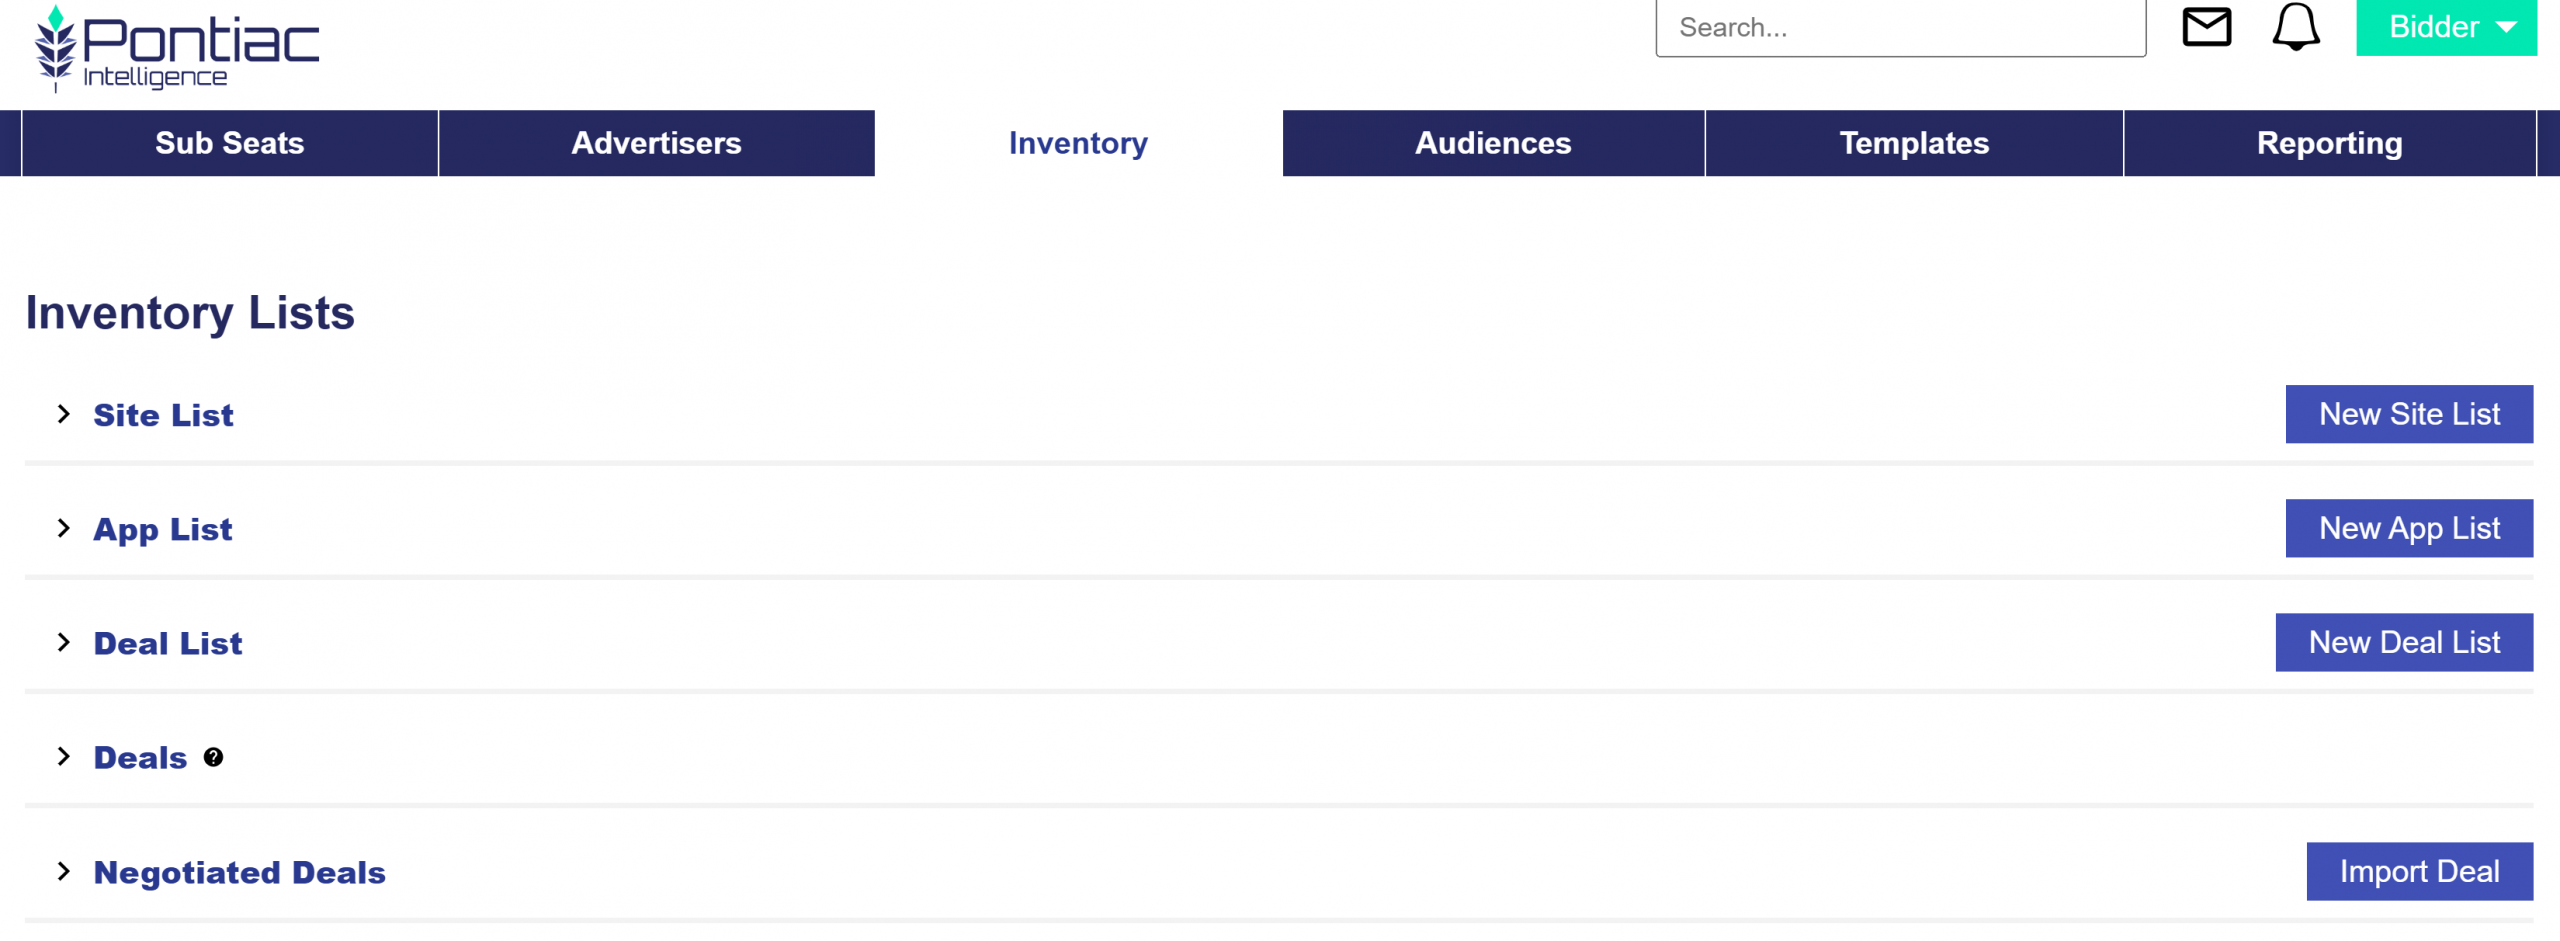
In the ‘Inventory’ Tab, create custom Site, App, and Deal Lists that can then be associated to Campaigns and Lines in their respective ‘Targeting’ Sections.

Site Lists

If no Site List is attached to your Campaign, domain targeting will be open by default.

Create Custom Site Lists:

  1. Navigate to the ‘Inventory’ tab.
  2. Select ‘New Site List’.
  3. Name the New Site List.
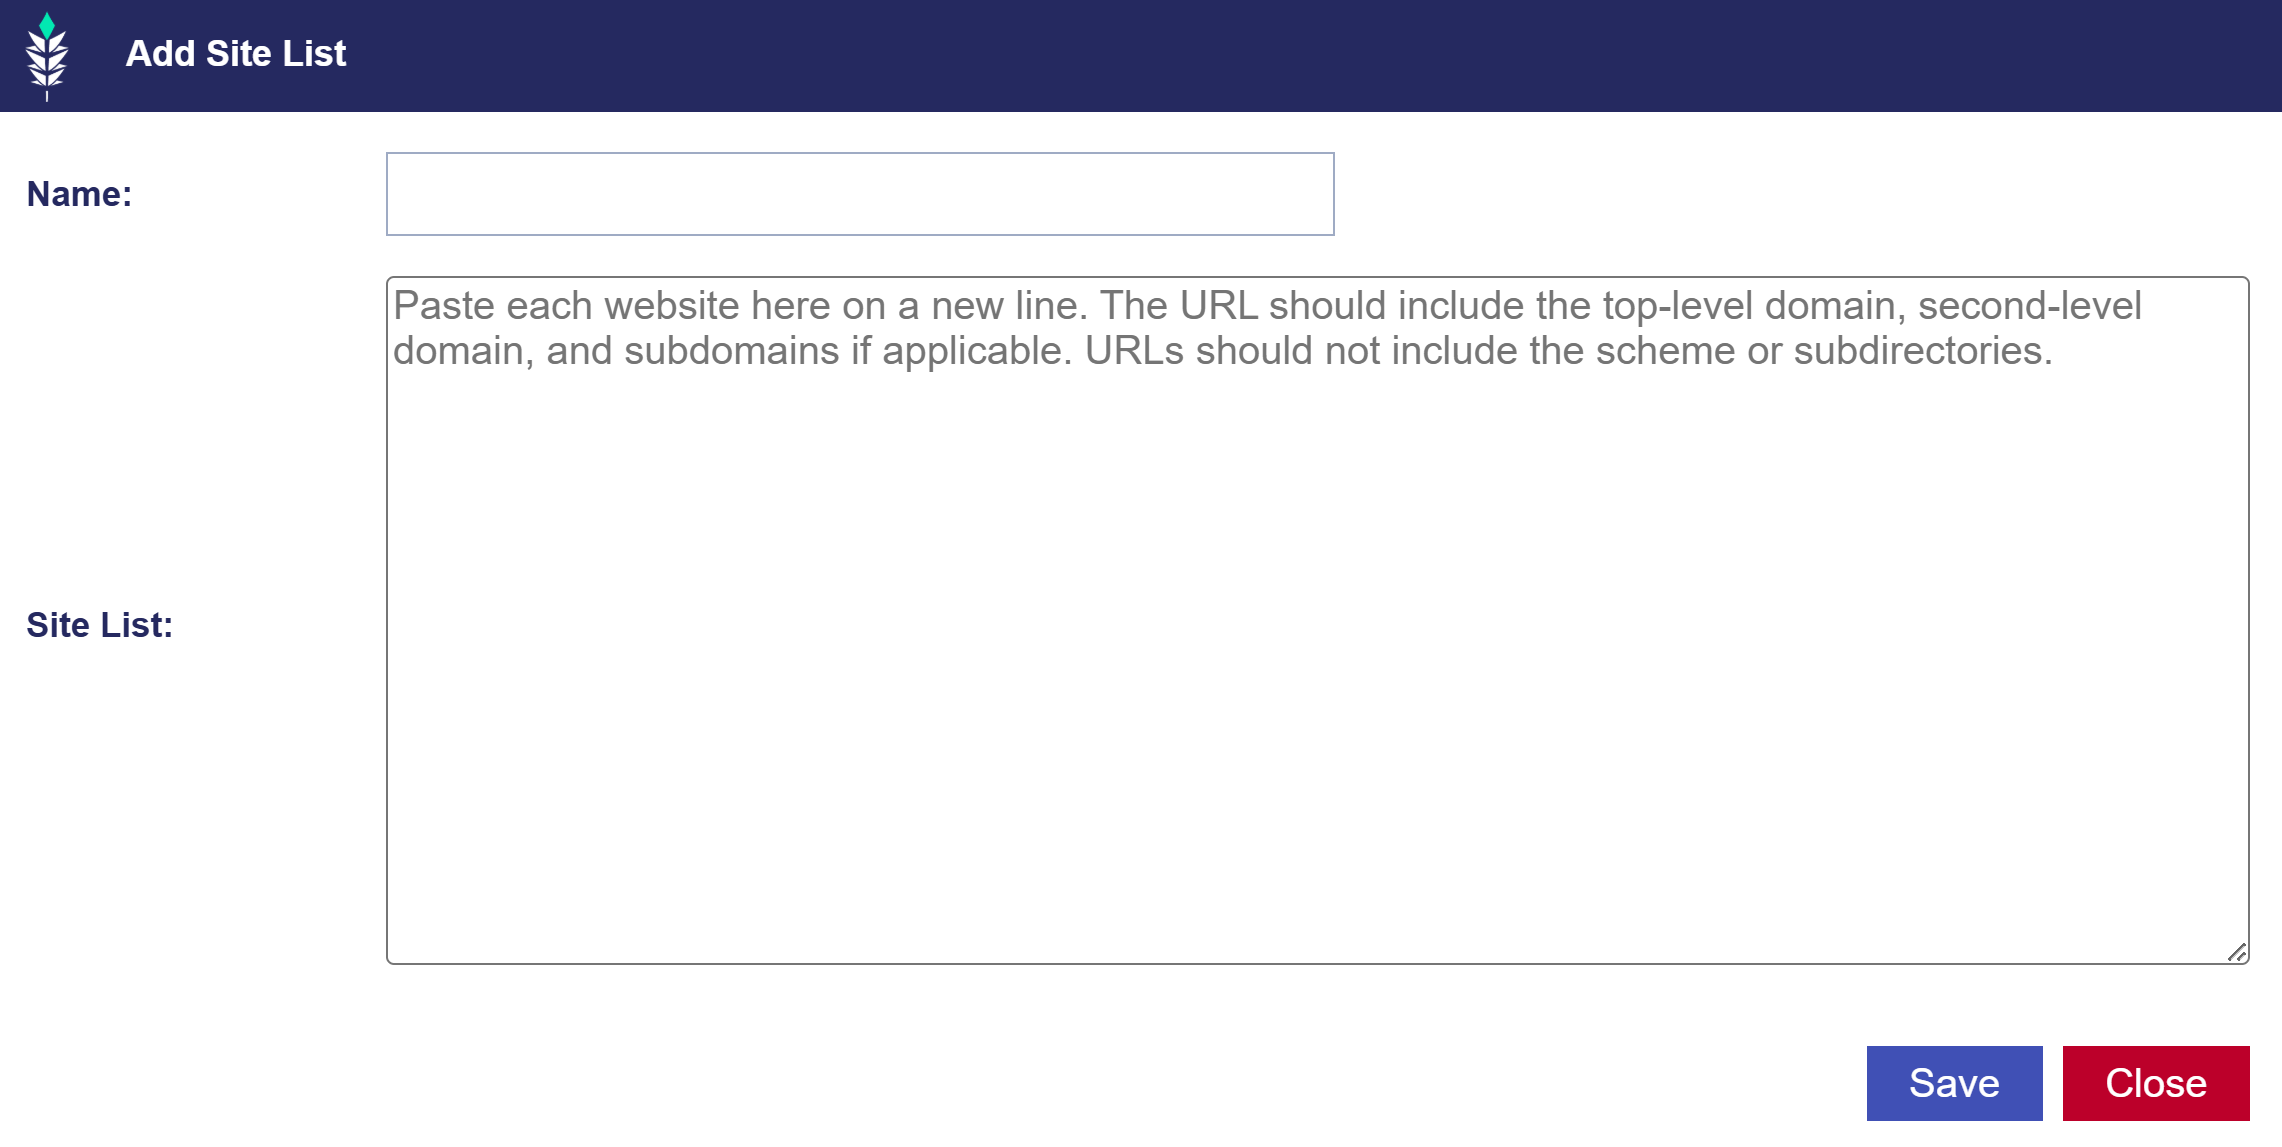
  4. Paste each website on a new line.
    • Note that the URL should include top-level domain, second-level domain, and subdomains if applicable. URLs should not include the scheme or subdirectories.
  5. Once a list is saved, it will automatically appear under the ‘Site Lists’ section in the ‘Targeting’ menu of the Campaign.

App Lists

Create Custom App Lists:

  1. Navigate to the ‘Inventory’ tab.
  2. Select ‘New App List’.
  3. Name the New App List.
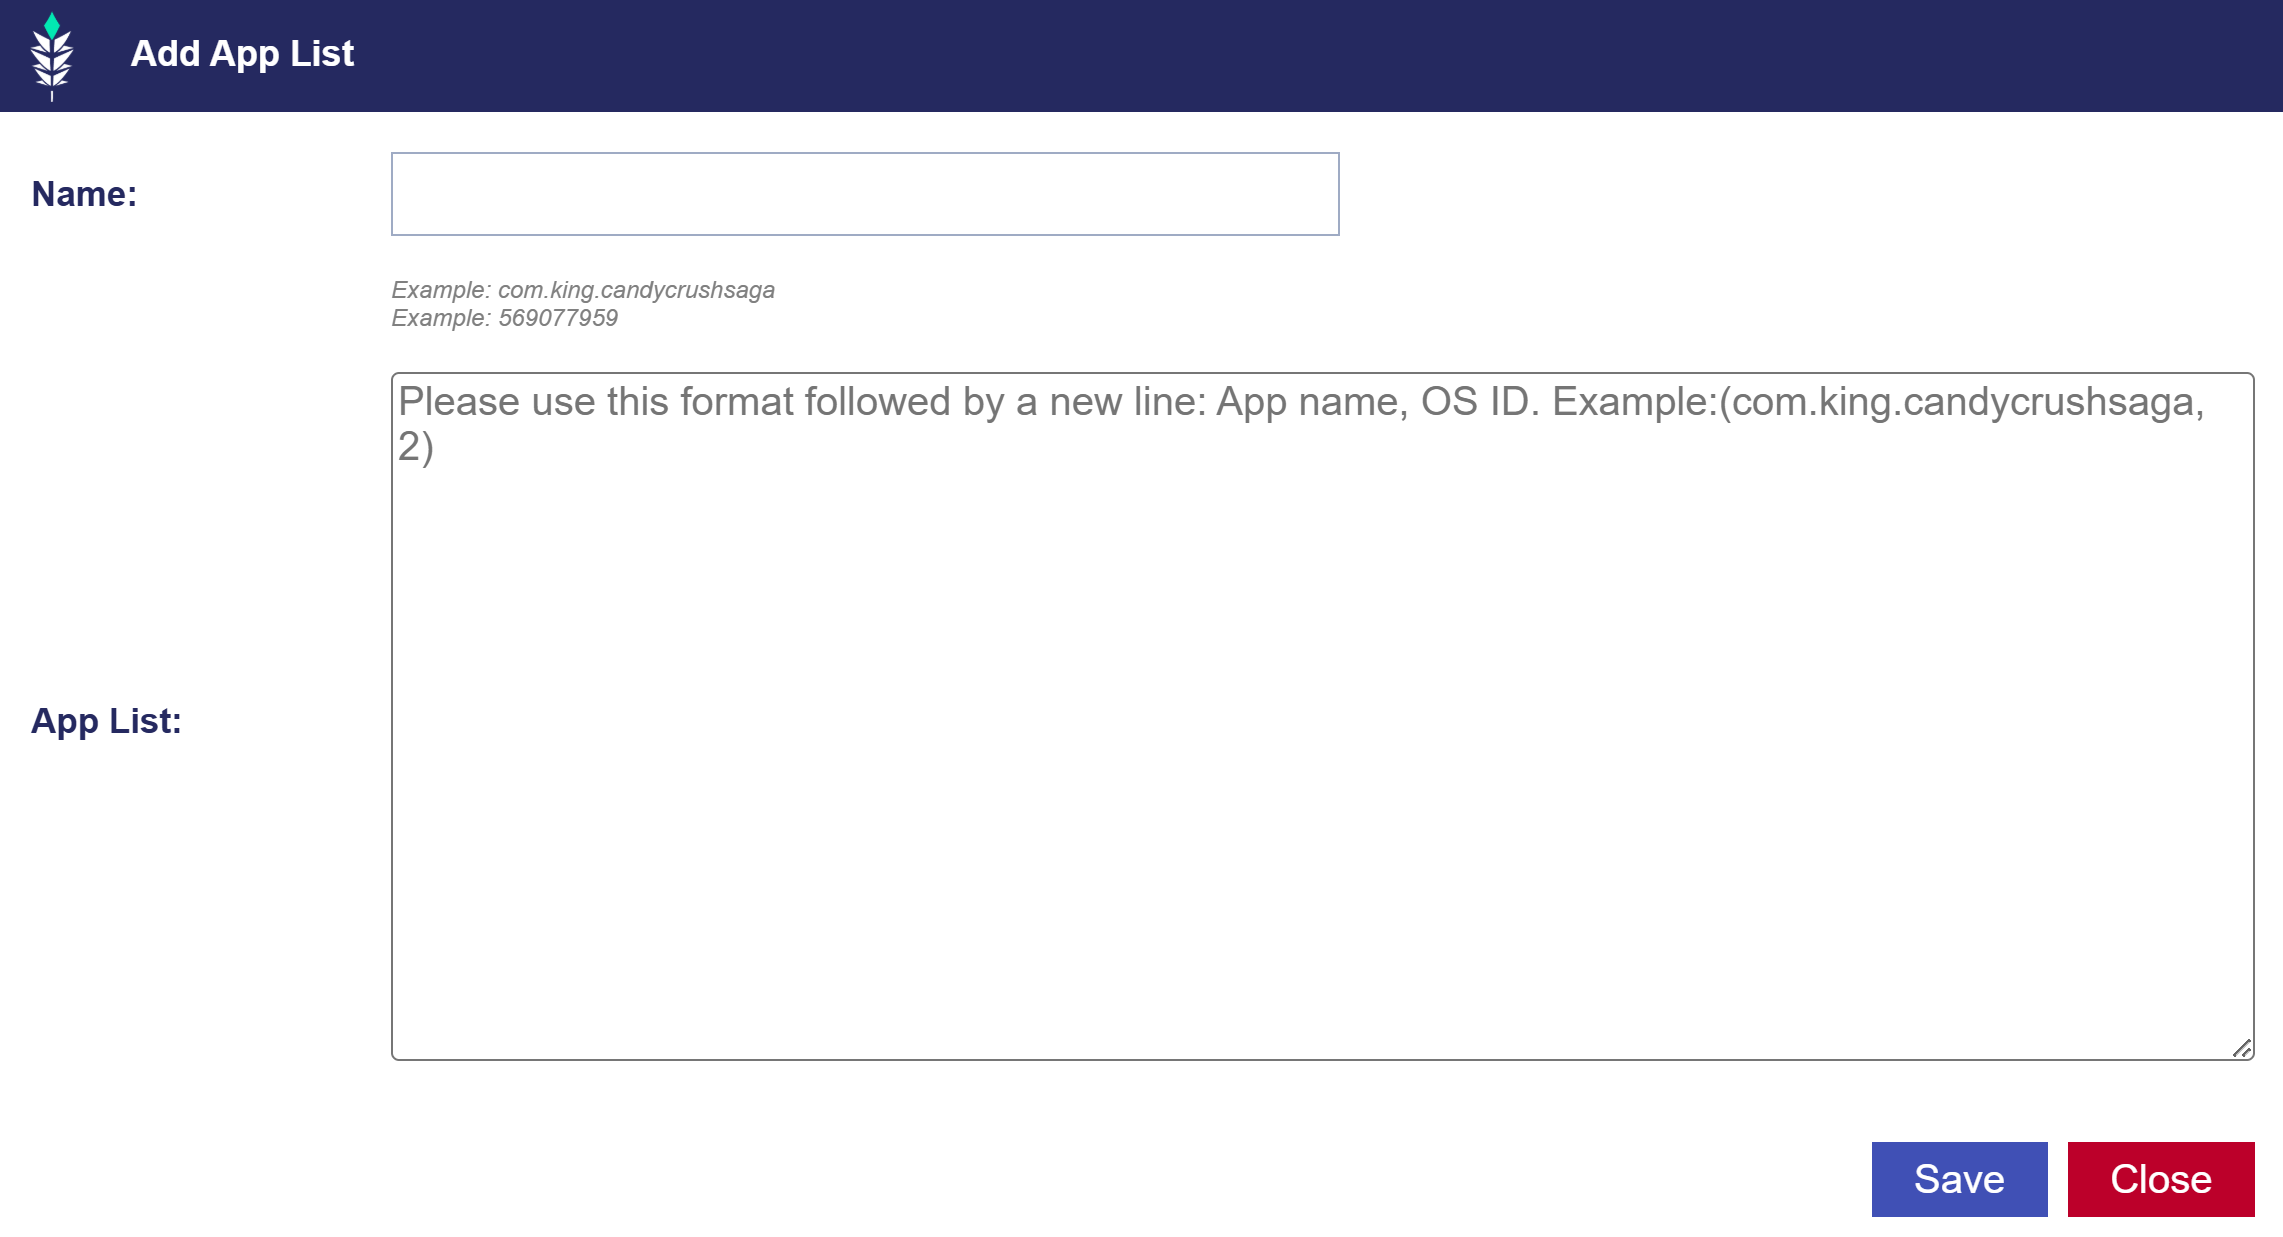
  4. Paste each App on a new line in the following format:
    • Line Format: App Name, OS ID
    • Line Example: com.king.candycrushsaga, 2
  5. Once a list is saved, it will automatically appear under the ‘App Lists’ section in the ‘Targeting’ menu of the Campaign.

Deal Lists

Create Custom Deal Lists:

  1. Navigate to the ‘Inventory’ tab.
  2. Select ‘New Deal List’.
  3. Name the New Deal List.
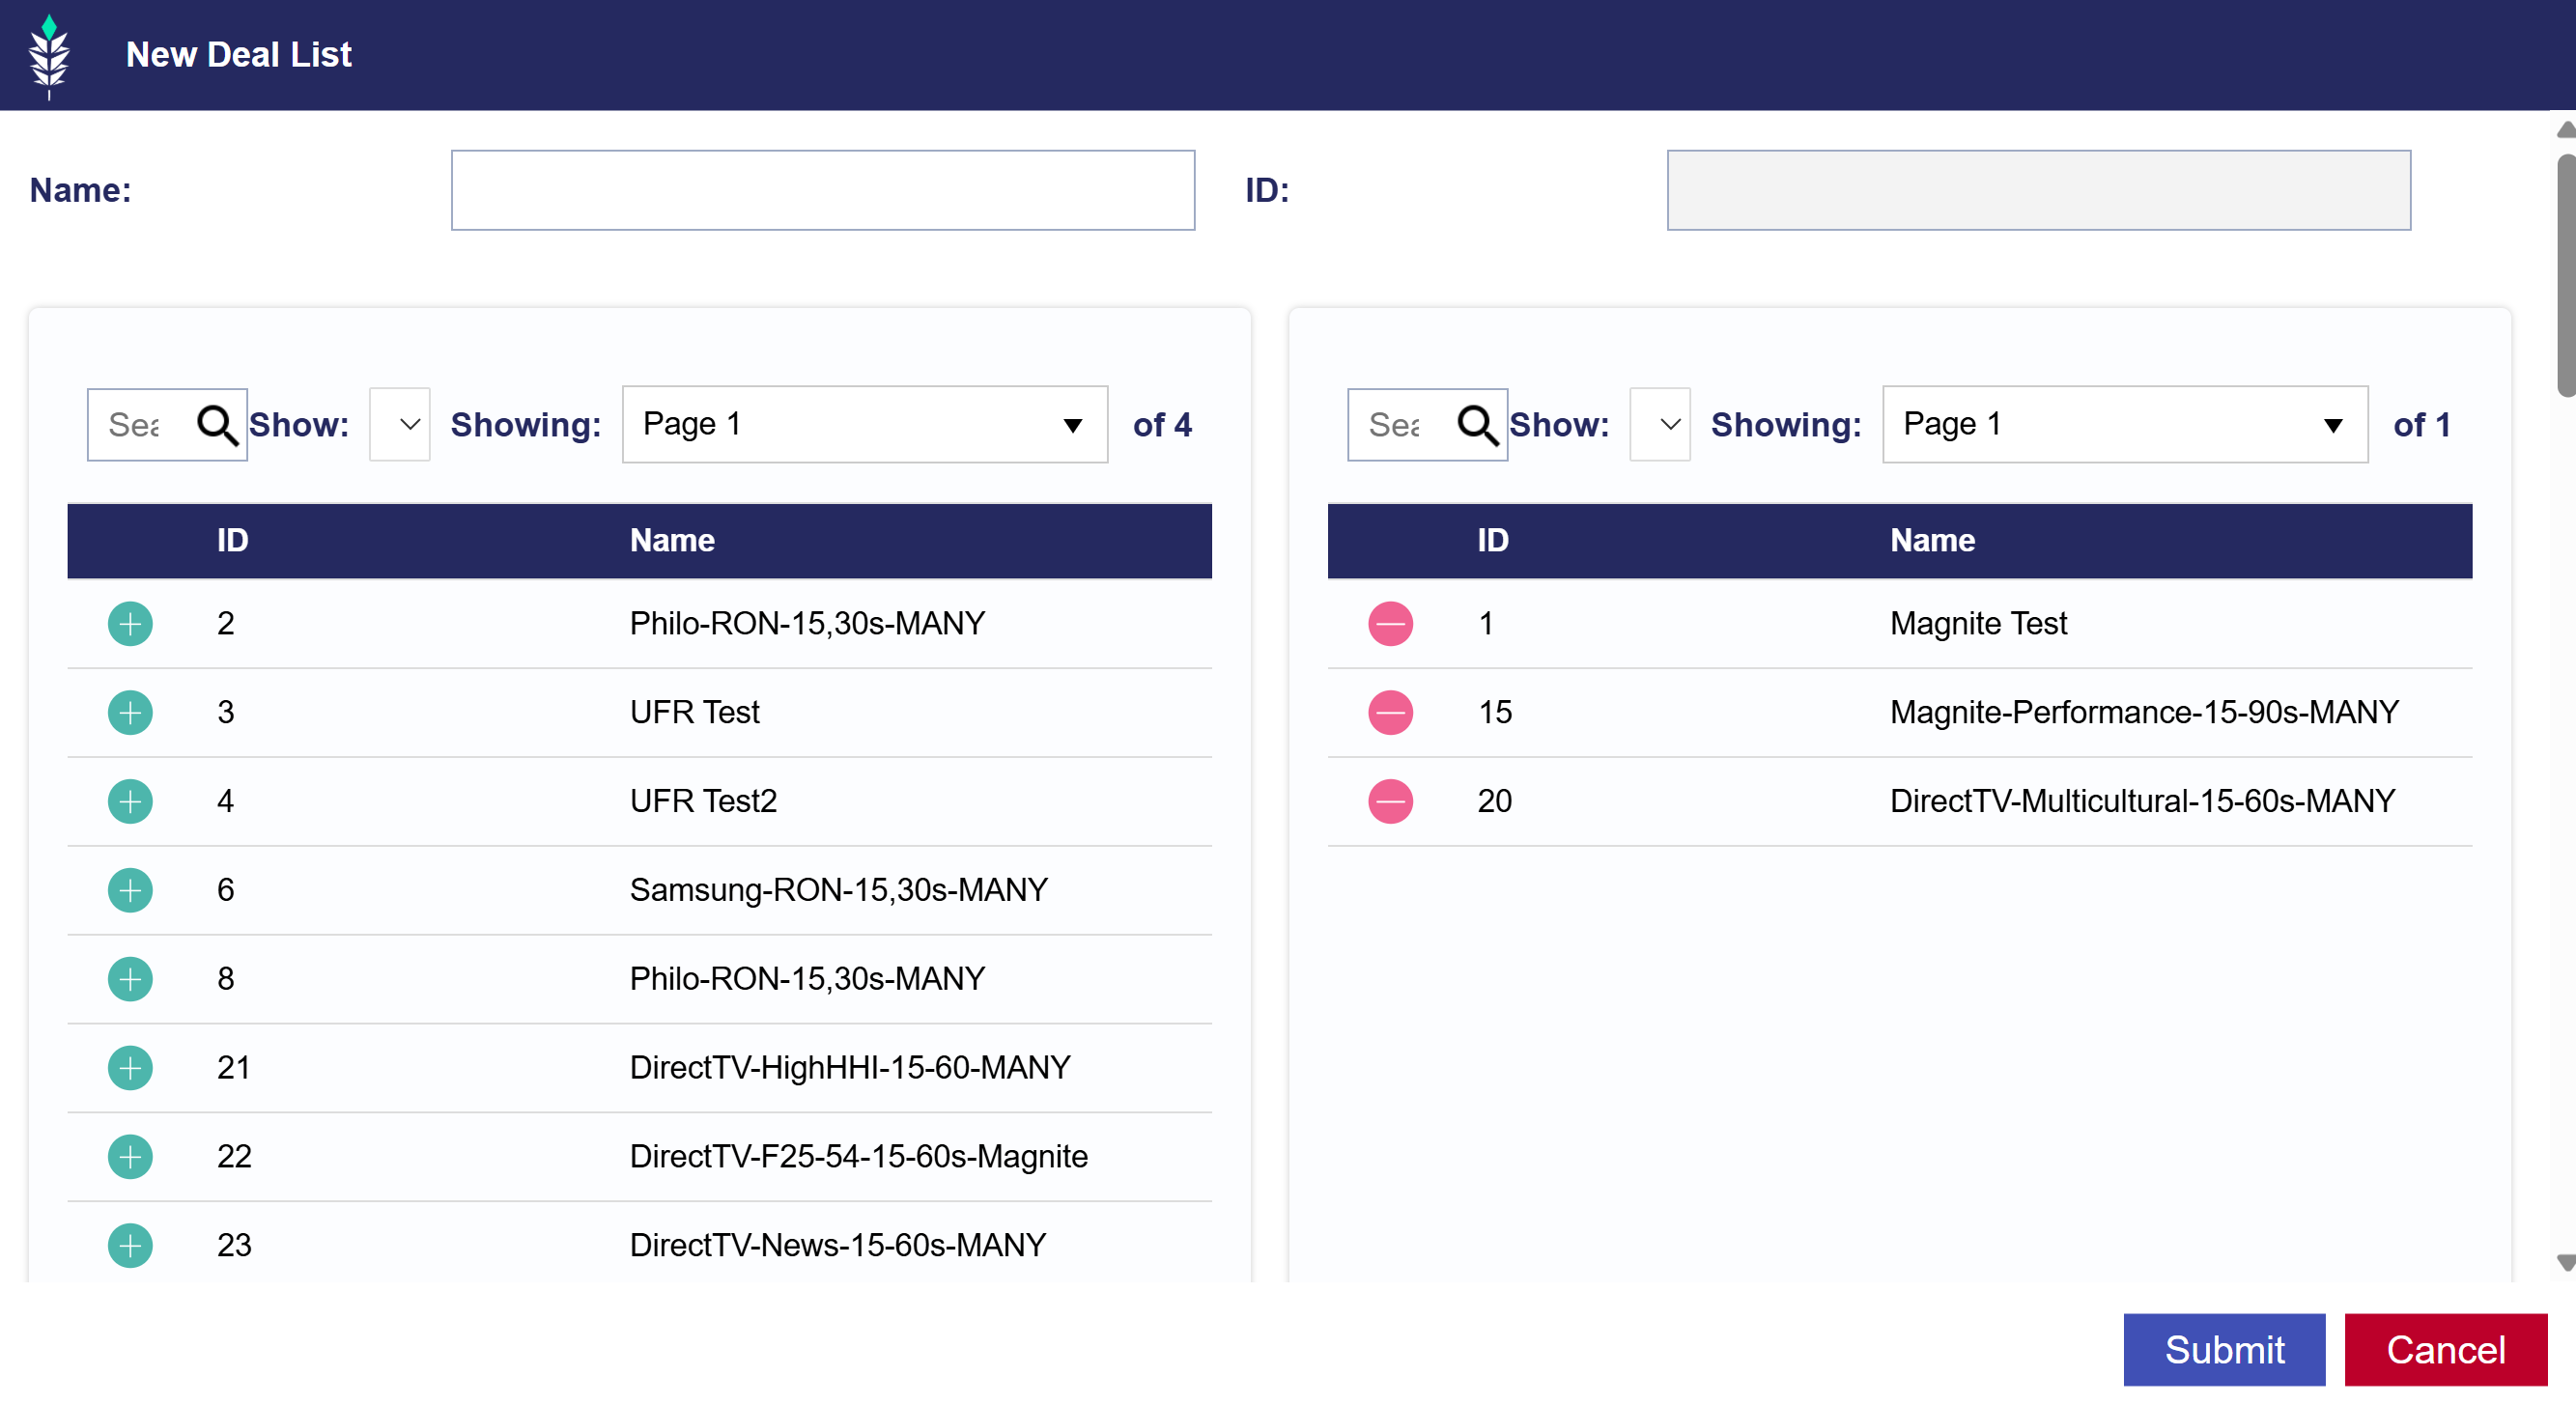
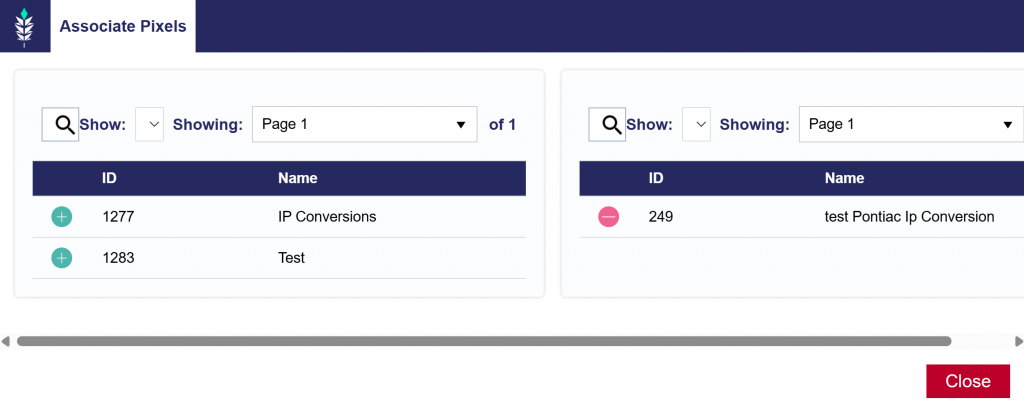
  4. Add names of deals from left box to the right box using the green plus symbol.
    • Remove deals from the list by using the red minus symbol.
  5. Once a list is saved, it will automatically appear under the ‘Deal Lists’ section in the ‘Targeting’ menu of the Campaign.

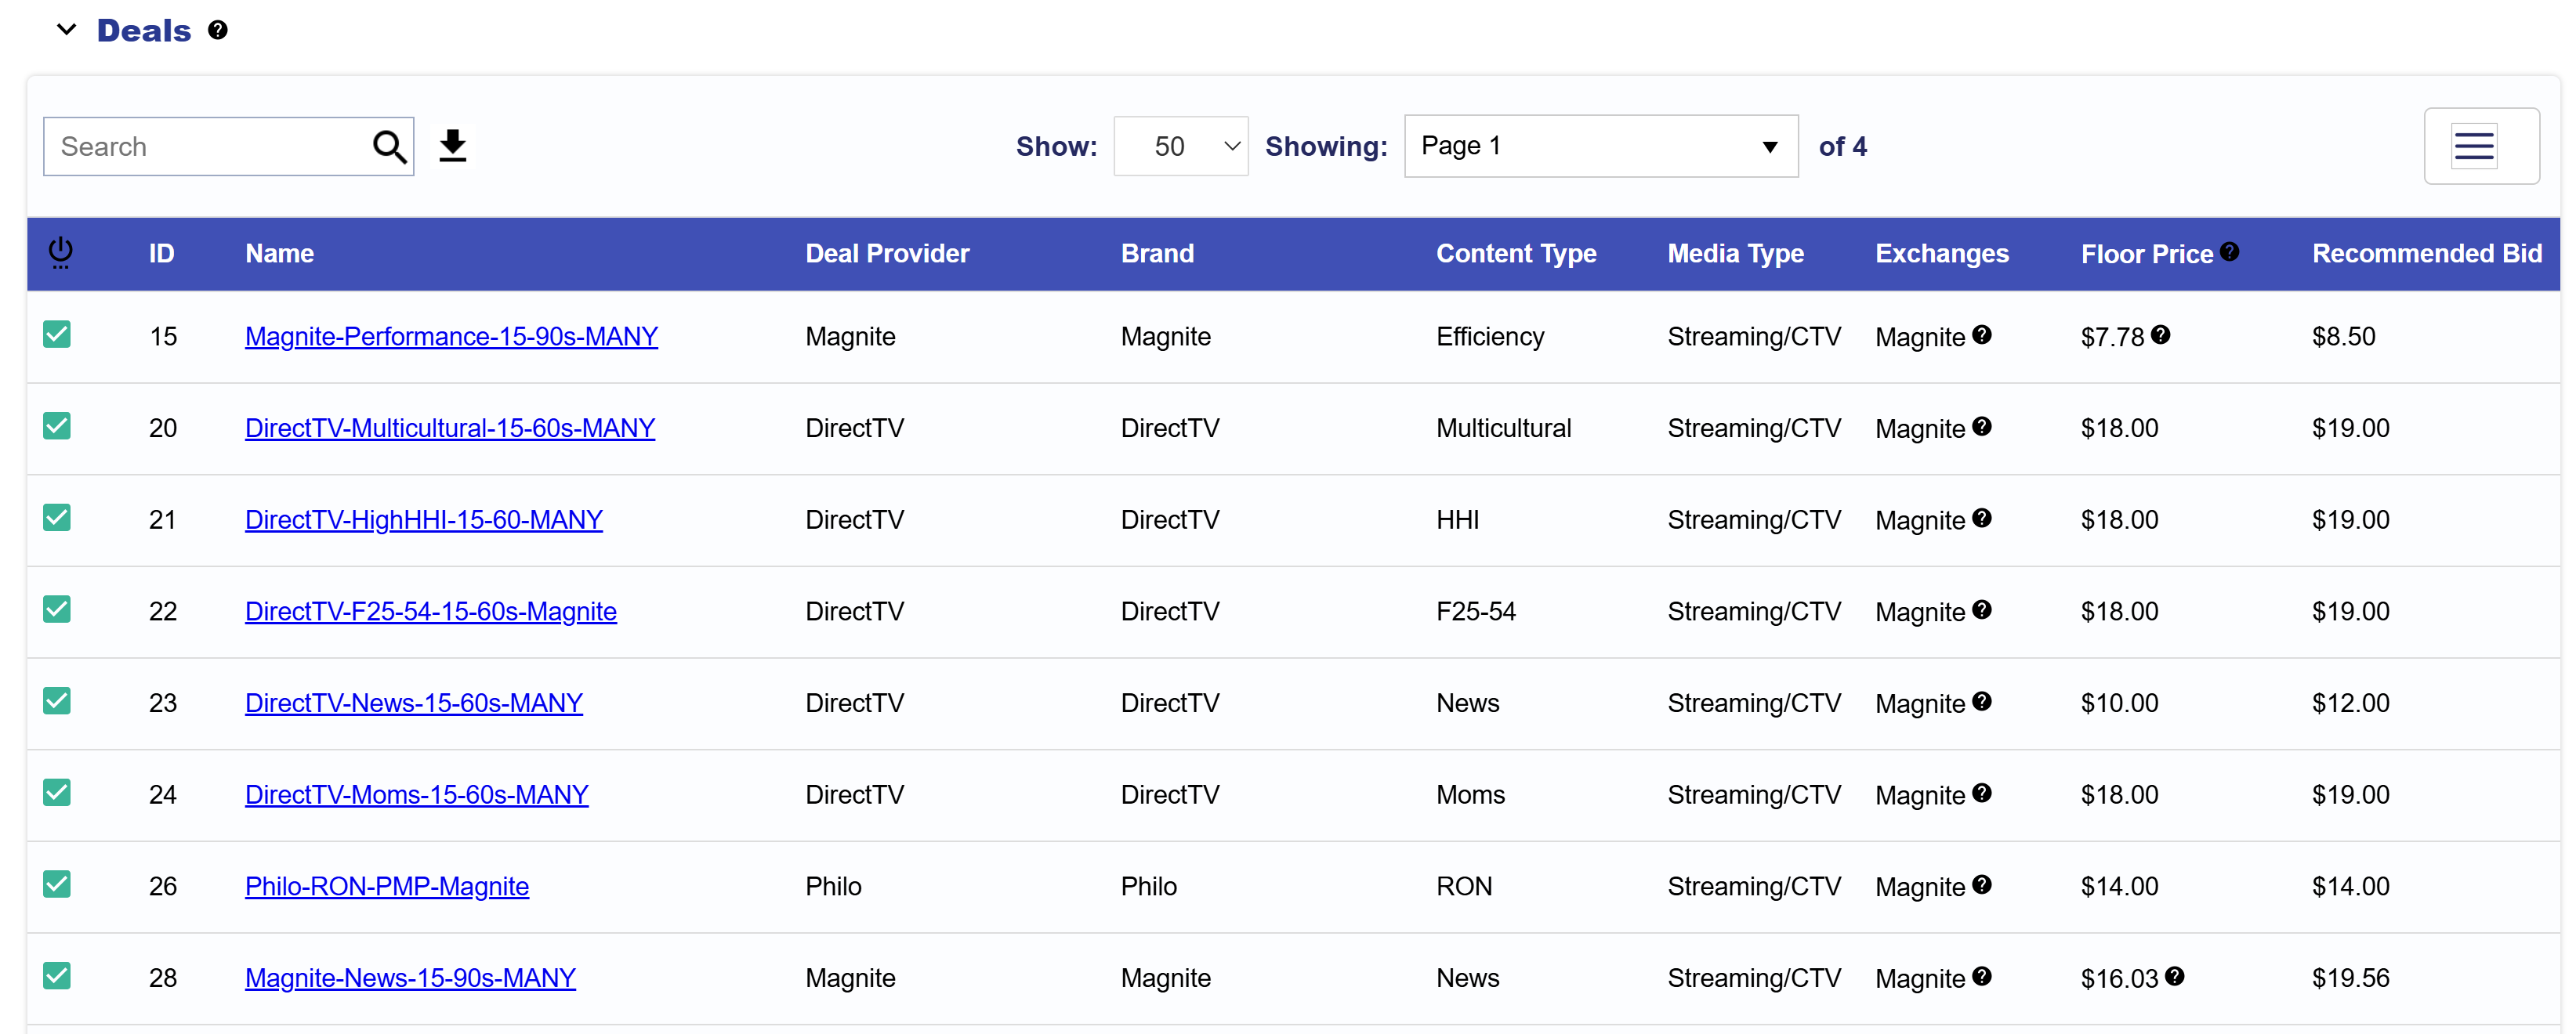
Deals

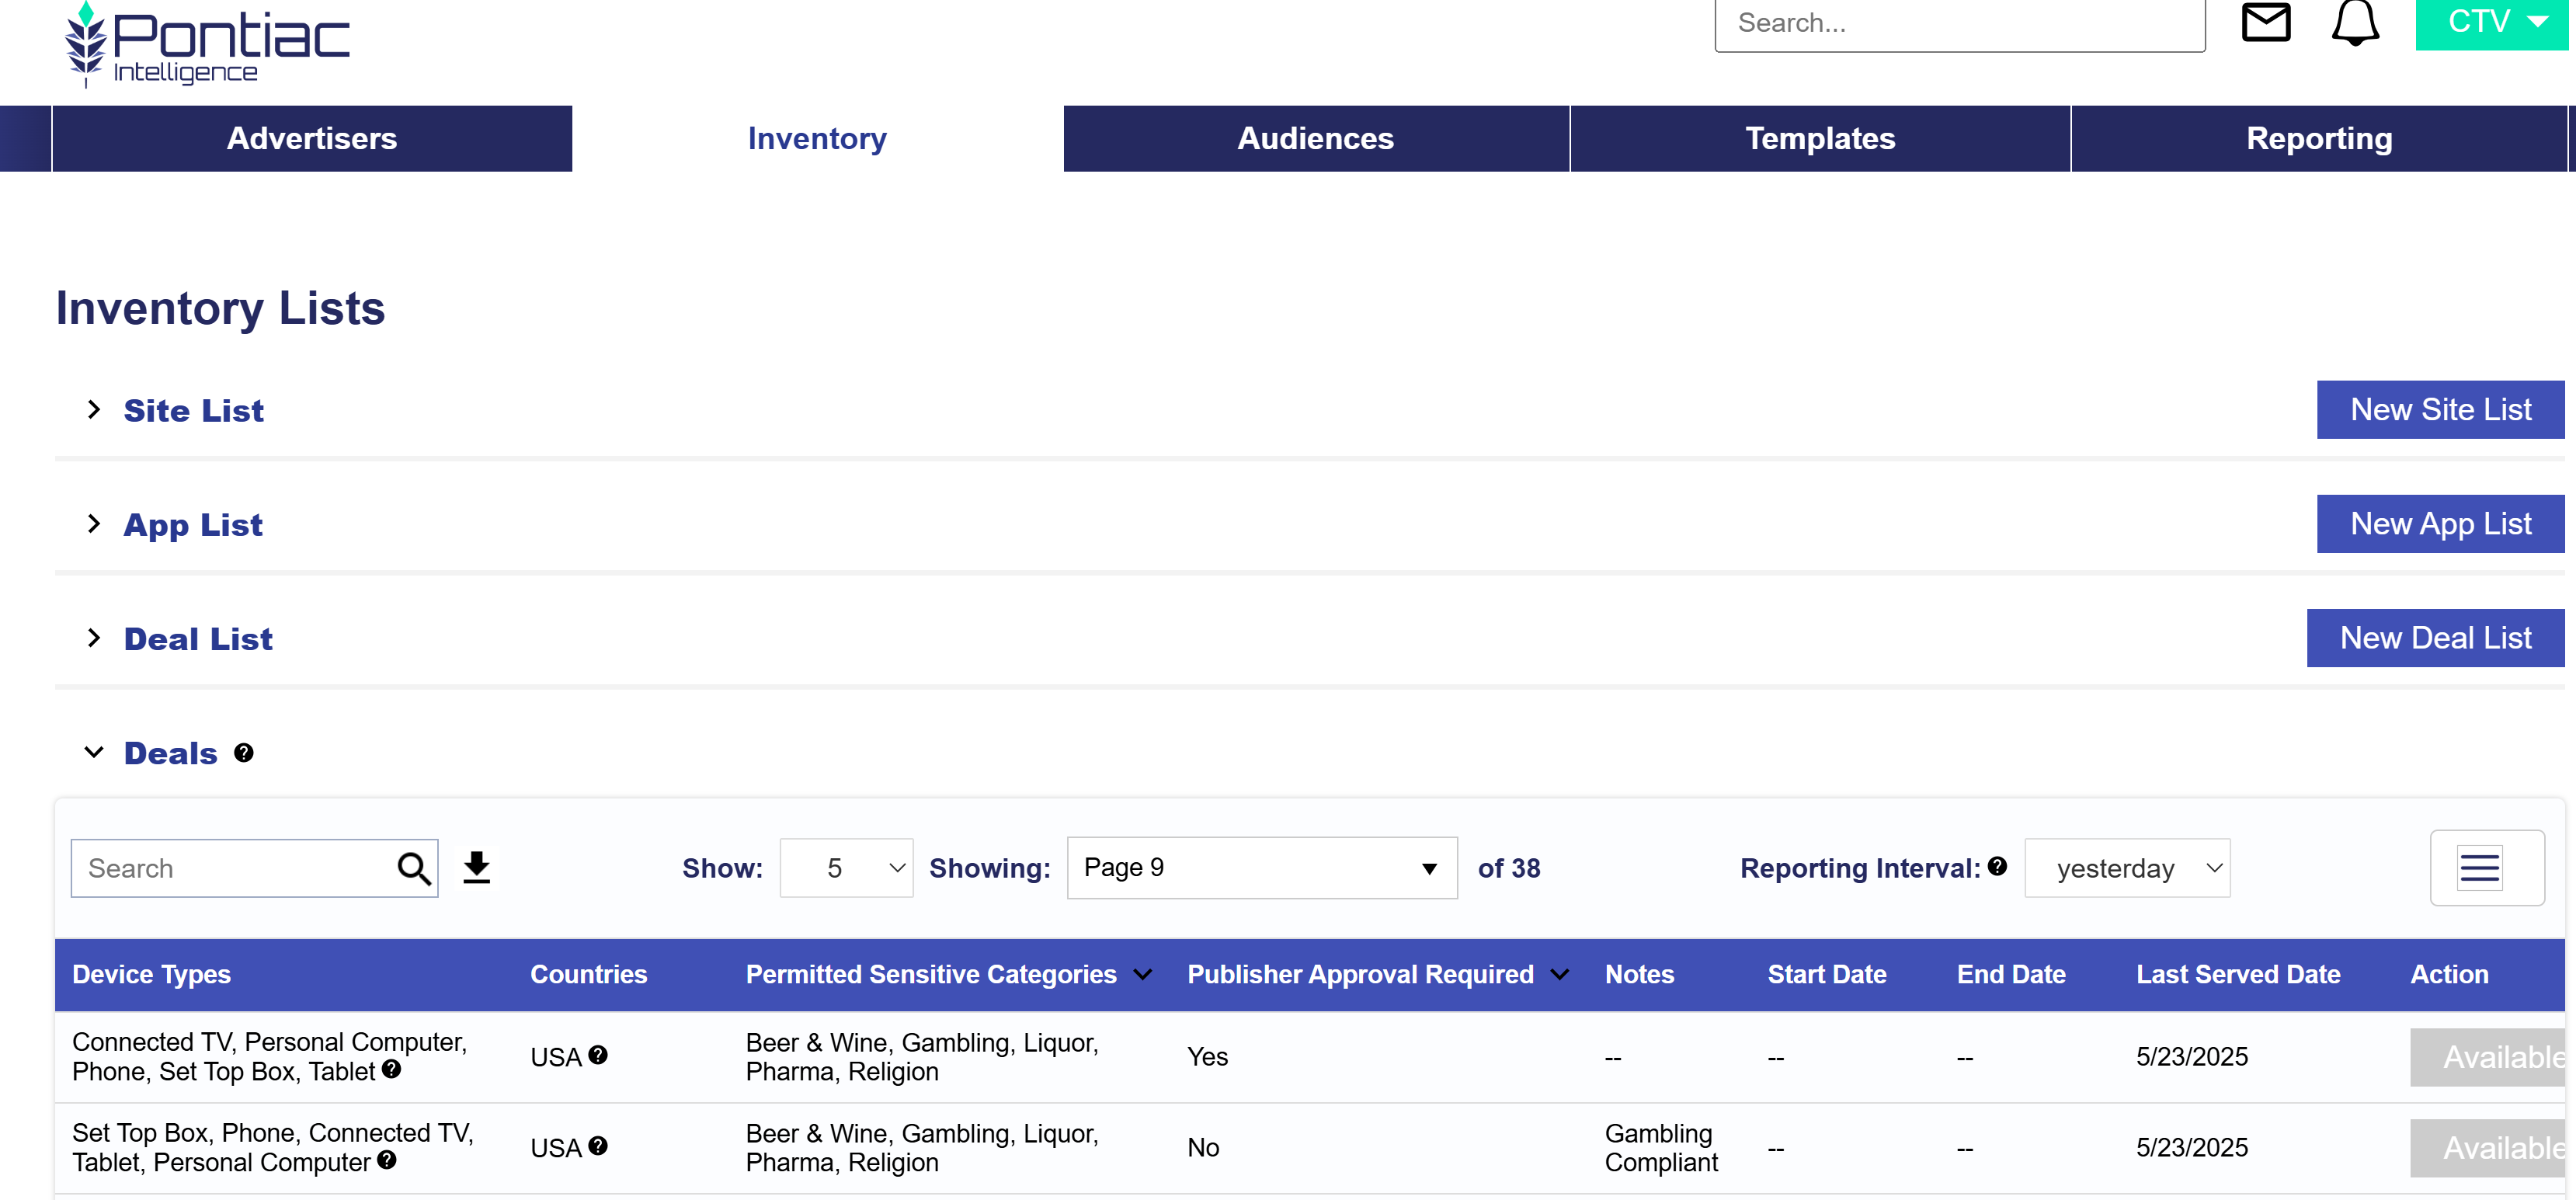
The Deals dropdown section shows the Deals available on Pontiac. Download the CVS file for convenience and to see what deals would be the best fit for your Campaign’s goals. Columns include the following:

  • Deal ID
  • Name
  • Deal Provider
  • Brand
  • Content Type
  • Media Type
  • Exchanges
  • Floor Price: The minimum CPM required to bid on the Deal. Max bid should be significantly higher in order to compete in the auction.
  • Recommended Bid
  • Livestream
  • Duration
  • Sizes
  • Auction Type
  • Device Types
  • Countries
  • Permitted Sensitive Categories
  • Publisher Approval Required
  • Notes
  • Start Date
  • End Date
  • Last Served Date
  • Action

All deals will be approved within 24 hours after being requested. Once approved, these can be targeted by individually targeting them or by creating a Deal List and adding them to the Campaign targeting section. Remove all exchanges from the targeting and associate the selected Deals using the green plus sign next to the name of the Deal. The Price Floor provides guidance for bidding, but it’s recommended to add at least $5-10 to the price floor for your Max Bid. Since this is still an RTB environment, competitive bids are necessary to achieve scale with premium inventory.

Negotiated Deals

The Negotiated Deals dropdown section shows all of your Negotiated Deals that are connected to Pontiac. The Deals dropdown section shows the Deals available on Pontiac. Download the CVS file for convenience and to see what deals would be the best fit for your Campaign’s goals. Columns include the following:

  • Action
  • Deal ID
  • Name
  • Deal Provider
  • Brand
  • Content Type
  • Media Type
  • Exchanges
  • Floor Price: The minimum CPM required to bid on the Deal. Max bid should be significantly higher in order to compete in the auction.
  • Recommended Bid
  • Livestream
  • Duration
  • Sizes
  • Auction Type
  • Device Types
  • Countries
  • Permitted Sensitive Categories
  • Publisher Approval Required
  • Notes
  • Start Date
  • End Date
  • Last Served Date

These Deals can be targeted by individually targeting them or by creating a Deal List and adding them to the Campaign targeting section. Remove all exchanges from the targeting and associate the selected Deals using the green plus sign next to the name of the Deal. The Price Floor provides guidance for bidding, but it’s recommended to add at least $5-10 to the price floor for your Max Bid. Since this is still an RTB environment, competitive bids are necessary to achieve scale with premium inventory.

ART Audiences

The first step to create a Custom ART Audience is to build out an ART report in the ‘ART’ section of the platform under ‘Audience Research’ or ‘Audience Discovery’. Create a lookalike model from an existing audience or build a new audience according to desired demographics or interests. Once the ART Report is created and pushed, it will appear in the Custom Audiences dropdown.

Build an ART Report:

To create an ART audience, first generate an ART report in the ‘ART’ section under Audience Research or Audience Discovery.

  1. Audience Research Audiences:
    • Select an existing audience to source key demo & interest data to build custom lookalike models. The existing audience data can be pulled from a Pontiac IP Conversion Pixel placed on the Advertiser’s website, or select key geos to build a lookalike model from the demographics & interests of the selected area.
  2. Audience Discovery Audiences:
    • Select key demo & interest categories to define, locate & build your brand’s ideal target audience. Create the ‘ideal’ user profile for your brand, then locate key target markets to reach this demographic.

Note that on the ART Report, the field ‘Auto Refresh’ will determine the cadence at which the report data will refresh. Interest & Inventory data are updated every 30 days and new data may change report results. If a report is set to auto refresh and the matched zip codes in the results of the report are updated, this will automatically update any published audiences associated to the report.

Publish the ART Audience

Once you’ve created an Audience Research or Audience Discovery report, you can publish it as a Custom Audience for cookieless targeting across Pontiac Campaigns.

  1. Open the ART report and select the ‘Publish Audience’ button.
  2. Select the threshold for matched zip codes, choosing from:
    • All results
    • Top 10%
    • Top 20%
    • Top 50%
  3. Give the Audience a name.
  4. Click the ‘Save’ button.

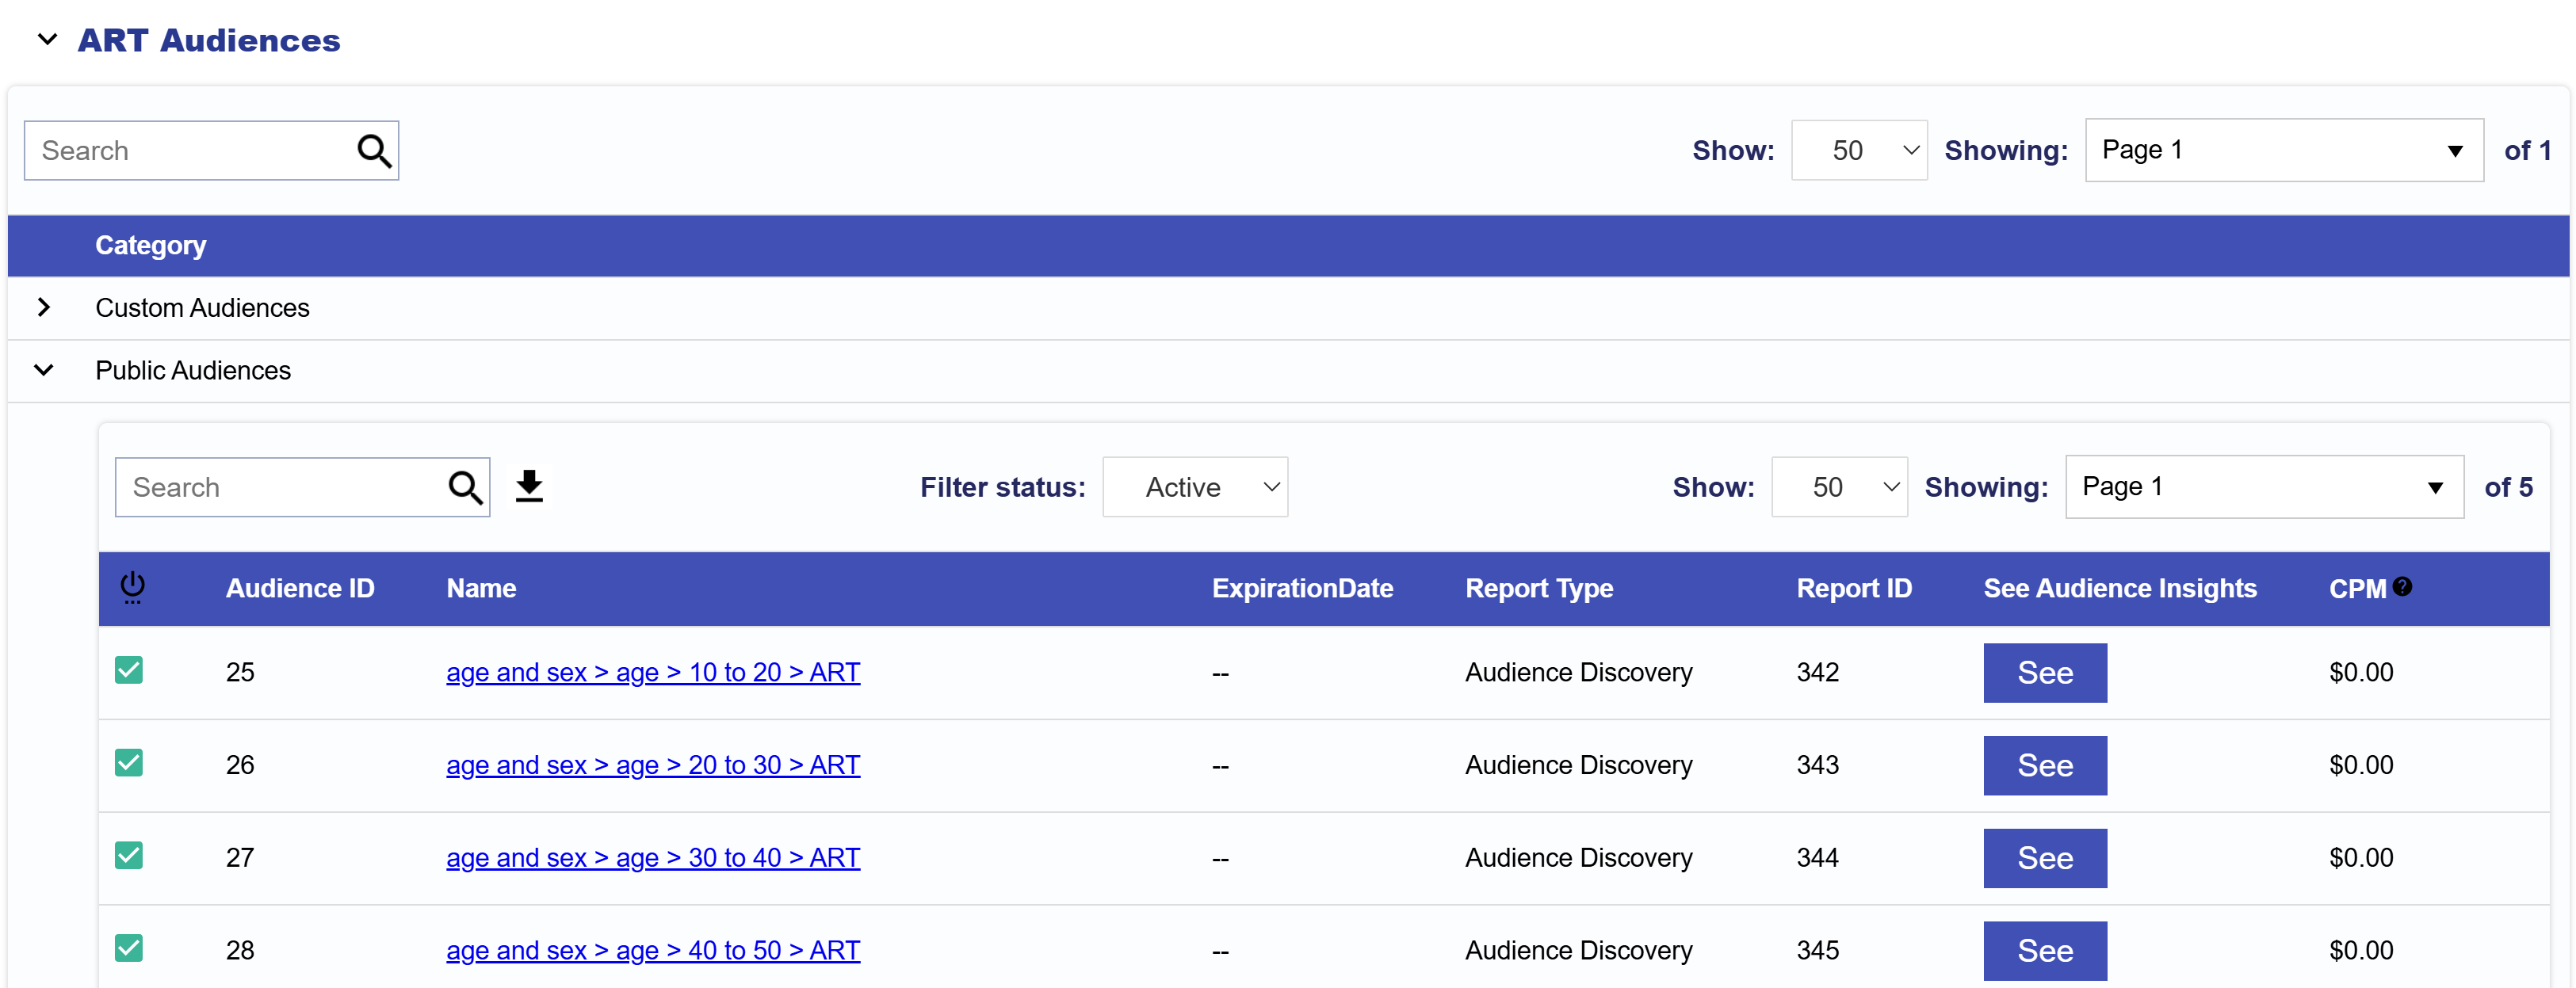
To view Pontiac ART Public Audiences, expand the Public Audiences tab.

Select these audiences in the ‘Associate Segments’ section of a Campaign or Line Item, under ‘ART Audiences’ and navigate to ‘Public Audiences’.

To learn more, see the following documentation: ART Documentation and Campaign Audiences

Contextual AI

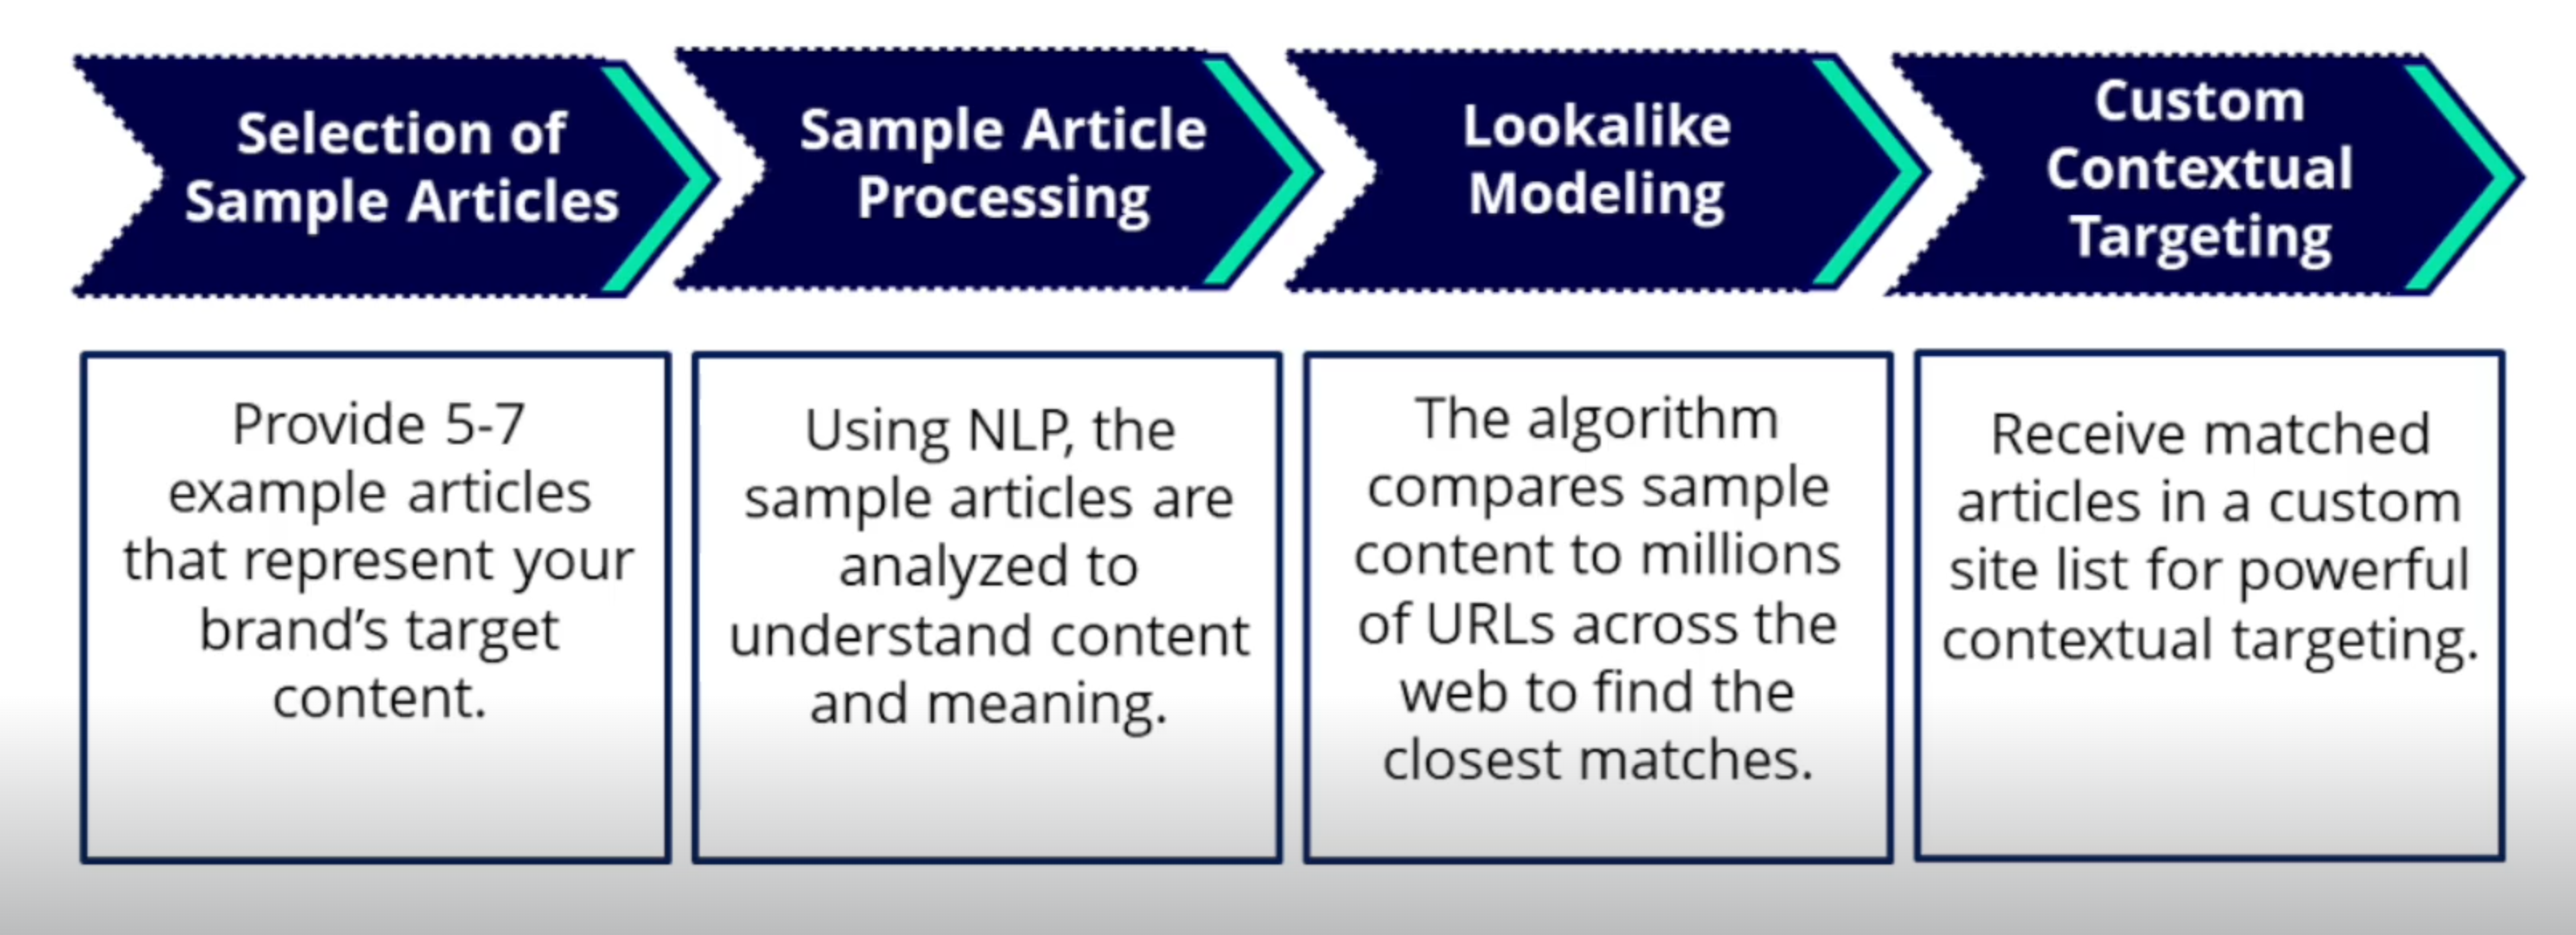
Contextual AI is an AI-based, custom targeting solution that performs deep content analysis to find the best contextual placements for your ads. Contextual AI uses Natural Language Processing (NLP) to digest the content of articles across the web and understand the text the way a human would. By processing entire websites of content, the AI overcomes the ambiguities in language that over-simplified tools such as keywords can overlook, accurately assigning meaning to the words in context. (For example, does the word ‘Apple’ in this article refer to a company or a fruit?). A neural network produces an embedding vector of the content, allowing full webpages to be indexed for contextual relevance.

Leveraging this rich contextual analysis, Advertisers can build custom lookalike segments from a few sample articles or select from our list of curated contextual segments for over 300 IAB content categories. These segments have an additional cost of a $0.25 CPM that will be added to the all-in cost of media.

To create a Custom Contextual Audience, go to the ‘Audiences’ tab and select ‘New Contextual Audience’. Give the Audience a name and select one of the Input Types:

  • URLs: Enter source sites below that represent your brand’s target content, this should be the Full URL including the scheme, subdomains, and all subdirectories. Sites should be text rich and not behind a paywall. Enter each URL on a new line.
    • Aim for a minimum of 3-5 example pages per contextual segment. Closer to 10 may provide good results depending on the subject.
    • Choose the number of examples based on how broad or narrow you want to match. If you want to go for something really broad (for example, “current events”, an IAB category), you’ll want a number of examples covering many aspects of such a broad subject (in December of 2022 I might include examples covering inflation, the Ukraine war, midterm elections, twitter, gpt-3, Donald Trump, Joe Biden and the World Cup for example). On the other hand, if you want to get very precise, for example “1960s muscle cars” you can get away with fewer examples.
    • Look for pages that are text-heavy with at least 5 sentences. Low quality pages (e.g. infinite scroll, interactive, or image heavy pages) will have lower performance in the matching process. News articles, blog posts, how-to articles, etc will provide more accurate matches.
  • Text: Enter a descriptive paragraph of text about the topic of interest to build a list of contextually relevant URLs for targeting. Text should have a minimum of 50 words and maximum of 500.

To learn how to associate Contextual AI Audience Segments to a Campaign, continue to the following documentation: Campaign Audiences

IAB Curated Contextual Segments

In the ‘Audiences’ tab you will find over 300 Contextual AI segments curated by the Pontiac Team for each of the IAB categories. If you click on the name of the segment, you can see the input and the sample output for this segment. The ‘Site List’ section displays the articles that were used to ‘define’ the desired content for the category. The ‘Example Audience Data’ below shows a sample of the matched articles where the ads would serve if this Audience is targeted. This is a sample and not the complete list of URLs contained in the Audience.

Note, these IAB Category segments cannot be edited and they are already available for use across all of your Advertisers at a $0.25 CPM. These can be added in the ‘Associate Segments’ section of the Line Item, under ‘Contextual’.

Custom Audiences

The Pontiac platform offers a variety of Custom Audience options that allow you to customize your targeting and strategically place your ads to reach the right users. To create a Custom Audience, go to the ‘Audiences’ tab and select ‘New Custom Audience’. Give the Audience a name and select the type of Audience from the dropdown. Enter the Audience data according to the indicated format. These Audiences will automatically be available to associate to any Line Item or Campaign.
Custom Audiences will expire 180 days after they are created. The expiration date for each Custom Audience is visible in the ‘Audiences’ tab. An expired audience can be re-activated after the expiration date by opening the audience, checking the ‘Active’ box, then clicking ‘Save’.

Note that if a segment appears in gray and cannot be associated, it is either expired or cannot be used for the selected creative or inventory type.

To create a Custom Audience, go to the ‘Audiences’ tab and select ‘New Custom Audience’. Give the Audience a name and select the type of Audience from the dropdown. Here is a list of Types available and the proper line formatting:
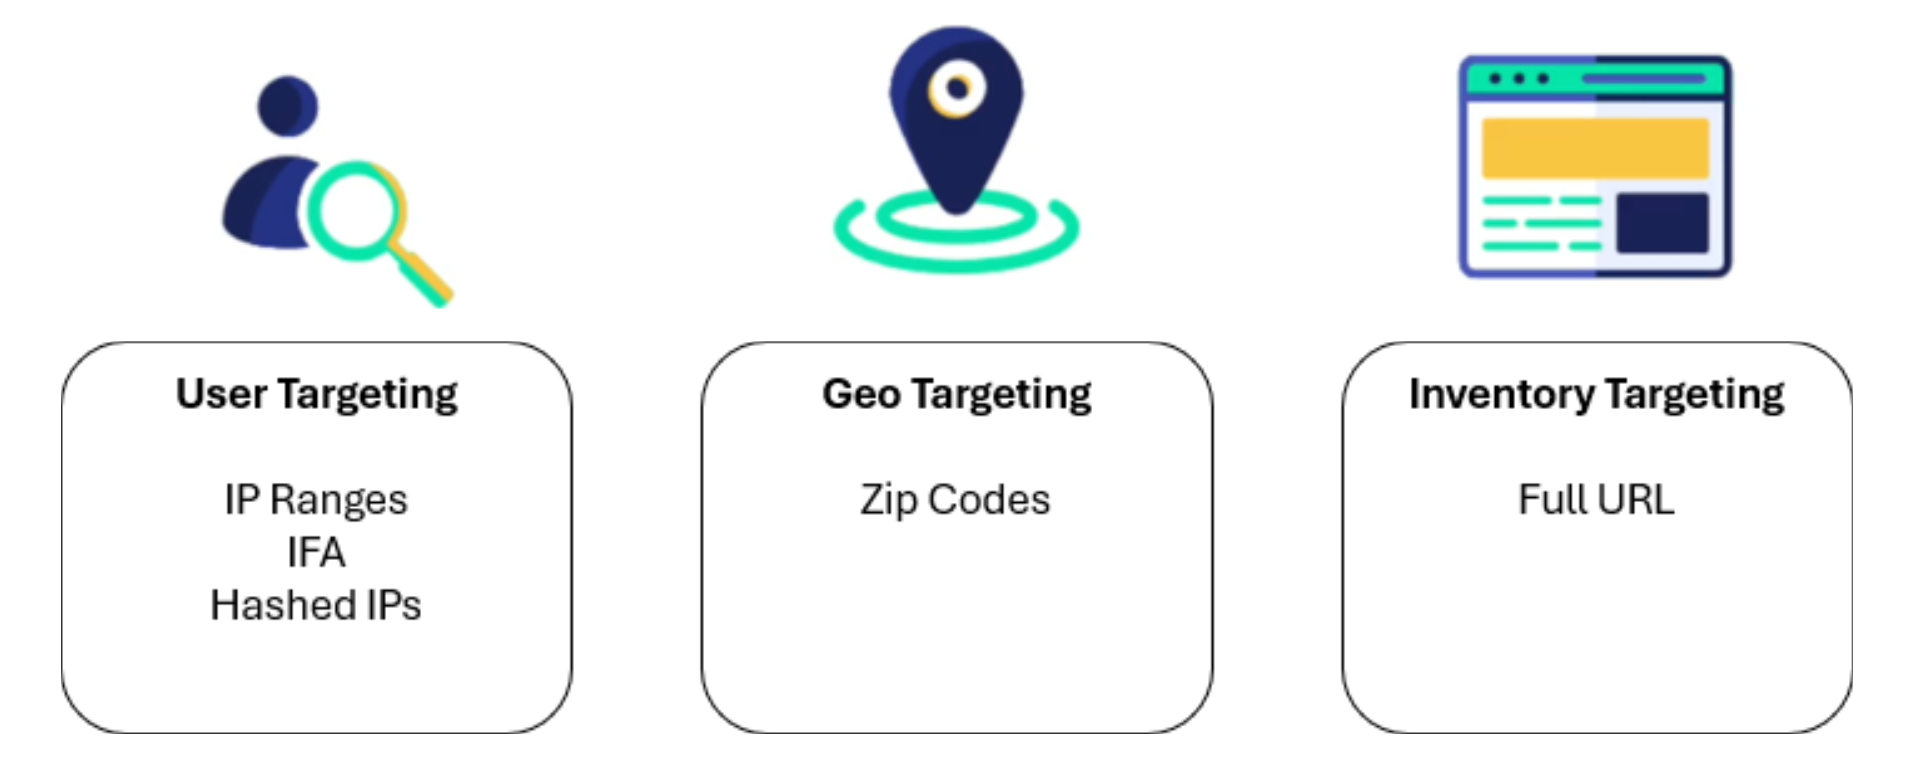
  • IP Ranges: An IP address audience uses a list of IPs or IP ranges to target devices.
    • Line Format: [IP] or [Start IP],[End IP]
    • Line Example: 63.148.81.24 or 234.123.0.13,234.123.10.15
  • Zips: A Zip Code Audience leverages the national postal code system to target a specific geographical area. This Audience has a limit of 100,000 Zips per list. Enter the Zip Code followed by a comma and the Country Code with each entry on an individual line. If the country code is not entered, it will default to US.
    • Line Format: [Zip Code],[Country Code]
    • Line Example: 03102,US
    • Note that if the country code is omitted the US is used by default.
  • IFA: The IFA is a device ID sanctioned for advertiser use, these can be found in Pontiac log files from previous campaigns. Enter each IFA on a new line.
    • Line Format: [Device IFA]
    • Line Example: 735612e1-d4b9-40ec-83da-9ea0d3c5ceb3
  • Hashed IPs: Enter the hashed IPs from log files, IP conversion pixel reports, or other custom reports downloaded from Pontiac to create an audience for targeting on bidder campaigns. Target converted IPs (IP Path to Conversion report), IPs that saw ads from previous campaigns (Log Level Report), or IPs that have visited a site where an IP pixel is placed (IP Pixel Page Visits Report). Note: these must be IPs that were hashed by Pontiac.
    • Line Format: [IP Hash]
    • Line Example: 225f334d5db5e4c824d49cd7b03fc73ae21d1c715573a7c1a86abb7a11a80364
  • Full URL: A Full URL Audience allows for targeting site lists that contain the full URL pathway to place ads on specific articles. These can be used for OLV campaigns serving on web inventory. Enter the Full URL in the text box, will each entry on a new line. The URL should not include the scheme.
    • Line format: [Full URL]
    • Example: www.viki.com/videos/1153464v
    • Note that the URL should not include the scheme.

Enter the Audience data according to the indicated format. These Audiences will automatically be available to associate to any Campaign. To learn how to associate Custom Audience Segments to a Campaign, continue to the following documentation: Campaign Audiences

Onboarded Audiences

Custom CRM Audiences

In partnership with TransUnion, Pontiac customers can create custom data segments from their existing CRM data. Using any of the data points listed below, create a targetable audience for CTV and OLV campaigns using TransUnion’s identity graph.

  • Email Addresses
  • Name & Postal Address
  • Phone Number

Reach out through the Help Center for more information.

Third Party Audiences

The Pontiac platform is directly integrated with TransUnion to provide demographic and interest data that is compatible with any media or campaign type. The TruAudience Data Marketplace library contains over 55,000 audiences ranging from demographics to auto intenders, lifestyle groups, purchase behavior, political party affiliation and more. With the precision tuned and deterministically grounded view of identity covering people, households and devices, the TruAudience Data Marketplace delivers scale across 80 million plus US households to optimize advertising and maximize streaming media campaign performance. For more information on available audiences and assistance activating with TransUnion on your campaigns, reach out through the Help Center.

Audience fees will be applied as a CPM on the line item that is included in ‘Total Cost’. If multiple audiences are targeted or anti-targeted, the line will only include the CPM of the highest priced segment.

Overview

On the Seat Level, navigate to the ‘Templates’ Tab to see, Edit, and Clone all Campaign and Line Templates. Templates are extremely useful to ensure you can quickly launch Campaigns and Lines with consistent settings, saving time and maintaining best practices.

Refer to the following documentation for more details on these processes, which are managed on different levels of the platform, not the Seat Level:

  • Create Campaign from Template
  • Create a New Campaign Template
  • Create Line from Template
  • Create a New Line Template

Campaign Templates

Create a Campaign Template

How to Save a Campaign as a Template:

  1. Navigate to the Campaign page of the Campaign you want to use as a Template or create a new Campaign.
  2. Click the ‘Save as Template’ button located at the top right corner.
  3. Enter a Name, Description, and Icon for the Campaign Template.
  4. Click ‘Save’ to save the Campaign as a template.

You can now use this template later to create a new Campaign with the same structure. This will help save time, reduce mistakes, and ensure consistency in Campaign setup. Manage all Campaign and Line Templates on the Seat Level in the Templates tab. For more details, refer to the Create Campaign from Template documentation.

Edit a Campaign Template

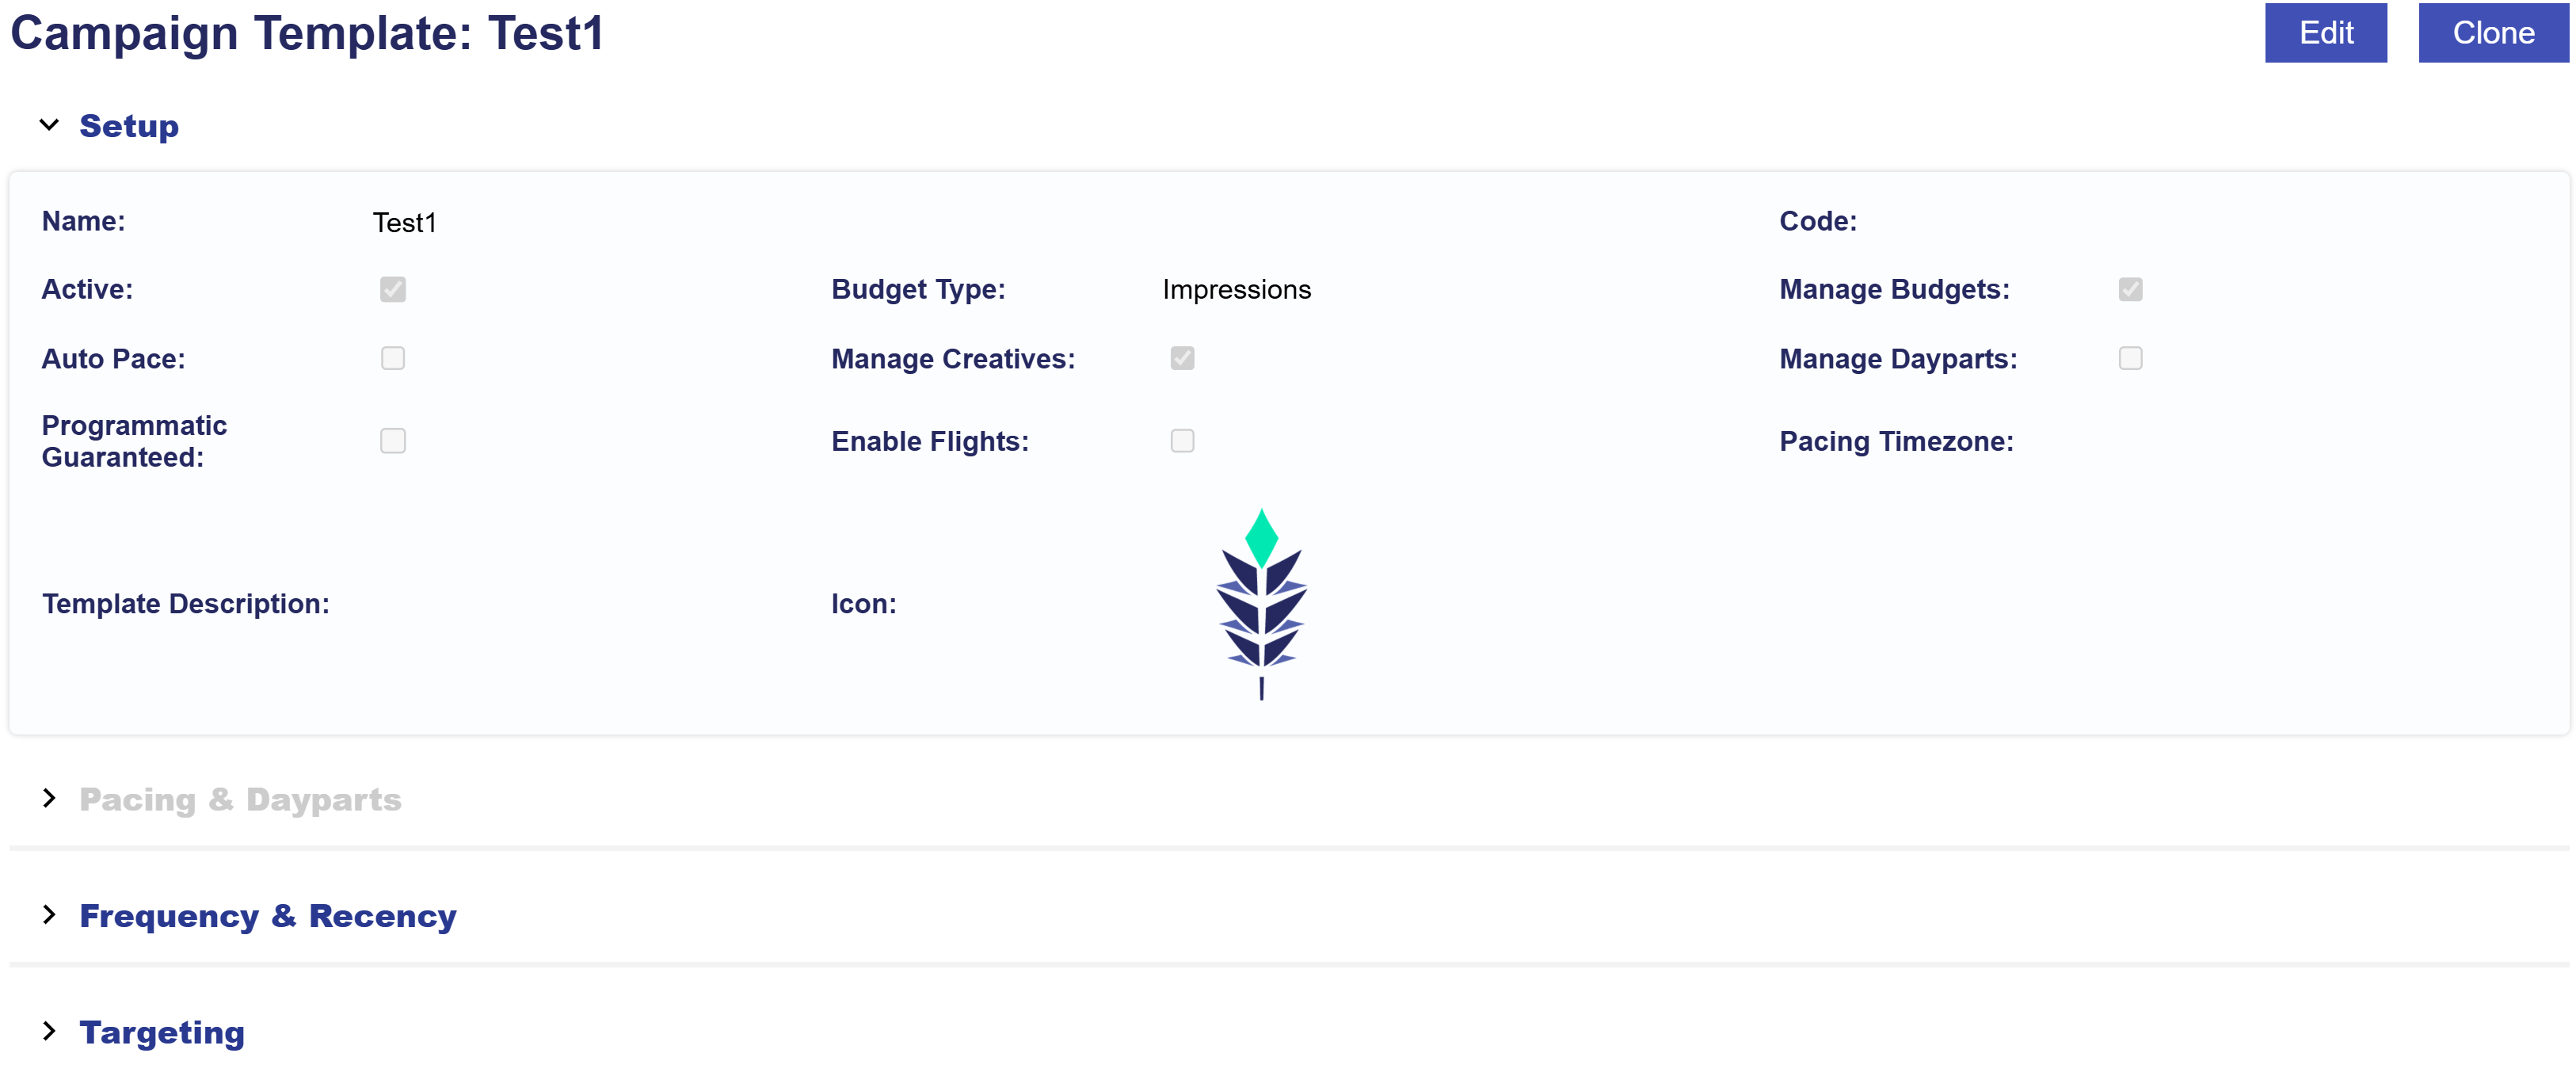
To edit a Campaign Template, navigate to the ‘Templates’ tab and expand the Campaign Templates dropdown section. Click on the name of the Campaign Template you wish to edit, and then click the ‘Edit’ button located in the top right corner. This will allow you to make the below changes to the selected Campaign Template.

Setup Section

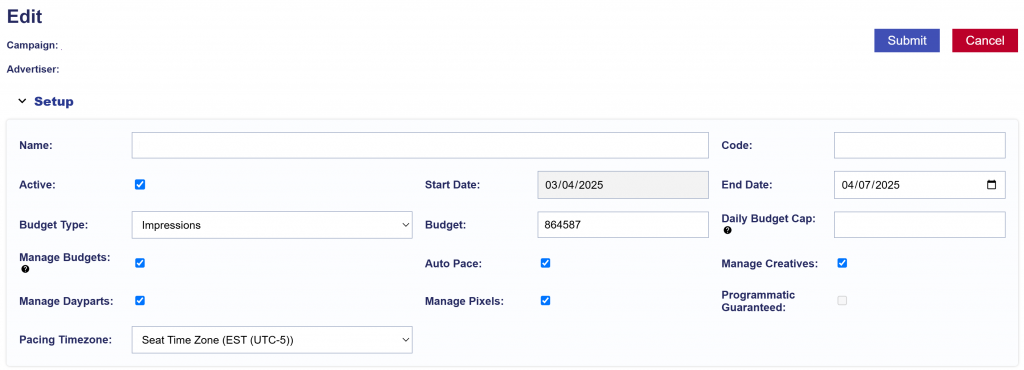
In the Setup section, edit the following fields:

  • Name: Enter a unique name for your new Campaign Template to identify it easily.
  • Code: Optional and for reporting purposes.
  • Budget Type: Spend or Impressions
  • Active Status: The ‘Active’ box is automatically checked, but uncheck it if you want to create an Inactive Campaign.
  • Manage Budgets: This box is automatically checked. When selected, all Lines under this Campaign will be modified to match the Start Date, End Date, and Budget Type of the Campaign. Budgets must be allocated below by percentage. Uncheck if you do not want to modify the Lines’ budgets.
  • Auto Pace: Select this option if you want the system to automatically pace your Campaign.
  • Manage Creatives: Select this option to associate creatives with the Campaign.
  • Manage Dayparts: This option allows you to manage pacing and dayparts at the Campaign Level.
  • Programmatic Guaranteed: Enabling this will erase any targeting or settings previously configured. Targeting for Programmatic Guaranteed Campaigns must be configured by the publisher on the deal. The budget and flight date fields on the Campaign and associated Line Items are for monitoring and pacing purposes only; the publisher controls flight and delivery.
  • Enable Flights: This option allows you to add flight dates for the Campaign. You can input a start date, end date, budget, and define whether rollover budgets will be used. If rollover is selected, you can define the rollover type: either ‘even’ or ‘next flight’.
  • Pacing Timezone: Select the desired seat time zone for pacing purposes.
  • Template Description: A brief explanation that helps you and other users understand the purpose of the Template.
  • Icon: An image that makes the template easily identifiable, helping users quickly recognize it.

Targeting Section

To edit the Targeting section of a Campaign, follow these steps:

  1. Navigate to the Targeting section within the Campaign Template.
  2. Click ‘Edit Targeting’ to modify targeting settings.
  3. Make the necessary changes to the targeting settings. Refer to the documentation page to review available targeting options: Campaign Targeting
  4. Click ‘Save’ in the bottom right corner of the popup window to apply all changes. To discard changes and revert to the previous settings, click ‘Cancel’.
  5. If you have finished editing the Template, close the window and click the ‘Submit’ button in the top right corner of the page to save and apply all changes. If you do not want to apply the edits, press ‘Cancel’ to discard changes and revert the Campaign Template to its previous settings. To continue making edits, proceed to the other sections.

Lines Section

In the Lines section of the Campaign Template, decide which Lines should be included by checking or unchecking the corresponding Line boxes. This allows you to customize which Lines are part of the Campaign Template based on your specific needs.

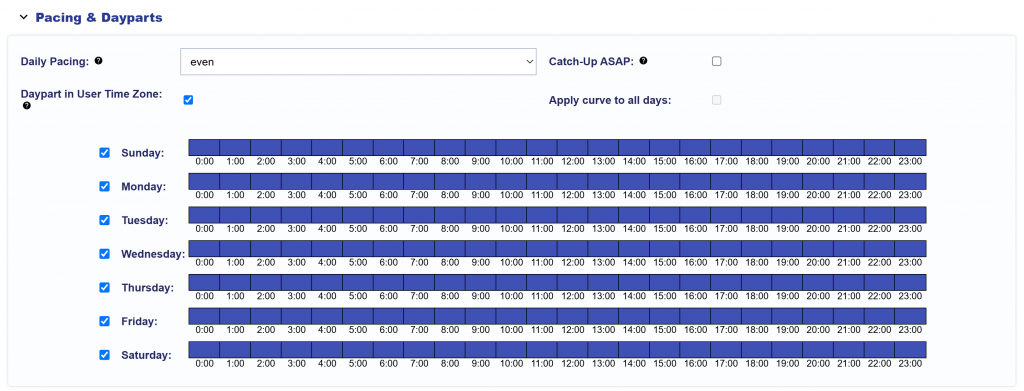
Pacing & Dayparts Section

If ‘Mange Dayparts’ is enabled on the Campaign Template Setup section and you want to edit the Pacing & Dayparts section of the Campaign Template, follow these steps:

  1. Navigate to the Pacing & Dayparts section within the Campaign Template.
  2. Make the necessary changes to the Pacing & Dayparts settings. Refer to the documentation page to review available Pacing & Dayparts options: Campaign Pacing & Dayparts
  3. If you have finished editing the Template, click the ‘Submit’ button in the top right corner of the page to save and apply all changes. If you do not want to apply the edits, press ‘Cancel’ to discard changes and revert the Campaign to its previous settings. To continue making edits, proceed to other sections.

Frequency & Recency Section

If the ‘Enable Campaign Frequency’ feature is checked in the Campaign Template Setup section and you want to edit the Frequency & Recency section of the Campaign Template, follow these steps:

  1. Navigate to the Frequency & Recency section within the Campaign Template.
  2. Make the necessary changes to the Frequency & Recency settings. Refer to the documentation page to review available Frequency & Recency options: Campaign Frequency & Recency
  3. If you have finished editing the Template, close the window and click the ‘Submit’ button in the top right corner of the page to save and apply all changes. If you do not want to apply the edits, press ‘Cancel’ to discard changes and revert the Campaign to its previous settings. To continue making edits, proceed to other sections.

Clone a Campaign Template

To Clone a Campaign Template, follow these steps:

  1. Navigate to the Campaign Template that you want to Clone.
  2. Click the ‘Clone’ button located at the top right corner of the page.
  3. Enter a New Name for the cloned Campaign Template.
  4. Adjust the Campaign Template settings as needed to match specific needs. See the Edit a Campaign Template documentation for guidance.
  5. Click ‘Submit’ to finalize and create the cloned Campaign Template.

The Campaign is now ready to be used when creating a new Campaign. Refer to the following documentation for more details on this process: Create Campaign from Template

Line Templates

Coming soon

Create a Line Template

How to Save a Line as a Template:

  1. Navigate to the Line page of the Line you want to use as a Template or create a new Line.
  2. Click the ‘Save as Template’ button located at the top right corner.
  3. Enter a Name, Description, and Icon for the Line Template.
  4. Click ‘Save’ to save the Line as a template.

You can now use this template later to create a new Line with the same structure. This will help save time, reduce mistakes, and ensure consistency in Line setup. Manage all Campaign and Line Templates on the Seat Level in the Templates tab. For more details, refer to the Create Line from Template documentation.

Edit a Line Template

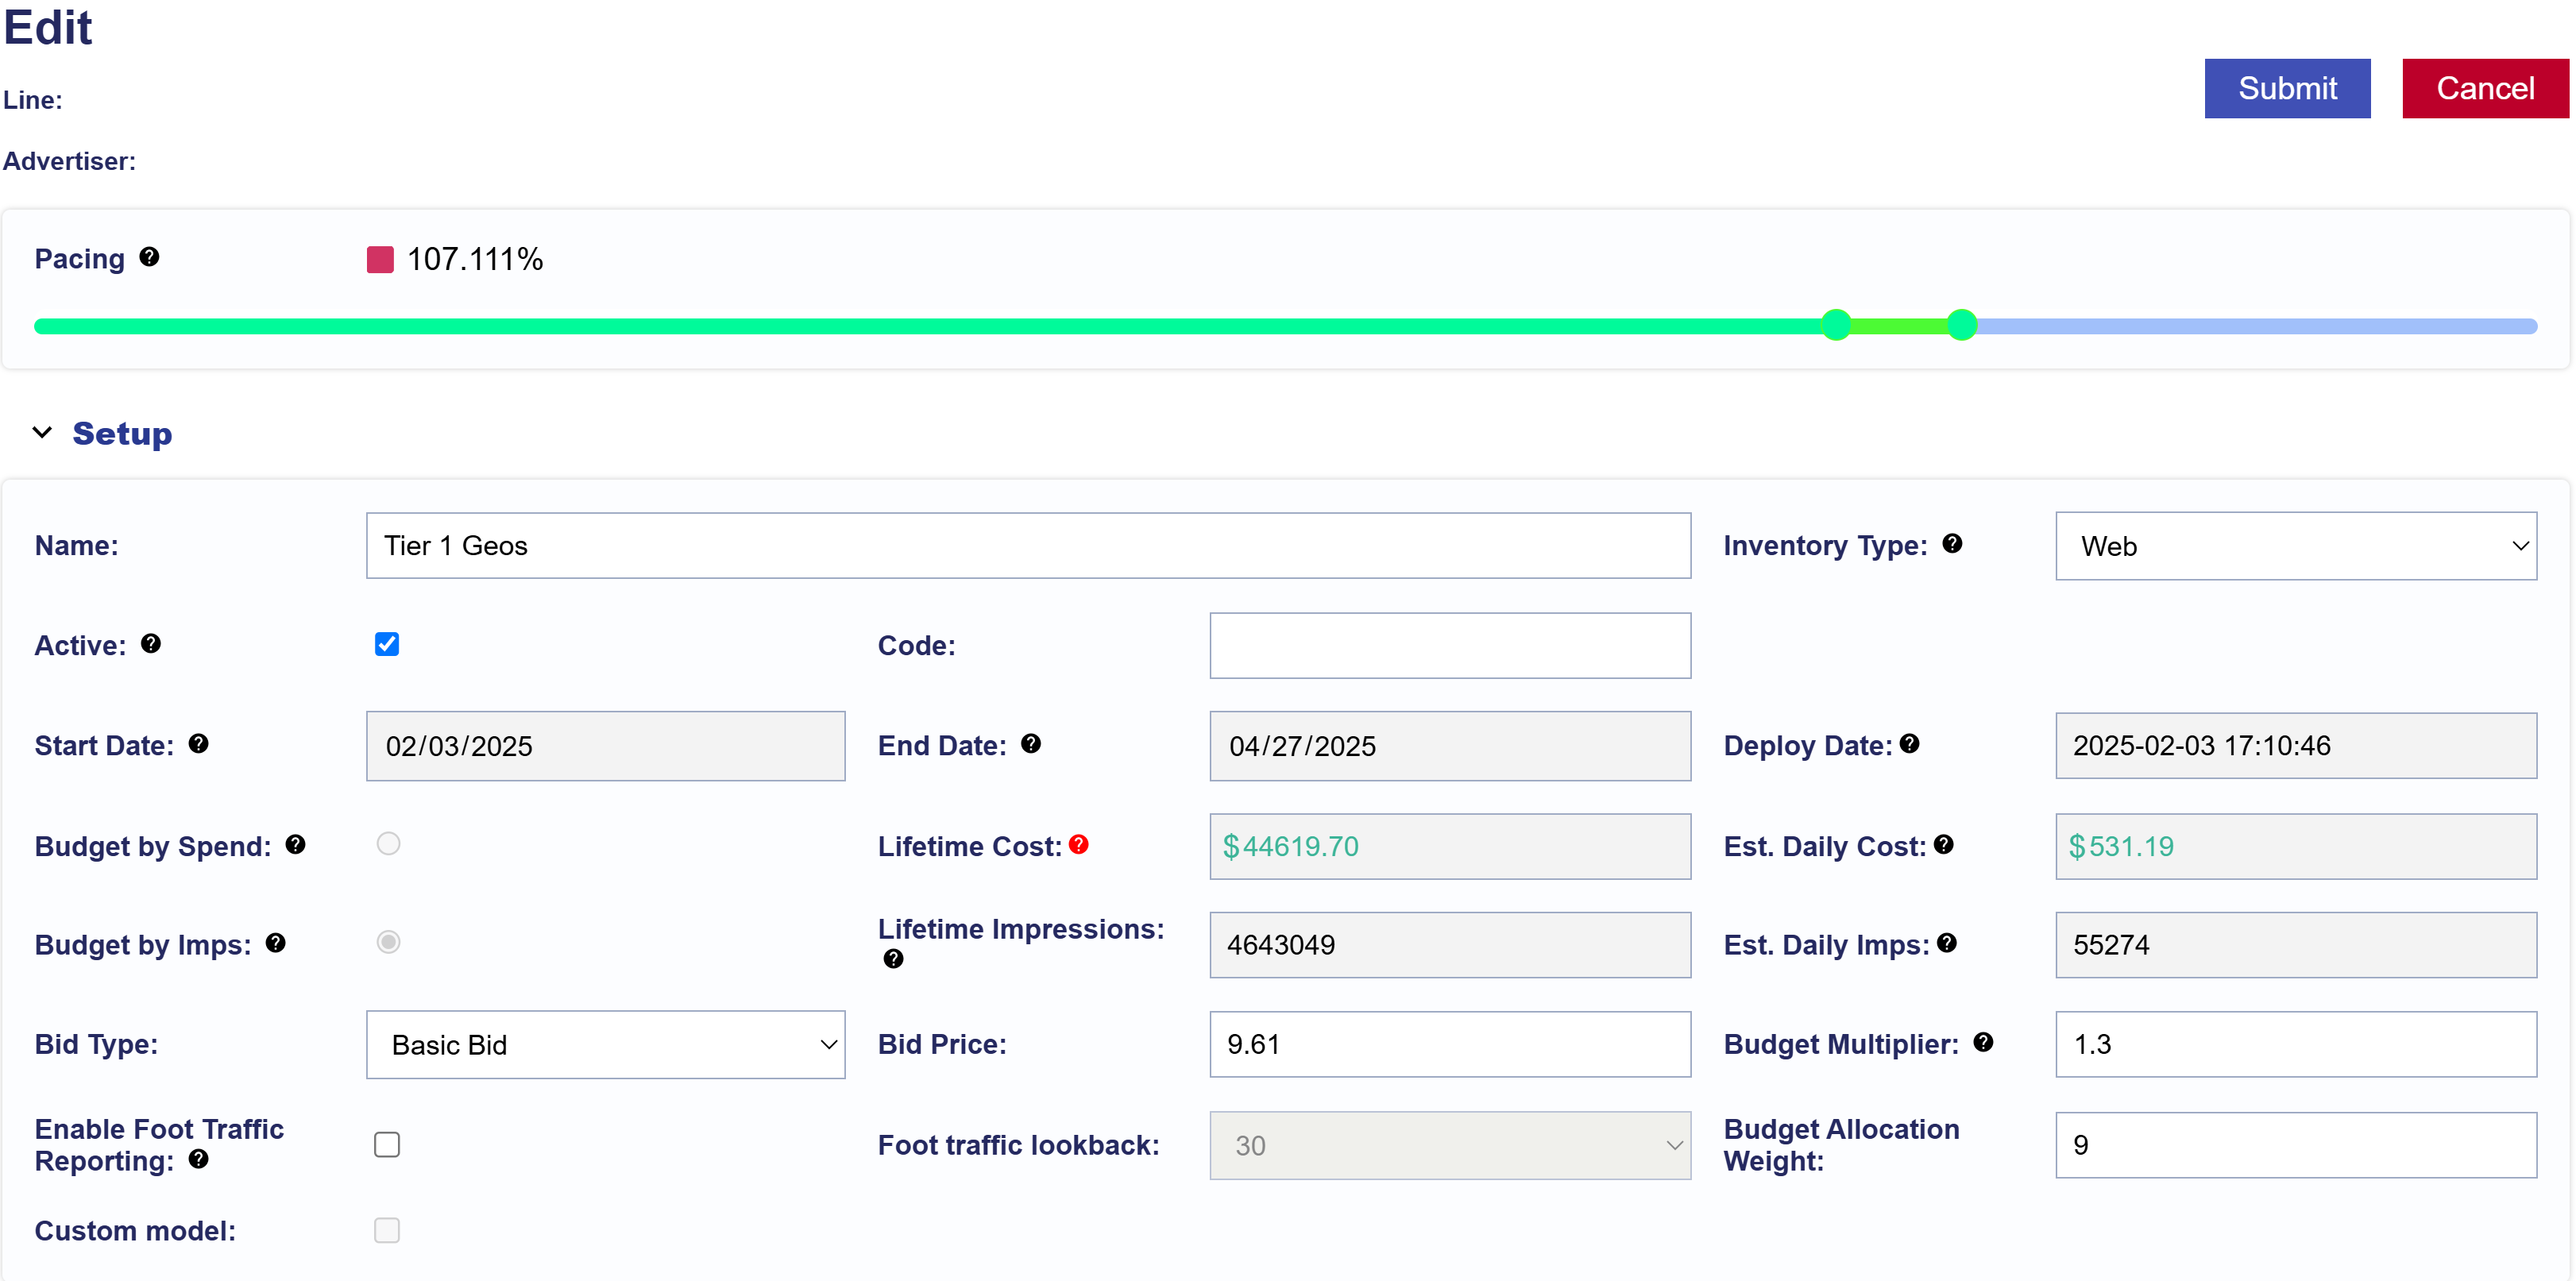
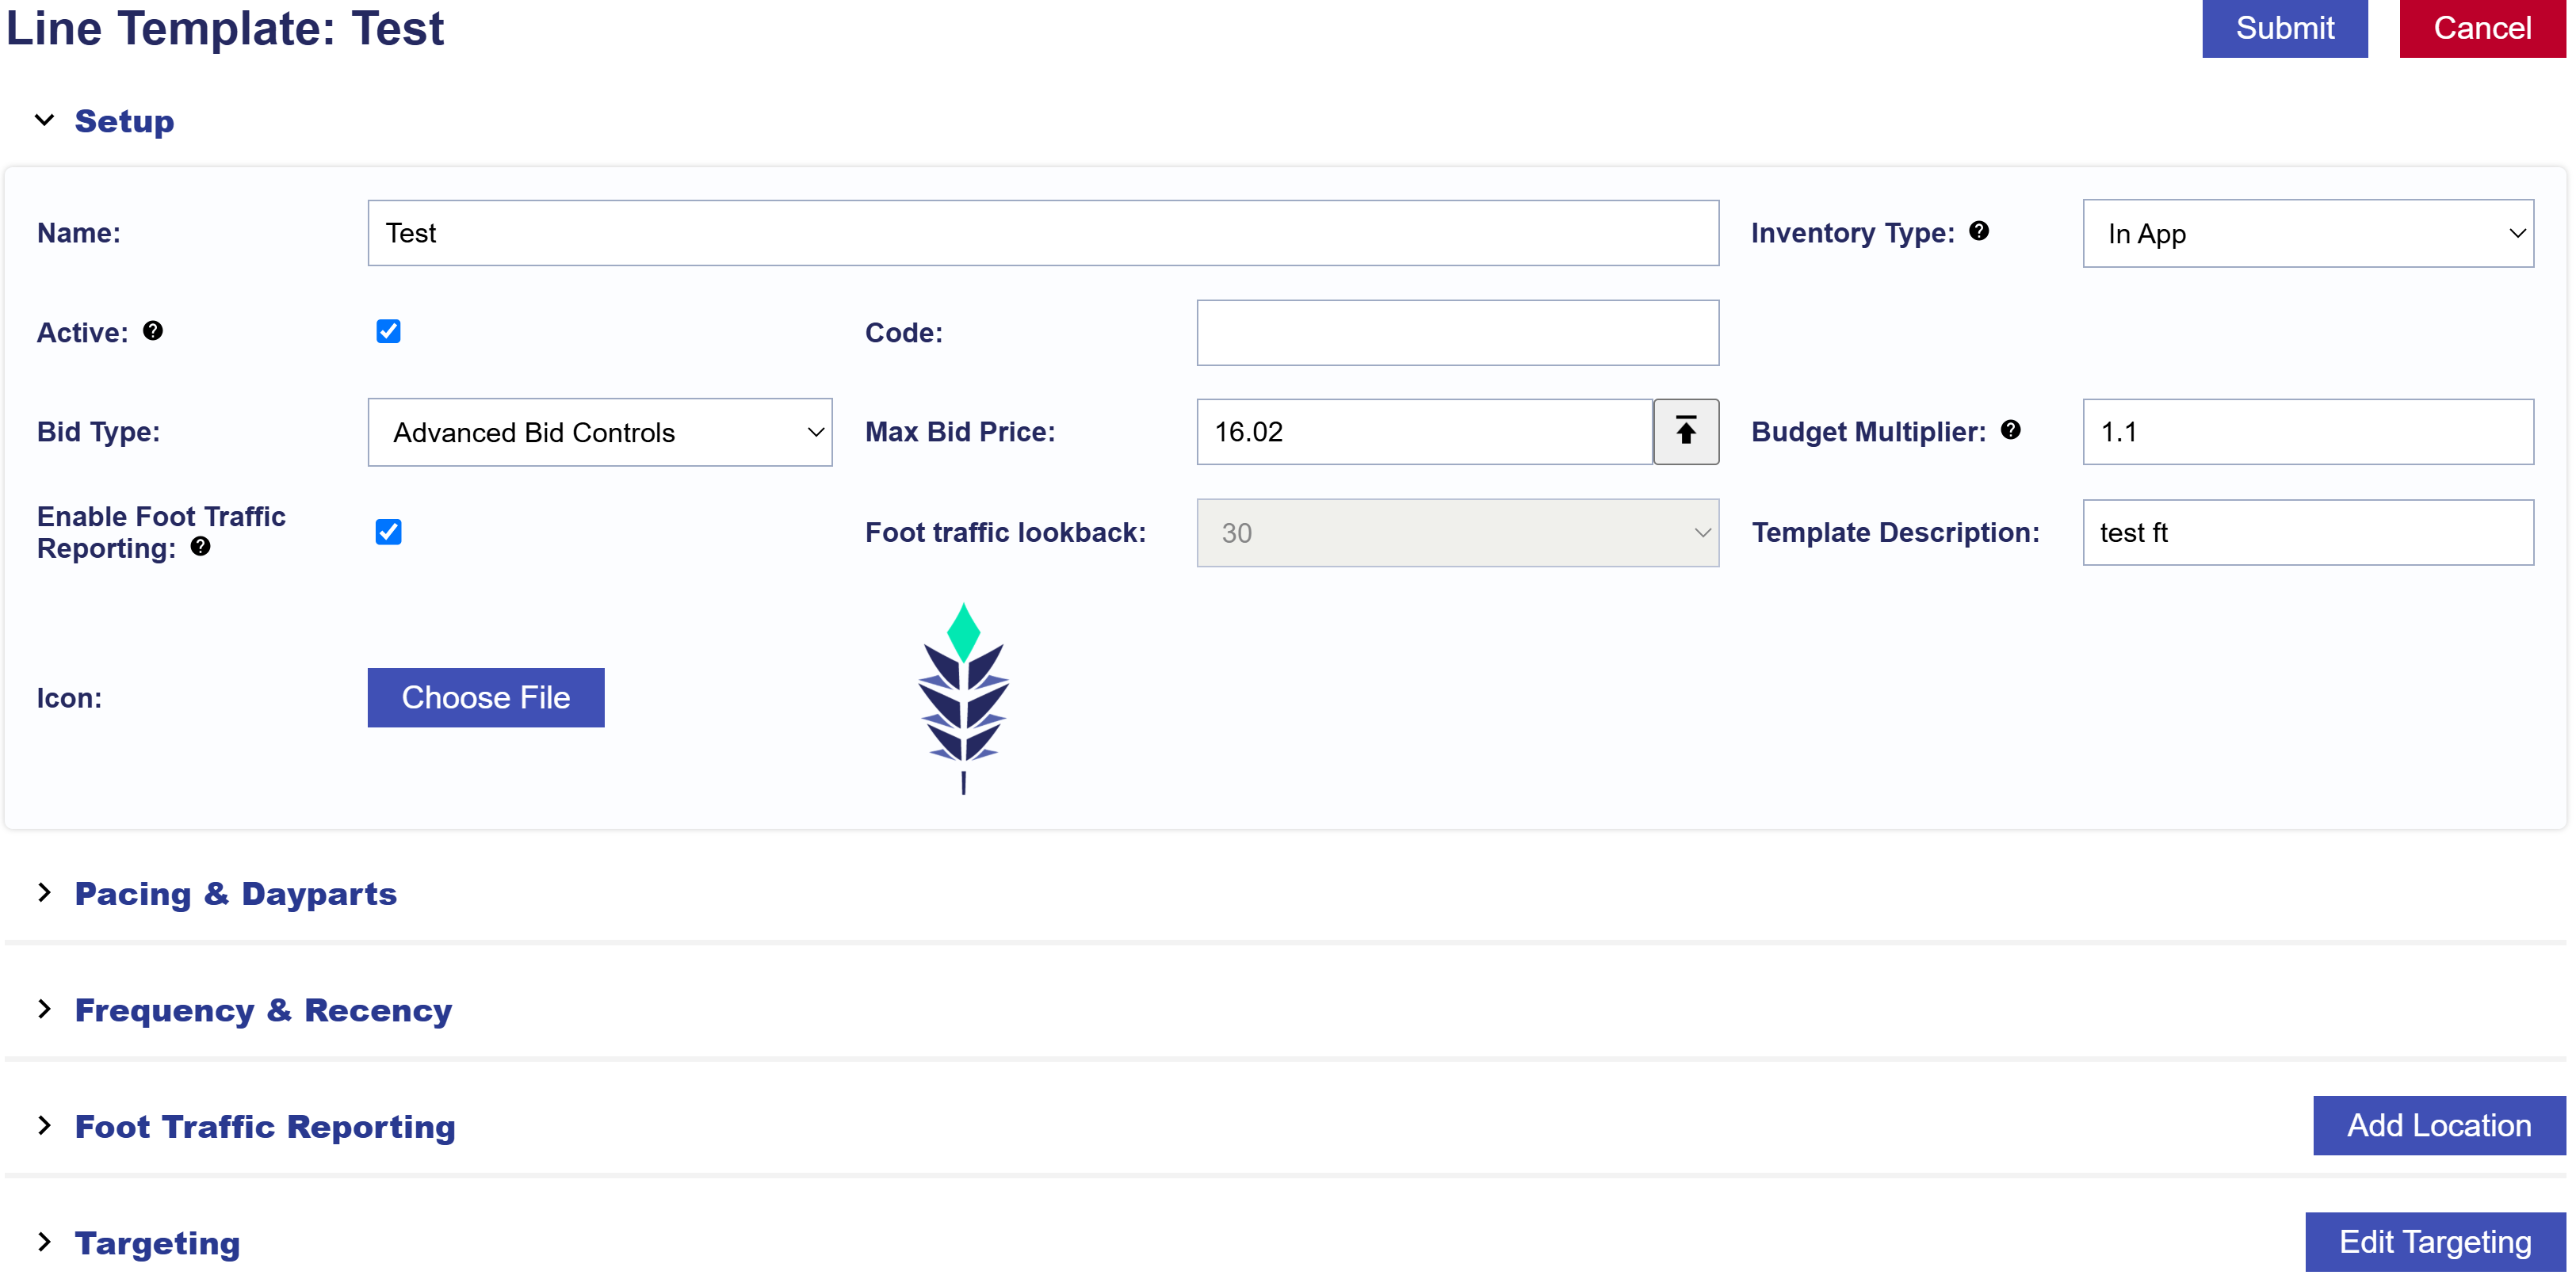
To edit a Line Template, navigate to the ‘Templates’ tab and expand the Line Templates dropdown section. Click on the name of the Line Template you wish to edit, and then click the ‘Edit’ button located in the top right corner. This will allow you to make the below changes to the selected Line Template.

Setup Section

In the Setup section, edit the following fields:

  • Name: Enter a unique name for your new Line Template to identify it easily.
  • Inventory Type: Web, In App, Combined
  • Active Status: Check the ‘Active’ box if you want the Line to be live, but uncheck it if you want to create an Inactive Line or to pause the Line.
  • Code: Optional and for reporting purposes.
  • Bid Type:
    • Basic Bid: Standard bid price applied across all inventory of the Line.
    • Bid at Floor Price: The maximum bid price and CPM floor allowed for an auction.
    • Advanced Bid Controls: A feature that allows setting a maximum bid price for Deals, giving more control over bid adjustments and spending limits.
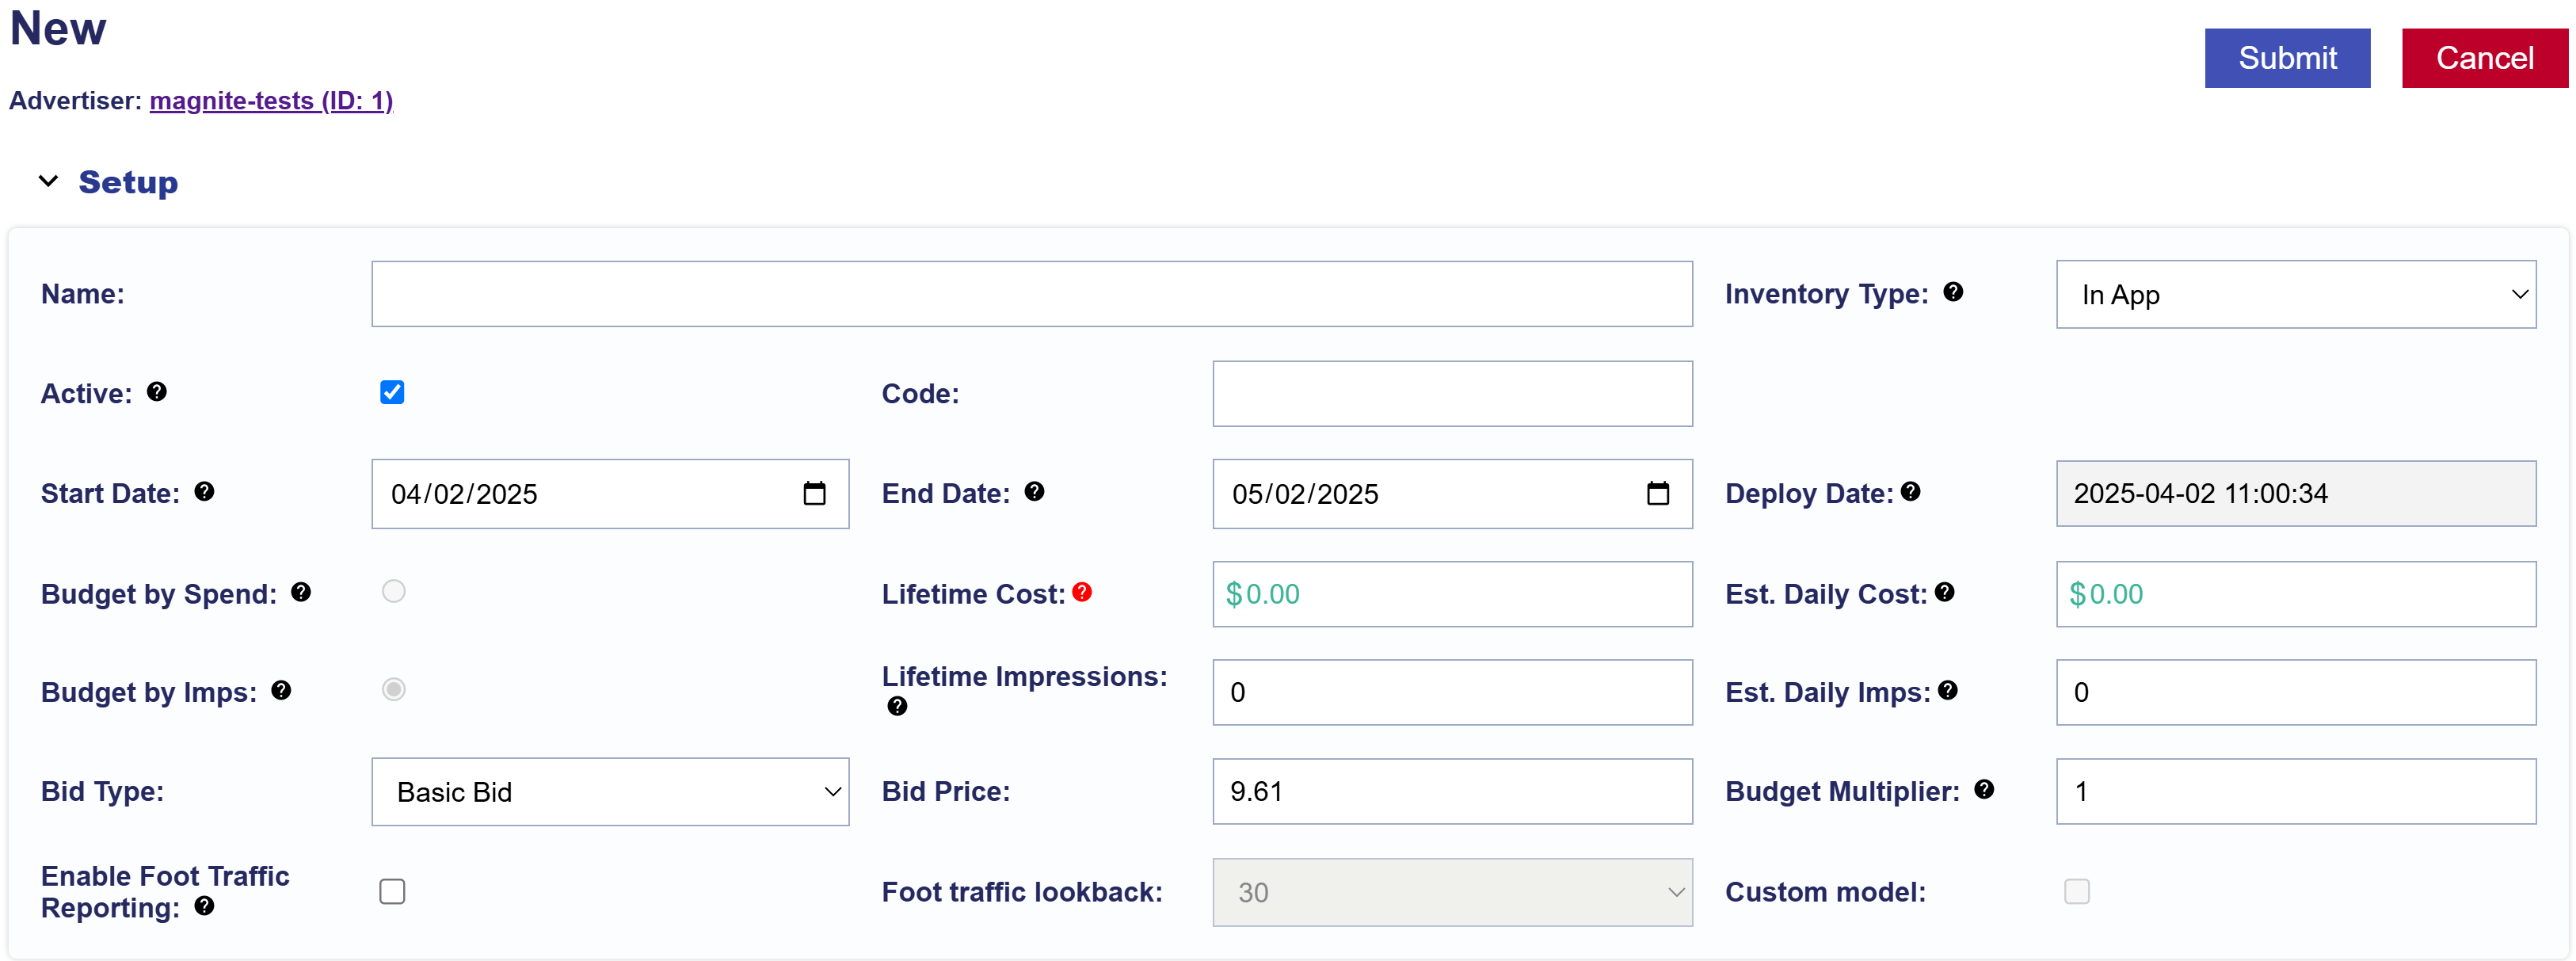
  • Bid Price: The bid price determines how much you are willing to spend based on the selected bid type. For Advanced Bid Controls, set a Default Bid Price and custom bid prices. Deals must be associated at the Campaign and Line level to allow for custom bid prices. When new Deals are added to the Line if a custom bid is not set, the bid price will default to the value set in the Default Bid Price field on the Line.
  • Budget Multiplier: This feature allows the user to specify a multiplier on the daily budget. For example, setting a 1.1 multiplier will allow the Line to adjust the daily budget up to 110% of its typical daily budget. The new daily spend is calculated as Budget Multiplier x Daily Budget = New Daily Spend. Keep in mind, the daily budget may adjust based on pacing, and the actual daily spend could exceed the set multiplier.
  • Enable Foot Traffic Reporting: Foot Traffic Reporting allows you to enter specific commercial addresses and track whether users that were served your Ads visited those locations.
  • Foot Traffic Lookback: Set the time window for tracking foot traffic data.
  • Template Description: A brief explanation that helps you and other users understand the purpose of the Template.
  • Icon: An image that makes the template easily identifiable, helping users quickly recognize it.

Pacing & Dayparts

If ‘Mange Dayparts’ is NOT enabled on the Campaign Template Setup section and you want to edit the Pacing & Dayparts section of the Line Template, follow these steps:

  1. Navigate to the Pacing & Dayparts section within the Line Template.
  2. Make the necessary changes to the Pacing & Dayparts settings. Refer to the documentation page to review available Pacing & Dayparts options: Line Pacing & Dayparts
  3. If you have finished editing the Template, click the ‘Submit’ button in the top right corner of the page to save and apply all changes. If you do not want to apply the edits, press ‘Cancel’ to discard changes and revert the Campaign to its previous settings. To continue making edits, proceed to other sections.

If ‘Manage Dayparts’ is enabled on the Campaign Template Setup section and you want to edit the Pacing & Dayparts section of the Line Template, follow these steps:

  1. Navigate to the Pacing & Dayparts section within the Campaign Template that the Line belongs to.
  2. Edit the Campaign Template and uncheck the ‘Manage Dayparts’ box to enable Line Level control.
  3. Once disabled, go to the Line Template and update the Pacing & Dayparts settings. Refer to the documentation page to review available Pacing & Dayparts options: Line Pacing & Dayparts
  4. If you have finished editing, click the ‘Submit’ button in the top right corner of the page to save and apply all changes. If you do not want to apply the edits, press ‘Cancel’ to discard changes and revert the Line to its previous settings. To continue making edits, proceed to another section.

Frequency & Recency

If the ‘Enable Line Frequency’ feature is checked in the Line Template Setup section and you want to edit the Frequency & Recency section of the Line Template, follow these steps:

  1. Navigate to the Frequency & Recency section within the Line Template.
  2. Make the necessary changes to the Frequency & Recency settings. Refer to the documentation page to review available Frequency & Recency options: Line Frequency & Recency
  3. If you have finished editing the Template, close the window and click the ‘Submit’ button in the top right corner of the page to save and apply all changes. If you do not want to apply the edits, press ‘Cancel’ to discard changes and revert the Campaign to its previous settings. To continue making edits, proceed to other sections.

Foot Traffic Reporting

If the ‘Enable Foot Traffic Reporting’ feature is checked in the Line Template Setup section and you want to edit the Locations of the Line Template, follow these steps:

  1. Navigate to the Foot Traffic Reporting section within the Line Template.
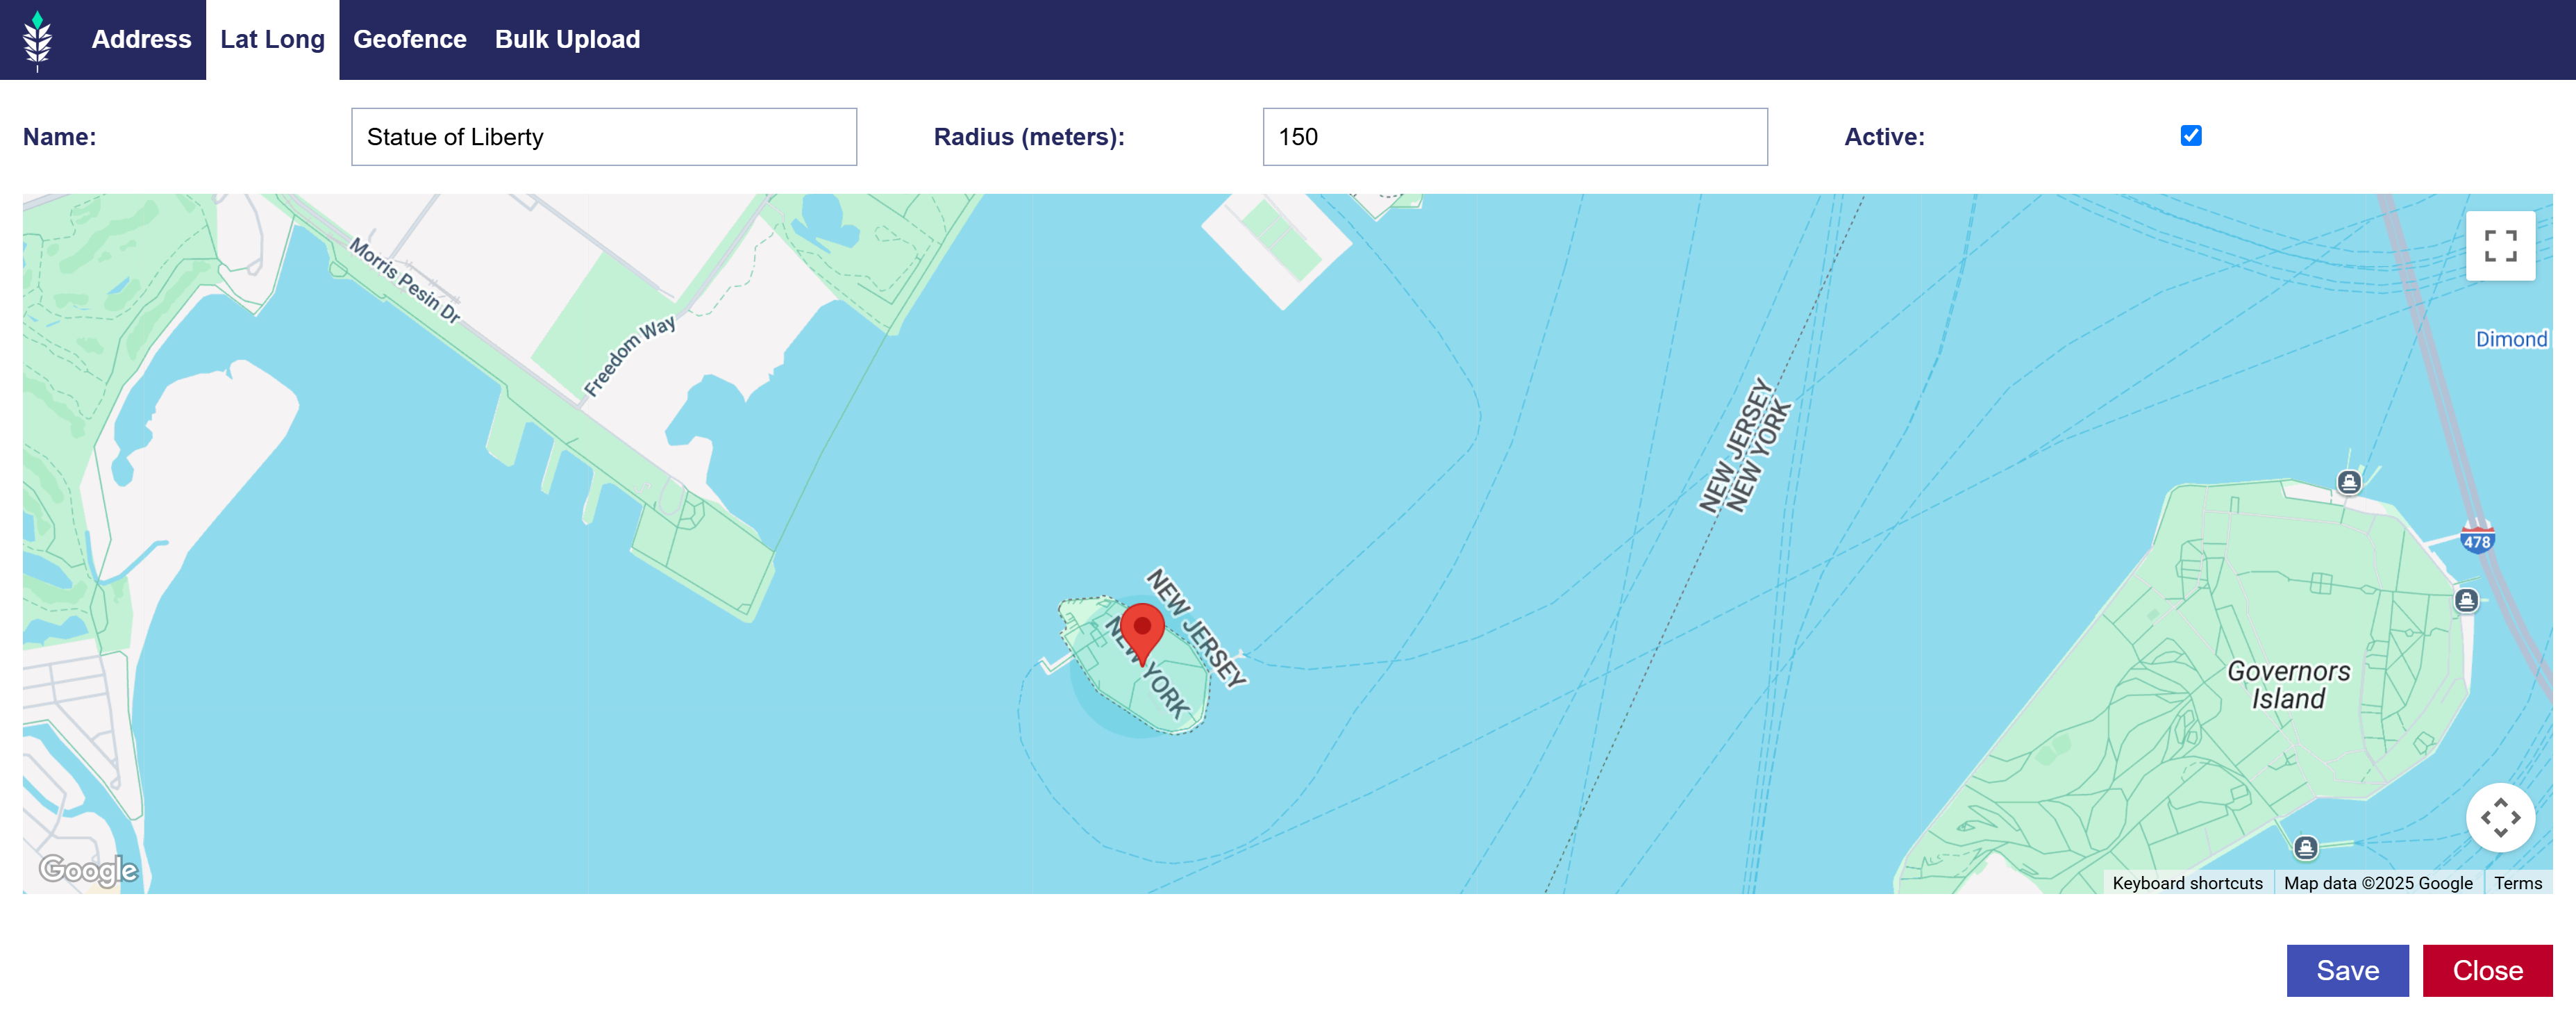
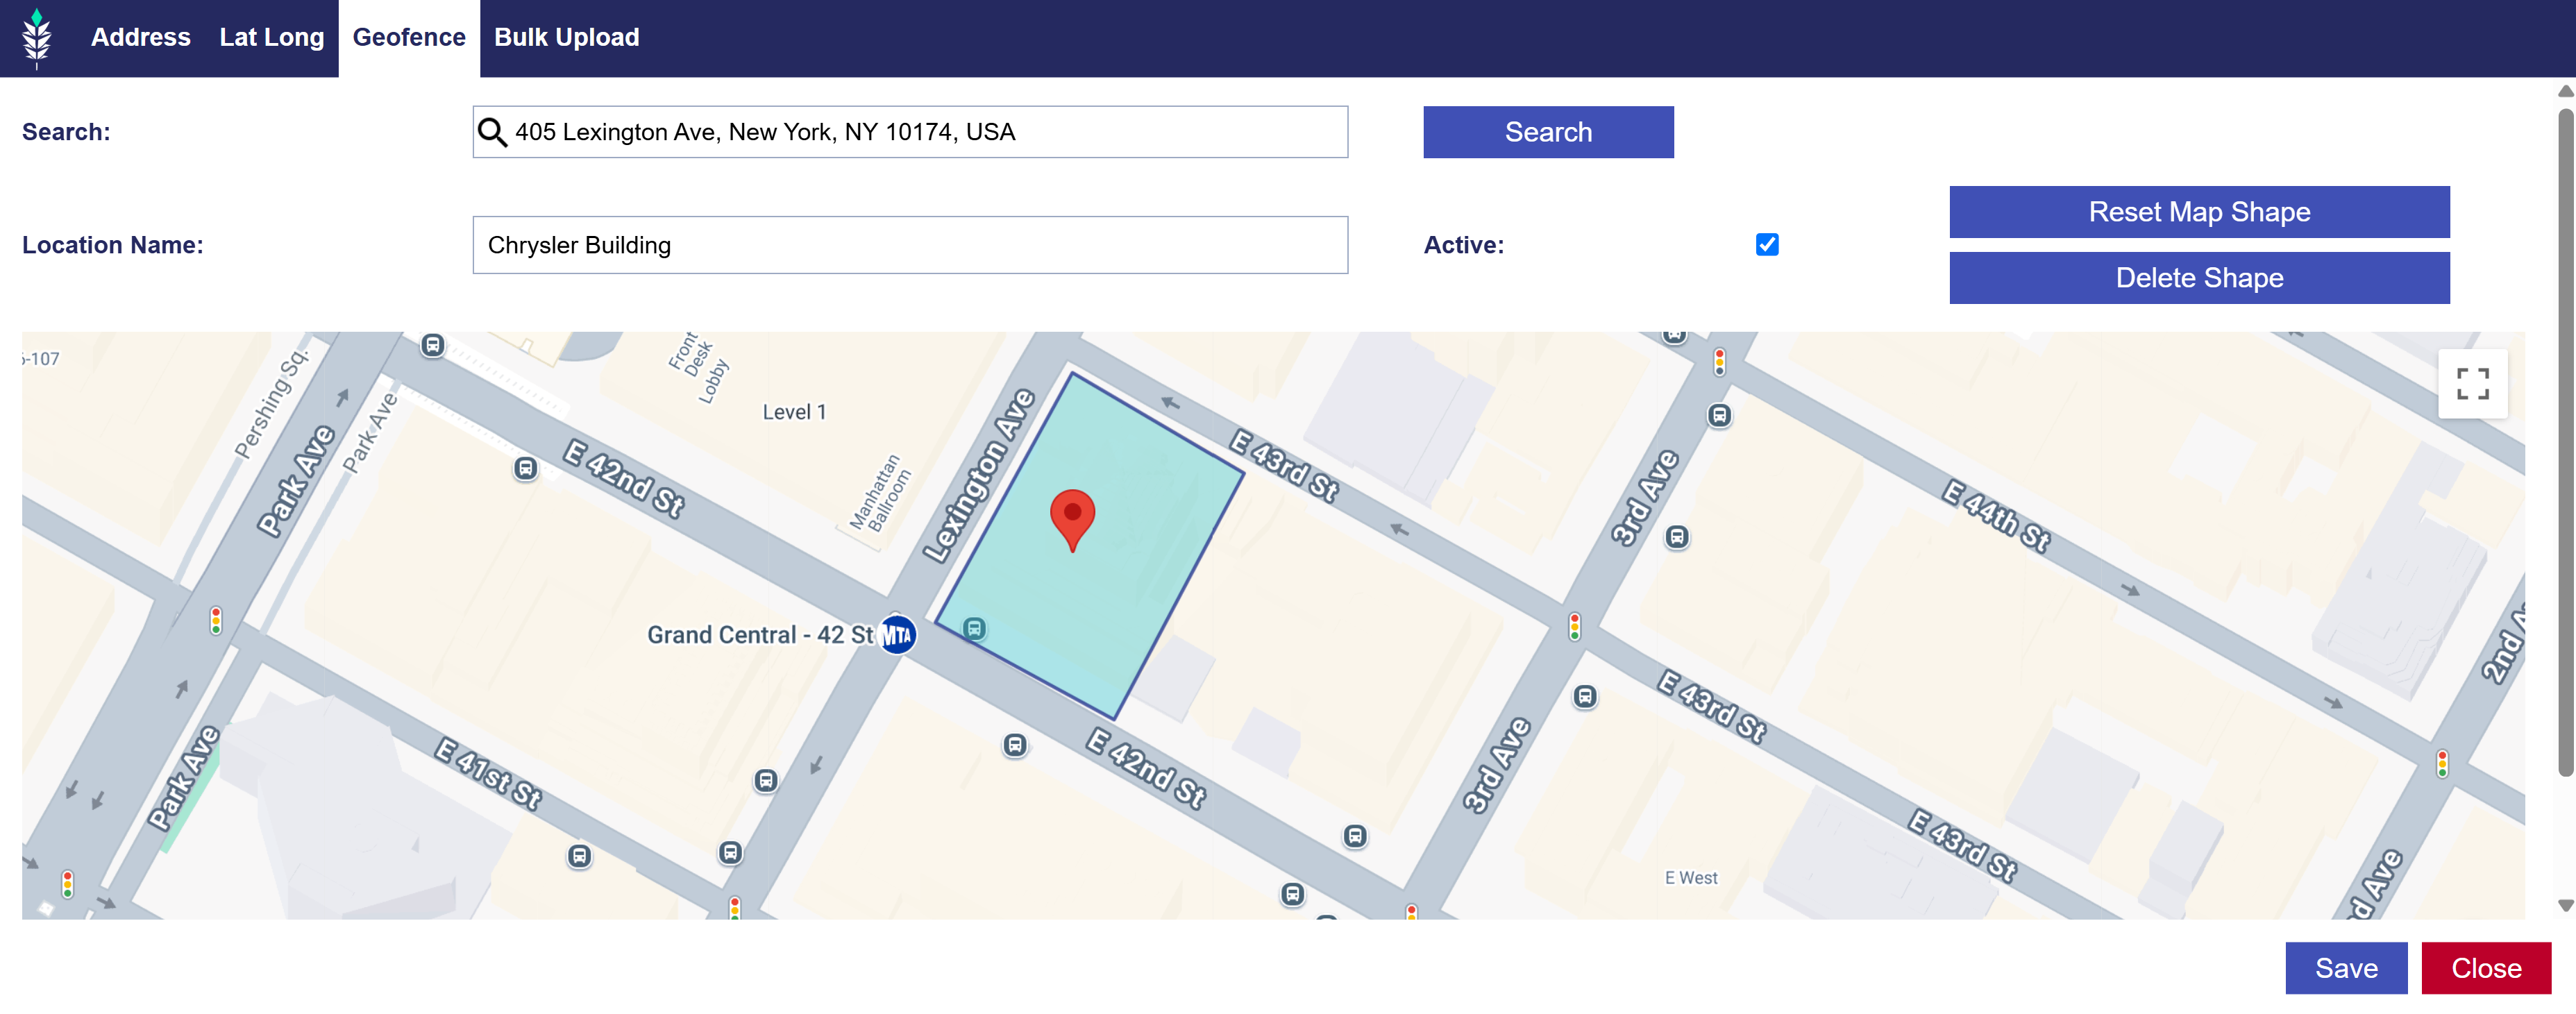
  2. Add or delete Locations using one of the below methods. Refer to the following documentation for instructions on setting up a new location using each method: Line Foot Traffic Reporting
    • Address
    • Latitude Longitude (Lat Long)
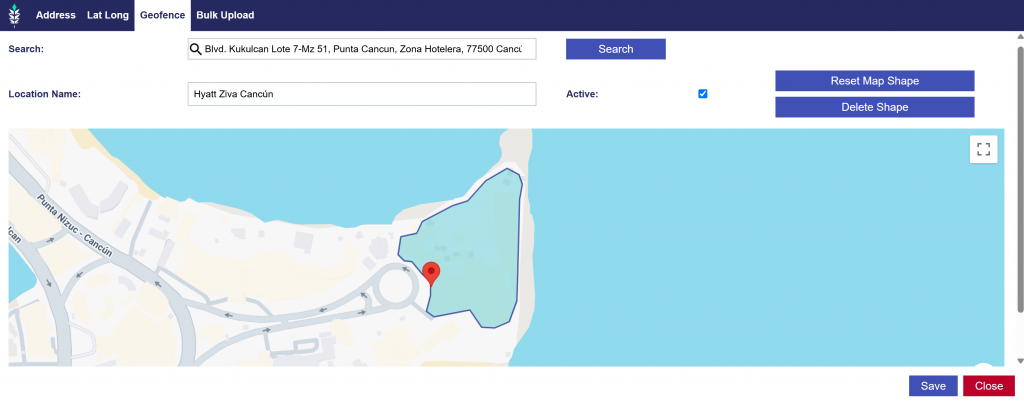
    • Geofence
    • Bulk Upload
  3. If you have finished editing the Template, close the window and click the ‘Submit’ button in the top right corner of the page to save and apply all changes. If you do not want to apply the edits, press ‘Cancel’ to discard changes and revert the Campaign to its previous settings. To continue making edits, proceed to other sections.

Targeting

To edit the Targeting section of a Line, follow these steps:

  1. Navigate to the Targeting section within the Line Template.
  2. Click ‘Edit Targeting’ to modify targeting settings.
  3. Make the necessary changes to the targeting settings. Refer to the documentation page to review available targeting options:  Line Targeting
  4. Click ‘Save’ in the bottom right corner of the popup window to apply all changes. To discard changes and revert to the previous settings, click ‘Cancel’.
  5. If you have finished editing the Template, close the window and click the ‘Submit’ button in the top right corner of the page to save and apply all changes. If you do not want to apply the edits, press ‘Cancel’ to discard changes and revert the Line Template to its previous settings. To continue making edits, proceed to the other sections.

Clone a Line Template

To Clone a Line Template, follow these steps:

  1. Navigate to the Line Template that you want to Clone.
  2. Click the ‘Clone’ button located at the top right corner of the page.
  3. Enter a New Name for the cloned Line Template.
  4. Adjust the Line Template settings as needed to match specific needs. See the Edit a Line Template documentation for guidance.
  5. Click ‘Submit’ to finalize and create the cloned Line Template.

The Line Template is now ready to be used when creating a new Line. Refer to the following documentation for more details on this process: Create Line from Template

Standard Reporting

Overview

In the Reporting tab of the CTV platform, create a Standard Report by selecting the Advertisers, Campaigns, and Lines you want to analyze. This report provides summarized data and charts to help evaluate performance and identify key insights. The sections include:

  • Summary
  • Inventory
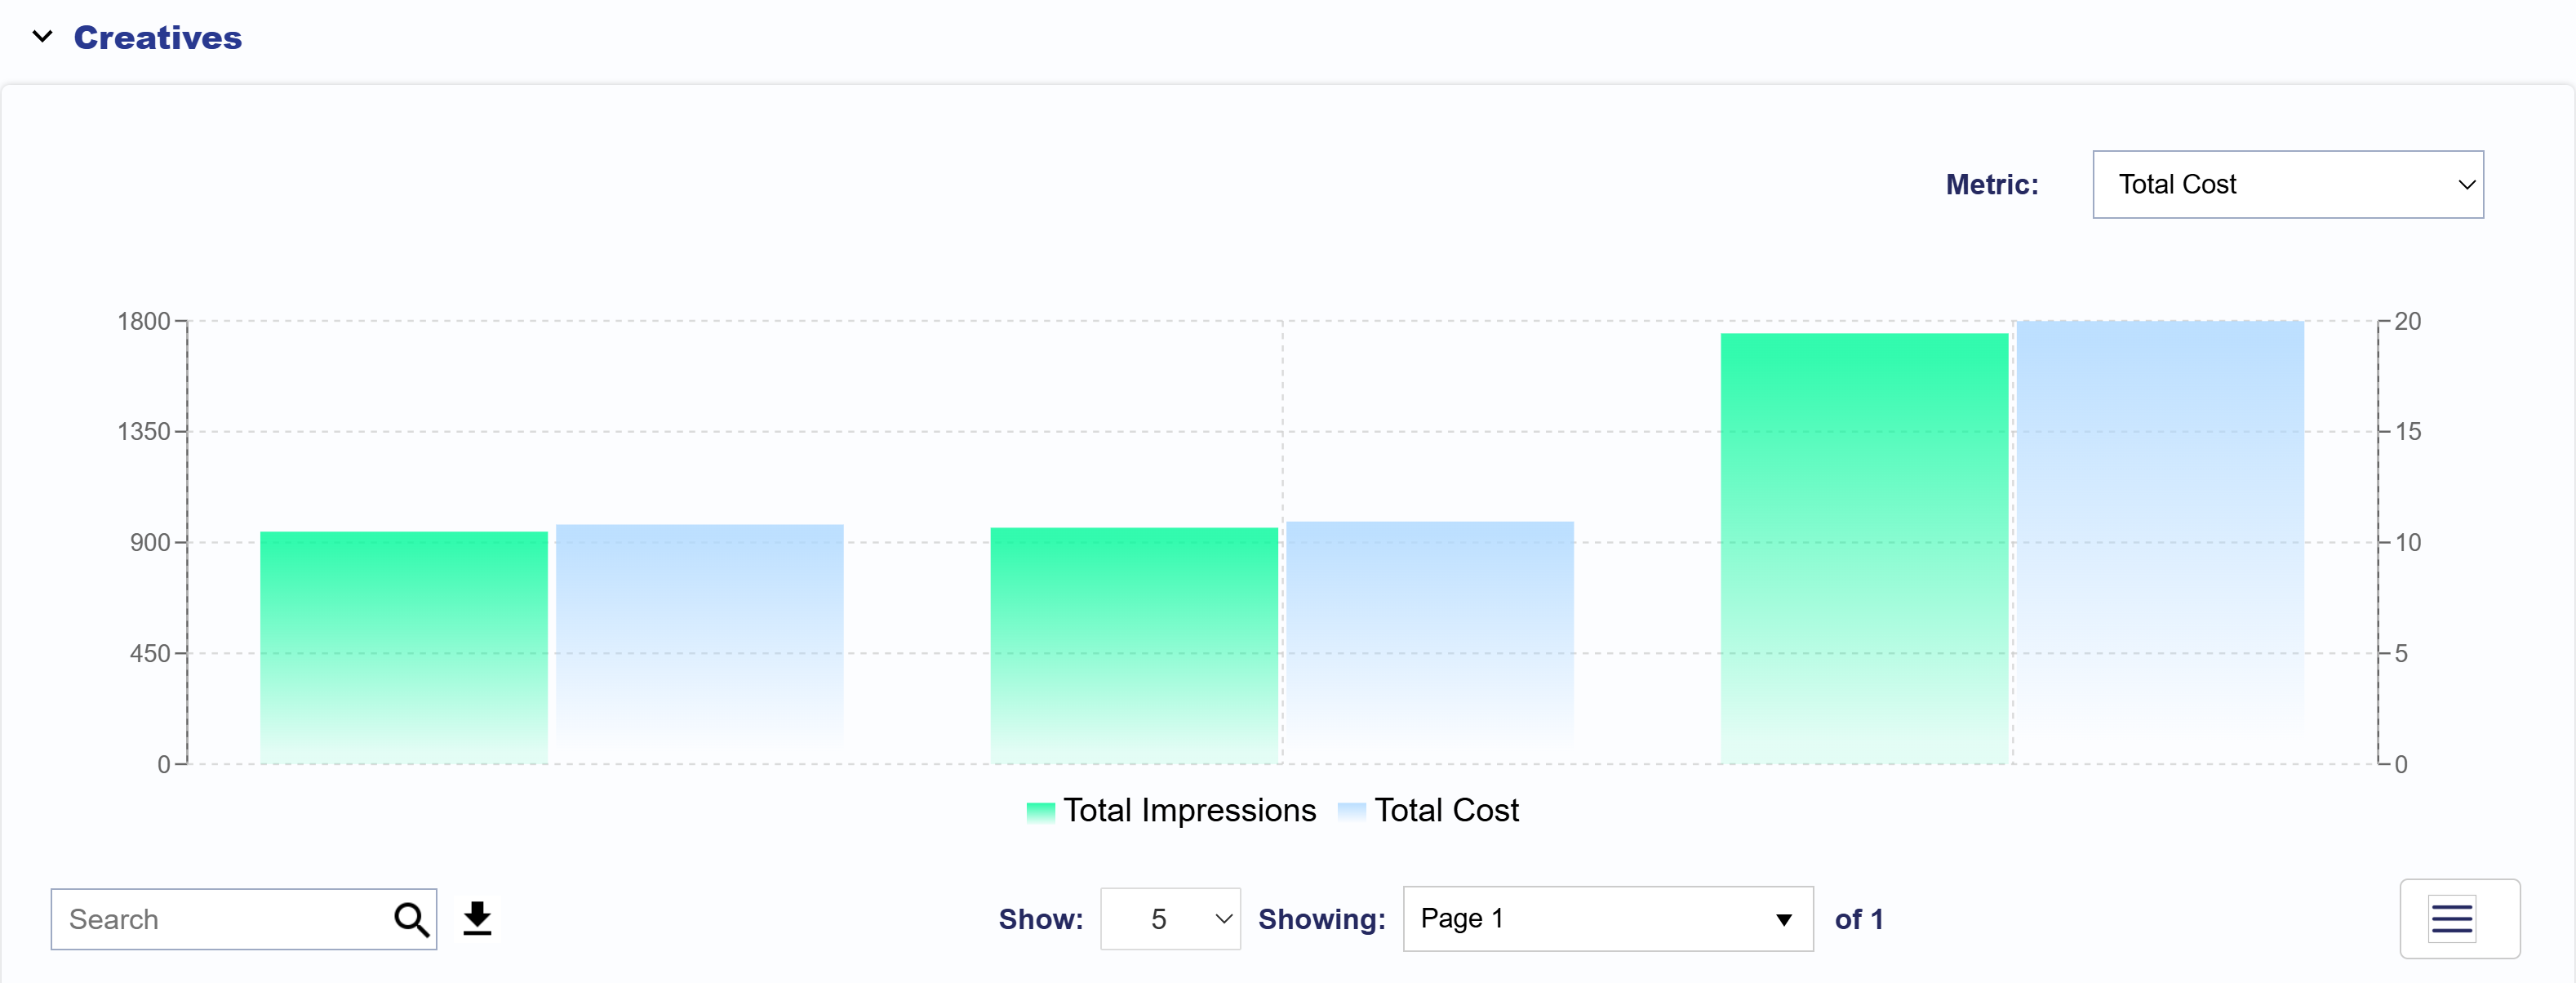
  • Creatives
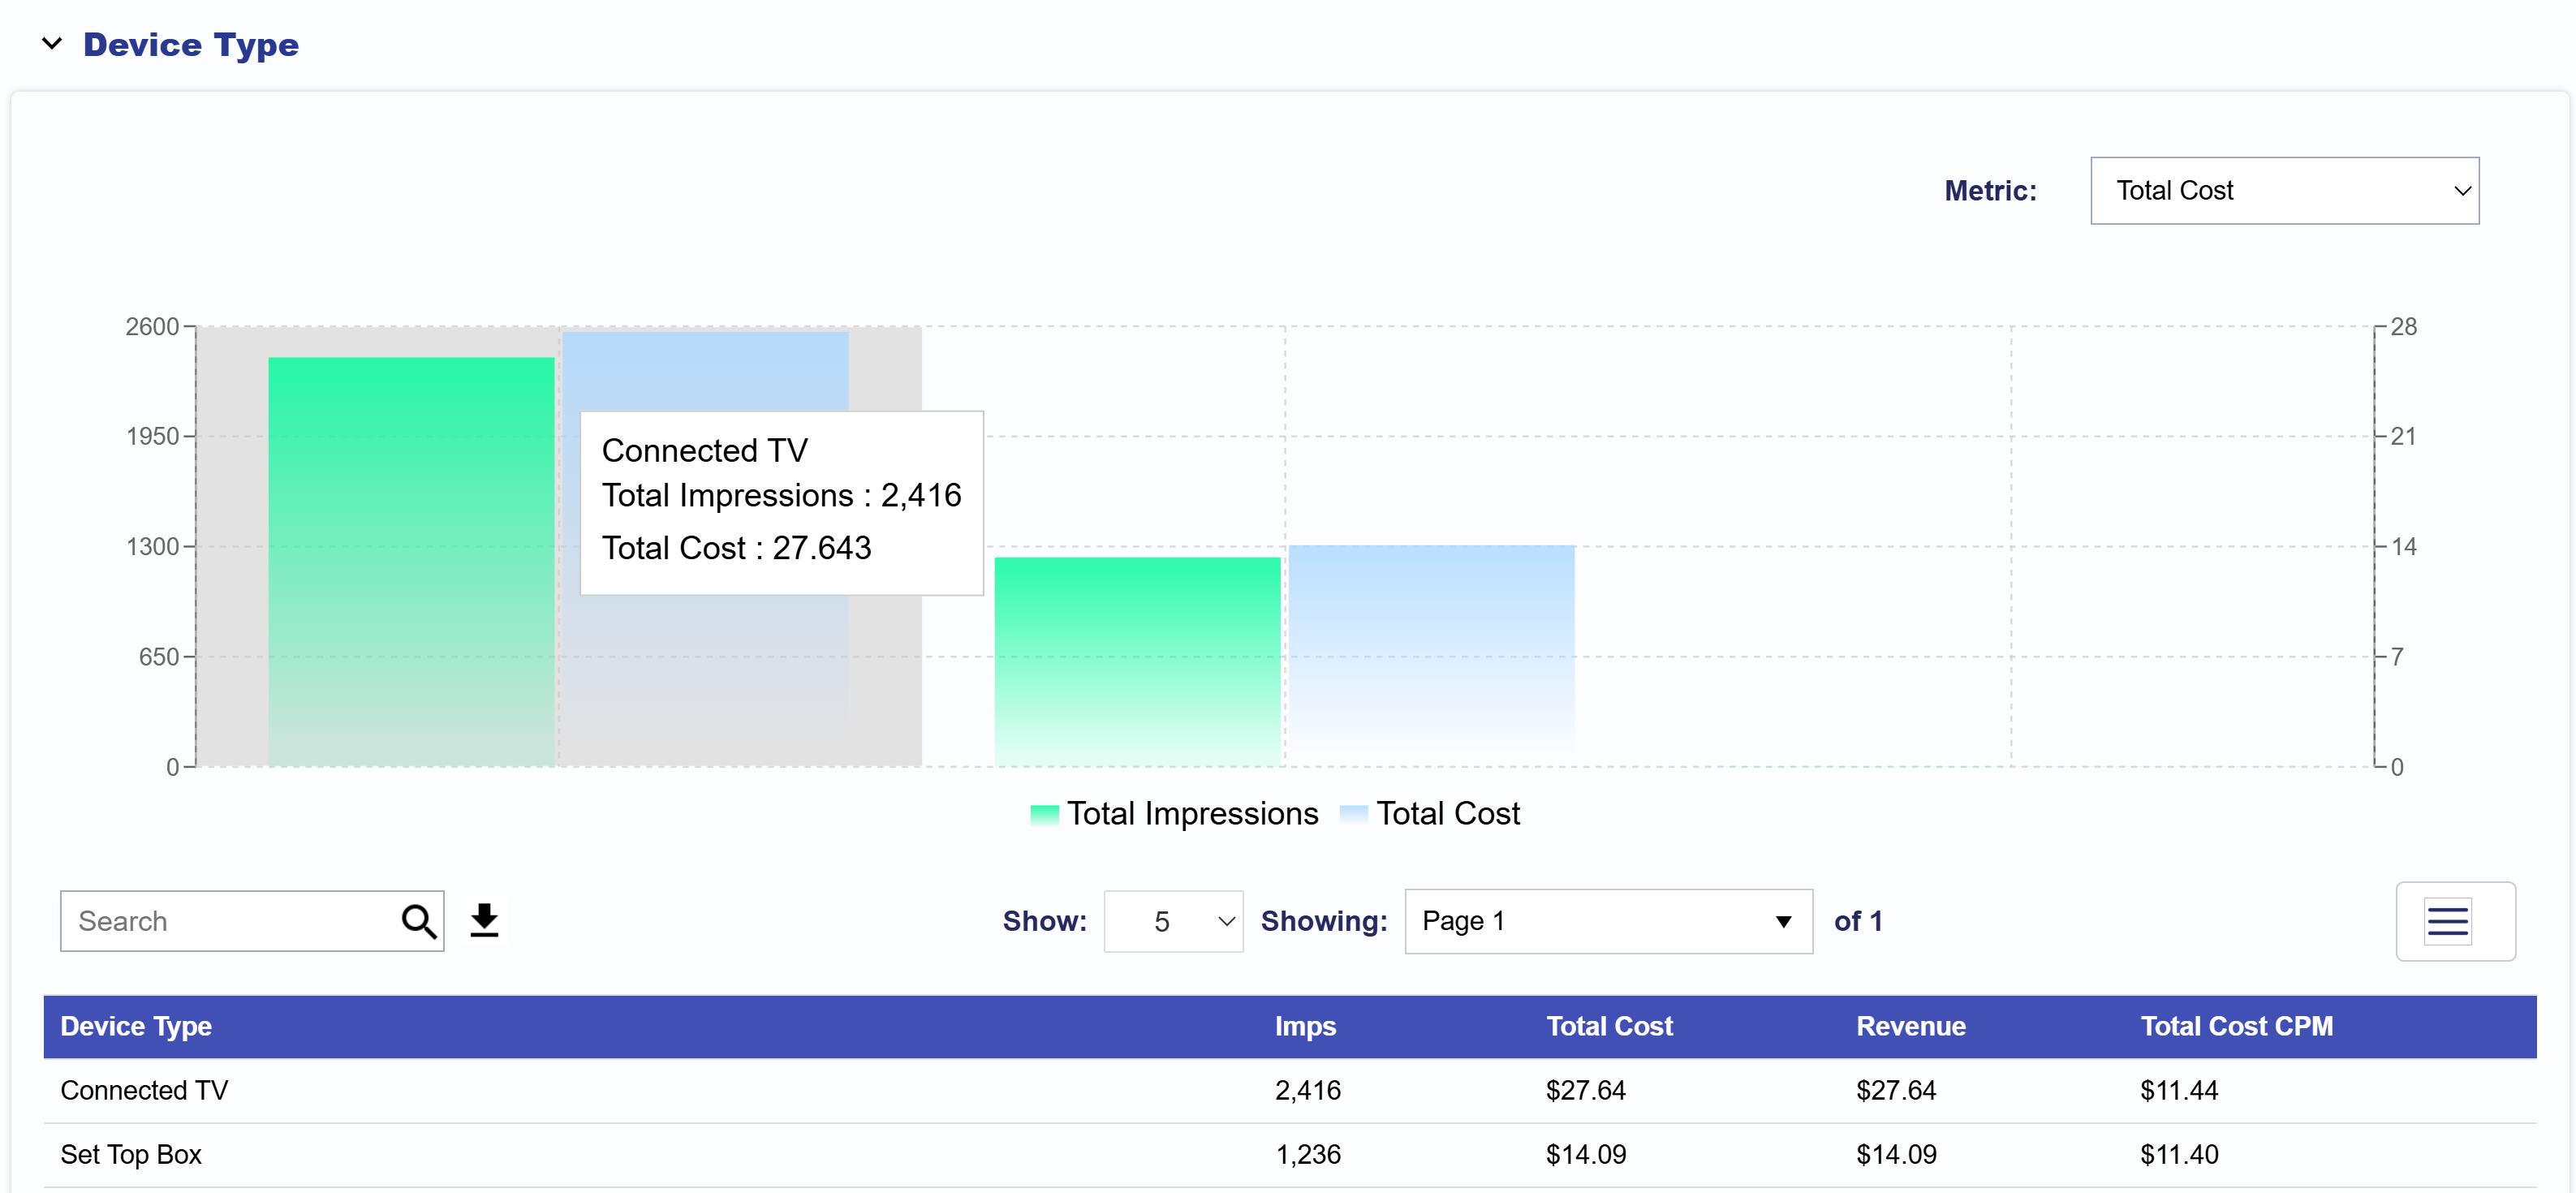
  • Device Type
  • Foot Traffic
  • Geo

Continue to each section to learn more.

Summary

The summary section within Standard Reporting provides a high level glance of the selected Advertiser, Campaign, and Lines for the Reporting Interval. This section is broken into top tiles, two metrics comparison chart, a downloadable CSV file to conduct further analysis, Volume by Hour Heatmap, Pie charts, Transparency (% reported), and Video Events. Continue to read about each section.

Top Tiles

Note that all intervals with the exception of yesterday, include metrics from today. Today’s metrics update hourly and have a 3 hour delay. The metrics include:

  • Report Date: Shows the selected report date or date range.
  • Impressions: The total number of impressions the selected Advertiser, Campaign, and Lines served within the selected reporting interval.
  • Total Cost: The total amount of spend that the selected Advertiser, Campaign, and Lines spent, including media costs and any applicable margins or fees, within the selected reporting interval.
  • Total Cost CPM: The total cost per thousand impressions for the selected Advertiser, Campaign, and Lines within the selected reporting interval, calculated as (Total Cost / Impressions) x 1,000.
  • Revenue: The total amount of revenue generated by the selected Advertiser, Campaign, and Lines within the selected reporting interval.
  • Transparency Score: A score indicating the level of transparency in reporting and data availability.

Metric Comparison Chart

Filter for only days with data or all days and select and compare two metrics against each other. Select from the following metrics:

  • Imps: The total number of impressions served within the selected reporting interval.
  • Media Cost: The total dollar amount spent on the media before additional fees or margins are applied.
  • Total Cost: The total spend, including media costs and any applicable margins or fees.
  • Total Cost CPM: The total cost per thousand impressions, calculated as (Total Cost / Impressions) x 1,000.
  • Revenue: The total revenue generated from the selected reporting interval.
  • VCR: The percentage of video ad impressions that are played to completion.
  • IP Conversions: The number of conversions attributed to users who were served an ad and later converted based on IP tracking.
  • Foot Traffic ‘Attributed Visitors’: The number of users who visited a physical location after viewing an ad.

Downloadable Table

Below the chart, locate the search bar in the Table section. On the right-hand side of the search bar, click the download button to export the performance data as a CSV file. All metrics listed above are available for export. To customize the metrics included in the CSV file, click the three lines in the top right corner of the table and select or deselect the metrics that matter most to you.

Volume by Hour Heatmap

The Volume by Hour Heatmap allows you to explore activity patterns over time. By default, the heatmap is displayed using your Seat’s time zone, but you can filter for any time zone as needed. Use the color key in the top right corner to interpret volume levels from low to high. This visualization highlights hourly volume trends by date, making it easy to identify peak activity periods and uncover actionable insights. Hover over any cell to view the Total Cost for that specific date and hour. Use this heatmap to quickly detect spikes in volume, optimize dayparting strategies, or compare performance across time zones.

Pie Charts

The Pie Charts section highlights the top 10 impression performers across key supply sources: Networks, Publishers, Deals, Channels, and Apps. This visualization offers a quick snapshot of which sources are driving the most impressions. When hovering over a segment in any pie chart, you’ll see displayed the name of the supply source and the number of impressions served, helping you quickly identify high performing supply sources.

Transparency (% reported)

The Transparency Chart displays the reporting percentages for key inventory identifiers including Series, Title, Network, Channel, and Full IP. It helps users understand what portion of impressions include data for each category. For each identifier, the chart shows:

  • The percentage of impressions where the value was reported
  • The number of unique values reported
  • The total number of impressions associated with that category

This provides a clear view into the transparency of supply sources and helps identify areas where reporting may be limited.

Video Events

The Video Events bar chart illustrates each stage of the video playback journey from Start through Q1, Q2, Q3, to Complete. It offers a clear breakdown of how many impressions reached each milestone. You can compare your eligible impressions with your completed impressions to evaluate overall video performance and completion rates across your campaign.

Inventory

The Inventory dropdown section features both a chart and a table to help you analyze campaign performance by inventory source. The chart can be filtered by categories such as Site Domain, Exchange, Publisher, Series, Title, and Genre, and metrics such as Total Cost, Revenue, Total Cost CPM, and Transparency Score, offering flexible insight into impression and cost trends.

The bar chart displays the selected category and metric. Hover over each bar pair to view the Category Name, Total Impressions, and Total Cost. To adjust how many are shown, use the Show: dropdown to display 5, 10, 25, 50, or 100 results.

To export data, go to the Table section. On the right side of the search bar, click the download icon to export the table as a CSV file. All metrics mentioned above are included as well as impressions. To customize the export, click the three line icon in the top right of the table to select or deselect the metrics most relevant to your analysis.

Creatives

The Creatives section displays Total Cost and Impressions for each creative associated with the selected Advertiser, Campaign, and Lines in the top filter section, based on the selected reporting interval. The left Y-axis shows Impression counts, while the right Y-axis shows Total Cost, helping you compare delivery and spend across creatives at a glance.

You can adjust the metric compared to Total Impressions to show Total Cost, Revenue, Total Cost CPM, or Completion Rate for more customized analysis.

To export this data, scroll down to the Table section below the chart. On the right side of the search bar, click the download icon to export the table as a CSV file. You can further customize your export by clicking the three line icon in the top right corner of the table to select or deselect the metrics that are most relevant to your analysis.

Below are the available metric:

  • Creative ID: The unique ID assigned to your creative.
  • Name: The name of the creative.
  • Imps: The total number of impressions the creative served.
  • Total Cost: The total spend attributed to the creative.
  • Revenue: The revenue generated by the creative.
  • Total Cost CPM: The cost per thousand impressions (CPM).
  • Completion Rate: The percentage of impressions that completed the full video.

Device Type

The Device Type section displays Total Cost and Impressions for each device type associated with the selected Advertiser, Campaign, and Lines in the top filter section, based on the selected reporting interval. The data is broken down by device type, allowing you to compare performance across different devices. The left Y-axis shows Impression counts, while the right Y-axis shows Total Cost, helping you easily compare delivery and spend across devices at a glance.
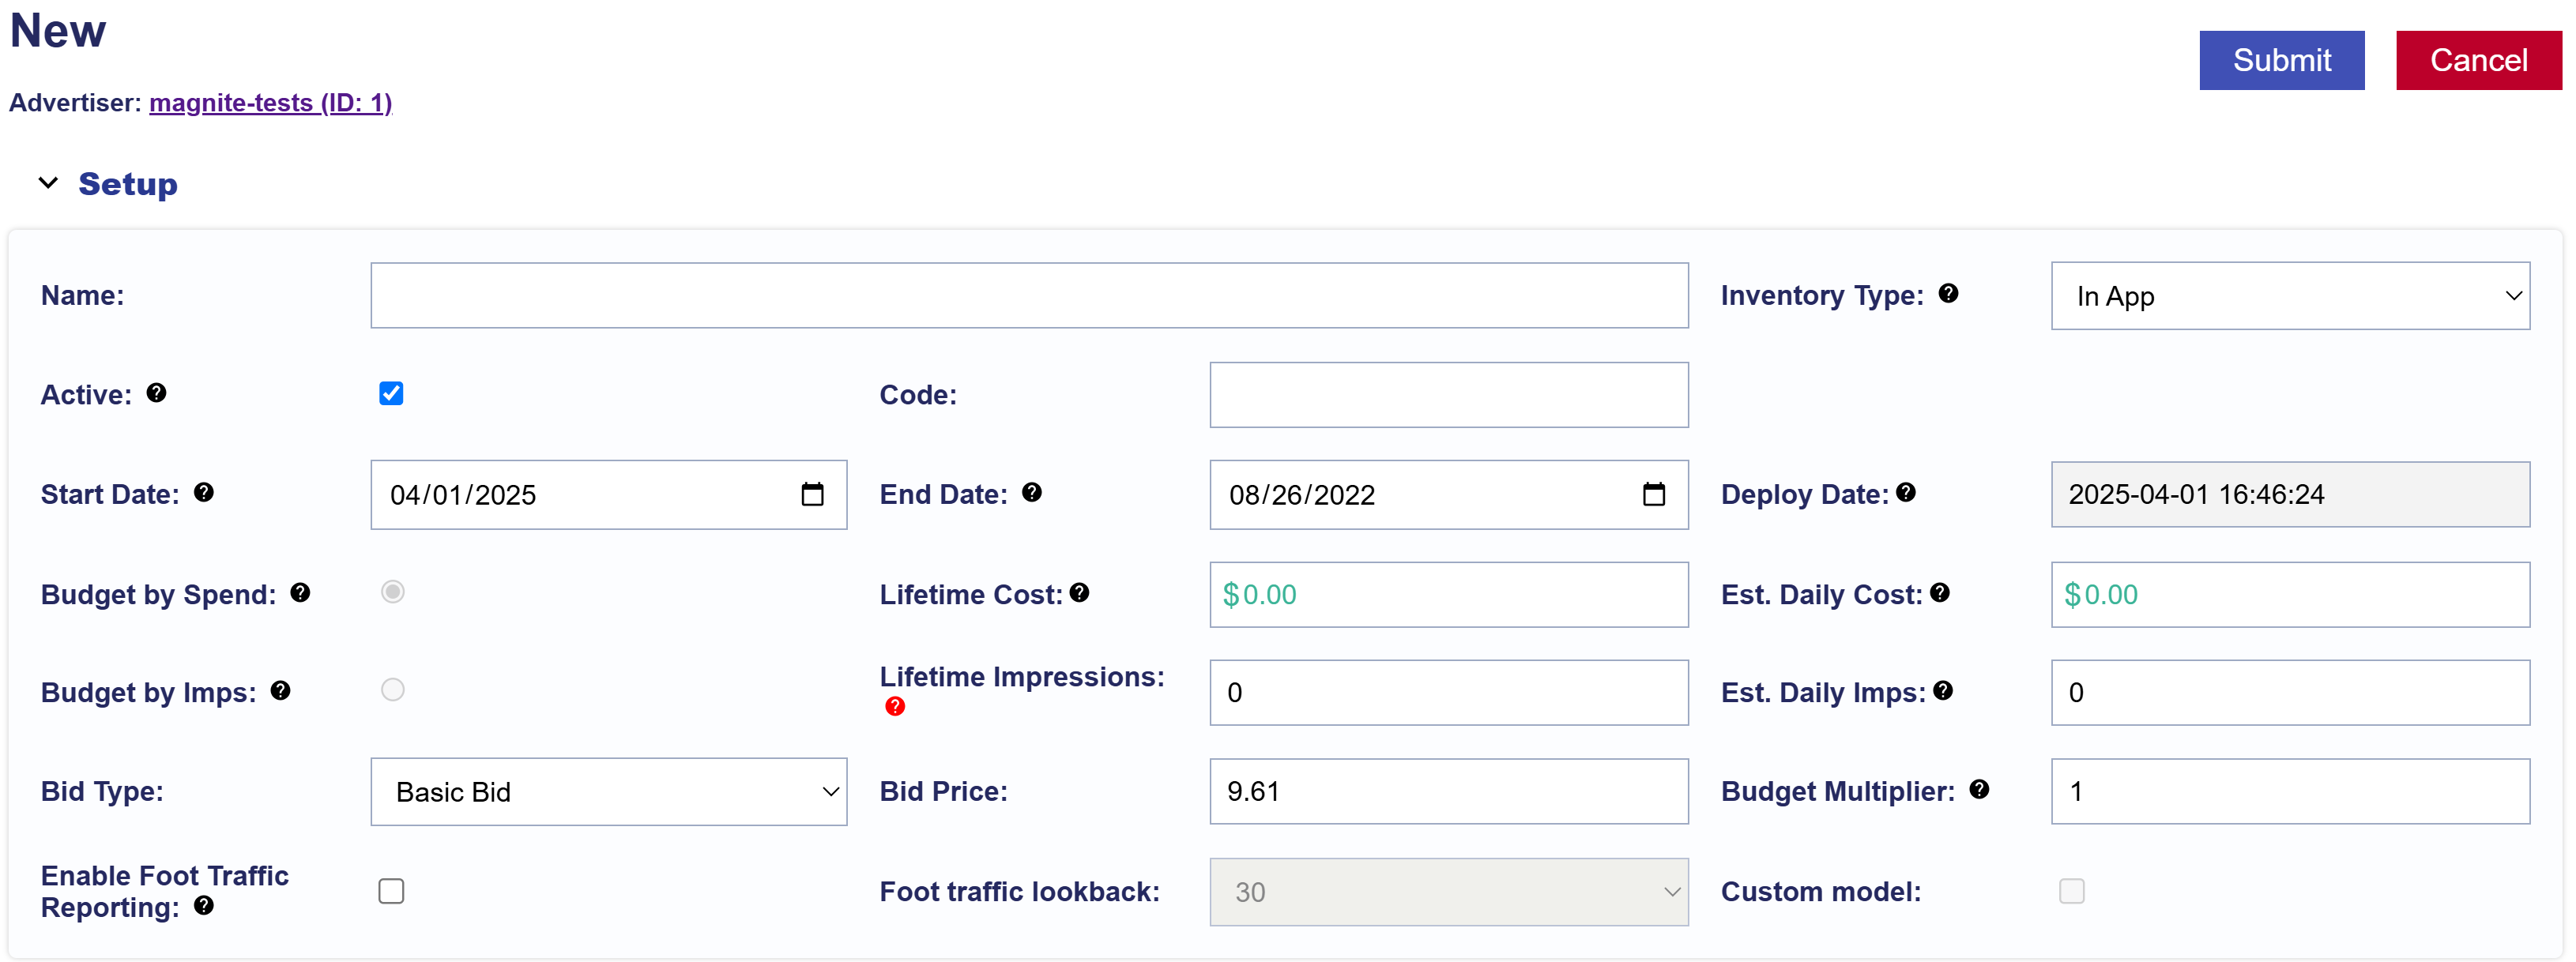
You can adjust the metric compared to Total Impressions to show Total Cost, Revenue, or Total Cost CPM for more customized analysis.

To export this data, scroll down to the Table section below the chart. On the right side of the search bar, click the Download icon to export the table as a CSV file. You can further customize your export by clicking the three line icon in the top right corner of the table to select or deselect the metrics that are most relevant to your analysis.

  • Device Type: The name of the device type.
  • Imps: The total number of impressions served by each device type.
  • Total Cost: The total spend attributed to each device type.
  • Revenue: The revenue generated by each device type.
  • Total Cost CPM: The cost per thousand impressions (CPM) for each device type.

Network

The Network section displays Total Cost and Impressions for each network associated with the selected Advertiser, Campaign, and Lines in the top filter section, based on the selected reporting interval. The data is broken down by network, allowing you to compare performance across different inventory sources. The left Y-axis shows Impression counts, while the right Y-axis shows Total Cost, making it easy to compare delivery and spend across networks at a glance.

You can adjust the metric compared to Total Impressions to show Total Cost, Revenue, or Total Cost CPM for more customized analysis.

To export this data, scroll down to the Table section below the chart. On the right side of the search bar, click the Download icon to export the table as a CSV file. You can further customize your export by clicking the three-line icon in the top right corner of the table to select or deselect the metrics most relevant to your analysis.

  • Network: The name of the network.
  • Imps: The total number of impressions served by each network.
  • Total Cost: The total spend attributed to each network.
  • Revenue: The revenue generated by each network.
  • Total Cost CPM: The cost per thousand impressions (CPM) for each network.

Deal

The Deal section displays a chosen metric and Impressions for each deal associated with the selected Advertiser, Campaign, and Lines in the top filter section, based on the selected reporting interval. The data is broken down by deal, allowing you to compare performance across different deals. The left Y-axis shows Impression counts, while the right Y-axis shows your chosen metric, making it easy to compare delivery and spend across deals at a glance.

You can adjust the metric compared to Total Impressions to show Total Cost, Revenue, Total Cost CPM, or Transparency Score for more customized analysis.

To export this data, scroll down to the Table section below the chart. On the right side of the search bar, click the Download icon to export the table as a CSV file. You can further customize your export by clicking the three-line icon in the top right corner of the table to select or deselect the metrics that are most relevant to your analysis.

  • Deal: The name of the deal.
  • Imps: The total number of impressions served by each deal.
  • Total Cost: The total spend attributed to each deal.
  • Revenue: The revenue generated by each deal.
  • Total Cost CPM: The cost per thousand impressions (CPM) for each deal.
  • Transparency Score: The score indicating the transparency level of the deal.

Channel

The Channel section displays a chosen metric and Impressions for each channel associated with the selected Advertiser, Campaign, and Lines in the top filter section, based on the selected reporting interval. The data is broken down by channel, allowing you to compare performance across different channels. The left Y-axis shows Impression counts, while the right Y-axis shows your chosen metric, making it easy to compare delivery and spend across channels at a glance.

You can adjust the metric compared to Total Impressions to show Total Cost, Revenue, or Total Cost CPM for more customized analysis.

To export this data, scroll down to the Table section below the chart. On the right side of the search bar, click the Download icon to export the table as a CSV file. You can further customize your export by clicking the three-line icon in the top right corner of the table to select or deselect the metrics that are most relevant to your analysis.

  • Channel: The name of the channel.
  • Imps: The total number of impressions served by each channel.
  • Total Cost: The total spend attributed to each channel.
  • Revenue: The revenue generated by each channel.
  • Total Cost CPM: The cost per thousand impressions (CPM) for each channel.

App

The App section displays a chosen metric and Impressions for each app associated with the selected Advertiser, Campaign, and Lines in the top filter section, based on the selected reporting interval. The data is broken down by app, allowing you to compare performance across different apps. The left Y-axis shows Impression counts, while the right Y-axis shows your chosen metric, making it easy to compare delivery and spend across apps at a glance.

You can adjust the metric compared to Total Impressions to show Total Cost, Revenue, Total Cost CPM, Completion Rate, or Transparency Score for more customized analysis.

To export this data, scroll down to the Table section below the chart. On the right side of the search bar, click the Download icon to export the table as a CSV file. You can further customize your export by clicking the three-line icon in the top right corner of the table to select or deselect the metrics that are most relevant to your analysis.

  • App: The name of the App.
  • Imps: The total number of impressions served by each App.
  • Total Cost: The total spend attributed to each App.
  • Revenue: The revenue generated by each App.
  • Total Cost CPM: The cost per thousand impressions (CPM) for each App.
  • Transparency Score: A score indicating the transparency level of the App, helping assess the clarity of supply source information and ad placement.

Foot Traffic

The Foot Traffic section shows the following metrics:

  • Location ID: Unique identifier assigned to the location.
  • Location Name: The name assigned to the Location.
  • Type: Specifies the location type (e.g., Address).
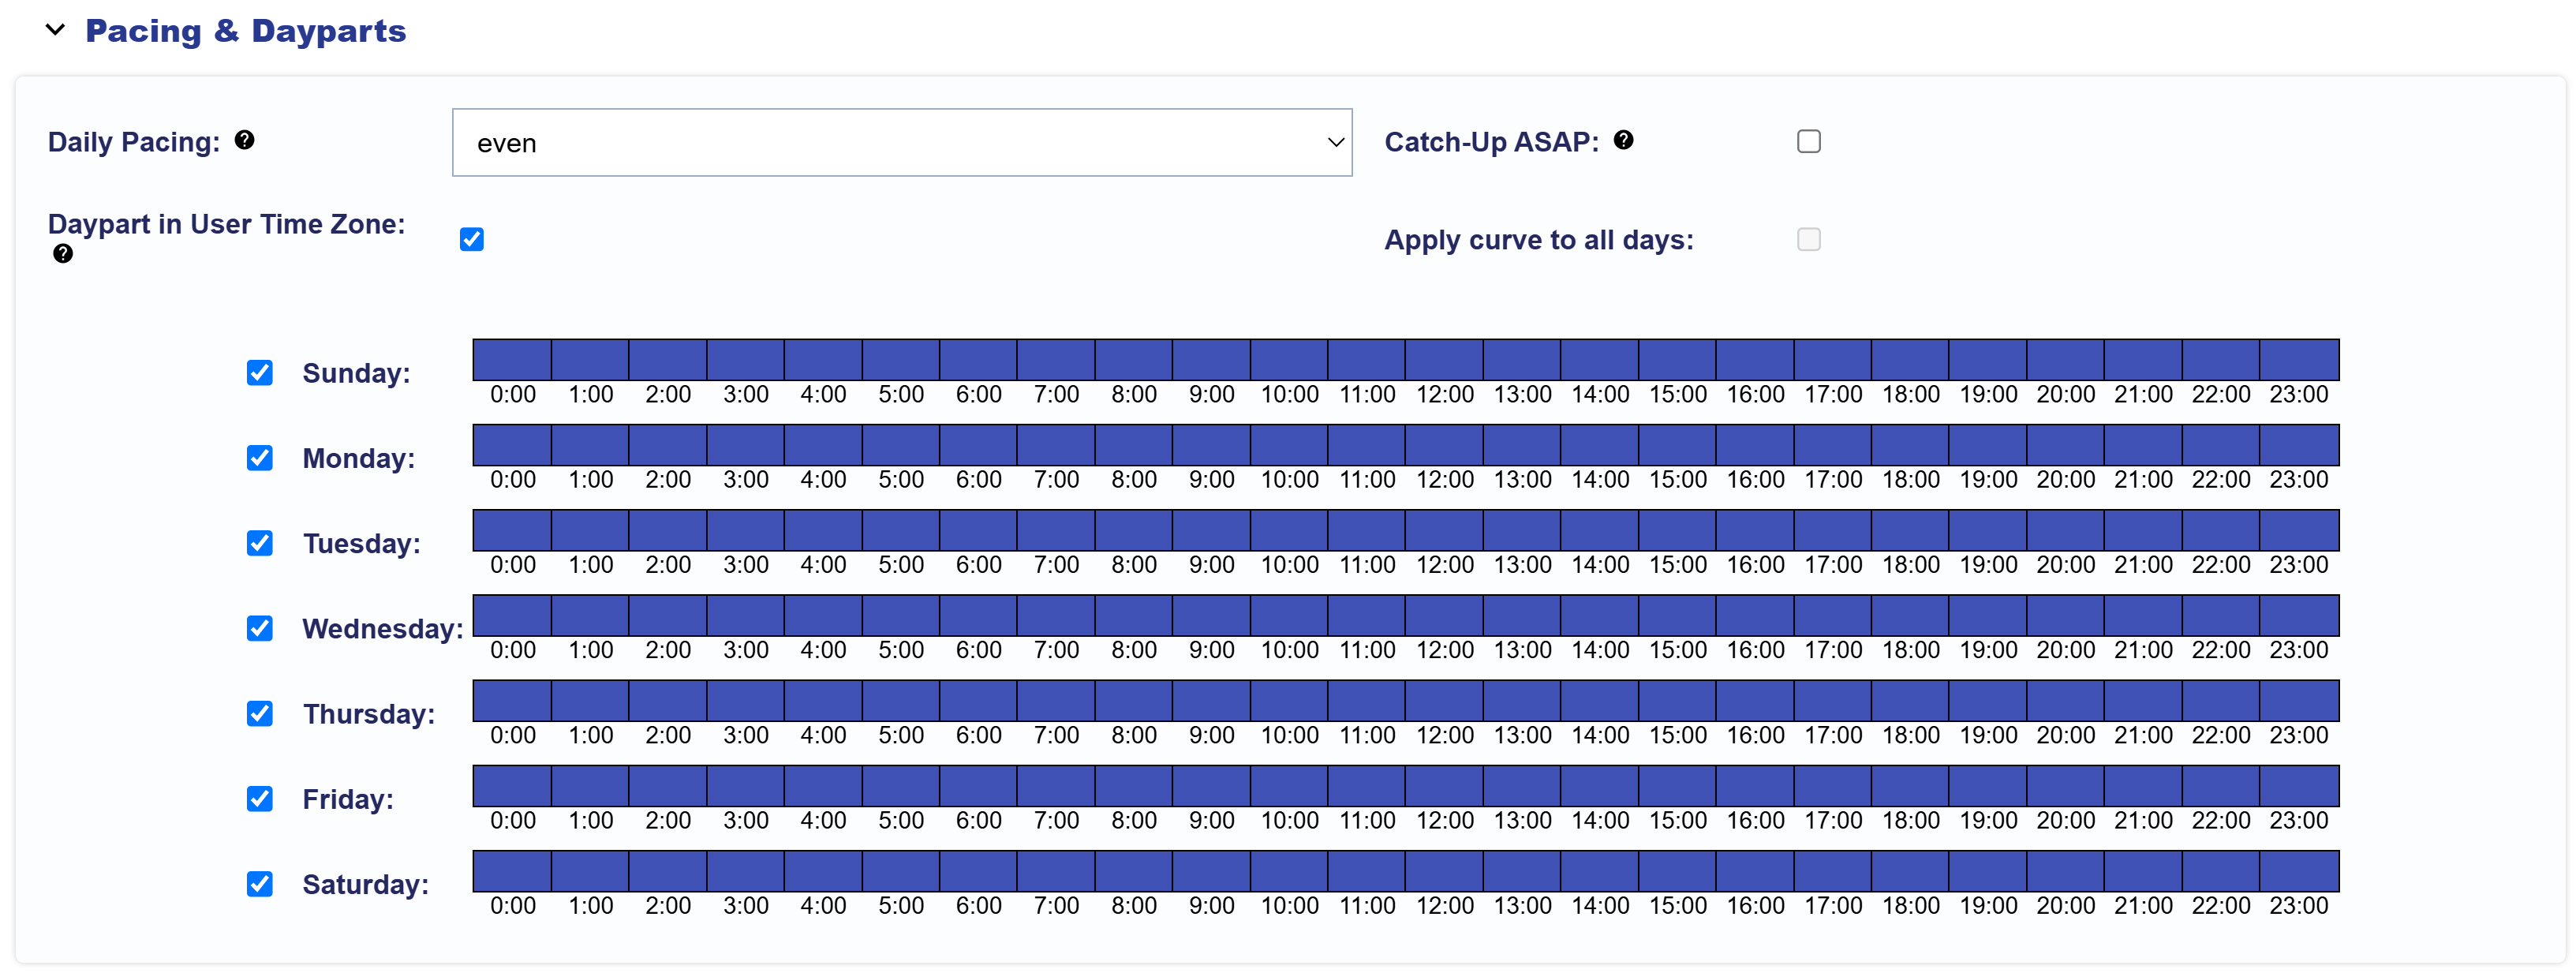
  • Active Status: Indicates whether the location is Active or Inactive.
  • Validation Status: Displays if the location is Valid or Invalid.
  • Attributed Visitors: The number of users who were served an Ad from this Campaign and subsequently visited this location during the selected Reporting Interval.
  • Average Daily Visitor: The average number of total visitors recorded at this location per day within selected reporting interval. This is used to indicate if the address entered is correct and tracking visitors. If 0 visitors are seen at this location, there may be an issue. Contact your Account Manager for more information or for assistance with locations displaying 0 visitors.

The table can be downloaded as a CSV file for further analysis. Click the download button next to the search bar at the top of the table.

Geo

The Geo section shows a heat map of where impressions served were most concentrated. Use the Geo filter located on the bottom right corner of the Map to filter for Country, Region, DMA, and Zip codes. This filter also impacts the table below the map, which can be downloaded as a CSV file to conduct further analysis.

The table displays metrics based on the selected filters. For example, to view Impressions, Total Cost, Revenue, Total Cost CPM, and Completion Rate by Zip Code, apply the Geo filter for Zip Codes.

Custom Reporting

Overview

Custom reporting allows you to select and customize all dimensions and metrics you wish to evaluate, providing an exportable CSV with Campaign data. You can choose Advertisers, Campaigns, Line Items, Dimensions, Metrics, and a Date Range to generate a report. All reports are created in UTC time zone.

Custom Report Types

  • Custom Report
  • IP Conversion Pixel: Path to Conversion
  • IP Conversion Pixel: Page Visits
  • IP Conversion Pixel: Conversion Rate
  • Log Level Reporting
  • Reach/Frequency Report

Report Availability

  • Reports remain downloadable in the platform for 30 days.
  • After expiration, reports must be rerun. Note that some data points may no longer be available.

Report Limitations

  • Maximum Rows: Custom Reports are limited to 10,000,000 rows, depending on the delivery method and report type selected.
  • Incomplete Data Warning: If a report exceeds this limit, a yellow caution symbol will appear next to the report name, indicating that the data is incomplete.
    • If you require additional data beyond this limit, you can:
      • Split the report into multiple smaller reports.
      • Reduce the number of selected dimensions to decrease row count.
      • Contact your Account Manager for assistance.

Custom Reporting Time Zone

The time zone for custom reports can be configured on each individual report. Note, metrics will only match billing if the report is pulled in UTC. Custom reports may not match the metrics shown in the platform if they are not pulled in the seat time zone.

User time zone will use the ‘user time zone offset’ from the bid request to adjust report metrics for each impression to the time zone where that impression was served. When the user’s time zone offset is not present in the bid request, it will be defaulted to UTC.

Seat Time Zone

The time zone for your account can be configured under the ‘Admin’ section of the platform in ‘Seat Settings’ under ‘Preferences’. This time zone setting will adjust the metrics in the advertiser tab (advertisers, campaign and line item metrics) as well as the reporting dashboard. Note: this does not apply to billing metrics in the account balance or the pacing and dayparts on campaigns or lines. All billing metrics and transactions are for account activity in UTC. Pacing and dayparting time zones can be configured on each campaign or line.

Note that all platform activity appears in the account balance and is billed in UTC time zone.

Scheduled Reports

Custom reports can be automatically delivered to your email, FTP or S3 bucket, or Google Cloud Storage on the schedule of your choice. When creating a custom report, select the ‘Schedule Automated Report’ box, then open the ‘Scheduled Reports’ tab to choose the schedule and configure the delivery method.

When creating a new Custom Report and selecting Schedule Automated Report, the Scheduled Reports tab becomes editable. Complete the setup by selecting the following:

  • Report Frequency:
    • Daily: Reports will be sent each morning for the previous day.
    • Weekly: Reports will be delivered on Monday mornings for the previous week.
    • Monthly: Reports will be delivered on the first of each month for the previous month.
    • Custom:
      • Set a specific day frequency. For example, every 2 days.
      • Set a specific week frequency on a specific day. For example, every 2 weeks on Monday.
  • Reporting Interval: Yesterday, Last 7 days, Last 30 days, Month to Date, Previous Month, Custom
    • Custom: Last __ Days
  • Deliver by: Choose delivery method by selecting the checkbox for each.
    • Email
      • Email addresses should be separated by comma.
    • FTP
      • FTP Server
      • FTP Path
      • FTP Port
      • FTP Username
        FTP Password
    • AWS S3
      • Bucket: This is the name of the bucket, e.g. example.bucket. Bucket name does not contain a leading backslash or the s3:// prefix.
        • Creating a bucket in AWS S3:
          • In AWS S3 click Create Bucket
          • Chose a bucket name that is available and the desired AWS Region.
          • Change Object Ownership to ACLs enabled.
          • Uncheck Block all public access field and check “I acknowledge that the current settings might result in this bucket and the objects within becoming public”.
          • Click Create bucket.
          • Navigate to the newly created bucket and click Create folder with the output path that we chose in Pontiac (“output-path”). Confirm to create the folder.
        • Setting up the report in Pontiac:
          • Go to Reporting tab and then click New Custom Report.
          • Select Log Level Report from the Report Type Drop Down
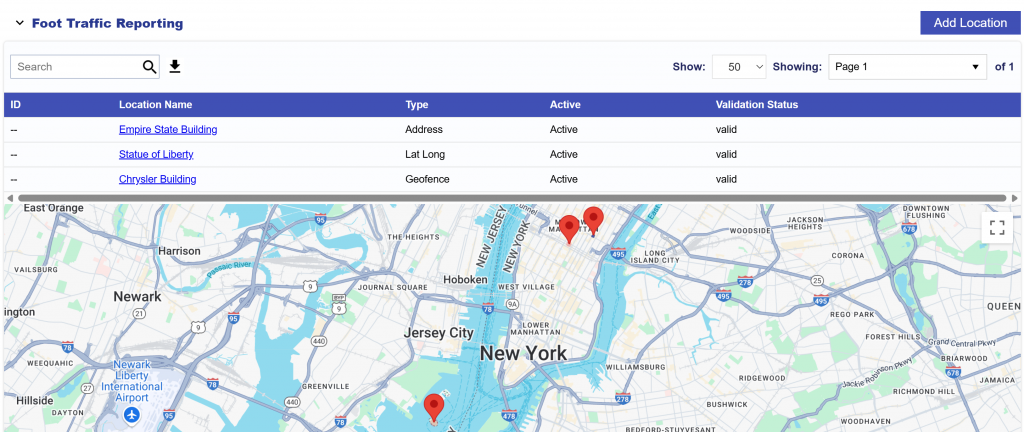
          • Go to Scheduled Reports tab and check Deliver by S3 box.
          • In the expandable section fill out the Bucket field with the AWS S3 Bucket name. Example: S3-test-bucket.
          • Fill out the Path field with a desired output path location and file name (To include the date macro use dateInt (YYYYMMDD) like xxx/filename-%dateInt% otherwise your file will be overwritten each day). Example: output-path/Pontiac-reports.csv or output-path/Pontiac-reports-%dateInt%.csv
          • Click View security policy and copy the full text area.
          • Go to Amazon AWS S3 and modify permissions for the bucket we chose earlier. In the Permissions tab click Edit and paste the policy text from earlier and Save.
          • Back in Pontiac reports screen click Verify and wait for a successful confirmation message.
      • Path: This will be the full location that the report is saved to. To include the date macro use dateInt (YYYYMMDD) like xxx/filename-%dateInt% otherwise your file will be overwritten each day.
      • View Security Policy
      • Verify your configured bucket policy.
    • Google Cloud Storage
      • Bucket: This is the name of the bucket, e.g. example.bucket. Bucket name does not contain a leading backslash or the gs:// prefix.
      • Path: This will be the full location that the report is saved to. To include the date macro use dateInt (YYYYMMDD) like xxx/filename-%dateInt% otherwise your file will be overwritten each day.
      • Credentials: Valid json object.

Custom Report

Overview

Custom reporting allows you to customize all the dimensions and metrics you wish to evaluate, providing an exportable csv with all the data from your campaigns.

Create a Standard Custom Report:

  1. Navigate to the Reporting Tab and open the Custom Reporting dropdown section.
  2. Click ‘New Custom Report’.
  3. Select ‘Custom Report’ as the Type.
  4. Fill out the required report details.
  5. Click ‘Save’.
  6. Expand the Custom Reporting dropdown section and click the ‘Download’ button associated with the name of your custom report.
    • If Scheduled Automated Reports were selected, the report will be accessible via your chosen delivery method.

Below are the customizations available when creating the report:

  • Name: Enter a title for your report.
  • Schedule Automated Report: Choose this option to have the report sent to you on regular intervals. See the section for setup details Scheduled Reports
  • Advertiser ID: Select the Advertiser IDs that you would like to include in your report. By default, all Advertisers are included.
  • Campaign ID: Select the Campaign IDs that you would like to include in your report. By default, all Campaigns under the selected Advertisers are included.
  • Line ID: Select the Line IDs that you would like to include in your report. By default, all Lines under the selected Advertisers and Campaigns are included.
  • Start Date: Define the start date for the report interval.
  • End Date: Define the end date for the report interval.
  • Type: Choose the type of report. See each section for more details on report types.
    • Custom Report
    • IP Conversion Pixel: Path to Conversion
    • IP Conversion Pixel: Page Visits
    • IP Conversion Pixel: Conversion Rate
    • Log Level Report
    • Reach/Frequency Report.
  • Timezone: Select the timezone that the report will generate, such as Seat Time Zone, User Time Zone, UTC, etc.
  • Dimensions: Categorical values that define how data is grouped and segmented in reports, such as Campaign Name, Advertiser, and Exchange.
  • Metrics: Quantitative values that measure performance, such as impressions, clicks, conversions, spend, and CTR.

Dimensions:

  • Date
  • Advertiser ID
  • Advertiser Name
  • Advertiser Code
  • Campaign ID
  • Campaign Name
  • Campaign Code
  • Line ID
  • Line Name
  • Line Code
  • Creative ID
  • Creative Name
  • Creative Size
  • Region/State Code
  • Region/State Name
  • Country Code
  • Country Name
  • DMA Code
  • DMA Name
  • Zip Code
  • Browser
  • Operating System
  • Site Domain
  • Exchange
  • App Domain
  • App Bundle
  • App Name
  • Publisher Name
  • Device Type
  • Device Model
  • Deal ID
  • Deal Name
  • Content Genre
  • Content Episode
  • Content Title
  • Content Series
  • Content Channel
  • Content Network
  • Hour
  • Device Type Name
  • Inventory Type
  • Multi Field

Metrics:

  • Impressions
  • Media Cost
  • Total Cost
  • Revenue
  • Media Cost CPM
  • Total Cost CPM
  • Revenue CPM
  • Profit
  • Video Starts
  • 25% Video Complete
  • 50% Video Complete
  • 75% Video Complete
  • Video Completions
  • Video Clicks
  • Chrome Conversions
  • Data Costs
  • Art Fee
  • DCM Hosting Fee
  • CC Fee
  • Foot Traffic Fee
  • Contextual Fee
  • Chalice Fee

IP Conversion Pixel: Path To Conversion

Overview

The ‘Path to Conversion’ report provides data on IP conversions and impressions served to users who later converted. It shows the complete journey from an impression view to the conversion action on your website, helping you understand how impressions influence conversions over time.

Key Columns:

  • Impression Time: Indicates when the impression was served to a user who later visited or converted on the site where the pixel is placed. The total number of ‘imp_times’ shows how many impressions were served to users who then converted, corresponding to the ‘Attributed Imps’ field in the IP Conversion Pixel metrics under the Advertiser.
  • Conversion Time: Shows the time the conversion or action occurred. The total number of unique ‘conv_times’ represents the total number of conversions or visits driven by the campaign, corresponding to the ‘Total Convs’ field in the IP Conversion Pixel metrics under the Advertiser.

Lookback Window:

  • By default, the IP conversion pixels use a 30-day lookback window. However, if you need to pull data with a custom lookback window, you can select a value up to 30 days from the ‘Lookback Window’ dropdown.

Create an IP Conversion Pixel: Path to Conversion Report

  1. Navigate to the Reporting tab and open the Custom Reporting dropdown section.
  2. Click ‘New Custom Report’.
  3. Select ‘IP Conversion Pixel: Path to Conversion’ as the Type.
  4. Fill out the required report details.
  5. Click ‘Save’.
  6. Expand the Custom Reporting dropdown section and click the ‘Download’ button next to the name of your custom report.
    • If Scheduled Automated Reports were selected, the report will be delivered via your chosen delivery method.

Below are the customizations available when creating the report:

  • Name: Enter a title for your report.
  • Schedule Automated Report: Choose this option to have the report sent to you on regular intervals. See the section for setup details Scheduled Reports
  • Advertiser ID: Select the Advertiser IDs that you would like to include in your report. By default, all Advertisers are included.
  • Campaign ID: Select the Campaign IDs that you would like to include in your report. By default, all Campaigns under the selected Advertisers are included.
  • Line ID: Select the Line IDs that you would like to include in your report. By default, all Lines under the selected Advertisers and Campaigns are included.
  • Pixel ID: Select the Pixel IDs that you would like to include in your report. By default, all Pixels are included.
  • Start Date: Define the start date for the report interval.
  • End Date: Define the end date for the report interval.
  • Type: Choose the type of report. See each section for more details on report types.
    • Custom Report
    • IP Conversion Pixel: Path to Conversion
    • IP Conversion Pixel: Page Visits
    • IP Conversion Pixel: Conversion Rate
    • Log Level Report
    • Reach/Frequency Report.
  • Timezone: Select the timezone that the report will generate, such as Seat Time Zone, User Time Zone, UTC, etc.
  • Lookback window: By default, the IP conversion pixels use a 30-day lookback window.
  • Dimensions: Categorical values that define how data is grouped and segmented in reports, such as Campaign Name, Advertiser, and Impression Time.
  • Metrics: Quantitative values that measure performance, such as fractional attribution.

Dimensions:

  • Pixel ID
  • Pixel Name
  • Conversion Time
  • Impression Time
  • IP Address Truncated
  • IP Address Hashed
  • Home or Business
  • Zip Code
  • Site Domain
  • Exchange
  • Region/State Code
  • User ID
  • Advertiser ID
  • Advertiser Name
  • Line ID
  • Line Name
  • Date
  • Device Type
  • Creative ID
  • Creative Name
  • App Domain
  • App Bundle
  • App Name
  • Order ID: Reporting on this field requires this value to be dynamically passed on the IP Pixel using the Order Value or Order ID parameters. Check the Order ID or Order Value boxes when creating the IP Pixel for further guidance.
  • Order Value: Reporting on this field requires this value to be dynamically passed on the IP Pixel using the Order Value or Order ID parameters. Check the Order ID or Order Value boxes when creating the IP Pixel for further guidance.
  • Deal Name
  • Publisher Name
  • Content Network
  • Content Channel
  • Content Series
  • Content Title
  • Content Genre
  • Custom Variable 1
  • Custom Variable 2
  • Custom Variable 3
  • Custom Variable 4
  • Other Parameters
  • Consumer ID
  • Campaign ID
  • Campaign Name
  • Conversion Date
  • Impression Date
  • Operating System
  • Browser
  • User Agent
  • Device Type Name
  • Inventory Type

Metrics:

  • Fractional Attribution: Assigns an evenly weighted conversion value to each impression event that leads to a conversion.

IP Conversion Pixel: Page Visits

Overview

The IP Conversion Pixel: Page Visits report pulls data on page visits associated with the IP Conversion Pixel. It only includes visit data at the advertiser level and is not tied to specific lines. Each record in this report represents a user visiting your page, independent of any media served.

Create an IP Conversion Pixel: Page Visits Report:

  1. Navigate to the Reporting Tab and open the Custom Reporting dropdown section.
  2. Click ‘New Custom Report’.
  3. Select ‘IP Conversion Pixel: Page Visits’ as the Type.
  4. Fill out the required report details.
  5. Click ‘Save’.
  6. Expand the Custom Reporting dropdown section and click the ‘Download’ button associated with the name of your custom report.
    • If Scheduled Automated Reports were selected, the report will be accessible via your chosen delivery method.

Below are the customizations available when creating the report:

  • Name: Enter a title for your report.
  • Schedule Automated Report: Choose this option to have the report sent to you on regular intervals. See the section for setup details Scheduled Reports
  • Advertiser ID: Select the Advertiser IDs that you would like to include in your report. By default, all Advertisers are included.
  • Pixel ID: Select the Pixel IDs that you would like to include in your report. By default, all Pixels are included.
  • Start Date: Define the start date for the report interval.
  • End Date: Define the end date for the report interval.
  • Type: Choose the type of report. See each section for more details on report types.
    • Custom Report
    • IP Conversion Pixel: Path to Conversion
    • IP Conversion Pixel: Page Visits
    • IP Conversion Pixel: Conversion Rate
    • Log Level Report
    • Reach/Frequency Report.
  • Timezone: Select the timezone that the report will generate, such as Seat Time Zone, User Time Zone, UTC, etc.
  • Dimensions: Categorical values that define how data is grouped and segmented in reports, such as Campaign Name, Advertiser, and Impression Time.

Dimensions:

  • Pixel ID
  • Pixel Name
  • Conversion Time
  • Impression Time
  • IP Address Truncated
  • IP Address Hashed
  • Home or Business
  • Zip Code
  • Region/State Code
  • Advertiser ID
  • Date
  • Custom Variable 1
  • Custom Variable 2
  • Custom Variable 3
  • Custom Variable 4
  • Other Parameters
  • Order ID: Reporting on this field requires this value to be dynamically passed on the IP Pixel using the Order Value or Order ID parameters. Check the Order ID or Order Value boxes when creating the IP Pixel for further guidance.
  • Order Value: Reporting on this field requires this value to be dynamically passed on the IP Pixel using the Order Value or Order ID parameters. Check the Order ID or Order Value boxes when creating the IP Pixel for further guidance.
  • Consumer ID

IP Conversion Pixel: Conversion Rate

Overview

The ‘Conversion Rate Report’ helps track the effectiveness of your ads by analyzing conversion rates day over day. To calculate the conversion rate for each day, divide ‘Conversions’ by ‘Imps’.

The conversion metric in this report matches the UI metrics when the ‘Line’ dimension is included. When this dimension is selected, conversions are not de-duplicated across line items. For example, if a user sees ads from two Lines under the same Campaign and completes one purchase, this will count as a conversion for both Line Items, and the Campaign will show two conversions.

For unique conversions across an advertiser or campaign, you can run a custom ‘IP Conversion Rate’ report without selecting the ‘Line ID’ dimension. This report will show unique conversions on the selected date(s). For unique conversions across a campaign flight, run the ‘IP Path to Conversion Report’ and de-duplicate the hashed IP address across all dates.

Create an IP Conversion Pixel: Conversion Rate Report

  1. Navigate to the Reporting tab and open the Custom Reporting dropdown section.
  2. Click ‘New Custom Report’.
  3. Select ‘IP Conversion Pixel: Conversion Rate’ as the Type.
  4. Fill out the required report details.
  5. Click ‘Save’.
  6. Expand the Custom Reporting dropdown section and click the ‘Download’ button next to the name of your custom report.
    • If Scheduled Automated Reports were selected, the report will be delivered via your chosen delivery method.

Below are the customizations available when creating the report:

  • Name: Enter a title for your report.
  • Schedule Automated Report: Choose this option to have the report sent to you on regular intervals. See the section for setup details Scheduled Reports
  • Advertiser ID: Select the Advertiser IDs that you would like to include in your report. By default, all Advertisers are included.
  • Campaign ID: Select the Campaign IDs that you would like to include in your report. By default, all Campaigns under the selected Advertisers are included.
  • Line ID: Select the Line IDs that you would like to include in your report. By default, all Lines under the selected Advertisers and Campaigns are included.
  • Pixel ID: Select the Pixel IDs that you would like to include in your report. By default, all Pixels are included.
  • Start Date: Define the start date for the report interval.
  • End Date: Define the end date for the report interval.
  • Type: Choose the type of report. See each section for more details on report types.
    • Custom Report
    • IP Conversion Pixel: Path to Conversion
    • IP Conversion Pixel: Page Visits
    • IP Conversion Pixel: Conversion Rate
    • Log Level Report
    • Reach/Frequency Report.
  • Timezone: Select the timezone that the report will generate, such as Seat Time Zone, User Time Zone, UTC, etc.
  • Lookback window: By default, the IP conversion pixels use a 30-day lookback window.
  • Dimensions: Categorical values that define how data is grouped and segmented in reports, such as Line ID and Line Name.

Log Level Reporting

Overview

Log level reporting provides advertisers with detailed bid request data for purchased inventory, with IP addresses and IFAs encrypted for privacy. Reports are delivered daily in UTC for the previous day’s activity. The user time zone offset is included in these reports and can be utilized to adjust the report time zone if needed. To receive log level reports, you must have either an AWS or Google Cloud account and have a scheduled report configured for delivery to s3 or Google Storage. Additionally, certain bid request fields contain numerical values that correspond to specific descriptions. The tables below provide mappings for device type, geo type, video protocol, and livestream values.

Device Type

ValueDescription
1Mobile/Tablet
2Personal Computer
3Connected TV
4Phone
5Tablet
6Connected Device
7Set Top Box

Geo Type

ValueDescription
1GPS/Location Services
2IP Address
3User Provided (e.g. Registration data)

Video Protocol

ValueDescription
1VAST 1.0
2VAST 2.0
3VAST 3.0
4VAST 1.0 Wrapper
5VAST 2.0 Wrapper
6VAST 3.0 Wrapper
7VAST 4.0
8VAST 4.0 Wrapper
9DAAST 1.0
10DAAST 1.0 Wrapper

Livestream

ValueDescription
0Non-live Content
1Live Content

Download the CTV log level report schema for a full list of available fields.

ctv-log-level-report-schemaDownload

Create a Log Level Report:

  1. Navigate to the Reporting tab and open the Custom Reporting dropdown section.
  2. Click ‘New Custom Report’.
  3. Select ‘Log Level’ as the Type.
  4. Fill out the required report details.
  5. Click ‘Save’.
  6. To receive log level reports you must have either an AWS or Google Cloud account and have a scheduled report configured for delivery to s3 or Google Storage.

Below are the customizations available when creating the report:

  • Name: Enter a title for your report.
  • Schedule Automated Report: Choose this option to have the report sent to you on regular intervals. See the section for setup details Scheduled Reports
  • Advertiser ID: Select the Advertiser IDs that you would like to include in your report. By default, all Advertisers are included.
  • Campaign ID: Select the Campaign IDs that you would like to include in your report. By default, all Campaigns under the selected Advertisers are included.
  • Line ID: Select the Line IDs that you would like to include in your report. By default, all Lines under the selected Advertisers and Campaigns are included.
  • Type: Choose the type of report. See each section for more details on report types.
    • Custom Report
    • IP Conversion Pixel: Path to Conversion
    • IP Conversion Pixel: Page Visits
    • IP Conversion Pixel: Conversion Rate
    • Log Level Report
    • Reach/Frequency Report.
  • Columns: Categorical values (dimensions) and quantitative values (metrics).

Below are the column customizations available when creating the report:

  • Exchange
  • Auction ID
  • Impression ID
  • Impression Tag ID
  • Impression Bid Floor
  • Impression Bid Floor Currency
  • Advertiser ID
  • Advertiser Code
  • Campaign ID
  • Campaign Code
  • Line ID
  • Line Code
  • Creative ID
  • Bid Price Millicents
  • Win Price Millicents
  • Impression Timestamp
  • Source FD
  • Source Pchain
  • Creative Type
  • Creative Categories
  • Creative Duration
  • Creative Domain
  • Width
  • Height
  • Video Placement
  • Video Start Delay
  • Video Protocols
  • Device Type
  • Device Connection Type
  • Device IFA
  • Device Make
  • Device Model
  • Geo Country
  • Geo Region
  • Geo Zip
  • Geo Metro
  • Geo Latitude
  • Geo Longitude
  • UTC Offset
  • Geo Type
  • Geo IP Service
  • IP Address Truncated
  • IP Address Hashed
  • IP Address Hashed Std
  • Device Language
  • Operating System
  • OS Version
  • Hardware Version
  • Auction Type
  • BCAT
  • Currency
  • User Agent
  • Browser
  • Site Domain
  • App Bundle
  • App ID
  • App Domain
  • App Name
  • App Category
  • App Store URL
  • Content ID
  • Content Livestream
  • Content Content
  • Content Length
  • Content Genre
  • Content Episode
  • Content Season
  • Content Title
  • Content Series
  • Content URL
  • Content Category
  • Content Network
  • Content Channel
  • Content Content Rating
  • Content Producer Name
  • Publisher ID
  • Publisher Name
  • Publisher Domain
  • Private Auction
  • Deal ID
  • Deal At
  • Deal Bid Floor
  • Deal Bid Floor Currency
  • Data Cost
  • Revenue
  • Total Cost
  • Fees
  • Chrome Conversion
  • Conversion Pixel ID
  • Site Page
  • Foot Traffic Fee
  • Data Comm
  • Art Fee
  • Contextual Fee
  • DCM Hosting Fee
  • CC Fee
  • Chalice Fee
  • Advertiser Name
  • Campaign Name
  • Line Name
  • Creative Name

Reach/Frequency Report

Overview

The Reach/Frequency Report provides insights into the number of unique users reached by a campaign. Select the Advertisers, Campaigns, Lines, and Date Range to generate the report, which includes the following metrics:

  • Unique Device IDs (IFAs)
  • Unique IP Addresses
  • Impressions Served

Estimate frequency by dividing total impressions served by either unique device IDs or unique IP addresses.

Create a Reach/Frequency Report:

  1. Navigate to the Reporting Tab and open the Custom Reporting dropdown section.
  2. Click ‘New Custom Report’.
  3. Select ‘Reach/Frequency’ as the Type.
  4. Fill out the required report details.
  5. Click ‘Save’.
  6. Expand the Custom Reporting dropdown section and click the ‘Download’ button associated with the name of your custom report.
    • If Scheduled Automated Reports were selected, the report will be accessible via your chosen delivery method.

Below are the customizations available when creating the report:

  • Name: Enter a title for your report.
  • Schedule Automated Report: Choose this option to have the report sent to you on regular intervals. See the section for setup details Scheduled Reports
  • Advertiser ID: Select the Advertiser IDs that you would like to include in your report. By default, all Advertisers are included.
  • Pixel ID: Select the Pixel IDs that you would like to include in your report. By default, all Pixels are included.
  • Start Date: Define the start date for the report interval.
  • End Date: Define the end date for the report interval.
  • Type: Choose the type of report. See each section for more details on report types.
    • Custom Report
    • IP Conversion Pixel: Path to Conversion
    • IP Conversion Pixel: Page Visits
    • IP Conversion Pixel: Conversion Rate
    • Log Level Report
    • Reach/Frequency Report.
  • Timezone: Select the timezone that the report will generate, such as Seat Time Zone, User Time Zone, UTC, etc.
  • Dimensions: Categorical values that define how data is grouped and segmented in reports, such as Campaign Name, Advertiser ID, and Line ID.

Dimensions:

  • Advertiser ID
  • Advertiser Name
  • Campaign ID
  • Campaign Name
  • Line ID
  • Line Name

Conversion Tracking

Pontiac IP Conversions

With the Pontiac pixel, a client can place this on their website and attribute online actions (browsing a page, loading the shopping cart, purchases) to CTV campaigns run through the Pontiac platform. Pontiac IP Conversion Pixels are a proprietary and privacy safe attribution solution that utilizes the user’s IP Address to track website traffic and online purchases driven by your campaigns.

To create a new pixel, enter the Pontiac platform and create or open an Advertiser. Once inside the Advertiser, click the ‘New Pixel’ button and enter a name for the pixel. Wait for 30-60 seconds for the pixel to generate, then click back on the name of the pixel to view the code. Both an image version and a script version of the pixel will generate. The format required may depend on the configuration of the website where the pixel will be placed. The pixel should be placed directly in the source code in the header or the body, then associate it to the Line Item where you wish to track conversions.

If you wish to track an action such as purchase, this pixel should be placed on the page the user will see once the transaction is completed, ie. the ‘Thank you’ page. If you want to register any website visit as a conversion (ie. a user that sees your CTV ad, then goes to your homepage), you can place the pixel in the header to fire on all pages, or one specific page you wish to measure.

IP conversion pixels have a standard lookback of 30 days in the metrics under the Advertiser. This means that the user must complete the desired action within 30 days of seeing the ad for it to count as a conversion. If you would like to pull reporting with a custom lookback window, this can be done in Custom Reporting using the IP Conversion Custom Report. You can select from ‘5’, ‘7’, ’15’ or ’30’ day as the lookback.

For metrics in the Advertiser and Campaign screens, a conversion will be attributed to each Line Item that contributed to the action. For example, if a user sees an ad from 2 lines under a campaign and then completes one purchase, this will be counted as a conversion attributed to both Line Items, appearing as 2 conversions on the Campaign when aggregated.

If you would like to see unique conversions under an advertiser or campaign, you can run a custom ‘IP Conversion Rate’ report without selecting the ‘Line ID’ dimension. These are uniques on the selected dates. For uniques across a campaign flight, run an ‘IP Path to Conversion Report’ and de-duplicate the hashed IP address across all dates.

Query String Parameters

Client IP is a parameter that can be used to pass the IP address seen by your website for the visitor when the pixel loads. This parameter should be used when the pixel is placed in a container or in any case where the IP that would be registered by the pixel would be inaccurate. For loads where Client IP is present, this will be used in attribution and reporting.

To track Order ID, Order Value, and Customer ID using this pixel, select the boxes for these values once the pixel has generated. This will add the parameters and placeholders for the values to the pixel. Work with your web developer to dynamically replace these placeholders with the intended values. These values can then be pulled in Custom Reporting to gather additional insight about conversions driven by your campaigns & optimize towards ROAS.

Google Privacy Sandbox: Chrome Conversions

Through integration with the Google Privacy Sandbox, Pontiac pixels can also be used to track cookieless conversions that occur in Chrome browsers for online video campaigns. To activate with the Google Privacy Sandbox, the advertiser in the Pontiac platform will need to be created with the website where conversions will be tracked in the ‘Advertiser Domain’ field. On the Pontiac pixel, check the ‘Track Chrome Conversions’ check box. This pixel should then be placed on the Advertiser’s website where the conversion event will take place. For example, this could be the ‘thank you’ page the user will land on after a purchase.

Foot Traffic Studies

Overview

Foot Traffic Attribution is a conversion tracking feature powered by OnSpot, enabling advertisers to measure how many users were served an ad through Pontiac and then visited a tracked commercial location. This is achieved by leveraging Mobile Advertising IDs and GPS data from mobile devices.

How It Works

  • Mobile Attribution: OnSpot registers users who were served your ad and whose mobile device was later detected at the tracked location.
  • CTV Household Extension: For CTV campaigns, household extension technology links TVs, desktops, and laptops to mobile devices using IP addresses, allowing mobile GPS data to attribute visits from the same household.
  • Currently only available in the United States.
  • Each Line Item can track up to 200 locations.

Setup & Availability

  • Availability: Foot Traffic Reporting is currently available only in the United States.
  • Tracking Limits: Each Line Item can track up to 200 locations.
  • Setup in Pontiac:
    1. Enable Foot Traffic Attribution by checking the ‘Enable Foot Traffic’ box when setting up a Line Item.
    2. Under the ‘Foot Traffic Reporting’ section, click ‘Add Location’ to specify the locations to track.
      • See the following documentation for more detail on the methods of adding locations: Line Foot Traffic Reporting
      • Pricing: A $4.00 fee is added to CTV Line Items with Foot Traffic enabled.
  • Download Report:
    1. Navigate to the Reporting tab and open the Foot Traffic Studies section.
    2. Find the desired date and click the associated Download or Download All buttons to retrieve the report.
      • Foot Traffic Reports will generate daily with a 5 day delay. For example, if the report for visits that occurred on the 1/15 the report will generate on 1/20.

The following metrics are included in the report:

  • Date: The specific date for which the data is recorded.
  • Line ID: The unique identifier assigned to the Line.
  • Line Name: The name of the Line associated with the Campaign.
  • Campaign ID: The unique identifier assigned to the Campaign.
  • Campaign Name: The name of the Campaign associated with the Line.
  • Location ID: Unique identifier assigned to the Location.
  • Location Name: The name assigned to the Location.
  • Daily Visitors: The number of total visitors recorded at this location on the report’s date. This is used to indicate if the address entered is correct and tracking visitors. If 0 visitors are seen at this location, there may be an issue. Contact your Account Manager for more information or for assistance with locations displaying 0 visitors.
  • Attributed Visitors: The number of users who were served an ad from this Campaign and subsequently visited this location on the report’s date.

IP Conversion Pixels

Overview

With the IP based pixel, a client can place this on their website and attribute online actions (browsing a page, loading the shopping cart, purchases) to CTV or Streaming Audio campaigns run through the Pontiac platform. Typically, pixels are based on third party cookies which work on browsers, and these do not allow for attribution for CTV and Streaming Audio campaigns. Pontiac IP Conversion Pixels are a proprietary and privacy safe attribution solution for CTV & Streaming Audio that utilizes the user’s IP Address to track website traffic and online purchases driven by your campaigns.

For more detail, see the following page: IP Conversion Pixels

Create an IP Conversion Pixel

To create an IP Conversion Pixel, follow these steps:

  1. Create or Open an Advertiser: Enter the Pontiac platform and either create a new Advertiser or open an existing one.
  2. Create a New Pixel: Inside the Advertiser, click on the ‘New Pixel’ button and enter a name for the IP Conversion Pixel.
  3. Share Pixel with Origin Advertiser (Optional): If needed, select an Origin Advertiser you want to share the pixel with.
  4. Create a CTV or Origin Audience (Optional): Check the corresponding boxes if creating a CTV or Origin Audience from the Pixel is desired.
    • Set Days to Live: Set the number of days to live.
  5. Click Save: Save the changes.
  6. Wait for Pixel to Generate: Wait for 30-60 seconds for the pixel to generate.
  7. View the Pixel Code: After the pixel is created, click on the pixel name to view the generated code.
  8. Place the Pixel on Your Website: Place the pixel code on your website. To track conversions from users who see your CTV ad and later visit your website, you can place the pixel in the header to fire on all pages or place it on a specific page you want to measure.
  9. Associate the Pixel with Campaign and Line Item: After placing the pixel, associate it with the appropriate Campaign and Line Item where you want to track conversions.

By following these steps, you can effectively track conversions and measure the success of your Campaigns.

Edit an IP Conversion Pixel

To edit an existing IP Conversion Pixel, follow these steps:

  1. Access the Pixel: In the Advertiser, click on the existing IP Conversion Pixel. This will open the pixel settings.
  2. Include Query String Macros: Once the pixel has been generated, you can track additional parameters by selecting the corresponding boxes for:
    • Order ID
    • Order Amount
    • Client IP
    • Consumer ID
    • Chrome Conversions (Note: Chrome conversions are only available for campaigns running on the CTV platform.)
  3. Work with Your Web Developer: After selecting the desired tracking values, work with your web developer to dynamically replace the placeholders in the pixel code with the intended values. This ensures that the pixel collects the appropriate data from your website.

By following these steps, you can customize the pixel to capture the necessary information and optimize your campaign tracking. For more information on the metrics available for the IP Conversion Pixel, see here: IP Conversion Pixel Metrics

Query String Parameters

Client IP is a parameter that can be used to pass the IP address seen by your website for the visitor when the pixel loads. This parameter should be used when the pixel is placed in a container or in any case where the IP that would be registered by the pixel would be inaccurate. For loads where Client IP is present, this will be used in attribution and reporting.

To track Order ID, Order Value, and Customer ID using this pixel, select the boxes for these values once the pixel has generated. This will add the parameters and placeholders for the values to the pixel. Work with your web developer to dynamically replace these placeholders with the intended values. These values can then be pulled in Custom Reporting to gather additional insight about conversions driven by your campaigns & optimize towards ROAS.

Chrome Conversions

Through integration with the Google Privacy Sandbox, Pontiac pixels can also be used to track cookieless conversions that occur in Chrome browsers for online video campaigns. To activate with the Google Privacy Sandbox, the advertiser in the Pontiac platform will need to be created with the website where conversions will be tracked in the ‘Advertiser Domain’ field. On the Pontiac pixel, check the ‘Track Chrome Conversions’ check box. This pixel should then be placed on the Advertiser’s website where the conversion event will take place. For example, this could be the ‘thank you’ page the user will land on after a purchase.

Creative Upload Process

Overview

Creatives can be uploaded in the Advertiser details screen by selecting the ‘New Creative’ button. At this time the platform supports Video VAST tags from reputable Ad Servers, First-party Videos, and Ad Server Audio Tags. If you do not have access to an ad server to create VAST tags, Pontiac offers hosting services at an additional charge via DCM. Reach out through the Help Center for more information.

To upload a Creative, go to the Advertisers tab and click on the name of the Advertiser under which you would like to upload the Creative. Select ‘New Creative’ and select the type of Creative that you will be uploading. A preview of the Creative should appear in the green ‘Preview’ box. Ensure that the Creative does not extend outside this preview box. Complete all relevant fields, then click ‘Save’. Each Creative Type has a max file size as indicated in the Creative Specs. Creatives that exceed the max file size will incur Creative Overage Fees as indicated in our Pricing here: Pricing

Please note that Creatives can only be edited at the Advertiser Level. Please navigate to the Advertiser Level to modify your creatives.

Creative Acceptance Policy

Pontiac-Creative-Acceptance-PolicyDownload

Please thoroughly review all Creative Policies before uploading Creative. All Creative units uploaded will be subject to the Pontiac Intelligence creative audit process as well as any additional SSP, publisher, media owner or other creative approval processes that may apply in the acquisition of ad space.

Pontiac Intelligence reserves the right to reject any creative unit at its discretion, and subsequently suspend the account without advanced warning. If your account is suspended, you will be notified in writing and an investigation will take place within three business days.  If at any point your ad tags are flagged as malicious, your account balance will be forfeited to Pontiac and will not be refundable.

In addition to Pontiac Intelligence’s content policies, certain sellers have additional policies that apply to buyers of those sellers’ inventory and certain data providers have additional policies that apply to buyers of those data providers’ data. Pontiac Intelligence clients wishing to purchase such inventory or data are responsible for understanding and adhering to any such additional policies. Pontiac shall have no liability or responsibility of any kind if a third-party declines to serve any Ads proposed by a Pontiac user, regardless of whether the ads meet the Pontiac Ad Standards or are approved by Pontiac, and users agree to indemnify and hold harmless Pontiac from any losses arising from a third-party’s decision not to serve a user’s ads. 

New Creative Tab

On the New Creative tab, follow these steps to set up your creative:

  1. Click ‘New Creative’ button.
  2. Name the Creative.
  3. Choose whether or not to set the Creative to Active or Inactive by checking or unchecking the box.
    • Automatically set to Active.
  4. Select the Creative Type:
    • Ad Server Tag Video (VAST)
    • First-Party Video
    • Ad Server Tag Audio
  5. Set the Duration: Choose from 5, 10, 15, 30, 45, 60, 75, or 90 seconds.
    • Note, while rotating tags are allowed, the ads within the tag should not contain different durations. For the bidder, to correctly target and serve the ads in impressions where the Creative meets the criteria of the ad slot, the duration selected in upload must match the duration of the Creative.
  6. Assign Weight: Set a value between 1 and 10.
    • The creative weight setting will allow you to customize the amount of a Campaign or Line budget that will be allocated to each Creative associated. If the weights are equal across all Creatives, then the ads will rotate evenly among Creatives of the same duration. For creatives with distinct durations, Creatives will serve according to available impressions for each duration.
  7. Input Creative Assets: Video, Audio, or Click URL.
    • VAST URL
      • Enter the VAST URL for the Ad. VAST versions 2, 3 and 4 are currently accepted. For full Creative specs, see here: Creative Specs
      • Creative macros can be added to your tag here to dynamically pass back information for each impression served, for all supported Creative macros see here: Creative Macros
  8. Select Creative Sizes.
    • Automatically Detect Sizes
      • Automatically Detect Sizes will scan the tag entered & automatically pull up any sizes available for this Creative. If a specific size is not being detected on your tag, you may need to go into the ad server where the tag was created and add the size.
      • If new sizes are added to a tag after it has previously been saved to Pontiac, these new sizes will not be automatically added to the Creative. You must open the Creative and click ‘Save’ once the new sizes are detected in order to implement the sizes for the tag. New sizes that are detected, but have not been saved yet, will be highlighted in yellow.
    • Manually Set Sizes
      • If you would like to manually add sizes for the tag instead of automatically adding them, select ‘Manually Set Sizes’, and the sizes can then be selected from the size dropdown. For CTV, the recommended dimensions are 1920×1080 and 1280×720. While other sizes can be used, the majority of inventory available is for these two sizes and not including these sizes may limit Campaign scale.
  9. Option to enable ‘Serve to all sizes with similar aspect ratio’:
    • A checkbox in the creative upload window that enables the campaign to bid on impressions where the size is not selected/present on the tag but has the same aspect ratio as the sizes included. Note, creatives can scale down to smaller sizes, but will not scale to higher resolutions. The aspect ratios for included assets are visible in the creative specs tab. For example, if your creative includes 1920×1080 (1.78:1), then if this checkbox is applied the creative could also serve in ad slots that require 1280×720 (1.78:1), 640×360 (1.78:1) etc, without including media files in the tag for these sizes.
  10. Click ‘Save’.

Trackers Tab

1×1 third party impression trackers can be added to creatives in Pontiac on upload or in the edit screen. Under the ‘Tracker’ tab in the creative window, click ‘Add New Tracker’ to enter the third party tracking URL.

See Creative Macros for supported marcos that can be used to pass aditional information when the tracker fires.

Third Party Click Trackers

Click trackers should be configured in your ad server as the click URL for the creative. See Creative Macros for supported macros that can be used to pass additional information when the tracker fires.

Specs Tab

On the Specs Tab, see the Creative Size, Bit Rate, Mime, and Aspect ratio’s of the media files in the tag.

Flights Tab

On the Flights tab, choose to have the Creative Always On or Active for a specific Flight.

Flight dates can be applied on each creative to easily schedule and facilitate creative swaps on a Line or Campaign. For example, if you have a new creative for each week of a Campaign, you can associate all of the creatives to the Campaign, and set flight dates accordingly so that you do not have to edit the Campaign and swap creatives each week. The creative will only be eligible to serve during the date intervals selected unless the creative is set to ‘Always On’, in which case it will be eligible to serve whenever it is assigned to a Line or creative with current flight dates.

In the creative upload or edit window, under the ‘Flights’ tab, you can change the creative dates setting to ‘Flights’ then configure the dates when you would like the creative to serve. To add multiple flights, select the ‘Add Flight’ button.

To remove a flight, click the red circle next to the selected dates. If a creative is switched from ‘Flights’ to ‘Always On’, all existing flights will be removed.

Edit Creatives

To Edit Creatives you must go to the Advertiser Level. Navigate down to the Creatives dropdown and click on the Creative Name that you want tot edit. Note that making changes to the Creative and then selecting ‘Save’ will automatically send the updated Creative to be Re-audit.

This image has an empty alt attribute; its file name is Screenshot-2025-04-01-115838.png


Editable Fields on Creative Tab:

  • Name
  • Duration
  • Weight
  • Video URL
  • Sizes
    • Automatically Detect Sizes
    • Manually Set Sizes
  • Serve to all sizes with similar aspect ratio checkbox

Editable Fields on Trackers Tab:

  • Add New Tracker

Editable Fields on Flights

  • Creative Dates
    • Always On
    • Flights

Creative Specs

CTV Specifications

Recommended Ad Duration*:15 seconds or :30 seconds
Creative TypeVAST 2, 3, 4
Media TypeMP4
Recommended BitrateBetween 15,000 Kbps and 30,000 Kbps
Recommended Resolution*1920×1080, 1280×720 (sometimes notated as 720p)
*other resolutions and durations are supported, these are the most common and are recommended for CTV

Specs may vary by publisher & media owner. Sample bid requests that contain the min & max duration, bit rate and other creative requirements can be found in the CTV Landscape report by Deal. Click on the Deal name to review this information for 50 sample impressions.

At this time all creatives are required to be uploaded as VAST tags. If you do not have access to an ad server to host your creatives, Pontiac offers hosting via DCM at an additional cost. Reach out via the Help Center for more information.

Creative Rotation on Tags

Tags uploaded to the platform may rotate creatives, however, each creative within the tag should contain the same creative duration, creative resolution and brand. Creatives that improperly rotate brand, resolution or duration will be rejected in the audit.

Ad Tags

Tags uploaded to the Pontiac platform must not rotate brands or advertisers. Tags may rotate through various ads for the SAME brand, but all creative attributes (size, duration, brand), must be the same for all versions of the creative.

We automatically search each tag for malicious activity (including for malware and other viruses that can be distributed through ad tags), but you are solely responsible for any tags that you upload or any damage that they cause. If at any point your ad tags are flagged as malicious, your account will be suspended pending an investigation and the remaining account balance will be forfeited to Pontiac and will not be refundable.

Creative Audit

Overview

The Creative audit process takes one business day from the time you upload a Creative. Before uploading any Creatives read the Pontiac Intelligence Creative Acceptance Policy here: 

Pontiac-Creative-Acceptance-Policy-3Download

Pontiac Intelligence reserves the right to reject any Creative unit at its discretion, and subsequently suspend the account without advanced warning. If your account is suspended, you will be notified in writing and an investigation will take place within three business days. Pontiac Intelligence is unable to change the audit results of Xandr/AppNexus & RiskIQ. Audit results can only be changed by resolving the issue that caused a Creative to be rejected or flagged as sensitive.

Audit Status

Creative audit results will be displayed under ‘Audit Status’ next to the name of the Creative, in the ‘Creatives’ section of the Advertiser, Campaign or Line. Audit status will be indicated by a symbol; a yellow triangle for ‘audit pending’, a green check box for ‘passed audit’, a green triangle for ‘marked as sensitive’ and a red box for ‘rejected’. Hover over this symbol to view additional information about the audit status.

More Resources

For more information about Creative issues see the below links:

  • Sensitive Categories
  • Creative Flagged as Sensitive
  • Rejected Creatives
  • Creative Re-Audit

Overview

Pontiac Intelligence reserves the right to reject any Creative unit at its discretion, and subsequently suspend the account without advanced warning. If your account is suspended, you will be notified in writing and an investigation will take place within three business days. Audit results can only be changed by resolving the issue that caused a Creative to be rejected or flagged as sensitive.

Audit Status

Creative audit results will be displayed under ‘Audit Status’ next to the name of the Creative, in the ‘Creatives’ section of the Advertiser, Campaign or Line. Audit status will be indicated by a symbol; a yellow triangle for ‘pending’ audit, a green check box for ‘approved’, a green triangle for ‘marked as sensitive’ and a red box for ‘rejected’. Hover over this symbol to view additional information about the audit status.

Creative Brand & IAB Category

In the Creative audit process, all ad units uploaded to the Pontiac platform will be assigned an IAB category and a brand using the Advertiser’s web domain or click URL if applicable. Both parameters are used by the publishers in the bid request to control the types of ads.

The IAB category assigned to your creative can be found by clicking on the creative name to open the creative details window. This field is displayed below the creative in the ‘Creative Category’ field:

These categories come from the Open RTB Specs, that can be found here in table 5.1 ‘Content Categories’: Open RTB Specs v2.5

If you believe the incorrect IAB category has been assigned to your creative, create a ticket in the Help Center for assistance.

Sensitive Creatives

Creatives that are flagged as ‘Sensitive’ will display a green triangle in the ‘Audit status’ column. Hover over this symbol to review the sensitive category the creative was assigned to. You can also see the category and sensitive attributes by opening the creative window. These are also displayed under the preview of the creative:

Sensitive creatives will only be allowed to run on the platform through the open exchange and on deals that explicitly accept content in the specified sensitive category. In the ‘Deals’ section of the ‘Inventory tab’ there is a column that lists sensitive categories that are accepted on each deal.

For inquiries regarding inventory that may be available for a sensitive category, reach out to our team through the Help Center.

The following sensitive categories are allowed on the Pontiac platform, but ads will be restricted to deals, exchanges, and publishers or venues that have explicitly approved this content. Pontiac makes no guarantee that inventory will be available for any of the following categories or that creatives will be approved by SSP or publisher partners. As a platform user, it is your sole responsibility to ensure compliance with all applicable local and national laws, restrictions, or regulations, including licensing and/or registration and targeting requirements in each market where the content is serving.

  • Political
  • Gambling
  • Religion
  • Pharma
  • Alcohol
  • Adult content
  • Cannabis, CBD & hemp
  • Tobacco vaping & smoking products
  • Firearms & weapons

Political and Gambling advertisements will require additional documentation as prompted within the platform.

Political Creatives

Political creatives will only be allowed to run on the platform through deals that explicitly accept political content. Depending on the Partner or Publishers, there may also be additional creative approval processes in order to run on these deals.

This information can be found in the ‘Deals’ section of the Inventory Tab. Deals that allow political content will have ‘Political’ listed in the ‘Permitted Sensitive Categories’. If additional publisher approvals are required, this will be noted in the ‘Publisher Approval Required’ field. To request publisher approval for a deal, reach out through the Help Center.

All Political Creatives must run under an Advertiser with the ‘Political’ box checked and the disclosure form completed. If the disclosure form has not been filled out and a creative is marked as political in the audit, the Advertiser and all associated Campaigns will be disabled until the required information has been entered.

Pontiac Intelligence permits political advertising on CTV platform (advertising relating to elections, ballot initiatives, or political candidates) in the United States, but requires that such advertising comply with applicable law. We also require that you certify certain information about the ads and the political organization that purchased them for certain political advertising on the state or local level, as legally required.

All necessary information must be entered directly into the Pontiac platform.  The platform will guide you through a series of questions.  The below exemplifies the nature of the information that must be provided, but is subject to change.  Failure to supply all applicable information into the platform could prevent your ads from serving.

  1. Are you in any way running ads related to an election, ballot initiative, or political candidate in the United States?  If yes, please complete a and b below.
    1. I certify that all such advertising has been paid for, or will be paid for, with funds from financial institutions in the same country and currency where the election, ballot initiative, or campaign for political candidate is being held.
      1. Yes:_____.     NO:_____
    2. I am unaware of any portion of the payment being provided by foreign nationals or foreign principals organized under the laws of a foreign country or having their principal place of business in a foreign country.
      1. I am unaware:_______     I can Confirm:________
  • Does your creative include a disclaimer stating who paid for the advertisement and whether it was authorized by the relevant candidate or paid for by an independent expenditure committee?
    • Yes:_____   If Yes is checked, continue to question 3.
    • No: _____   , If No is checked, stop here. All creatives of political nature require this disclaimer, so please go back and adjust the creatives to clearly include this disclaimer
  • Is your campaign running at the Local/State or Federal Level?
    • State/Local _____: If checked, continue to question 4.
    • Federal_____: If only Federal politics are involved, please move to question 5.
    • Both_____:      If Both are involved, move to Question 4.
  • Is your State/Local campaign running in California, Illinois, Maryland, Nevada, New Jersey, New Jersey, Virginia, or Washington?  If Yes, please Fill out Sections a-g below in full.  If No, and you are running at the State/Local level OUTSIDE of one of these states, please complete a-g below with as much information as applicable.  If the information cannot be completed fill out the field with N/A.
    • US FEC ID:.                                                                                                                                 
    • Organization Name:.                                                                                                                        
    • Address (Address/City/State/Zip):.                                                                                             
      •                                                  
      •                                                  
      •                                                
    • Phone Number: .                                                                                          
    • Treasurer Name: .                                                                                
    • Subject of the Ad:.                                                            
    • Method of Payment: .                                                                            
  • If your campaign is running at the Federal Level, provide your ID number issued by Federal Elections Committee.
    • US FEC ID:.                                                     .
  • Is your campaign being paid for by an Independent Expenditure Committee, as defined as follows: a political committee that makes only independent expenditures; that is, it spends money on political communications that expressly advocate the election or defeat of a clearly identified candidate and does not coordinate with a candidate, a candidate’s authorized committee, or an agent of the candidate?
    • Yes:_____  If yes is checked, AND the campaign being run in New Jersey, or New York State, please attach the separate State Registration Form to the email along with this completed document.
    • No:_____  

Prohibited Content

The following content is prohibited across all Pontiac products. Any ad unit flagged under one of these categories will be blocked from serving on the platform and may result in account suspension or forfeiture.

  • Profanity, Hate Speech or Defamatory Language
  • Graphic or excessive violence
  • Pornography, Nudity, Obscenities, or other ‘Adult’ Content
  • Inappropriate content (at our discretion)
  • Sale of, or instructions for creating, guns, bombs, ammunition, or weapons
  • Discussing or promoting sale of federally illegal drugs, including marijuana, illegal pharmaceuticals, and other schedule 1 drugs.
  • Malware, privacy and security violations
  • Broken Ads or blank creative
  • Enabling or Permitting Piracy
  • Charging for government forms and services
  • Misappropriation of Copyright, Trademark, Trade Secret, or Patent
  • Executes or Downloads Files without User Interactions
  • Causing degradation of site performance (ex: excessive animation, weight)
  • Illegal Material or Content
  • Misleading or sensationalized messaging, content, or images
  • Pop ups or any ad or landing pages that spawn them.
  • Content that intends to, or does, induce user action through misleading appearance or behavior, including, but not limited to, creatives that mimic video players, functional buttons, errors or warnings about viruses, missing codecs, and corrupt disks.
  • Displaying fake errors to induce user action, or messaging that implies knowledge of a user’s computer or operating system.
  • Creatives must not rotate brands or advertisers.
  • The landing page must match brand of the advertisement.
  • The landing page must contain a privacy policy.

All creatives uploaded to the CTV platform, and advertiser landing pages when applicable, are subject to the Pontiac audit process. This process may take up to 1 business day and Pontiac reserves the right to deny any creative, even if they are compliant with listed standards and policies. Any ads deemed malicious or inappropriate at Pontiac’s discretion will result in your account being suspended.

Creative Macros

MACRODESCRIPTION
##{HEIGHT}##Creative height
##{WIDTH}##Creative width
##{DEVICE_TYPE}##TV, phone, set top, etc. This is numeric and can be mapped to the device type
##{DEVICE_IFA}## ID sanctioned for advertiser use in the clear (i.e., not hashed)
##{DIDSHA1}##Hardware device ID (e.g., IMEI); hashed via SHA1
##{DIDMD5}## Hardware device ID (e.g., IMEI); hashed via MD5
##{DPIDSHA1}##Platform device ID (e.g., Android ID); hashed via SHA1
##{DPIDMD5}##Platform device ID (e.g., Android ID); hashed via MD5
##{MACSHA1}## MAC address of the device; hashed via SHA1
##{MACMD5}##MAC address of the device; hashed via MD5
##{DEVICE_OS}##Device operating system
##{DEVICE_MAKE}##Device make
##{DEVICE_MODEL}##Device model
##{APP_BUNDLE_ID}##App bundle ID
##{IP}##User IP Address
##{TIMESTAMP}##Timestamp of the impression
##{PUBLISHER_ID}##Publisher ID, mapping can be provided for Publisher name
##{CREATIVE_ID}##Pontiac Creative ID
##{DEAL_ID}##Pontiac Deal ID
##{LINE_ID}##Pontiac Line ID
##{CAMPAIGN_ID}##Pontiac Campaign ID
##{GEO_LAT}##Latitude
##{GEO_LONG}##Longitude
##{GEO_ZIP}##Zip Code

Publisher Specs & Approval Process

Some publishers require advertisers to complete an approval process before their inventory can be targeted. If a deal requires publisher approval, it will be indicated in the ‘Publisher Approval Required’ column within the Deals table under the Inventory tab.

Once a creative is approved for a specific publisher, it will be displayed in the ‘Approved for:’ field

Disney Approval Process

For all Disney-owned properties, including ESPN, Disney XP, Disney+, Hulu, ABC & more, an approval process is required before ads can run. This process involves two key steps:

  1. Brand Safe-Listing
  2. Creative QA conducted by the Disney team to ensure all assets meet the publisher’s specifications.

Ads that do not complete this process will not be allowed to run on these Disney-affiliated deals.

Before initiating the approval, please review the publisher’s specifications in detail and ensure that all tags and creatives fully comply with the stated requirements.

  • ESPN: https://files.disneyadvertising.com/MediaKit/ESPN/espn_watch-espn-mid-roll.pdf
  • Disney XP: https://files.disneyadvertising.com/MediaKit/Disney-XP/disney-xp_digital-video.pdf
  • Disney+: https://files.disneyadvertising.com/MediaKit/Disney-Plus/disneyplus_video.pdf
  • Hulu: https://hulu.disneyadvertising.com/ad-products/video-commercial/
  • ABC: https://www.disneyadvertising.com/mediakit/abc-brands/

For more information, see Disney Company Ad Specifications page: https://www.disneyadvertising.com/mediakit/

To start the Disney approval process, reach out through the Help Center with the following information:

  • Advertiser URL
  • Advertiser Creative Asset
  • Advertiser Tags
  • Properties you want access to (Disney XP, ESPN, Hulu, etc.)

Publisher Blocked Categories

For each impression, there is a field called ‘b-cat’ (blocked categories) included in the request that allows the publisher to block creatives with content in certain IAB categories. If the IAB category assigned to your creative in the audit is included in the list of blocked categories, your ad will not be eligible to serve on that inventory. In the CTV landscape report, the request_bcat column can be found in the sample logs for each deal. While this is just a sample and blocked categories could vary for each impression, this provides insight into commonly blocked categories by Deal. If your creative category is blocked in all sample impressions, it is unlikely you will be able to run through the selected deal.

These categories come from the Open RTB Specs, that can be found here in table 5.1 ‘Content Categories’:

Open RTB Specs v2.5

Publisher Audits

Certain inventory or deals may require an additional publisher audit for each creative ad unit targeting that inventory. Creatives will not run through Deals that require a publisher audit until they have been approved for this inventory by the publisher and deal provider. For questions regarding the process for these audits, reach out through the Help Center.

Pontiac shall have no liability or responsibility of any kind if a third-party declines to serve any Ads proposed by a Pontiac user, regardless of whether the ads meet the Pontiac Ad Standards or are approved by Pontiac, and users agree to indemnify and hold harmless Pontiac from any losses arising from a third-party’s decision not to serve a user’s ads. 

Create a Campaign

Campaign Setup

To create a new Campaign, follow these steps:

  1. Go to the selected Advertiser where you want to create the new Campaign.
  2. Navigate to the Campaigns dropdown section within the Advertiser’s dashboard.
  3. Select the ‘New Campaign’ button to begin the creation process.
  4. Give the Campaign a name: Enter a unique name for your new Campaign to identify it easily.
  5. Code: Optional and for reporting purposes.
  6. Active Status: The ‘Active’ box is automatically checked, but uncheck it if you want to create an Inactive Campaign.
  7. Select Start and End Dates for your Campaign.
  8. Choose between ‘Impressions’ or ‘Spend’ for your Budget Type.
  9. Set Budget based on your selected Budget Type, enter the total budget for your Campaign.
  10. Set a Daily Budget Cap: This is an optional field. If ‘Managed Dayparts’ is checked and the pacing time zone is set at the Campaign level, this time zone will be used to define the ‘day’ and apply the cap. If the pacing time zone is controlled by the Lines, the seat time zone will be used. When the daily budget cap is reached, all Lines under the Campaign will stop bidding, regardless of Line budget and pacing. It’s not recommended to enable catch-up pacing if the daily budget cap is set, as this may cause erratic behavior.
  11. Manage Budgets: This box is automatically checked. When selected, all Lines under this Campaign will be modified to match the Start Date, End Date, and Budget Type of the Campaign. Budgets must be allocated below by percentage. Uncheck if you do not want to modify the Lines’ budgets.
  12. Auto Pace: Select this option if you want the system to automatically pace your Campaign.
  13. Manage Creatives: Select this option to associate creatives with the Campaign.
  14. Manage Dayparts: This option allows you to manage pacing and dayparts at the Campaign level.
  15. Manage Pixels: This allows you to associate pixels to the Campaign for tracking purposes.
  16. Programmatic Guaranteed: Enabling this will erase any targeting or settings previously configured. Targeting for Programmatic Guaranteed Campaigns must be configured by the publisher on the deal. The budget and flight date fields on the Campaign and associated Line Items are for monitoring and pacing purposes only; the publisher controls flight and delivery.
  17. Enable Flights: This option allows you to add flight dates for the Campaign. You can input a start date, end date, budget, and define whether rollover budgets will be used. If rollover is selected, you can define the rollover type: either ‘even’ or ‘next flight’.
  18. Pacing Timezone: Select the desired seat time zone for pacing purposes.
  19. Enable Campaign Frequency: This option sets a frequency cap for your Campaign, determining how often an ad is shown to the same individual user within a specified time frame. You can set the recency, which controls the minimum amount of time between ads shown to the same user.

Continue to the Targeting Section.

Campaign Targeting

The Campaign Targeting section is designed to enables buyers to control what they buy through the following:

  • Deals
  • Exchanges
  • Geo
  • Zip
  • OLV
  • Livestream
  • Site Lists
  • App Lists
  • Deal Lists
  • Device Type
  • Channel
  • Network
  • Publisher
  • Genre
  • Series
  • Title
  • Multi Field
  • Privacy

See below for more details for each targeting section.

Deals

  • Public Deals: Pontiac provides pre-negotiated CTV, OTT, OLV and Audio Deals through a wide variety of publishers in all content categories, available directly in the platform. Click the dropdown to see the full list of available public deals.
  • Negotiated Deals: Click the dropdown to see your Seat’s Negotiated Deals. Reach out to the Pontiac Help Center if the deal you are looking for does not appear here.

For more information and best practices, see the following documentation: How to Setup CTV with Deals

Exchanges

Select the exchanges that you wish to buy media through. These are inventory sources that your ad will run through (also known as Supply Side Platforms). You can select as many or as few exchanges as you would like.

For more information and best practices, see the following documentation: How to Setup CTV with Exchanges

Geo

  • Country
  • Regions
  • DMAs

Select Countries, Regions, and DMAs for where your Campaign will target. Below are the key points to setting up Geo targeting:

  • Block List vs Allow List: Geo targeting allows advertisers to control where their ads appear using two different approaches: Allow Lists and Block Lists.
    • Allow List: An allow list is a list of specific geographic locations where ads are allowed to be shown. If an advertiser only wants their Campaign to run in a particular set of locations (e.g., Countries, Regions, or DMAs), they would use an allow list.
    • Block List: A block list is a list of geographic locations where ads are not allowed to be shown. If an advertiser wants to target a broad region but exclude specific areas, they would use a block list.
  • Country Selection: At least one Country must be selected to begin targeting. Once a country is chosen, you can further refine your targeting by adding secondary geographic layers such as Regions, Designated Marketing Areas (DMAs), or Cities. Note that Regions refer to states, provinces, or municipalities.
  • Targeting Funnel: Geo targeting works like a funnel, where the most granular targeting condition must ALWAYS be met for an impression to be served. For instance, if you select a zip code in Miami, along with the Miami DMA and United States as the country, your campaign will only serve in that specific zip code since it’s the most granular level of targeting.
  • Layer Consistency: Each layer of Geo targeting must coincide with the previous layers. If there are conflicts, such as selecting the United States, a New York City DMA, and a Florida zip code, the Campaign will NOT be able to serve because the DMA and Zip Code are geographically inconsistent.
  • Available DMAs: The following countries support DMAs for targeting.
    • Aland Islands
    • Australia
    • Canada
    • China (Diji Shi cities)
    • Finland
    • France (Departments)
    • Germany (German Nielsen Metro Codes)
    • Korea, Republic of (Si/Gun/Gu)
    • New Zealand
    • Norway
    • Russian Federation (Federal Districts)
    • United Kingdom (ITV Regions)
    • United States (DMAs)

Zip Codes

You can target specific zip codes in the United States or other countries through their regional postal code system. By targeting a set of zip codes, a client’s Campaign ads will only serve in the most relevant areas. These zip codes can be created in either the ‘Audiences’ tab through the Custom Audience Zips Type or in the Campaign or Line Item targeting menu.

To create a list of zip codes in the Line Item targeting menu, follow the below steps:

  1. Select the Country: From the dropdown menu, choose the country you want to target.
  2. Enter Zip Codes: Paste the zip codes you wish to target into the textbox, separated by commas.
  3. Add a Country: To add a country to the dropdown menu, contact your Account Manager via email

Tip for Better Scale:

  • Expand Zip Targets: If your zip code targeting isn’t scaling effectively, use the ‘Expand Zip Targets’ feature. In the Targeting menu, open the zip code tab, enter a radius in meters, and select ‘Get Zips’. This will find zip codes within this radius from the center point of the zip code’s entered. A window will open showing you the list of zip codes found within this radius. Select ‘Add Zips’ to add the new zip codes to the targeting on the Campaign or Line Item.

OLV

Video environment targeting can be found in the ‘OLV’ tab of the ‘Targeting’ section on both the Campaign and Line Item levels.

Playback Type:

  • PreRoll: An instream placement where ad plays before streaming video content.
  • MidRoll: An instream placement where ad plays during streaming video content.
  • PostRoll: An instream placement where ad plays after streaming video content.
  • Outstream: An outstream video is placed in non-video environments among other types of content, ie. web article or mobile game.

Player Size:

  • Large: Minimum width of 640 pixels
  • Medium: Minimum width of 320 pixels, maximum width of 639 pixels
  • Small: Maximum width of 319 pixels

Video Playback Method:

  • Autoplay with Sound On
  • Autoplay with Sound Off by Default
  • Click to Play
  • Mouse-Over

Livestream

As noted in the figure above, checking the livestream box will filter out any on-demand (VOD) inventory to target only impressions within content being live-streamed. Live content typically includes sports games, news, coverage of live events, etc. Not all publishers and streaming platforms contain live content, so it is recommended to run an Inventory Availability report to verify if live content is available prior to applying this targeting feature.

Site Lists

If no site list is attached to your Campaign, domain targeting will be open by default.

  • Create Custom Lists:
    • Navigate to the ‘Inventory’ tab.
    • Select ‘New Site List’ or ‘New App List’ or ‘New Deal List’.
    • Once a list is saved, it will automatically appear under the ‘Site Lists’ or ‘App Lists’ or ‘Deal Lists’ section in the ‘Targeting’ menu of the Campaign.
  • Premade Lists:
    • Pontiac also provides premade site lists and app lists for various categories that you can choose from. See the full list and definitions in the following documentation: Site & App Lists
  • Allow List vs. Block List:
    • Allow List (Target): Use this to target specific sites or apps.
    • Block List (Anti-target): Use this to avoid specific sites or apps.
  • How to Associate Lists:
    • Go to ‘Edit Targeting’ within your Campaign.
    • In the ‘Sites Lists’ or ‘App Lists’ or ‘Deal Lists’ tab, select the ‘Allow List’ or ‘Block List’ bubble, depending on your targeting needs.
    • Click the green plus sign next to the list you want to target or avoid.
    • The associated lists will appear on the right side of the screen.
    • Click ‘Save’ and the list targeting will be applied.

Note, when creating a new Site List you must paste each website on a new line. The URL should include the top-level domain, second-level domain, and subdomains if applicable. URLs should not include the scheme or subdirectories.

App Lists

Follow the directions under the above Site Lists to create and associate App Lists. When creating a new App List, please use the following format on new lines for each app.

  • Line Format: App name, OS ID
  • Line Example: com.king.candycrushsaga, 2

Deal Lists

Follow the directions under the above Site Lists to create and associate Deal Lists.

When creating a new Deal List, all available deals will be shown on the left hand side. To add them to your new Deal List, just click the green plus symbol. Press the red minus symbol to remove the deal.

When adding a Deal List to targeting, click the green symbol to add the Deal List and press the red minus symbol to remove the Deal List.

Device Types

Target based on the following Device Types:

  • Personal Computer
  • Connected TV (CTV)
  • Phone:
  • Tablet
  • Connected Device
  • Set Top Box

Channel

To Target specific Channels, enter each value on a separate line and follow the following formatting:

  • Line Format: Channel
  • Line Example: tlc

Note that you can Require Channel and create a Channel Allow List or Block List.

Network

To Target specific Networks, enter each value on a separate line and follow the following formatting:

  • Line Format: Network
  • Line Example: discovery

Note that you can Require Network and create a Network Allow List or Block List.

Publisher

To Target specific Publisher, enter each value on a separate line and follow the following formatting:

  • Line Format: Publisher
  • Line Example: roku

Note that you can Require Publisher and create a Publisher Allow List or Block List.

Genre

To Target specific Genres, enter each value on a separate line and follow the following formatting:

  • Line Format: Genre
  • Line Example:
    • sitcom
    • comedy
    • family

Note that you can Require Genre and create a Genre Allow List or Block List.

Series

To Target specific Series, enter each value on a separate line and follow the following formatting:

  • Line Format: Series
  • Line Example: 9e546169b8652754ea43f33d8618135e

Note that you can Require Series and create a Series Allow List or Block List.

Title

To Target specific Titles, enter each value on a separate line and follow the following formatting:

  • Line Format: Title
  • Line Example: epg

Note that you can Require Title and create a Title Allow List or Block List.

Multi Field

The Multi Field option enables targeting across multiple fields simultaneously. If content matches any of the selected fields (genre, series, title, etc.), the add will be shown to the viewer.

  • Line Format: Content
  • Line Example:
    • roku
    • sitcom
    • comedy
    • family
    • epg

Note that you can create a Multi Field Allow List or Block List.

Privacy

As noted in the image above, if either of the following options are selected, targeting by any persistent identifiers (e.g., cookies, IDFAs, Google ad IDs, fingerprints), precise geolocation, full IP addresses or full referrer URLs is prohibited. This data will be stripped from the bid request before filtering is applied. In addition, IP address or IFAs cannot be passed back to clients or passed on through pixel/creative macros.

  • Serve to COPPA: If this box is checked inventory regulated “COPPA” ( Children’s Online Privacy Protection Act) will be purchased.
  • Serve to DNT: If this box is checked users who have elected not to be tracked will be served to.

Campaign Audiences

Associate Audience Segments to the Campaign of your choosing through Custom Audiences, Contextual Audiences, or ART Audiences.

Custom Audiences

To create a Custom Audience, go to the ‘Audiences’ tab and select ‘New Custom Audience’. Give the Audience a name and select the type of Audience from the dropdown. Here is a list of Types available and the proper line formatting:

  • IP Ranges
    • Line Format: [IP] or [Start IP],[End IP]
    • Line Example: 63.148.81.24 or 234.123.0.13,234.123.10.15
  • Zips
    • Line Format: [Zip Code],[Country Code]
    • Line Example: 03102,US
    • Note that if the country code is omitted the US is used by default.
  • IFA
    • Line Format: [Device IFA]
    • Line Example: 735612e1-d4b9-40ec-83da-9ea0d3c5ceb3
  • Hashed IPs
    • Line Format: [IP Hash]
    • Line Example: 225f334d5db5e4c824d49cd7b03fc73ae21d1c715573a7c1a86abb7a11a80364
  • Full URL
    • Line format: [Full URL]
    • Example: www.viki.com/videos/1153464v
    • Note that the URL should not include the scheme.

Enter the Audience data according to the indicated format. These Audiences will automatically be available to associate to any Campaign.

Important things to note:

  • Each seat can have a maximum of 50 updatable custom audiences at a time.
  • These audiences can also only be updated 50 times per day.
  • Custom Audiences expire after 180 days. If a segment appears in gray and cannot be associated, it is either expired or cannot be used for the selected creative or inventory type.

To associate Custom Audience Segments to a Campaign:

  1. Navigate to the ‘Audiences’ section.
  2. Click the ‘Associate Segments’ button. The segment selection window will appear.
  3. Open the ‘Custom Audiences’ dropdown.
  4. Click ‘Add New Group’ on the right hand side and drag and drop the Custom Audience name to the right box.
  5. Choose to include or exclude the segment.
  6. Select which Boolean Logic to follow: Boolean Logic

Contextual Audiences

Contextual AI is an AI-based, custom targeting solution that performs deep content analysis to find the best contextual placements for your ads. The Contextual AI will use the URLs or Text entered in the Audience Input section to build a lookalike model and return a list of the most contextually relevant URLs for targeting.

To create a Custom Contextual Audience, go to the ‘Audiences’ tab and select ‘New Contextual Audience’. Give the Audience a name and select one of the Input Types:

  • URLs: Enter source sites below that represent your brand’s target content, this should be the Full URL including the scheme, subdomains, and all subdirectories. Sites should be text rich and not behind a paywall. Enter each URL on a new line.
  • Text: Enter a descriptive paragraph of text about the topic of interest to build a list of contextually relevant URLs for targeting. Text should have a minimum of 50 words and maximum of 500.

Associate a Contextual Audience Segment to your Campaign by following these steps:

  1. Navigate to the ‘Audiences’ section.
  2. Click the ‘Associate Segments‘ button. The segment selection window will appear.
  3. Open the ‘Contextual Audience‘ dropdown to browse over 300 AI segments curated by Pontiac categorized by IAB standards.
    • Note, these IAB Category segments cannot be edited and they are already available for use across all of your Advertisers at a $0.25 CPM.
    • To set bids, we recommend adding the average cost of all associated segments to your desired bids for the media.
  4. To add a Custom Contextual Audience Segment, scroll to the bottom, select ‘Custom‘, and find the segment name.
  5. Click ‘Add New Group’ on the right hand side and drag and drop the Custom Contextual Audience name to the right box.
  6. Choose to include or exclude the segment.
  7. Select which Boolean Logic to follow: Boolean Logic

Note: Avoid layering this segment with additional inventory or audience targeting, as it may limit Campaign scale. For more information about Contextual AI, continue to the following documentation page: Contextual AI

ART Audiences

The first step to create an ART audience is to build out an ART report in the ‘ART’ section of the platform under ‘Audience Research’ or ‘Audience Discovery’. Create a lookalike model from an existing audience or build a new audience according to desired demographics or interests.

Build an ART Report:

To create an ART audience, first generate an ART report in the ‘ART’ section under Audience Research or Audience Discovery.

  1. Audience Research Audiences:
    • Select an existing audience to source key demo & interest data to build custom lookalike models. The existing audience data can be pulled from a Pontiac IP Conversion Pixel placed on the Advertiser’s website, or select key geos to build a lookalike model from the demographics & interests of the selected area.
  2. Audience Discovery Audiences:
    • Select key demo & interest categories to define, locate & build your brand’s ideal target audience. Create the ‘ideal’ user profile for your brand, then locate key target markets to reach this demographic.

Note that on the ART Report, the field ‘Auto Refresh’ will determine the cadence at which the report data will refresh. Interest & Inventory data are updated every 30 days and new data may change report results. If a report is set to auto refresh and the matched zip codes in the results of the report are updated, this will automatically update any published audiences associated to the report.

Publish the ART Audience

Once you’ve created an Audience Research or Audience Discovery report, you can publish it as a custom audience for cookieless targeting across Pontiac Campaigns.

  1. Open the ART report and select the ‘Publish Audience’ button.
  2. Select the threshold for matched zip codes, choosing from:
    • All results
    • Top 10%
    • Top 20%
    • Top 50%
  3. Give the Audience a name.
  4. Click the ‘Save’ button.

To add an ART audience to a Campaign:

  1. Navigate to the ‘Audiences’ section and click ‘Associate Segments’.
  2. On the window popup, select the ‘ART Audiences’ dropdown and find your Custom Audiences to target.
  3. Click ‘Add New Group’ on the right hand side and drag and drop the ART Audience name to the right box.
  4. Choose to include or exclude the segment.
  5. Select which Boolean Logic to follow: Boolean Logic

To learn more, see the following documentation: ART Documentation

Continue to the following sections if enabled in the Campaign Setup: Creatives, Pacing & Dayparts, Pixels, Flights, and Frequency & Recency. If these sections are not enabled, proceed directly to setting up Line Items under your Campaign.

Campaign Creatives

On the Campaign Level, users can Associate Creatives. Note that Creatives must be uploaded and edited on the Advertiser Level. For more information see the following documentation: Creatives

Campaign Pixels

On the Campaign Level, users can Associate Pixels. Note that Pixels must be created and edited on the Advertiser Level. For more information see the following documentation: Pixels

To Associate a Pixel to a Campaign:

  1. Navigate to the ‘Pixel’ section of the Campaign.
  2. Click ‘Associate Pixel’.
  3. The above pop-up window will appear, allowing you to add pixels to the Campaign.
    • Click the green plus sign to add pixels to the Campaign.
    • Click the red minus sign to remove pixels from the Campaign.

Campaign Pacing & Dayparts

If ‘Mange Dayparts’ is enabled on the Campaign Setup, you can configure the following settings:

  • Daily Pacing Type:
    • Even: Spends both the daily and lifetime budgets as evenly as possible.
    • ASAP: Spends the daily budget as quickly as possible and will spend the lifetime budget evenly.
    • Primetime: Allocates the daily budget based on weighted ‘prime’ times of day.
    • Custom: Customize pacing by selecting weights for specific hours, days, and hours per day.
      • Enable ‘Apply curve to all days’ for custom weights to apply across all days.
      • If disabled, set custom weights for each hour of each day individually.
  • Catch-up ASAP: Opt in or out to allow unspent budget to catch up quickly. This will override the daily budget and daily pacing type selected to spend as quickly as possible until the Campaign or Line reaches 100% pacing. Once the Campaign or Line has caught up on any underspent budget, it will return to the selected daily pacing model.
  • Daypart in User Time Zone: If applied, dayparts will filter impressions according to the user’s timezone. If unchecked, dayparts will filter impressions according to the pacing timezone selected.

Campaign Flights

If the ‘Enable Flights’ feature is checked in the Campaign Setup, the Flights section will become available for the Campaign.

To add a Flight to a Campaign:

  1. Click ‘Add Flight’.
  2. Select a Start Date.
    • Note that must be on or after the Campaign’s Start Date.
  3. Select an End Date.
    • Note that must be on or before the Campaign’s End Date.
  4. The Budget Type is automatically inherited from the campaign’s settings.
  5. Set the Flight Budget:
    • If the Budget Type is Spend, enter the dollar amount.
    • If the Budget Type is Impressions (Imps), enter the number of impressions.
  6. Check Rollover Budgets to select a Rollover Budget Type:
    • Even: Distributes unused budget evenly across remaining flights.
    • Next Flight: Rolls unused budget into the next scheduled flight.

For more information about the Flights tab, see the Campaigns Flight Tab documentation.

Campaign Frequency & Recency

If the ‘Enable Campaign Frequency’ feature is checked in the Campaign Setup, the Frequency & Recency section will become available for the Campaign.

In the Frequency & Recency section users can configure the following settings:

  • Campaign Frequency: Sets a frequency cap for how often an ad is shown to the same individual user within a specified time frame.
  • Time Frame Days: Choose the time frame for the frequency cap.
    • 1-14 days
  • Campaign Recency: Sets the minimum allowable amount of time between ads shown to an individual user.
    • None
    • 1 minute
    • 5 minutes
    • 15 minutes
    • 30 minutes
    • 1 hour
    • 6 hours

For example:

  • Campaign Frequency: 10
  • Time Frame Days: 1
  • Campaign Recency: 30 minutes

This means, for this Campaign, the ad will be shown up to 10 times per user within a 1-day window, with a minimum of 30 minutes between each ad shown to the same user.

Create Campaign from Template

To Create a New Campaign using a Campaign Template, follow these steps:

  1. Navigate to the Advertiser under which you want to create the Campaign.
  2. Within the Campaigns section, locate and open the Campaign Templates dropdown.
  3. Click the image of the desired template you wish to use for your Campaign creation.
  4. All Campaign settings will be inherited from the selected Template.
  5. Adjust any Campaign settings that you need. Refer to the Edit a Campaign documentation for more details.
  6. Click ‘Submit’ to save and create the new Campaign based on the selected template.

This process will ensure that you can quickly launch Campaigns with consistent settings, saving time and maintaining best practices. Follow the steps outline in the following documentation if you need to Create a New Template: Create a New Template

Edit a Campaign

Setup Section

To edit an existing Campaign’s Setup section, follow these steps:

  1. Go to the selected Advertiser where you want to edit the existing Campaign.
  2. Navigate to the Campaigns dropdown section within the Advertiser’s dashboard.
  3. Select the name of the Campaign that you would like to edit.
  4. Press the ‘Edit’ button on the upper right corner of the page to enter Edit Mode.

In the Setup dropdown, the following fields are editable:

  • Name: Rename the Campaign.
  • Code: Optional and for reporting purposes.
  • Active Status: The ‘Active’ box is automatically checked, but uncheck it if you want to create an Inactive Campaign.
  • Start Date (if not started yet)
  • End Date (if not ended yet)
  • Budget Type: Spend or Impressions
  • Budget: Set based on your selected Budget Type, enter the total budget for your Campaign.
  • Set a Daily Budget Cap: This is an optional field. If ‘Managed Dayparts’ is checked and the pacing time zone is set at the Campaign level, this time zone will be used to define the ‘day’ and apply the cap. If the pacing time zone is controlled by the Lines, the seat time zone will be used. When the daily budget cap is reached, all Lines under the Campaign will stop bidding, regardless of Line budget and pacing. It’s not recommended to enable catch-up pacing if the daily budget cap is set, as this may cause erratic behavior.
  • Manage Budgets:
    • Applying ‘Manage Budgets’ will update Line Items flight dates to align with Campaign Start Date, End Date, and Budget Type.
    • Line budgets will be converted from the lifetime dollar or impression amount to a weight according to the percentage of the total Campaign budget currently allocated to the line.
    • Uncheck if you do not want to modify the Lines’ budgets.
  • Auto Pace: Select this option if you want the system to automatically pace your Campaign.
  • Manage Creatives: Select this option to associate creatives with the Campaign.
  • Manage Dayparts: This option allows you to manage pacing and dayparts at the Campaign level and will override pacing and dayparts that are set on any associated Line Items.
  • Manage Pixels:
    • This allows you to associate pixels to the Campaign for tracking purposes.
    • For all Lines under the Campaign, any Pixels associated at the Line Level will be removed and replaced by Pixels selected on the Campaign Level.
  • Enable Flights:
    • This option allows you to add flight dates for the Campaign. You can input a Start Date, End date, Budget, and define whether Rollover Budgets will be used.
    • If Rollover is selected, you can define the Rollover Type: either ‘even’ or ‘next flight’.
  • Pacing Timezone: Select the desired seat time zone for pacing purposes.
  • Enable Campaign Frequency: This option sets a frequency cap for your Campaign, determining how often an ad is shown to the same individual user within a specified time frame. You can set the recency, which controls the minimum amount of time between ads shown to the same user.

If you have finished editing, click the ‘Submit’ button in the top right corner of the page to save and apply all changes. If you do not want to apply the edits, press ‘Cancel’ to discard changes and revert the Campaign to its previous settings. To continue making edits, proceed to another section.

Targeting Section

To edit the Targeting section of a Campaign, follow these steps:

  1. Navigate to the Targeting section within the Campaign.
  2. Click ‘Edit Targeting’ to modify targeting settings.
  3. Make the necessary changes to the targeting settings. Refer to the documentation page to review available targeting options: Campaign Targeting
  4. Click ‘Save’ in the bottom right corner of the popup window to apply all changes. To discard changes and revert to the previous settings, click ‘Cancel’.
  5. If you have finished editing, close the window and click the ‘Submit’ button in the top right corner of the page to save and apply all changes. If you do not want to apply the edits, press ‘Cancel’ to discard changes and revert the Campaign to its previous settings. To continue making edits, proceed to another section.

Audiences Section

To edit the Audience section of a Campaign, follow these steps:

  1. Navigate to the Audience section within the Campaign.
  2. Click ‘Associate Segments’ to add and/or remove Audience Segments associated to the Campaign.
  3. Make the necessary changes to the Audience settings. Refer to the documentation page to review available Audience options: Campaign Audiences
  4. If you have finished editing, close the window and click the ‘Submit’ button in the top right corner of the page to save and apply all changes. If you do not want to apply the edits, press ‘Cancel’ to discard changes and revert the Campaign to its previous settings. To continue making edits, proceed to another section.

Flights Section

If the ‘Enable Flights’ feature is checked in the Campaign Setup section and you want to edit the Flights section of the Campaign, follow these steps:

  1. Navigate to the Campaign with the Flights that you want to edit.
  2. Click the ‘Edit’ button to enter edit mode.
  3. Refer to the documentation page to review available Flight options: Campaign Flights. The following fields are editable:
    • Add and/or delete Flights
    • Active Status
    • Start Date (if not started yet)
    • End Date (if not ended yet)
    • Flight Budget
    • Rollover Budgets Option
    • Rollover Type: Even or Next Flight
  4. Make the necessary changes to the Flight settings.
  5. If you have finished editing, close the window and click the ‘Submit’ button in the top right corner of the page to save and apply all changes. If you do not want to apply the edits, press ‘Cancel’ to discard changes and revert the Campaign to its previous settings. To continue making edits, proceed to another section.

Lines Section

In the Lines dropdown section, the following fields are editable:

  • Active Status
  • Line Name
  • Budget Allocation Weight
  • Bid Type: Basic Bid, Bid at Floor Price, Advanced Bid Controls
  • Bid Price
  • Budget Multiplier

If you have finished editing, click the ‘Submit’ button in the top right corner of the page to save and apply all changes. If you do not want to apply the edits, press ‘Cancel’ to discard changes and revert the Campaign to its previous settings. To continue making edits, proceed to another section.

Pacing & Dayparts Section

If ‘Manage Dayparts’ is enabled on the Campaign Setup section and you want to edit the Pacing & Dayparts section of the Campaign, follow these steps:

  1. Navigate to the Pacing & Dayparts section within the Campaign.
  2. Make the necessary changes to the Pacing & Dayparts settings. Refer to the documentation page to review available Pacing & Dayparts options: Campaign Pacing & Dayparts
  3. If you have finished editing, click the ‘Submit’ button in the top right corner of the page to save and apply all changes. If you do not want to apply the edits, press ‘Cancel’ to discard changes and revert the Campaign to its previous settings. To continue making edits, proceed to another section.

Frequency & Recency Section

If the ‘Enable Campaign Frequency’ feature is checked in the Campaign Setup section and you want to edit the Frequency & Recency section of the Campaign, follow these steps:

  1. Navigate to the Frequency & Recency section within the Campaign.
  2. Make the necessary changes to the Frequency & Recency settings. Refer to the documentation page to review available Frequency & Recency options: Campaign Frequency & Recency
  3. If you have finished editing, close the window and click the ‘Submit’ button in the top right corner of the page to save and apply all changes. If you do not want to apply the edits, press ‘Cancel’ to discard changes and revert the Campaign to its previous settings. To continue making edits, proceed to another section.

Creatives Section

If ‘Manage Creatives’ is enabled in the Campaign Setup section and you want to edit the Creatives section of the Campaign, follow these steps:

  1. Navigate to the Creatives section within the Campaign.
  2. Click ‘Associate Creatives’ to add and/or remove Creatives associated to the Campaign.
    • Note that you can only Edit a Creative on the Advertiser Level, not here on the Campaign Level.
  3. If you have finished editing, close the window and click the ‘Submit’ button in the top right corner of the page to save and apply all changes. If you do not want to apply the edits, press ‘Cancel’ to discard changes and revert the Campaign to its previous settings. To continue making edits, proceed to another section.

Pixels Section

If ‘Manage Pixels’ is enabled on the Campaign Setup section and you want to edit the Pixels section of the Campaign, follow these steps:

  1. Navigate to the Pixels section within the Campaign.
  2. Click ‘Associate Pixels’ to add and/or remove Pixels associated to the Campaign.
    • Note that you can only Create and Edit a Pixel on the Advertiser Level, not here on the Campaign Level.
  3. If you have finished editing, close the window and click the ‘Submit’ button in the top right corner of the page to save and apply all changes. If you do not want to apply the edits, press ‘Cancel’ to discard changes and revert the Campaign to its previous settings. To continue making edits, proceed to another section.

Clone a Campaign

To Clone a Campaign, follow these steps:

  1. Navigate to the Campaign page of the Campaign that you want to Clone.
  2. Click the ‘Clone’ button located at the top right corner.
  3. Enter a New Name for the cloned Campaign.
  4. Adjust the Campaign settings as needed to match specific requirements. See the edit a campaign documentation for guidance: Edit a Campaign
  5. Click ‘Submit’ to finalize and create the cloned Campaign.

Note that the cloned Campaign will exist under the same Advertiser as the base Campaign.

Create a New Template

How to Save a Campaign as a Template:

  1. Navigate to the Campaign page of the Campaign you want to use as a Template or create a new Campaign.
  2. Click the ‘Save as Template’ button located at the top right corner.
  3. Enter a Name, Description, and Icon for the Campaign Template.
  4. Click ‘Save’ to save the Campaign as a template.

You can now use this template later to create a new Campaign with the same structure. This will help save time, reduce mistakes, and ensure consistency in Campaign setup. Manage all Campaign and Line Templates on the Seat Level in the Templates tab. For more details, refer to the Create Campaign from Template documentation.

Campaign Flights Tab

Flight Metrics

Looking at the Campaign Flights tab, you can filter the Reporting Interval to adjust the top tiles section. The Flight Pacing is also shown here, which is the percentage of budget the campaign has spent compared to perfect pacing based on the flight dates and budget for that specific flight period. This metric will update daily and accounts for spend from the start date to ‘yesterday’ (it is not real-time pacing). This tab provides dropdown insights into Flights and Lines. See the sections below for more details on each.

Manage Flights

In the Flights dropdown section, users can manage all Flights associated with a Campaign. Available actions include:

  • View Flights
  • Download CSV
  • Edit Flights
  • Add Flights
  • Delete Flights

Follow the steps below to complete each action as needed.

View Flights

This table shows all relevant Flight Metrics:

  • Flight ID
  • Start Date
  • End Date
  • Budget Type
  • Budget
  • Flight Pacing
  • Imps
  • Total Cost
  • Rollover Budget
  • Rollover Type: If applicable, will show even or next flight.

Download CSV

On the right-hand side of the search bar, click the download button. The Flight data will be exported as a CSV file for download.

Edit Flights

To make the following adjustments to Flights, click the ‘Edit’ button. Here the user is able to Add Flights, Delete Existing Flights, and Edit the following fields:

  • Start Date
  • End Date
  • Budget
  • Rollover Budgets Checkbox (Optional)
  • Rollover Type (Optional):
    • Even
    • Next Flight

Add Flights

Add Flights by clicking the ‘Add Flights’ button. This will add a new Flight to the bottom of the table. Input the following fields:

  • Start Date
  • End Date
  • Budget
  • Rollover Budgets Checkbox (Optional)
  • Rollover Type (Optional):
    • Even
    • Next Flight

Delete Flights

Delete Flights by clicking the red minus symbol on the left hand side of the Flights table.

Manage Lines

In the Lines dropdown section, users can manage all Lines associated with a Campaign. Available actions include:

  • View Lines
  • Download CSV
  • Edit Lines

Follow the steps below to complete each action as needed.

View Lines

This table shows all relevant Flight Metrics:

  • Line Status
    • Active: Green check mark
    • Inactive: Red minus symbol
    • Error: Yellow caution symbol
      • This line contains expired deals and cannot be modified until invalid deals are removed. Expired Deals IDs: [Deal IDs displayed here]
  • Line ID
  • Line Name
  • Bid
  • Allocation
  • Daily Budget
  • Total Flight Budget
  • Pacing
  • Imps
  • Total Cost
  • IP Convs
    • Note that these are reported using the IP Conversion Pixel

Download CSV

On the right-hand side of the search bar, click the download button. The Line data will be exported as a CSV file for download.

Edit Lines

To make the following adjustments to Lines, click the ‘Edit’ button. Here the user is able to Edit the following fields for each Line:

    • Budget Allocation Weight
    • Budget Multiplier

    Click ‘Save’ to apply edits.

    Edit Flights

    Flights Section

    If the ‘Enable Flights’ feature is checked in the Campaign Setup section and you want to edit the Flights section of the Campaign, follow these steps:

    1. Navigate to the Campaign with the Flights that you want to edit.
    2. Click the ‘Edit’ button to enter edit mode.
    3. Refer to the documentation page to review available Flight options: Campaign Flights. The following fields are editable:
      • Add and/or delete Flights
      • Active Status
      • Start Date (if not started yet)
      • End Date (if not ended yet)
      • Flight Budget
      • Rollover Budgets Option
      • Rollover Type: Even or Next Flight
    4. Make the necessary changes to the Flight settings.
    5. If you have finished editing, close the window and click the ‘Submit’ button in the top right corner of the page to save and apply all changes. If you do not want to apply the edits, press ‘Cancel’ to discard changes and revert the Campaign to its previous settings.

    Campaign Performance Tab

    Overview

    Switching to the Campaign Performance tab, you can filter the Reporting Interval to adjust the top tiles section. This tab provides dropdown insights into Bid Data, Line Performance, Campaign Daily Performance, and Video Events. See the sections below for more details on each.

    Campaign Metrics

    Looking at the Campaign Performance tab, you can filter the Reporting Interval to adjust the top tiles section. Note that all intervals with the exception of yesterday, include metrics from today. Today’s metrics update hourly and have a 3 hour delay. The metrics include:

    • Report Date: Shows the selected report date or date range.
    • Impressions: The total number of impressions the Campaign served within the selected reporting interval.
    • Total Cost: The total Campaign spend, including media costs and any applicable margins or fees.
    • Revenue: The total Campaign revenue.
    • Total Cost CPM: The total cost per thousand impressions for the Campaign, calculated as (Total Cost / Impressions) x 1,000.
    • Campaign Pacing: The percentage of budget the Campaign has spent compared to perfect pacing based on flight dates and budget. This will update daily and takes into account spend from start date to ‘yesterday’. Optimal pacing is between 90 – 110%.

    Below the Pacing, this tab provides dropdown insights into Bid Data, Line Performance, Campaign Daily Performance, and Video Events. Continue to see each section for more details.

    Bid Data

    In the Bid Data dropdown section, the Time Frame can be adjusted to display bid data for 15 minutes, 1 hour, 12 hours, or 1 day. This section includes four charts that provide insights into the number of eligible bid requests, bids placed, impressions served, and confirmed spend for the Campaign. Hover over each bar to view the time of day, time elapsed, and the metric value for more detailed insights.

    Line Performance

    The Line Performance dropdown holds Line level metrics for the selected Campaign.

    Below are the metrics available in this section:

    • Line ID
    • Line Name
    • Imps: The total number of impressions the Line served within the selected reporting interval.
    • Media Cost: The total dollar amount spent on the Lines media before additional fees or margins are applied.
    • Total Cost: The total Line spend, including media costs and any applicable margins or fees.
    • Total Cost CPM: The total cost per thousand impressions for the Line, calculated as (Total Cost / Impressions) x 1,000.
    • IP Conversions: The number of conversions attributed to users by Line who were served an ad and later converted based on IP tracking.
    • Note that the bottom row shows the Campaign Totals for Imps, Media Cost, Total Cost, Avg Cost CPM, and IP Conversions.

    Campaign Daily Performance

    The Campaign Daily Performance dropdown section includes a chart and table. The Chart can be filtered to show Only Days with Data or All Days. The Chart compares two selected Metrics against each other. Use the dropdowns in the upper right corner to customize view and discover daily metrics about your Campaign’s performance.

    Select from these metrics:

    • Imps: The total number of impressions the Campaign served within the selected reporting interval.
    • Media Cost: The total dollar amount spent on the Campaign media before additional fees or margins are applied.
    • Total Cost: The total Campaign spend, including media costs and any applicable margins or fees.
    • Total Cost CPM: The total cost per thousand impressions, calculated as (Total Cost / Impressions) x 1,000.
    • IP Conversions: The number of conversions attributed to users by Campaign who were served an ad and later converted based on IP tracking.
    • Chrome Convs: The number of conversions recorded specifically from Chrome users.
    • Clicks: The total number of times users clicked on an ad.
    • CTR: The percentage of impressions that resulted in clicks, calculated as (Clicks / Impressions) × 100.
    • CPC: The average cost per click, calculated as (Total Cost / Clicks).
    • Transparency Score: A score indicating the level of transparency in reporting and data availability.
    • Foot Traffic ‘Attributed Visitors’: The number of users who visited a physical location after viewing an ad from the Campaign.
    • Revenue: The total revenue generated from the Campaign.
    • Media Cost CPM: The media cost per thousand impressions for the Campaign, calculated as (Media Cost / Impressions) × 1,000.
    • Data Cost: The cost associated with audience data usage for targeting.
    • Foot Traffic Cost: The cost incurred for tracking and attributing foot traffic conversions.
    • Credit Card Fee: Any additional fees applied for processing payments via credit card.
    • Hosting Fee: The fees associated with hosting Campaign assets, such as creative files.
    • ART Fee: A charge related to the ART usage.
    • Contextual Fee: The cost associated with using Contextual AI services.
    • Chalice Fee: A fee related to the Chalice service.

    To download a CSV file in the Campaign Daily Performance table, navigate to the Campaign Daily Performance dropdown and locate the search bar in the Table section. On the right-hand side of the search bar, click the download button to export the campaign’s daily performance data as a CSV file. All metrics listed above are available for export. To customize the metrics included in the CSV file, click the three lines in the top right corner of the table and select or deselect the Campaign metrics that matter most to you.

    Video Events

    The Video Events dropdown section provides a table with detailed video performance metrics for the Campaign, which can be downloaded as a CSV file.

    Below is a list of all metrics:

    • Date: The reporting date for the video event metrics.
    • Imps: The number of times the video ad was served.
    • Spend Per Complete: The cost incurred for each fully completed video view
    • Starts: The number of times the video ad started.
    • 25% Complete: The number of video ads that were watched at least 25% of the way through.
    • 50% Complete: The number of video ads that were watched at least halfway through.
    • 75% Complete: The number of video ads that were watched at least 75% of the way through.
    • 100% Complete: The number of video ads that were watched entirely.
    • Completion Rate: The percentage of video ads that were fully completed, calculated as (100% Complete ÷ Starts) × 100.

    All metrics listed above are available for export. To customize the metrics included in the CSV file, click the three lines in the top right corner of the table and select or deselect the Campaign metrics that matter most to you.

    Line Management

    Create a New Line

    At the Campaign Level, you can create a new Line either from scratch or by using a template. Refer to the respective documentation for detailed instructions on each method:

    • Create a Line
    • Create Line From Template

    Edit a Line

    At the Campaign Level, you can edit Lines by clicking the ‘Edit’ button in the Lines dropdown section, which enables edit mode for the Line section only. The following fields are editable:

    • Active: The ‘Active’ box sets the Line as live. Unselect this box if you want to set the Line to an Inactive status.
    • Start Date
    • End Date
    • Total Budget
    • Bid Type: Basic Bid, Bid at Floor Price, Advanced Bid Controls
    • Bid Price
    • Budget Multiplier

    To apply changes, press the ‘Submit’ button in the top right corner. If you do not want to save the edits, press ‘Cancel’ to revert the Line section to its previous settings.

    Note that if you are in the Campaign Level’s Edit Mode, the editable fields differ from those available in the Campaign’s Read-Only Mode. Please refer to Edit a Campaign for more information.

    To make further edits beyond these fields, enter the Line Level by clicking on the Line name you wish to modify. See the Edit a Line documentation for more information.

    Create a Line

    Line Setup

    To create a new Line, follow these steps:

    1. Go to the selected Advertiser and Campaign where you want to create the new Line.
    2. Navigate to the Lines dropdown section within the Campaign’s dashboard.
    3. Select the ‘New Line’ button to begin the creation process.

    Setup

    1. Name: Enter a unique name for your new Line to identify it easily.
    2. Code: Optional and for reporting purposes.
    3. Active Status: The ‘Active’ box is automatically checked, but uncheck it if you want to create an Inactive Line.
    4. Select Start and End Dates for your Line if not managed at Campaign Level.
    5. Deploy Date: Read-only field that shows the date the Line Item was created.
    6. Budget: Line’s budget by spend. Inherited from the Campaign Level or set at the Line Level.
    7. Lifetime Cost: The total cost for the Line based on serving dates and bids.
    8. Est. Daily Cost: The estimated daily spend if the budget is perfectly distributed and delivers evenly across the selected flight dates. This is not the actual Daily Budget.
    9. Budget by Imps: Line’s budget by imps. Inherited from the Campaign Level or set at the Line Level.
    10. Lifetime Impressions: The approximated total number of impressions the Line will serve in it’s lifetime.
    11. Est. Daily Imps: The estimated daily impressions if the budget is perfectly distributed and delivers evenly across the selected flight dates. This is not the actual Daily Budget.
    12. Bid Type:
      • Basic Bid: Standard bid price applied across all inventory of the Line.
      • Bid at Floor Price: The maximum bid price and CPM floor allowed for an auction.
      • Advanced Bid Controls: A feature that allows setting a maximum bid price for Deals, giving more control over bid adjustments and spending limits.
    13. Bid Price: The bid price determines how much you are willing to spend based on the selected bid type. For Advanced Bid Controls, set a Default Bid Price and custom bid prices. Deals must be associated at the Campaign and Line level to allow for custom bid prices. When new Deals are added to the Line if a custom bid is not set, the bid price will default to the value set in the Default Bid Price field on the Line.
    14. Budget Multiplier: This feature allows the user to specify a multiplier on the daily budget. For example, setting a 1.1 multiplier will allow the Line to adjust the daily budget up to 110% of its typical daily budget. The new daily spend is calculated as Budget Multiplier x Daily Budget = New Daily Spend. Keep in mind, the daily budget may adjust based on pacing, and the actual daily spend could exceed the set multiplier.
    15. Enable Foot Traffic Reporting: Opt-in to include foot traffic data tracking for your Line.
    16. Foot Traffic Lookback: Set the time window for tracking foot traffic data.
    17. Custom Model: Enable if you plan to use a custom model for the Line.
    18. Enable Line Frequency: This option sets a frequency cap for your Line, determining how often an ad is shown to the same individual user within a specified time frame. You can set the recency, which controls the minimum amount of time between ads shown to the same user.
      • Note that frequency capping is done using IP addresses and can severely limit spend.

    Continue to the other sections to complete Line setup.

    Line Pacing & Dayparts

    On the Line Level, you can configure the following settings:

    • Daily Pacing Type:
      • Even: Spends both the daily and lifetime budgets as evenly as possible.
      • ASAP: Spends the daily budget as quickly as possible and will spend the lifetime budget evenly.
      • Primetime: Allocates the daily budget based on weighted ‘prime’ times of day.
      • Custom: Customize pacing by selecting weights for specific hours, days, and hours per day.
        • Enable ‘Apply curve to all days’ for custom weights to apply across all days.
        • If disabled, set custom weights for each hour of each day individually.
    • Catch-up ASAP: Opt in or out to allow unspent budget to catch up quickly. This will override the daily budget and daily pacing type selected to spend as quickly as possible until the Campaign or Line reaches 100% pacing. Once the Campaign or Line has caught up on any underspent budget, it will return to the selected daily pacing model.
    • Daypart in User Time Zone: If applied, dayparts will filter impressions according to the user’s timezone. If unchecked, dayparts will filter impressions according to the pacing timezone selected.

    Line Frequency & Recency

    If the ‘Enable Line Frequency’ feature is checked in the Line Setup, the Frequency & Recency section will become available for the Line.

    In the Frequency & Recency section users can configure the following settings:

    • Line Frequency: Sets a frequency cap for how often an ad is shown to the same individual user within a specified time frame. 0 will allow for unlimited impressions.
    • Time Frame Days: Choose the time frame for the frequency cap.
      • 1-14 days
    • Line Recency: Sets the minimum allowable amount of time between ads shown to an individual user.
      • None
      • 1 minute
      • 5 minutes
      • 15 minutes
      • 30 minutes
      • 1 hour
      • 6 hours

    Line Foot Traffic Reporting

    On the Line Level, users can add Foot Traffic Reporting by enabling the feature in the Setup section of the Line. This feature tracks whether users who were served your ads visited specific commercial addresses. Add Addresses in the expandable below. Foot Traffic Reports will generate in the Reporting tab. This feature costs an additional $4.00 CPM for CTV Creatives. This CPM should be added to the bid data.

    Ways to Add a Location:

    • Address
    • Latitude Longitude (Lat Long)
    • Geofence
    • Bulk Upload

    Below are the instructions for setting up a new location using each method.

    Address

    The Address method attempts to derive a Lat Long point from the address submitted. The radius associated with Address based points is limited to 200m.

    Follow these steps to add a location using the Address method:

    1. Enable Foot Traffic Reporting in Line Setup.
    2. Navigate to the Foot Traffic Reporting dropdown section.
    3. Select ‘Add Location’.
    4. Enter the following details:
      • Location Name
      • Street Address
      • State
      • Active Status
      • Building Number
      • City
      • Postal Code
      • Radius (meters)
    5. Click ‘Save’.

    Lat Long

    Follow these steps to add a location using the Lat Long method:

    1. Enable Foot Traffic Reporting in Line Setup.
    2. Navigate to the Foot Traffic Reporting dropdown section.
    3. Select ‘Add Location’.
    4. Click the ‘Lat Long’ tab on the window pop up.
    5. Give location a name.
    6. Use the map to select your Lat Long point.
    7. Click ‘Save’.

    Geofence

    Follow these steps to add a location using the Geofence method:

    1. Enable Foot Traffic Reporting in Line Setup.
    2. Navigate to the Foot Traffic Reporting dropdown section.
    3. Select ‘Add Location’.
    4. Click the ‘Geofence’ tab on the window pop up.
    5. Use the Search tool to find address of your desired location.
    6. Give location a name.
    7. Click map to create the shape of your Geofence.
    8. Utilize the ‘Reset Map Shape’ and ‘Delete Shape’ until the Geofence fits your specifications.
    9. Click ‘Save’.

    Bulk Upload

    The Bulk Upload tab will allow you to upload up to 200 locations at one time.

    Please follow the following format:

    • Name, Building Number, Street Address, City, State, Postal Code, Active, Radius
    • Example Line: City Grill, 10701, Balls Ford rd, Manassas, VA, 20109,1,117
    • Note that the fields must be separated by comma’s and the header is optional.

    Example CSV file:

    sampleDownload

    Follow these steps to add a location using the Bulk Upload method:

    1. Enable Foot Traffic Reporting in Line Setup.
    2. Navigate to the Foot Traffic Reporting dropdown section.
    3. Select ‘Add Location’.
    4. Click the ‘Bulk Upload’ tab on the window pop up.
    5. Use the format above for up to 200 locations.
    6. Upload CSV file to the Pontiac Platform.
    7. Click ‘Save’.

    See additional information on Foot Traffic Attribution here: Foot Traffic Attribution

    Line Targeting

    The Line Targeting section is designed to enables buyers to control what they buy through the following:

    • Deals
    • Exchanges
    • Geo
    • Zip
    • OLV
    • Livestream
    • Site Lists
    • App Lists
    • Deal Lists
    • Device Type
    • Channel
    • Network
    • Publisher
    • Genre
    • Series
    • Title
    • Multi Field
    • Privacy

    See below for more details for each targeting section.

    Deals

    • Public Deals: Pontiac provides pre-negotiated CTV, OTT, OLV and Audio Deals through a wide variety of publishers in all content categories, available directly in the platform. Click the dropdown to see the full list of available public deals.
    • Negotiated Deals: Click the dropdown to see your Seat’s Negotiated Deals. Reach out to the Pontiac Help Center if the deal you are looking for does not appear here.

    For more information and best practices, see the following documentation: How to Setup CTV with Deals

    Exchanges

    Select the exchanges that you wish to buy media through. These are inventory sources that your ad will run through (also known as Supply Side Platforms). You can select as many or as few exchanges as you would like.

    For more information and best practices, see the following documentation: How to Setup CTV with Exchanges

    Geo

    • Country
    • Regions
    • DMAs

    Select Countries, Regions, and DMAs for where your Line will target. Below are the key points to setting up Geo targeting:

    • Block List vs Allow List: Geo targeting allows advertisers to control where their ads appear using two different approaches: Allow Lists and Block Lists.
      • Allow List: An allow list is a list of specific geographic locations where ads are allowed to be shown. If an advertiser only wants their Line to run in a particular set of locations (e.g., Countries, Regions, or DMAs), they would use an allow list.
      • Block List: A block list is a list of geographic locations where ads are not allowed to be shown. If an advertiser wants to target a broad region but exclude specific areas, they would use a block list.
    • Country Selection: At least one Country must be selected to begin targeting. Once a country is chosen, you can further refine your targeting by adding secondary geographic layers such as Regions, Designated Marketing Areas (DMAs), or Cities. Note that Regions refer to states, provinces, or municipalities.
    • Targeting Funnel: Geo targeting works like a funnel, where the most granular targeting condition must ALWAYS be met for an impression to be served. For instance, if you select a zip code in Miami, along with the Miami DMA and United States as the country, your Line will only serve in that specific zip code since it’s the most granular level of targeting.
    • Layer Consistency: Each layer of Geo targeting must coincide with the previous layers. If there are conflicts, such as selecting the United States, a New York City DMA, and a Florida zip code, the Line will NOT be able to serve because the DMA and Zip Code are geographically inconsistent.
    • Available DMAs: The following countries support DMAs for targeting.
      • Aland Islands
      • Australia
      • Canada
      • China (Diji Shi cities)
      • Finland
      • France (Departments)
      • Germany (German Nielsen Metro Codes)
      • Korea, Republic of (Si/Gun/Gu)
      • New Zealand
      • Norway
      • Russian Federation (Federal Districts)
      • United Kingdom (ITV Regions)
      • United States (DMAs)

    Zip Codes

    You can target specific zip codes in the United States or other countries through their regional postal code system. By targeting a set of zip codes, a client’s Line ads will only serve in the most relevant areas. These zip codes can be created in either the ‘Audiences’ tab through the Custom Audience Zips Type or in the Line Item targeting menu.

    To create a list of zip codes in the Line Item targeting menu, follow the below steps:

    1. Select the Country: From the dropdown menu, choose the country you want to target.
    2. Enter Zip Codes: Paste the zip codes you wish to target into the textbox, separated by commas.
    3. Allow List (Target): Use this to target specific Zip Codes.
    4. Block List (Anti-target): Use this to avoid specific Zip Codes.
    5. Add a Country: To add a country to the dropdown menu, contact your Account Manager via email

    Tip for Better Scale:

    • Expand Zip Targets: If your zip code targeting isn’t scaling effectively, use the ‘Expand Zip Targets’ feature. In the Targeting menu, open the zip code tab, enter a radius in meters, and select ‘Get Zips’. This will find zip codes within this radius from the center point of the zip code’s entered. A window will open showing you the list of zip codes found within this radius. Select ‘Add Zips’ to add the new zip codes to the targeting on the Line Item.

    OLV

    Video environment targeting can be found in the ‘OLV’ tab of the ‘Targeting’ section on both the Campaign and Line Item levels.

    Playback Type:

    • PreRoll: An instream placement where ad plays before streaming video content.
    • MidRoll: An instream placement where ad plays during streaming video content.
    • PostRoll: An instream placement where ad plays after streaming video content.
    • Outstream: An outstream video is placed in non-video environments among other types of content, ie. web article or mobile game.

    Player Size:

    • Large: Minimum width of 640 pixels
    • Medium: Minimum width of 320 pixels, maximum width of 639 pixels
    • Small: Maximum width of 319 pixels

    Video Playback Method:

    • Autoplay with Sound On
    • Autoplay with Sound Off by Default
    • Click to Play
    • Mouse-Over

    Livestream

    As noted in the figure above, checking the livestream box will filter out any on-demand (VOD) inventory to target only impressions within content being live-streamed. Live content typically includes sports games, news, coverage of live events, etc. Not all publishers and streaming platforms contain live content, so it is recommended to run an Inventory Availability report to verify if live content is available prior to applying this targeting feature.

    Site Lists

    If no site list is attached to your Line, domain targeting will be open by default.

    • Create Custom Lists:
      • Navigate to the ‘Inventory’ tab.
      • Select ‘New Site List’ or ‘New App List’ or ‘New Deal List’.
      • Once a list is saved, it will automatically appear under the ‘Site Lists’ or ‘App Lists’ or ‘Deal Lists’ section in the ‘Targeting’ menu of the Line.
    • Premade Lists:
      • Pontiac also provides premade site lists and app lists for various categories that you can choose from. See the full list and definitions in the following documentation: Site & App Lists
    • Allow List vs. Block List:
      • Allow List (Target): Use this to target specific sites or apps.
      • Block List (Anti-target): Use this to avoid specific sites or apps.
    • How to Associate Lists:
      • Go to ‘Edit Targeting’ within your Line.
      • In the ‘Sites Lists’ or ‘App Lists’ or ‘Deal Lists’ tab, select the ‘Allow List’ or ‘Block List’ bubble, depending on your targeting needs.
      • Click the green plus sign next to the list you want to target or avoid.
      • The associated lists will appear on the right side of the screen.
      • Click ‘Save’ and the list targeting will be applied.

    Note, when creating a new Site List you must paste each website on a new line. The URL should include the top-level domain, second-level domain, and subdomains if applicable. URLs should not include the scheme or subdirectories.

    App Lists

    Follow the directions under the above Site Lists to create and associate App Lists. When creating a new App List, please use the following format on new lines for each app.

    • Line Format: App name, OS ID
    • Line Example: com.king.candycrushsaga, 2

    Deal Lists

    Follow the directions under the above Site Lists to create and associate Deal Lists.

    When creating a new Deal List, all available deals will be shown on the left hand side. To add them to your new Deal List, just click the green plus symbol. Press the red minus symbol to remove the deal.

    When adding a Deal List to targeting, click the green symbol to add the Deal List and press the red minus symbol to remove the Deal List.

    Device Types

    Target based on the following Device Types:

    • Personal Computer
    • Connected TV (CTV)
    • Phone:
    • Tablet
    • Connected Device
    • Set Top Box

    Channel

    To Target specific Channels, enter each value on a separate line and follow the following formatting:

    • Line Format: Channel
    • Line Example: tlc

    Note that you can Require Channel and create a Channel Allow List or Block List.

    Network

    To Target specific Networks, enter each value on a separate line and follow the following formatting:

    • Line Format: Network
    • Line Example: discovery

    Note that you can Require Network and create a Network Allow List or Block List.

    Publisher

    To Target specific Publisher, enter each value on a separate line and follow the following formatting:

    • Line Format: Publisher
    • Line Example: roku

    Note that you can Require Publisher and create a Publisher Allow List or Block List.

    Genre

    To Target specific Genres, enter each value on a separate line and follow the following formatting:

    • Line Format: Genre
    • Line Example:
      • sitcom
      • comedy
      • family

    Note that you can Require Genre and create a Genre Allow List or Block List.

    Series

    To Target specific Series, enter each value on a separate line and follow the following formatting:

    • Line Format: Series
    • Line Example: 9e546169b8652754ea43f33d8618135e

    Note that you can Require Series and create a Series Allow List or Block List.

    Title

    To Target specific Titles, enter each value on a separate line and follow the following formatting:

    • Line Format: Title
    • Line Example: epg

    Note that you can Require Title and create a Title Allow List or Block List.

    Multi Field

    The Multi Field option enables targeting across multiple fields simultaneously. If content matches any of the selected fields (genre, series, title, etc.), the add will be shown to the viewer.

    • Line Format: Content
    • Line Example:
      • roku
      • sitcom
      • comedy
      • family
      • epg

    Note that you can create a Multi Field Allow List or Block List.

    Privacy

    As noted in the image above, if either of the following options are selected, targeting by any persistent identifiers (e.g., cookies, IDFAs, Google ad IDs, fingerprints), precise geolocation, full IP addresses or full referrer URLs is prohibited. This data will be stripped from the bid request before filtering is applied. In addition, IP address or IFAs cannot be passed back to clients or passed on through pixel/creative macros.

    • Serve to COPPA: If this box is checked inventory regulated “COPPA” ( Children’s Online Privacy Protection Act) will be purchased.
    • Serve to DNT: If this box is checked users who have elected not to be tracked will be served to.

    Line Creatives

    On the Line Level, users can Associate Creatives. In this window, you can add and remove creatives that are available for association with the Line. Note that Creatives must be uploaded and edited on the Advertiser Level. For more information see the following documentation: Creatives

    Line Audiences

    Associate Audience Segments to the Line of your choosing through Custom Audiences, Contextual Audiences, or ART Audiences.

    Custom Audiences

    To create a Custom Audience, go to the ‘Audiences’ tab and select ‘New Custom Audience’. Give the Audience a name and select the type of Audience from the dropdown. Here is a list of Types available and the proper line formatting:

    • IP Ranges
      • Line Format: [IP] or [Start IP],[End IP]
      • Line Example: 63.148.81.24 or 234.123.0.13,234.123.10.15
    • Zips
      • Line Format: [Zip Code],[Country Code]
      • Line Example: 03102,US
      • Note that if the country code is omitted the US is used by default.
    • IFA
      • Line Format: [Device IFA]
      • Line Example: 735612e1-d4b9-40ec-83da-9ea0d3c5ceb3
    • Hashed IPs
      • Line Format: [IP Hash]
      • Line Example: 225f334d5db5e4c824d49cd7b03fc73ae21d1c715573a7c1a86abb7a11a80364
    • Full URL
      • Line format: [Full URL]
      • Example: www.viki.com/videos/1153464v
      • Note that the URL should not include the scheme.

    Enter the Audience data according to the indicated format. These Audiences will automatically be available to associate to any Campaign.

    Important things to note:

    • Each seat can have a maximum of 50 updatable custom audiences at a time.
    • These audiences can also only be updated 50 times per day.
    • Custom Audiences expire after 180 days. If a segment appears in gray and cannot be associated, it is either expired or cannot be used for the selected creative or inventory type.

    To associate Custom Audience Segments to a Campaign:

    1. Navigate to the ‘Audiences’ section.
    2. Click the ‘Associate Segments’ button. The segment selection window will appear.
    3. Open the ‘Custom Audiences’ dropdown.
    4. Click ‘Add New Group’ on the right hand side and drag and drop the Custom Audience name to the right box.
    5. Choose to include or exclude the segment.
    6. Select which Boolean Logic to follow: Boolean Logic

    Contextual Audiences

    Contextual AI is an AI-based, custom targeting solution that performs deep content analysis to find the best contextual placements for your ads. The Contextual AI will use the URLs or Text entered in the Audience Input section to build a lookalike model and return a list of the most contextually relevant URLs for targeting.

    To create a Custom Contextual Audience, go to the ‘Audiences’ tab and select ‘New Contextual Audience’. Give the Audience a name and select one of the Input Types:

    • URLs: Enter source sites below that represent your brand’s target content, this should be the Full URL including the scheme, subdomains, and all subdirectories. Sites should be text rich and not behind a paywall. Enter each URL on a new line.
    • Text: Enter a descriptive paragraph of text about the topic of interest to build a list of contextually relevant URLs for targeting. Text should have a minimum of 50 words and maximum of 500.

    Associate a Contextual Audience Segment to your Campaign by following these steps:

    1. Navigate to the ‘Audiences’ section.
    2. Click the ‘Associate Segments‘ button. The segment selection window will appear.
    3. Open the ‘Contextual Audience‘ dropdown to browse over 300 AI segments curated by Pontiac categorized by IAB standards.
      • Note, these IAB Category segments cannot be edited and they are already available for use across all of your Advertisers at a $0.25 CPM.
      • To set bids, we recommend adding the average cost of all associated segments to your desired bids for the media.
    4. To add a Custom Contextual Audience Segment, scroll to the bottom, select ‘Custom‘, and find the segment name.
    5. Click ‘Add New Group’ on the right hand side and drag and drop the Custom Contextual Audience name to the right box.
    6. Choose to include or exclude the segment.
    7. Select which Boolean Logic to follow: Boolean Logic

    Note: Avoid layering this segment with additional inventory or audience targeting, as it may limit Campaign scale. For more information about Contextual AI, continue to the following documentation page: Contextual AI

    ART Audiences

    The first step to create an ART audience is to build out an ART report in the ‘ART’ section of the platform under ‘Audience Research’ or ‘Audience Discovery’. Create a lookalike model from an existing audience or build a new audience according to desired demographics or interests.

    Build an ART Report:

    To create an ART audience, first generate an ART report in the ‘ART’ section under Audience Research or Audience Discovery.

    1. Audience Research Audiences:
      • Select an existing audience to source key demo & interest data to build custom lookalike models. The existing audience data can be pulled from a Pontiac IP Conversion Pixel placed on the Advertiser’s website, or select key geos to build a lookalike model from the demographics & interests of the selected area.
    2. Audience Discovery Audiences:
      • Select key demo & interest categories to define, locate & build your brand’s ideal target audience. Create the ‘ideal’ user profile for your brand, then locate key target markets to reach this demographic.

    Note that on the ART Report, the field ‘Auto Refresh’ will determine the cadence at which the report data will refresh. Interest & Inventory data are updated every 30 days and new data may change report results. If a report is set to auto refresh and the matched zip codes in the results of the report are updated, this will automatically update any published audiences associated to the report.

    Publish the ART Audience

    Once you’ve created an Audience Research or Audience Discovery report, you can publish it as a custom audience for cookieless targeting across Pontiac Campaigns.

    1. Open the ART report and select the ‘Publish Audience’ button.
    2. Select the threshold for matched zip codes, choosing from:
      • All results
      • Top 10%
      • Top 20%
      • Top 50%
    3. Give the Audience a name.
    4. Click the ‘Save’ button.

    To add an ART audience to a Campaign:

    1. Navigate to the ‘Audiences’ section and click ‘Associate Segments’.
    2. On the window popup, select the ‘ART Audiences’ dropdown and find your Custom Audiences to target.
    3. Click ‘Add New Group’ on the right hand side and drag and drop the ART Audience name to the right box.
    4. Choose to include or exclude the segment.
    5. Select which Boolean Logic to follow: Boolean Logic

    To learn more, see the following documentation: ART Documentation

    Continue to the following sections if enabled in the Line Setup: Creatives, Pacing & Dayparts, Pixels, Frequency & Recency, and Foot Traffic Reporting.

    Line Pixels

    On the Line Level, users can Associate Pixels. Note that Pixels must be created and edited on the Advertiser Level. For more information see the following documentation: Pixels

    To Associate a Pixel to a Line:

    1. Navigate to the ‘Pixel’ section of the Line.
    2. Click ‘Associate Pixel’.
    3. The above pop-up window will appear, allowing you to add pixels to the Line.
      • Click the green plus sign to add pixels to the Line.
      • Click the red minus sign to remove pixels from the Line.

    Create Line from Template

    To Create a New Line using a Line Template, follow these steps:

    1. Navigate to the Advertiser and Campaign that you want to create the Line under.
    2. Within the Lines section, locate and open the Line Templates dropdown.
    3. Click the image of the desired template you wish to use for your Line creation.
    4. All Line settings will be inherited from the selected Template.
    5. Adjust any Line settings that you need. Refer to the Edit a Line documentation for more details.
    6. Click ‘Submit’ to save and create the new Line based on the selected template.

    This process will ensure that you can quickly launch Lines with consistent settings, saving time and maintaining best practices. Follow the steps outline in the following documentation if you need to Create a New Template: Create a New Template

    Edit a Line

    Setup Section

    To edit an existing Line’s Setup section, follow these steps:

    1. Go to the selected Advertiser > Campaign where you want to edit the existing Line.
    2. Navigate to the Lines dropdown section within the Campaign’s dashboard.
    3. Select the name of the Line that you would like to edit.
    4. Press the ‘Edit’ button on the upper right corner of the page to enter Edit Mode.

    In the Setup dropdown, the following fields are editable:

    • Name: Rename your Line.
    • Inventory Type: Select Web, In-App, or Combined.
    • Active Status: Check the ‘Active’ to set Line to live and uncheck it if you want to pause the Line.
    • Code: Optional and for reporting purposes.
    • Bid Type: Select Basic Bid, Bid at Floor, Advanced Bid Controls
    • Bid Price
    • Budget Multiplier
    • Enable Foot Traffic Reporting
      • Foot Traffic Lookback if the above is enabled
    • Budget Allocation Weight

    Note that when ‘Manage Budgets’ box is checked on the Campaign Level, all Lines under that Campaign will be modified to match the Start Date, End Date, and Budget Type of the Campaign, so it is not Editable when the checkbox is selected. Uncheck on the Campaign Level if you want to modify at the Line Level.

    If you have finished editing, click the ‘Submit’ button in the top right corner of the page to save and apply all changes. If you do not want to apply the edits, press ‘Cancel’ to discard changes and revert the Line to its previous settings. To continue making edits, proceed to another section.

    Pacing & Dayparts Section

    If ‘Manage Dayparts’ is enabled NOT on the Campaign Setup section and you want to edit the Pacing & Dayparts section of the Line, follow these steps:

    1. Navigate to the Pacing & Dayparts section within the Line.
    2. Make the necessary changes to the Pacing & Dayparts settings. Refer to the documentation page to review available Pacing & Dayparts options: Line Pacing & Dayparts
    3. If you have finished editing, click the ‘Submit’ button in the top right corner of the page to save and apply all changes. If you do not want to apply the edits, press ‘Cancel’ to discard changes and revert the Line to its previous settings. To continue making edits, proceed to another section.

    If ‘Manage Dayparts’ is enabled on the Campaign Setup section and you want to edit the Pacing & Dayparts section of the Line, follow these steps:

    1. Navigate to the Pacing & Dayparts section within the Campaign that the Line belongs to.
    2. Edit the Campaign and uncheck the ‘Manage Dayparts’ box to enable Line Level control.
    3. Once disabled, go to the Line Level and update the Pacing & Dayparts settings. Refer to the documentation page to review available Pacing & Dayparts options: Line Pacing & Dayparts
    4. If you have finished editing, click the ‘Submit’ button in the top right corner of the page to save and apply all changes. If you do not want to apply the edits, press ‘Cancel’ to discard changes and revert the Line to its previous settings. To continue making edits, proceed to another section.

    Frequency & Recency Section

    If the ‘Enable Line Frequency’ feature is checked in the Line Setup section and you want to edit the Frequency & Recency section of the Line, follow these steps:

    1. Navigate to the Frequency & Recency section within the Line.
    2. Make the necessary changes to the Frequency & Recency settings. Refer to the documentation page to review available Frequency & Recency options: Line Frequency & Recency
    3. If you have finished editing, close the window and click the ‘Submit’ button in the top right corner of the page to save and apply all changes. If you do not want to apply the edits, press ‘Cancel’ to discard changes and revert the Line to its previous settings. To continue making edits, proceed to another section.

    Note that if you want to Edit the Campaign Frequency & Recency section, see the following documentation: Campaign Frequency & Recency

    Foot Traffic Reporting Section

    If the ‘Enable Foot Traffic Reporting’ feature is checked in the Line Setup section and you want to edit the Frequency & Recency section of the Line, follow these steps:

    1. Navigate to the Foot Traffic Reporting section within the Line.
    2. Add or Remove Locations. See this documentation for further detail: Line Foot Traffic Reporting
    3. If you have finished editing, close the window and click the ‘Submit’ button in the top right corner of the page to save and apply all changes. If you do not want to apply the edits, press ‘Cancel’ to discard changes and revert the Line to its previous settings. To continue making edits, proceed to another section.

    Targeting Section

    To edit the Targeting section of a Line, follow these steps:

    1. Navigate to the Targeting section within the Line.
    2. Click ‘Edit Targeting’ to modify targeting settings.
    3. Make the necessary changes to the targeting settings. Refer to the documentation page to review available targeting options: Line Targeting
    4. Click ‘Save’ in the bottom right corner of the popup window to apply all changes. To discard changes and revert to the previous settings, click ‘Cancel’.
    5. If you have finished editing, close the window and click the ‘Submit’ button in the top right corner of the page to save and apply all changes. If you do not want to apply the edits, press ‘Cancel’ to discard changes and revert the Line to its previous settings. To continue making edits, proceed to another section.

    Creatives Section

    If ‘Manage Creatives’ is NOT enabled in the Campaign Setup section and you want to edit the Creatives section of the Line, follow these steps:

    1. Navigate to the Creatives section within the Line.
    2. Click ‘Associate Creatives’ to add and/or remove Creatives associated to the Line.
      • Note that you can only Edit a Creative on the Advertiser Level, not here on the Line Level.
    3. If you have finished editing, close the window and click the ‘Submit’ button in the top right corner of the page to save and apply all changes. If you do not want to apply the edits, press ‘Cancel’ to discard changes and revert the Line to its previous settings. To continue making edits, proceed to another section.

    If ‘Manage Creatives’ is enabled in the Campaign Setup section and you want to edit the Creatives section of the Line, follow these steps:

    1. Navigate to the Creatives section within the Campaign that the Line belongs to.
    2. Edit the Campaign and uncheck the ‘Manage Creatives’ box to enable Line Level control.
    3. Click ‘Associate Creatives’ to add and/or remove Creatives associated to the Campaign.
      • Note that you can only Edit a Creative on the Advertiser Level, not here on the Campaign Level.
    4. If you have finished editing, close the window and click the ‘Submit’ button in the top right corner of the page to save and apply all changes. If you do not want to apply the edits, press ‘Cancel’ to discard changes and revert the Line to its previous settings. To continue making edits, proceed to another section.

    Audiences Section

    To edit the Audience section of a Line, follow these steps:

    1. Navigate to the Audience section within the Line.
    2. Click ‘Associate Segments’ to add and/or remove Audience Segments associated to the Line.
    3. Make the necessary changes to the Audience settings. Refer to the documentation page to review available Audience options: Line Audiences
    4. If you have finished editing, close the window and click the ‘Submit’ button in the top right corner of the page to save and apply all changes. If you do not want to apply the edits, press ‘Cancel’ to discard changes and revert the Line to its previous settings. To continue making edits, proceed to another section.

    Pixels Section

    If ‘Manage Pixels’ is NOT enabled on the Campaign Setup section and you want to edit the Pixels section of the Line, follow these steps:

    1. Navigate to the Pixels section within the Line.
    2. Click ‘Associate Pixels’ to add and/or remove Pixels associated to the Line.
      • Note that you can only Create and Edit a Pixel on the Advertiser Level, not here on the Line Level.
    3. If you have finished editing, close the window and click the ‘Submit’ button in the top right corner of the page to save and apply all changes. If you do not want to apply the edits, press ‘Cancel’ to discard changes and revert the Campaign to its previous settings. To continue making edits, proceed to the another section.

    If ‘Manage Pixels’ is enabled on the Campaign Setup section and you want to edit the Pixels section of the Line, follow these steps:

    1. Navigate to the Pixels section within the Campaign that the Line belongs to.
    2. Edit the Campaign and uncheck the ‘Manage Pixels’ box to enable Line Level control.
    3. Once disabled, go to the Line Level and update the Pixels.
      • Click ‘Associate Pixels’ to add and/or remove Pixels associated to the Line.
      • Refer to the documentation page to review available Pixels options: Line Pixels
    4. If you have finished editing, click the ‘Submit’ button in the top right corner of the page to save and apply all changes. If you do not want to apply the edits, press ‘Cancel’ to discard changes and revert the Line to its previous settings. To continue making edits, proceed to another section.

    Clone a Line

    To Clone a Line, follow these steps:

    1. Navigate to the Line page of the Line that you want to Clone.
    2. Click the ‘Clone’ button located at the top right corner.
    3. Enter a New Name for the cloned Line.
    4. Adjust the Line settings as needed to match specific requirements. See the edit a line documentation for guidance: Edit a Line
    5. Click ‘Submit’ to finalize and create the cloned Line.

    Note that the cloned Line will exist under the same Advertiser and Campaign as the base Line.

    Create a New Template

    How to Save a Line as a Template:

    1. Navigate to the Line page of the Line you want to use as a Template or create a new Line.
    2. Click the ‘Save as Template’ button located at the top right corner.
    3. Enter a Name, Description, and Icon for the Line Template.
    4. Click ‘Save’ to save the Line as a template.

    You can now use this template later to create a new Line with the same structure. This will help save time, reduce mistakes, and ensure consistency in Line setup. Manage all Campaign and Line Templates on the Seat Level in the Templates tab. For more details, refer to the Create Line from Template documentation.

    Line Performance Tab

    Line Metrics

    Looking at the Line Performance tab, you can filter the Reporting Interval to adjust the top tiles section. Note that all intervals with the exception of yesterday, include metrics from today. Today’s metrics update hourly and have a 3 hour delay. The metrics include:

    • Report Date: Shows the selected report date or date range.
    • Impressions: The total number of impressions the Line served within the selected reporting interval.
    • Total Cost: The total Line spend, including media costs and any applicable margins or fees.
    • Revenue: The total Line revenue.
    • Total Cost CPM: The total cost per thousand impressions for the Line, calculated as (Total Cost / Impressions) x 1,000.
    • Line Pacing: The percentage of budget the Line has spent compared to perfect pacing based on flight dates and budget. This will update daily and takes into account spend from start date to ‘yesterday’. Optimal pacing is between 90 – 110%.
    • The Line Daily Pacing: The percentage of the daily allocated budget the Line has spent compared to the perfect daily pacing target. This will update daily and takes into account spend from start date to ‘yesterday’. Optimal pacing is between 90 – 110%.
    • Daily Budget: The actual targeted budget for today’s spend, factoring in the budget multiplier and the selected pacing algorithm.

    Below the Pacing, this tab provides dropdown insights into Bid Data, Line Daily Performance, and Video Events. Continue to see each section for more details.

    Bid Data

    In the Bid Data dropdown section, the Time Frame can be adjusted to display bid data for 15 minutes, 1 hour, 12 hours, or 1 day. This section includes four charts that provide insights into the number of eligible bid requests, bids placed, impressions served, and confirmed spend for the Line. Hover over each bar to view the time of day, time elapsed, and the metric value for more detailed insights.

    Line Daily Performance

    The Line Daily Performance dropdown section includes a chart and table. The Chart can be filtered to show Only Days with Data or All Days. The Chart compares two selected Metrics against each other. Use the dropdowns in the upper right corner to customize view and discover daily metrics about your Line’s performance.

    Select from these metrics:

    • Imps: The total number of impressions the Line served within the selected reporting interval.
    • Media Cost: The total dollar amount spent on the Line media before additional fees or margins are applied.
    • Total Cost: The total Line spend, including media costs and any applicable margins or fees.
    • Total Cost CPM: The total cost per thousand impressions, calculated as (Total Cost / Impressions) x 1,000.
    • IP Conversions: The number of conversions attributed to users by Line who were served an ad and later converted based on IP tracking.
    • Chrome Convs: The number of conversions recorded specifically from Chrome users.
    • Clicks: The total number of times users clicked on an ad.
    • CTR: The percentage of impressions that resulted in clicks, calculated as (Clicks / Impressions) × 100.
    • CPC: The average cost per click, calculated as (Total Cost / Clicks).
    • Transparency Score: A score indicating the level of transparency in reporting and data availability.
    • Foot Traffic ‘Attributed Visitors’: The number of users who visited a physical location after viewing an ad from the Line.
    • Revenue: The total revenue generated from the Line.
    • Media Cost CPM: The media cost per thousand impressions for the Line, calculated as (Media Cost / Impressions) × 1,000.
    • Data Cost: The cost associated with audience data usage for targeting.
    • Foot Traffic Cost: The cost incurred for tracking and attributing foot traffic conversions.
    • Credit Card Fee: Any additional fees applied for processing payments via credit card.
    • Hosting Fee: The fees associated with hosting Line assets, such as creative files.
    • ART Fee: A charge related to the ART usage.
    • Contextual Fee: The cost associated with using Contextual AI services.
    • Chalice Fee: A fee related to the Chalice service.

    To download a CSV file in the Line Daily Performance table, navigate to the Line Daily Performance dropdown and locate the search bar in the Table section. On the right-hand side of the search bar, click the download button to export the Line’s Daily Performance data as a CSV file. All metrics listed above are available for export. To customize the metrics included in the CSV file, click the three lines in the top right corner of the table and select or deselect the Line metrics that matter most to you.

    Video Events

    The Video Events dropdown section provides a table with detailed video performance metrics for the Line, which can be downloaded as a CSV file.

    Below is a list of all metrics:

    • Date: The reporting date for the video event metrics.
    • Imps: The number of times the video ad was served.
    • Spend Per Complete: The cost incurred for each fully completed video view
    • Starts: The number of times the video ad started.
    • 25% Complete: The number of video ads that were watched at least 25% of the way through.
    • 50% Complete: The number of video ads that were watched at least halfway through.
    • 75% Complete: The number of video ads that were watched at least 75% of the way through.
    • 100% Complete: The number of video ads that were watched entirely.
    • Completion Rate: The percentage of video ads that were fully completed, calculated as (100% Complete ÷ Starts) × 100.

    All metrics listed above are available for export. To customize the metrics included in the CSV file, click the three lines in the top right corner of the table and select or deselect the Line metrics that matter most to you.

    Campaign Delivery

    Bid Metrics

    Bid metrics are displayed on both the Campaign details and the Line details to provide insight into the bid funnel, real time delivery and any issues that may need to be addressed.

    • Eligible Requests: Bid requests or impressions that meet the targeting criteria for the Line or Campaign. This considers parameters in the ‘Targeting’ section – deals, geo, inventory targeting lists etc. If you are not seeing any eligible requests, your targeting may not be feasible if there are no impressions that meet all of the selected criteria. See the below section on troubleshooting delivery for more information.
    • Bids: Bids placed on eligible impressions. If your Line or Campaign has eligible impressions, but is not bidding there may be additional requirements blocking the bids from being placed. See the below section on troubleshooting delivery for more information.
    • Imps: Bids won, the number of confirmed impressions served by the Line or Campaign in the selected time frame.
    • Confirmed Spend: Confirmed dollars spent by the Line or Campaign in the selected time frame.

    Troubleshooting Delivery Issues

    1. Are there any eligible requests? If no, here are some steps to troubleshoot the lack of eligible requests:
      • Check the creative audit status on your ads, this can be seen in the Advertiser screen next to the creative ID.
        • If the status is ‘pending’ (yellow caution symbol) there cannot be eligible requests until your ads are audited by the Pontiac audit team. Keep in mind that the audit process may take up to one business day.
        • If your creative is rejected, it will not be able to serve on the Pontiac platform. Review our creative acceptance policy for more information on prohibited content.
      • Run an inventory availability report with the selected targeting parameters applied. If there are no estimated daily impressions available or the estimate is very low, your targeting may be too restrictive and should be expanded to find eligible impressions that meet your requirements.
      • Check your campaign & line set ups to verify that there are no conflicting targeting parameters. For example, if the campaign was set to target the state of Florida and the line set to target the state of Alabama, the line would not be able to serve. An impression must meet the targeting criteria of both the line and campaign to be eligible.
      • Check sample logs on the deal for publisher b-cats and any specific creative requirements such as duration, bitrate, etc. Verify that your creative meets all platform and publisher specs.
      • If you have content level targeting lists applied, check the deal sample logs to verify that these values are correctly formatted and in the correct field. Values in these lists will need to be exact matches to the values in the bid request (except for capitalization).
      • If you have ‘Require X’ applied on content level fields (require network, require channel, etc), check the deal sample logs for the deals targeted to see if they are passing values in these fields. If they are not populating these fields, you will need to select other deals that pass this info, or remove this setting from targets.
      • Check the deals table in the ‘Inventory’ tab for the ‘last served’ date on the deals being used. If this date is not current, it is possible the deal has expired, but has not yet been removed from the system. Reach out via the Help Center for assistance with this deal.
    2. If there are eligible requests, are there bids being placed? If no, here are some steps to troubleshoot the lack of bids:
      • Check deals table for ‘publisher approval’ required column. If the deal requires approval, you will need to submit a request via the Help Center to start the approval process for that deal. Once your creative is approved, this will appear below the creative preview in the section ‘Approved for: ‘ with the publisher name. You can find more info on this here: Creative Audit
      • Check for ‘sensitive categories allowed’ on the targeted deals if your creative has been flagged as sensitive. These creatives will only be eligible to run on deals that have explicitly been marked this category as accepted. You can find more information on this here: Sensitive Creatives
      • Reach out through the Help Center for further technical assistance if you try the above recommendations and are still not seeing bids on eligible impressions.
    3. If there are bids being placed, are there impressions being won? If no, here are some steps to troubleshoot the lack of wins:
      • Remove bid at floor price – if you are bidding higher than the floor but have this feature enabled, you will only be bidding at the floor and may be missing out on impressions that could’ve been winning with your max bid.
      • If you do not have ‘bid at price floor’ applied, you may still want to test incremental increases in the bid to see if more impressions can be won at a higher price point.
      • The publishers targeted may have additional specs or creative requirements that are blocking your creatives from serving. In most cases the specs can be found on the publishers website, the sample logs on the CTV landscape report also provide insight into requirements such as bit rates, video protocol (vast version) & more.
      • Reach out out through the Help Center for further technical assistance if you have tried the above recommendations and are still unable to see impressions won.
    4. If there are impressions being won, but the line or campaign is not meeting expectations for delivery, the following are suggestions to increase scale:
      • Increase the Budget Multiplier
      • Apply ‘ASAP’ in the Pacing section
      • Increase Frequency Caps
      • A low win rate is most likely due to the bid on the Line, test incremental increases to see how this affects Line delivery.
      • Run an inventory availability report with the selected targeting parameters applied. If there are no estimated daily impressions available or the estimate is very low, your targeting may need to be expanded to allow the line to serve. Can you add additional inventory, expand the geo or audience size, etc? The inventory availability report will also provide insight into the bid floors across the inventory within a deal, geo etc.

    Rejected Creatives

    Creative audit results will be displayed under ‘Audit Status’ next to the name of the Creative, in the ‘Creatives’ section of the Advertiser, Campaign, or Line. If your Creative is rejected, a red box will appear here. Hover over this symbol to view additional information about the audit status. Pontiac Intelligence is unable to change the audit results of Xandr/AppNexus & RiskIQ. 

    Audit results can only be changed by resolving the issue that caused the Creative to be rejected. If you think your Creative was rejected incorrectly, reach out to the Pontiac Team through the Help Center.

    • Rejected, Does not display properly: First check to see if there is a preview of the Creative in the green preview box in Pontiac and verify that the Creative fits in the designated area. If it does not fit correctly in the box you may have chosen the incorrect Creative size. You can edit the size then select ‘Save’. The Creative will be sent to audit and this process may take up to one business day to complete.
    • Rejected, Fails to render: If you are using an ad server tag, verify that the code you uploaded in Pontiac renders on your end. Check with your ad server that the tag is active and available. Email your Account Manager for additional help.
    • Rejected, Creative brand does not match Creative landing page: The brand displayed in the ad should match the brand of the website that the ad is driving users to. In order for this Creative to be accepted, you must change the brand displayed in the Creative, or change the Click URL to drive to this brand’s website. If you are driving to a third-party marketplace or other page that does not depict your branding, such as Amazon, check the ‘Use Alternative Mobile Click Url’ and enter a URL that contains the same branding represented in your ad. The audit team will use this URL to validate the branding represented in the creative. This will not be used as the landing page for the creative. Once you have edited the Creative details, ‘Save’ and close the Creative upload window. The Creative will be sent to audit and this process may take up to one business day to complete
    • Rejected, Creative does not click through properly: Your Creative will be rejected if the Creative is clicked and does not open a landing page, if the Creative is clicked and a landing page opens, but no content loads or if the Creative is clicked and a landing page loads, but an error keeps any content from being displayed. In any of these cases you must either update the landing page and then click ‘Reaudit’ or change the Click URL for the Creative and click ‘save’. The Creative will be sent to audit and this process may take up to one business day to complete.
    • Rejected, Malicious: Your account will be suspended, you will be notified in writing and an investigation will take place within three business days. Pontiac clients who upload ads deemed malicious will lose access to the platform and forfeit deposited funds.

    Incorrect IAB Creative Category

    The IAB category assigned to your creative can be found by clicking on the creative name to open the creative details window. This field is displayed below the creative in the ‘Creative Category’ field:

    These categories come from the Open RTB Specs, that can be found here in table 5.1 ‘Content Categories’: Open RTB Specs v2.5

    If you believe your creative has been assigned an incorrect IAB category, please submit a ticket through the Help Center. Be sure to include the Advertiser Name and ID associated with the creative in question so we can assist you promptly.

    © 2025 Pontiac Wiki Sec · All Rights Reserved · Developed by RDK

    • Contact Us
    • Privacy Policy
    • Terms & Conditions
    • Pontiac.media