Standard Conversion Pixels
Conversion pixels are codes that when fired, allow for the tracking of an event on your webpage. The standard conversion pixels utilize cookies to attribute a user that has seen an ad from your campaign and subsequently completed the desired action. These are placed on pages where Pontiac will ultimately try to drive users. Usually this is a purchase ‘Thank you’ page, and this pixel will fire whenever a user completes a transaction. These can be used to track micro conversions on your site as well, such as newsletter signups, meeting requests and more.
To create a conversion pixel, open the Advertiser and click ‘New Conversion Pixel’ on the right-hand side of the ‘Conversion Pixels’ dropdown. Give the pixel a name and fill in the following required fields:
Trigger Type:
- Click: This pixel will only fire when a user clicks the ad and immediately completes a conversion.
- View: This pixel will only fire when a user views an ad and completes a conversion. View will also count for users that click, do not immediately convert, but return to the domain and convert at a later time.
- Hybrid: This pixel will fire on both click AND view. Reporting can be broken out to examine click vs view.
Post View Expiration Days:
The number of days between a user being served the ad and then completing a conversion for a transaction to be counted as a valid post-view conversion attributable to the Pontiac ad. This is the ‘attribution window’ for post-view conversions.
Post Click Expiration Days:
The number of days between a user clicking on an ad and the user completing a conversion for the transaction to be counted as a valid post-click conversion attributable to the Pontiac ad. This is the ‘attribution window’ for post-click conversions.
Minimum Minutes Per Conversion:
Minimum duration of time during which a user can complete a conversion before registering another conversion.
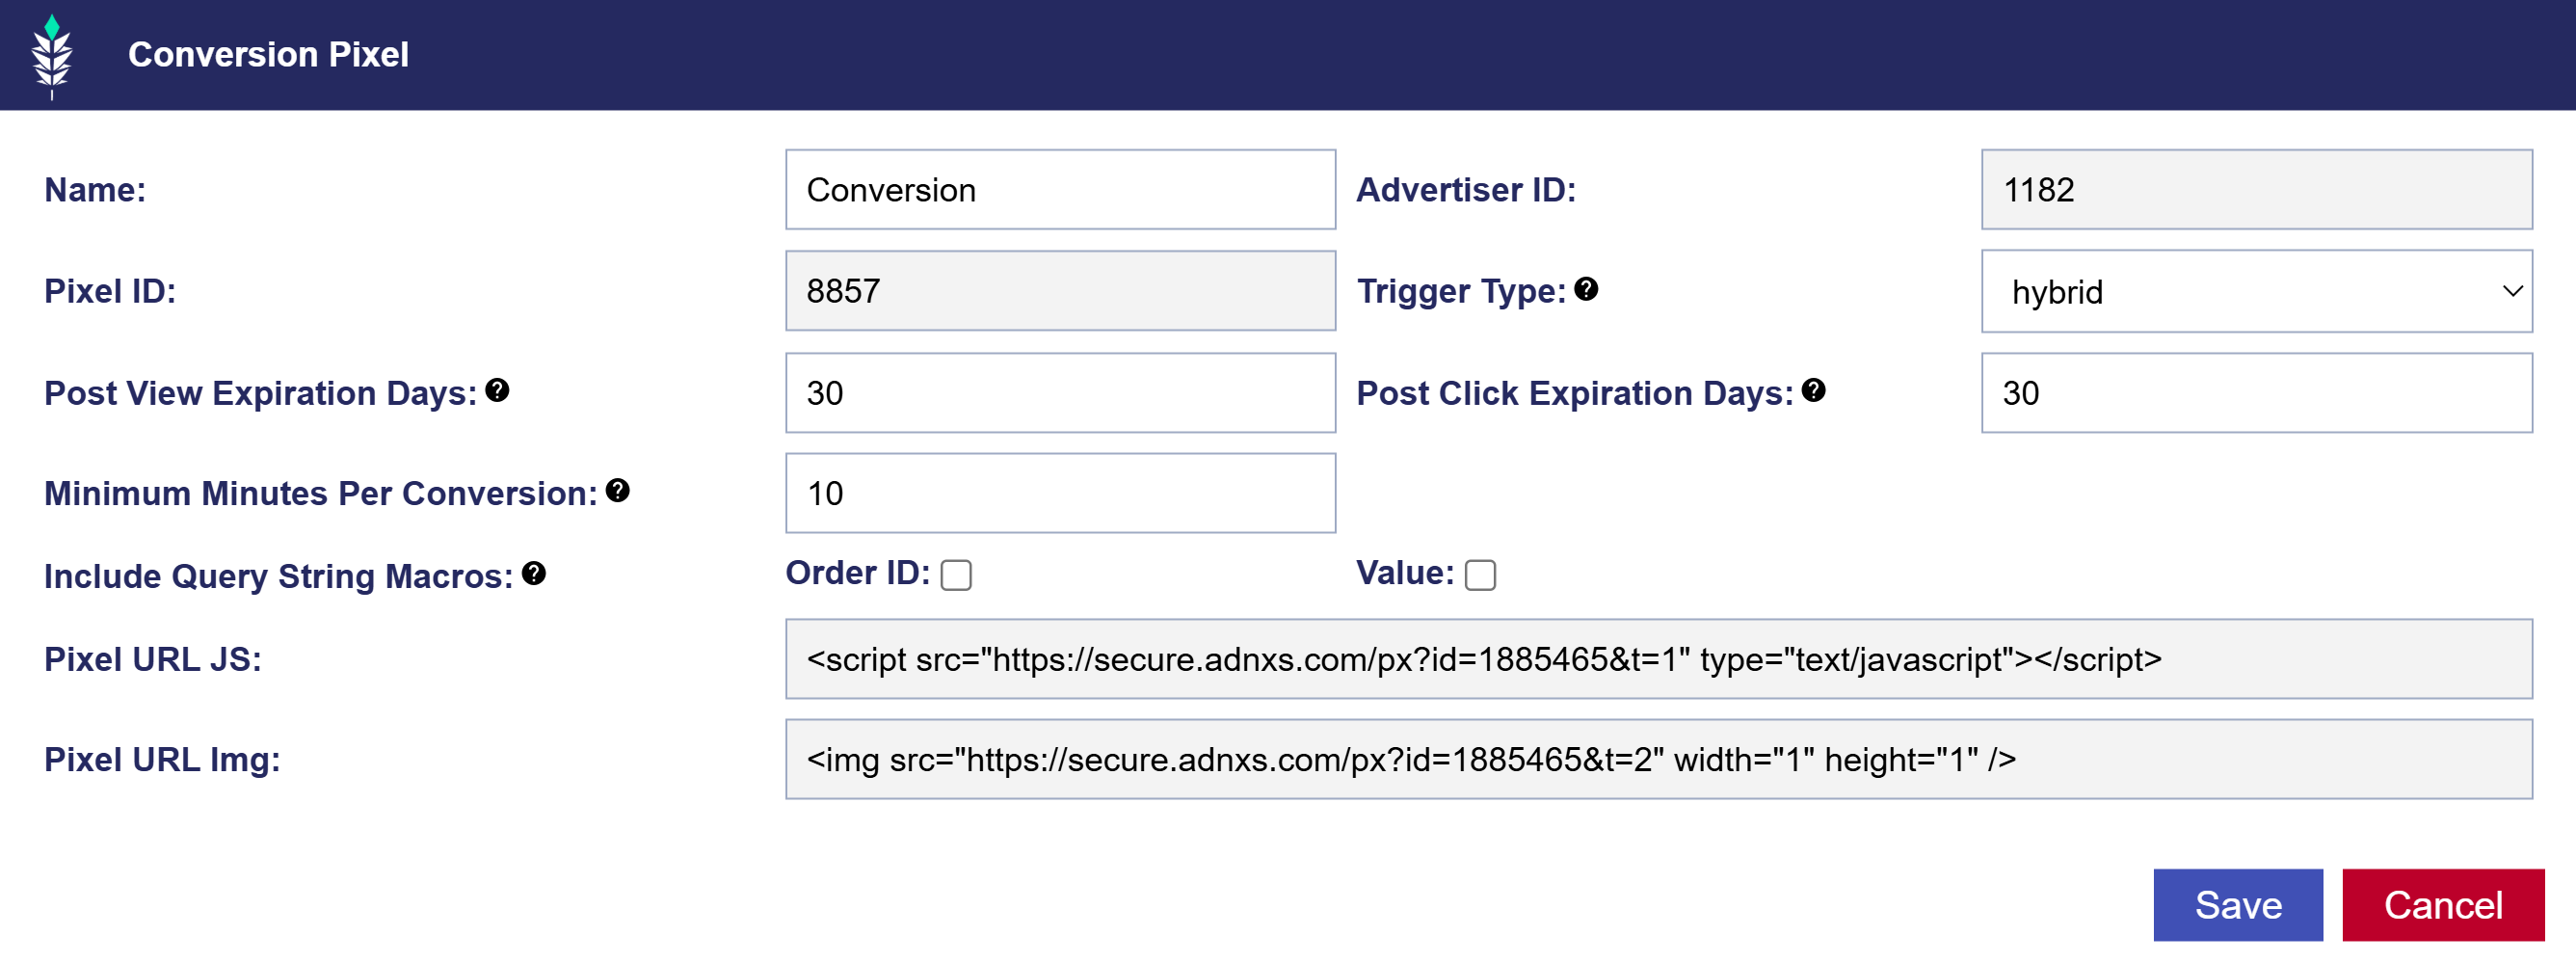
Wait a few minutes for the pixel to generate. Your pixel will appear in the Advertiser menu, under the conversion pixel dropdown, and when you click the name of the pixel you will see the following window:

Copy the ‘Pixel URL Img’ or ‘Pixel URL JS’ and place it on your website on the page that the user will see after completing a conversion. For more information on the metrics displayed for Conversion pixels, see here: Conversion Pixel Metrics.
Query String Macros
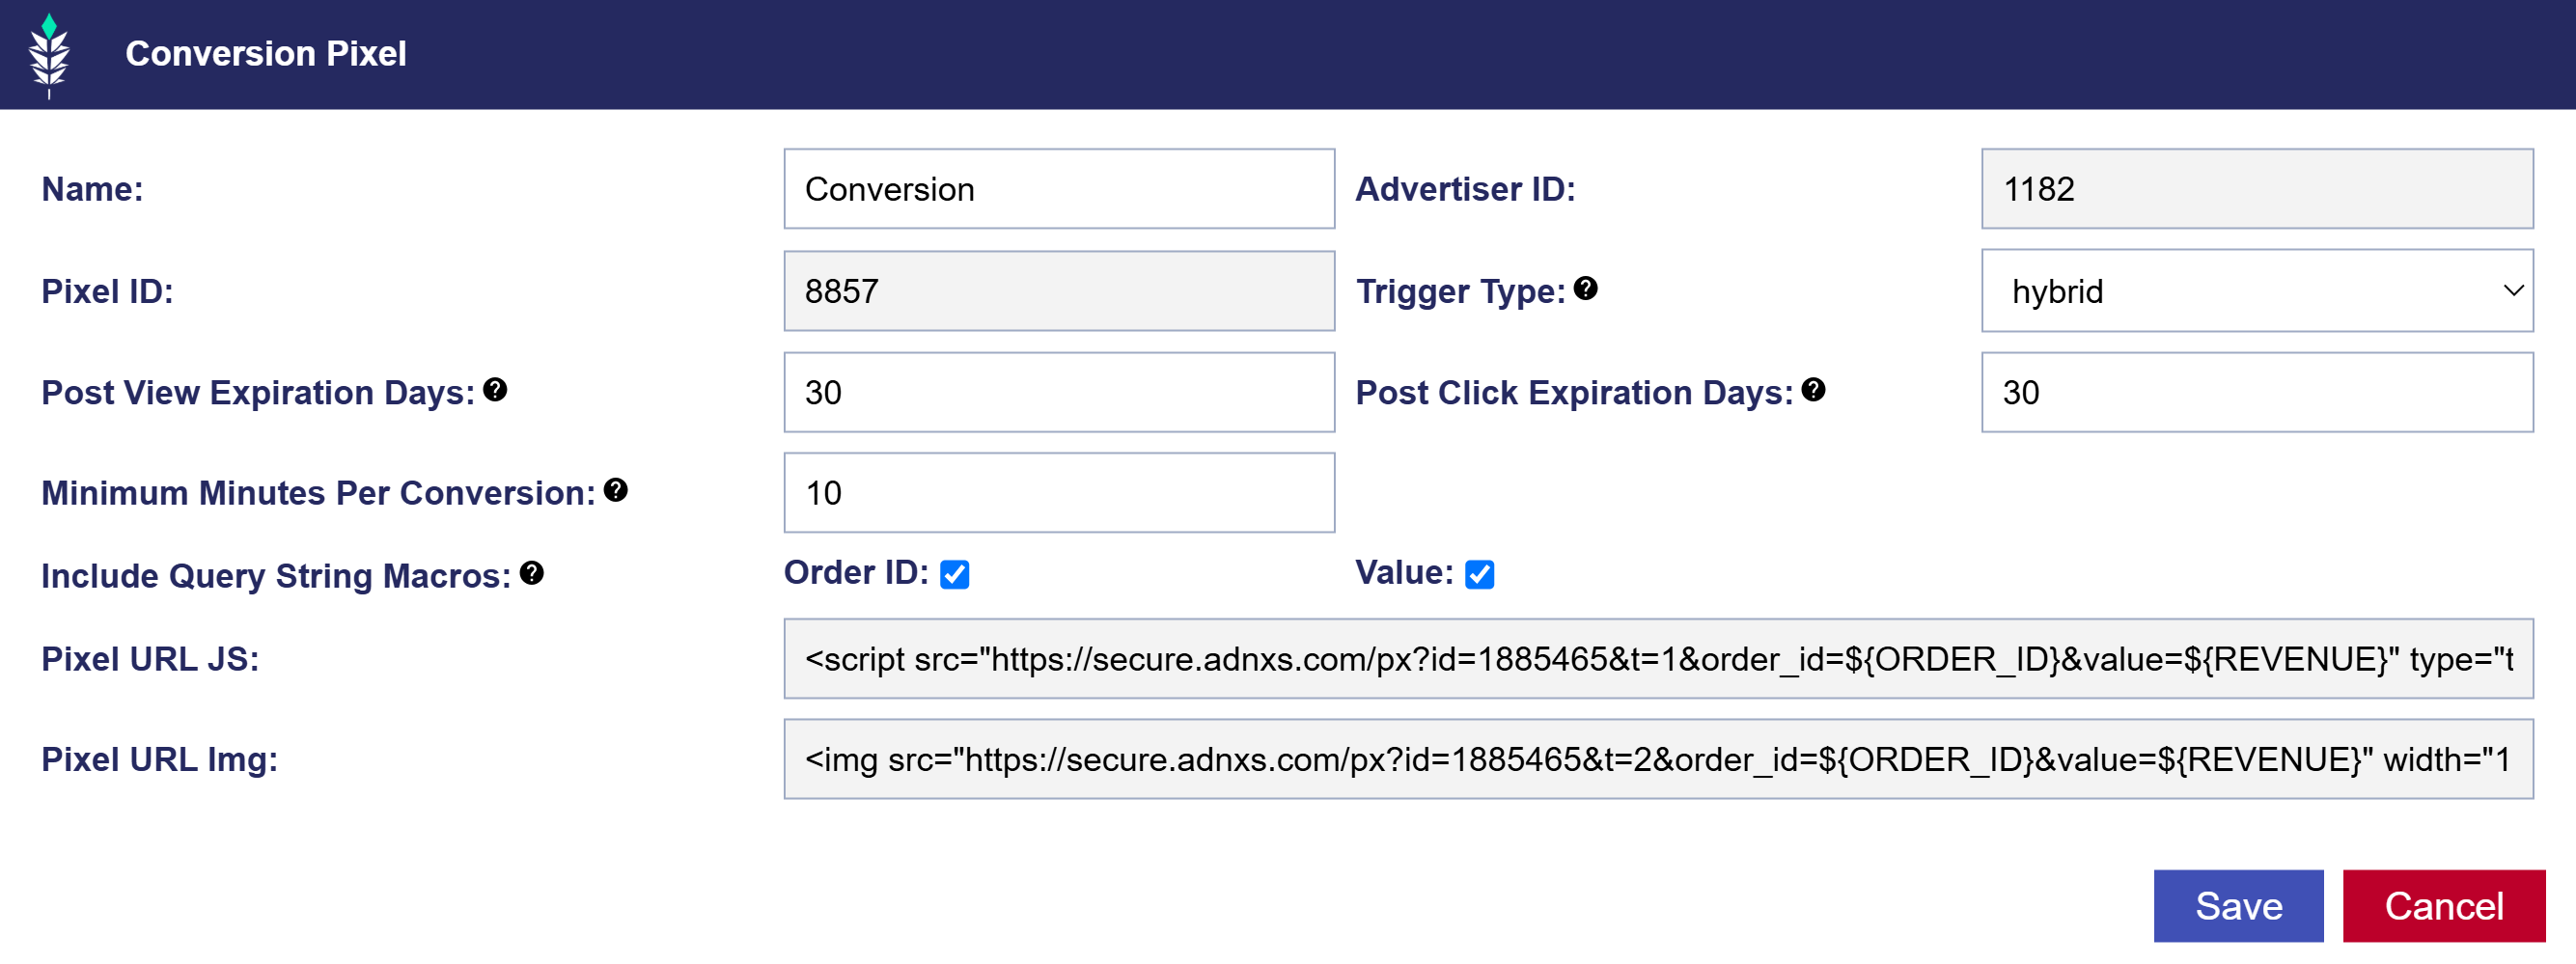
Once the conversion pixel generates you will have the option to add in query string macros. Click on the name of the pixel and check the boxes next to ‘Order id’ and ‘Value’. This will add the macros into the pixel which can then be copied and placed on the landing page after a conversion. Speak with your web developer to swap in the values that you would like to pass in. For example, ${ORDER_ID} must be replaced by the actual order ID and ${REVENUE} must be switched out for the actual value of the conversion when firing this pixel.
- Order_ID: Allows the platform to track the exact order ID number of a transaction generated from a Pontiac ad.
- Value: Allows the platform to track the exact value of a transaction generated from a Pontiac ad.
