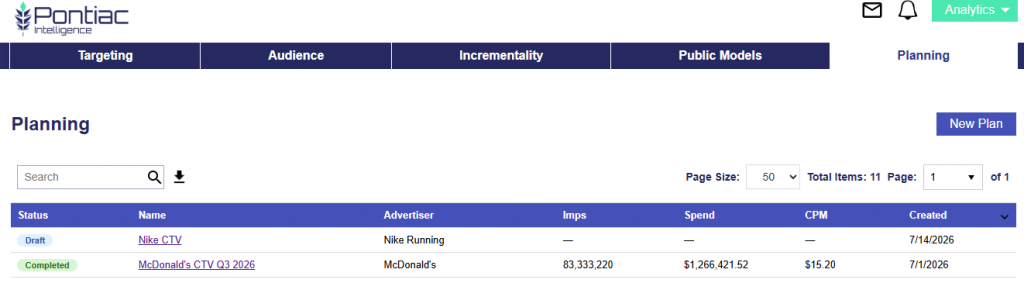
The Planning Tool allows users to quickly create a media plan with the help of LLM-powered research and recommendations. Users can provide information about their brand, campaign goals, target audience, geography, budget, and other relevant details, along with optional supporting documents.
Based on these inputs, the tool researches the brand, identifies potential audience and content alignment, and recommends inventory. It also uses Pontiac’s sample bid request data to match the campaign’s goals and targeting strategy with available inventory and expected volume, helping ensure that recommendations are grounded in real marketplace availability.
Users can review and refine the proposed plan before using it to launch campaigns directly in the platform.
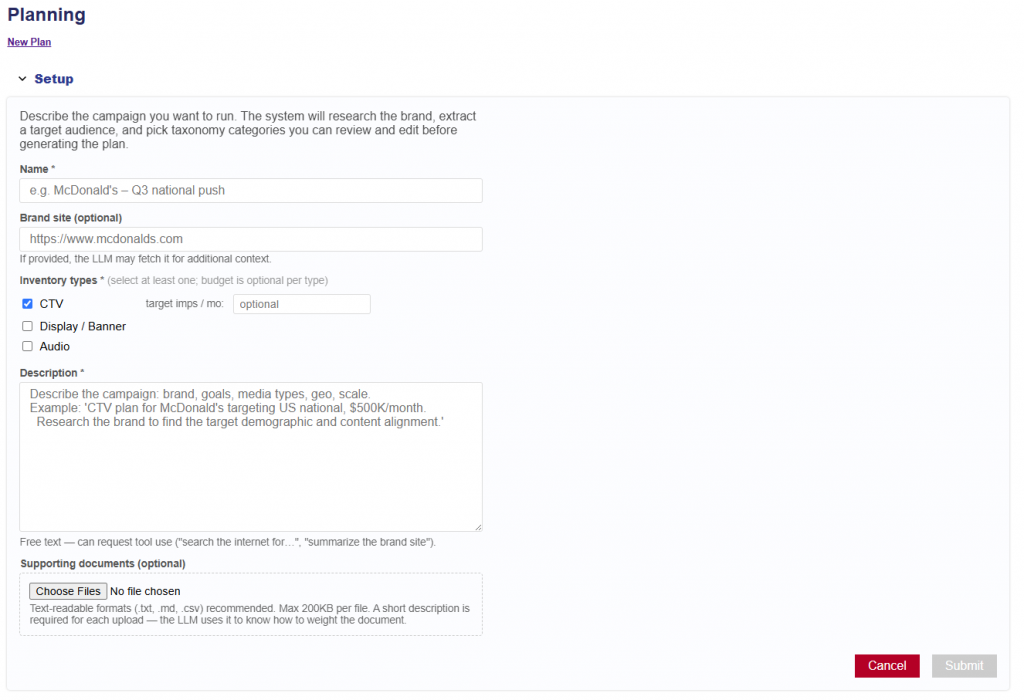
New Plan Set Up
Describe the campaign you want to run. The system will research the brand, extract a target audience, and pick taxonomy categories you can review and edit before generating the plan.
Instructions for generating a Media Plan. Follow the steps below:
Name: Enter a name for the Planning report. For example: McDonald’s – Q3 National Push.
Brand Site: Enter the brand’s site. This is an optional field, but if provided, the LLM may fetch it for additional context.
Inventory Types: Select at least one inventory type: CTV, Display / Banner, or Audio. Budget is optional for each selected inventory type. Users can also enter a target number of impressions per month.
Description: Enter a description of the campaign, including relevant details such as the brand, goals, media types, geography, budget, and desired scale.
Example: CTV plan for McDonald’s targeting the U.S. nationally with a $500K monthly budget. Research the brand to identify the target demographic and relevant content alignment.
Users can enter free-text instructions and request tool use, such as “Search the internet for…” or “Summarize the brand site.”
Supporting documents: Upload optional supporting files in a text-readable format, including .txt, .md, or .csv. Files can be up to 200 KB each. A short description is required for each upload so the LLM can understand the document’s purpose and how it should be weighted when generating the plan.
Click Submit.
Once the report is submitted, it will process and the status will change to Draft.
Continue building your Media Plan in the Draft Section:
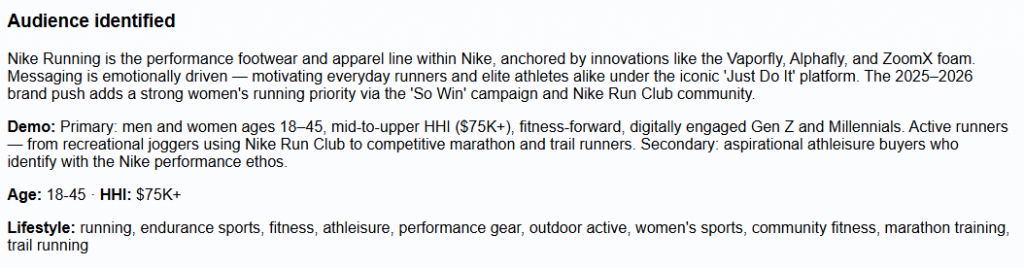
Audience Identified: Provides a summary of the audience the plan is designed to reach, based on the campaign inputs, brand research, and any supporting context provided. This may include the brand or product positioning, primary and secondary audience segments, demographic characteristics, income range, interests, behaviors, lifestyle traits, and other relevant audience signals.
Example fields may include:
Demo: Primary and secondary audience descriptions.
Age: Recommended age range.
HHI: Recommended household income range.
Lifestyle: Relevant interests, activities, behaviors, and affinities associated with the target audience.
Inventory Plan: For each selected inventory type, the Planning Tool generates recommended content veins based on the campaign goals, audience, brand context, and available inventory. Users can review and edit these recommendations before building the final plan. Users are not required to proceed with every inventory type originally selected during setup. For example, if both CTV and Audio were included initially, a user can remove Audio and continue with only the CTV plan.
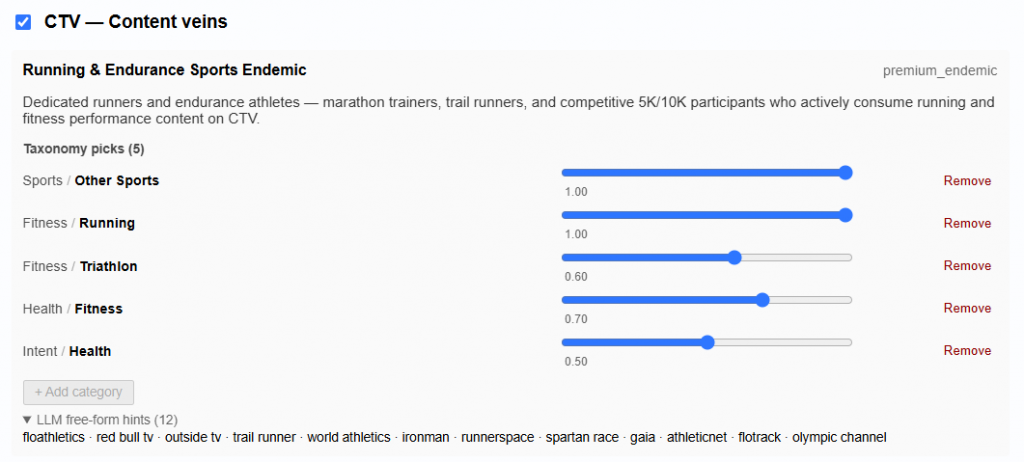
Content Veins: Content veins represent distinct audience or inventory strategies within an inventory type. Each vein includes:
Name: A descriptive label for the strategy.
Tier: Indicates the role of the strategy within the plan, such as premium endemic, value endemic, or premium reach.
Description: Explains the intended audience, content environment, and strategic purpose of the vein.
Taxonomy Picks: Structured targeting categories selected to support the strategy. Each category includes a weight indicating its relative importance to the content vein. Users can remove existing categories or add additional categories.
LLM Free-Form Hints: Additional contextual signals generated by the LLM to help identify relevant inventory that may not be fully represented by the structured taxonomy.
Users can review and modify the recommended content veins, by changing the weights, or removing taxonomy picks.
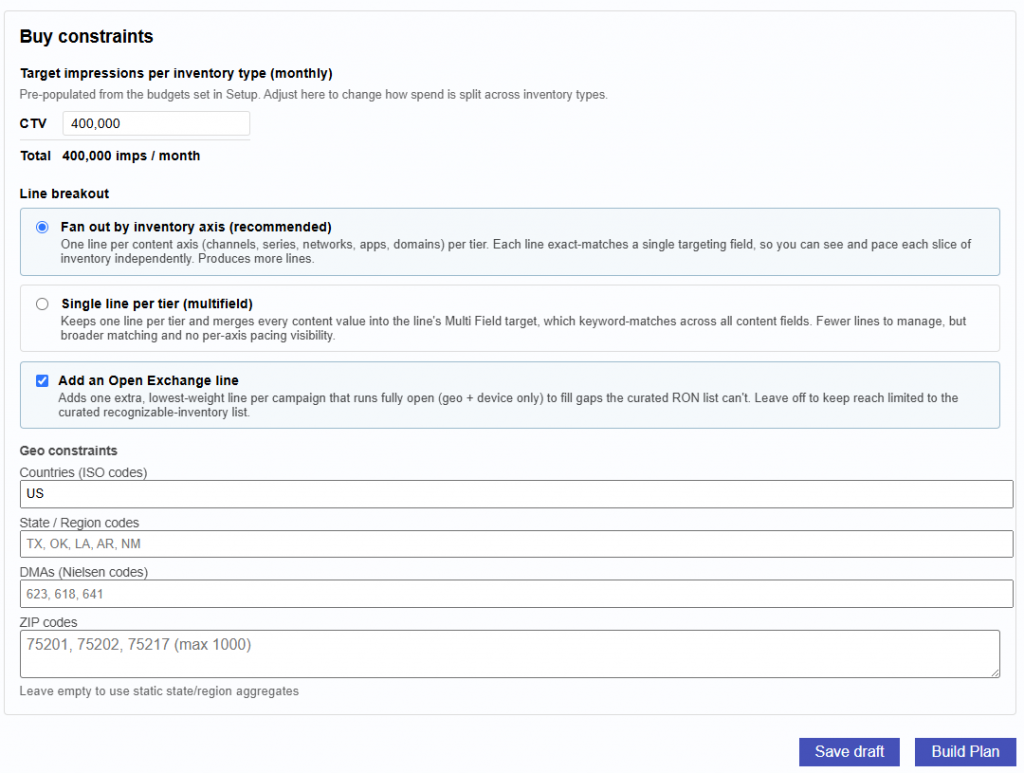
Buy Constraints: These constraints are used when matching the plan to available inventory and expected volume.
Target Impressions per Inventory Type: Set the desired monthly impression volume for each selected inventory type. Values may be pre-populated based on the budgets or impression goals entered during setup and can be adjusted before the plan is built.
Line Breakout: Users can choose how recommended inventory is organized into campaign lines.
Fan Out by Inventory Axis (Recommended): Creates separate lines for each content or inventory axis, such as channels, series, networks, apps, or domains. This provides more granular visibility and pacing control but may create more lines.
Single Line per Tier (Multifield): Creates one line per tier and combines multiple content values into a broader multi-field target. This reduces the number of lines to manage but provides less granular pacing and reporting by individual inventory axis.
Add an Open Exchange Line: Adds a lower-weight open exchange line using the broader campaign targeting, such as geography and device, to help capture additional scale outside of the curated inventory recommendations.
Geo Constraints: Users can further define where the plan should run by entering:
Countries using ISO country codes
State or region codes Nielsen DMA codes
ZIP codes (Max 1,000)
Click the Save Draft to save the contents and come back to it later.
Click the Build Plan button when ready to active and generate the plan.
Once the plan is built, users can review the generated strategy, campaign structure, inventory recommendations, projected scale, and downloadable deployment files. The Results section is split into three subtabs:
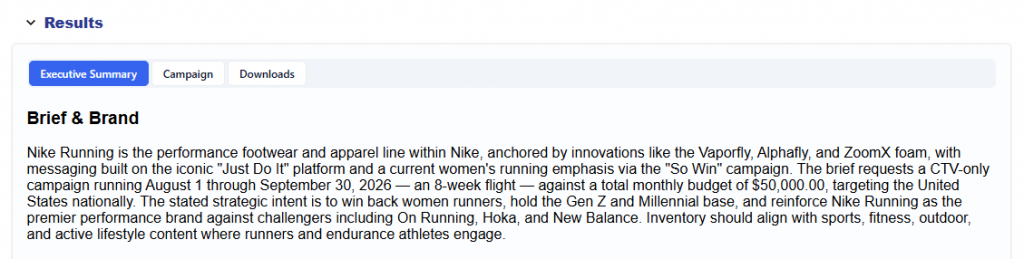
Executive Summary: Provides a high-level overview of the generated media plan, including the campaign brief, brand and audience insights, planning constraints, projected scale, room to scale, and a summary of the generated output files.
Campaign: Provides an editable view of the proposed campaign structure. Users can review inventory types, lines, bids, budgets, targeting, recommended deals, and availability estimates, and can click into each line to review or modify its settings.
Downloads: Provides access to the complete set of generated planning and deployment files, including human-readable plans, spreadsheets, Hawking import files, raw CSVs, and structured JSON outputs.
Executive Summary
The Executive Summary provides a high-level overview of the generated media plan, including:
Brief & Brand: Summarizes the campaign brief, brand context, objectives, competitive landscape, flight dates, budget, and intended media strategy.
Audience Identified: Describes the recommended audience, including demographics, lifestyle attributes, interests, and how those signals map to the proposed inventory strategy.
Constraints: Summarizes the geo, inventory types, budget, flight dates, and other planning requirements.
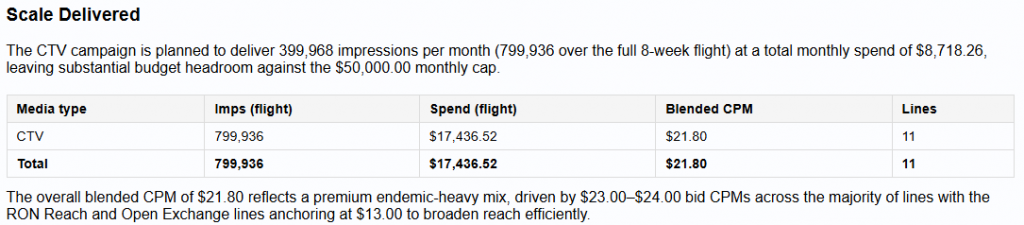
Scale Delivered: Shows projected impressions, spend, blended CPM, and line count by inventory type.
Room to Scale: Evaluates available inventory and capture rates to identify where additional scale may be available and where supply may be more limited.
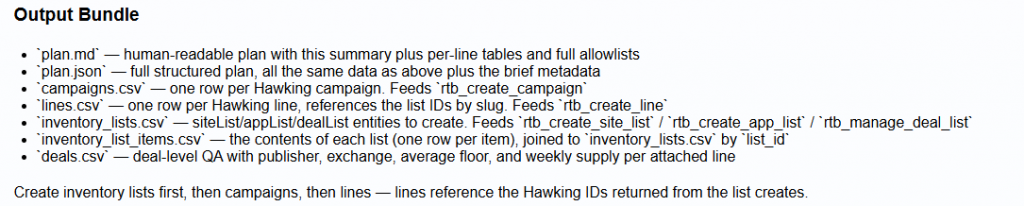
Output Bundle: Describes the files generated with the plan and how they can be used for review, analysis, or campaign deployment.
Campaign
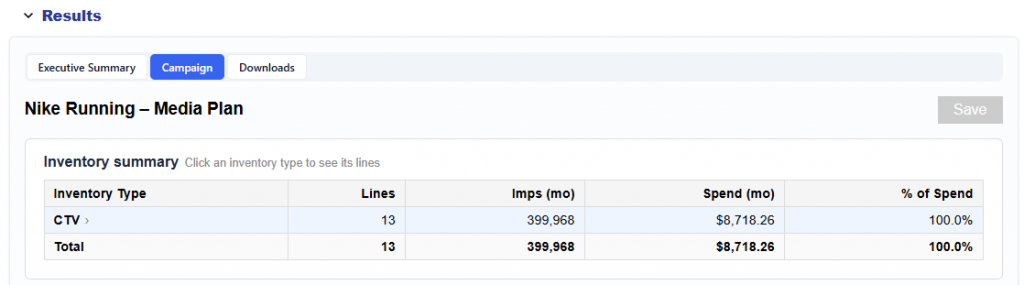
The Campaign tab provides an editable view of the proposed campaign structure.
The Inventory Summary shows the number of lines, projected monthly impressions, projected monthly spend, and share of spend by inventory type.
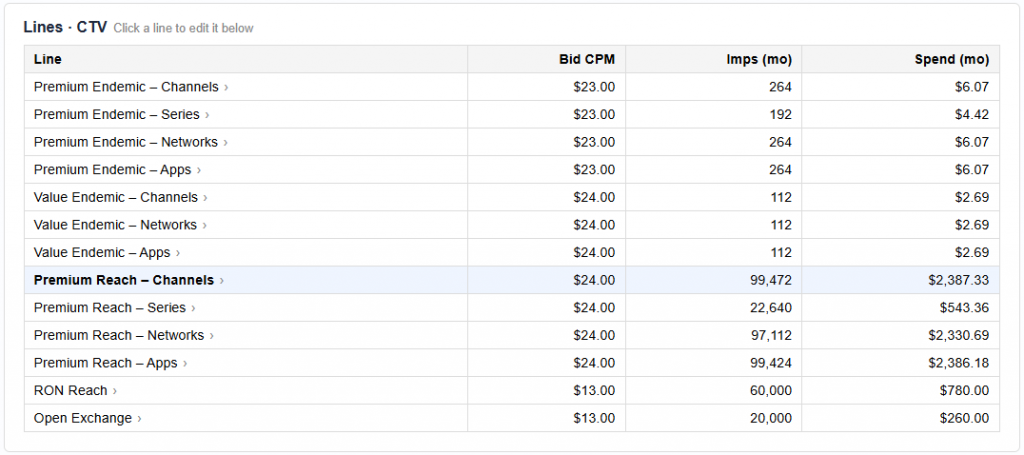
Users can select an inventory type to view its recommended lines. Each line displays:
Line name
Bid CPM
Monthly impression goal
Estimated monthly spend
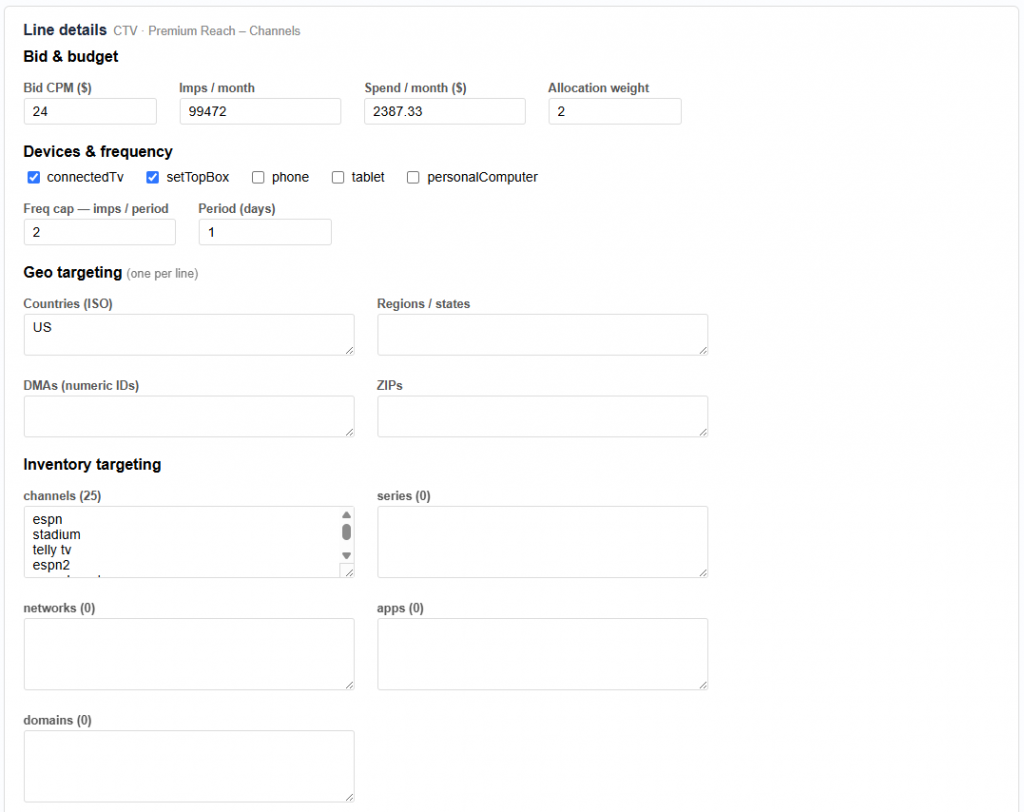
Selecting a line opens the full Line Details, where users can review and edit settings such as:
Bid CPM
Monthly impression goal
Estimated spend per month
Budget allocation weight
Device targeting
Frequency cap
Geo targeting: Countries, Regions / States, DMAs, ZIPs
Inventory targeting: Channels, Series, Networks, Apps, and Domains
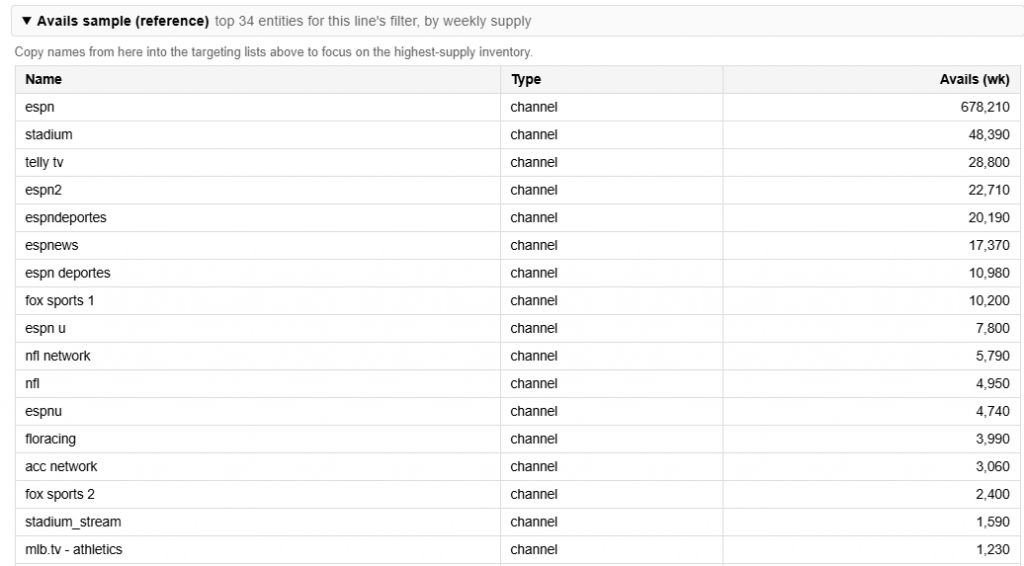
Sample availability and supply estimates
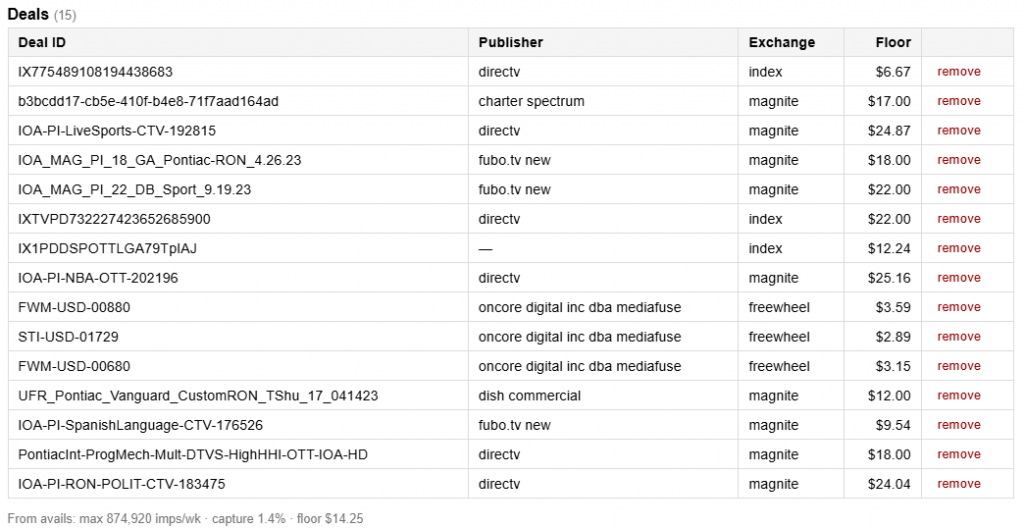
Deals that the inventory will be bought through
Expected capture rate
Average deal floor
The plan uses sample bid request data to connect the recommended content and inventory strategy with observed marketplace supply. This helps show not only what inventory is contextually aligned with the campaign goal, but also how much relevant inventory may be available.
Users can click through each proposed line to review and refine the settings before saving or launching the campaign.
Downloads
The Downloads tab provides the complete output bundle generated for the plan. These files are helpful for sharing and audit, but follow the documentation here to implement the Media Plan: Plan to Action
Recommended
plan.md: Human-readable version of the media plan
plan.xlsx: Spreadsheet version of the plan for review and sharing
plan_bundle.zip: Complete bundle of generated planning files
Hawking Import
hawking_import.json: Structured Hawking API JSON containing the campaigns, lines, and inventory lists required to deploy the plan
Raw CSVs (Hawking-shaped)
campaigns.csv : Campaign records to create
lines.csv: Line records to create
inventory_lists.csv: Site, app, and deal list records
inventory_list_items.csv: Individual items contained within each inventory list
deals.csv: Deal-level details and QA information
Other
plan.json: Full structured version of the generated plan
brief_text.txt: Original campaign brief used to generate the plan
These files allow users to review the strategy at different levels of detail, share the plan across teams, conduct additional analysis, or use the structured outputs to deploy the recommended campaign setup.
Plan to Action
Once a Planning report has been reviewed and is ready to use, it can be imported directly into a campaign. Follows these steps to launch your media plan:
Import the Plan at the Campaign Level
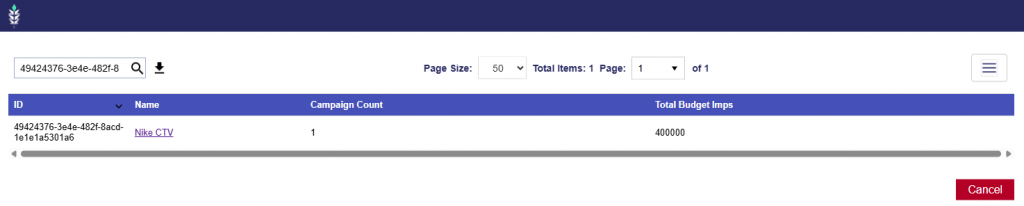
Navigate to the campaign level and click Import.
In the pop-up window, find and select the desired Planning report by name.
Click the Planning report name.
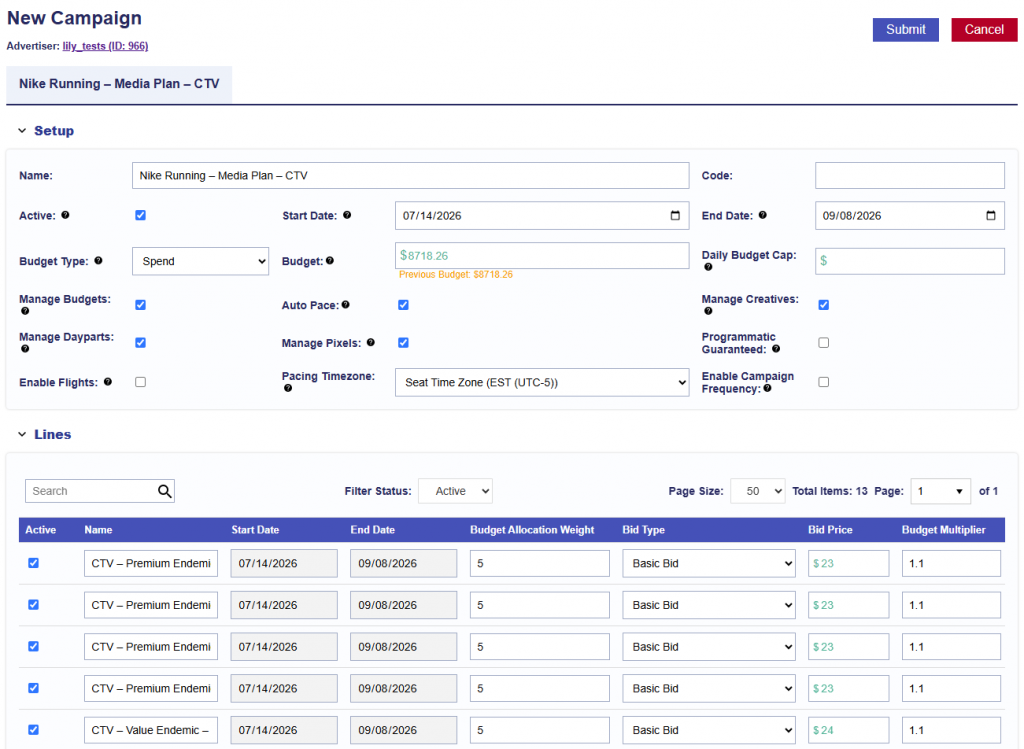
2. Review and QA the generated campaign to ensure all settings, targeting, budgets, and line configurations are as desired before launch.
The following campaign-level settings are selected by default when a Planning report is imported:
Manage Budgets
Auto Pace
Manage Creatives
Manage Dayparts
Manage Pixels
All lines included in the Planning report are also automatically populated as part of the import.
3. Associate your Creatives.
4. Associate Audience Segments if desired.
5. Associate your Pixels.
6. Once the campaign has been fully reviewed and all desired creatives, audiences, and pixels have been associated, click Submit.