New Report Set Up
Choose how you want to analyze your audience, whether through campaign performance, site visitors, or custom ZIPs, then configure dates, optimization type, and inputs to generate the report results and model.
Instructions for generating a Audience Report and Model. Follow the steps for initial setup below:
- Navigate to the Audience Tab.
- Click New Report button.
- Give report a name.
- Select the Advertiser to run the analysis on.
- Select the Analysis Mode:
- Campaign – analyze ad performance based on campaign delivery.
- Requires campaigns and lines with media served.
- Identifies which audiences and demographics drive conversions.
- Audience – profile site visitors using pixel data only.
- Requires pixel fires on the advertiser’s site.
- No campaign or line selection required.
- Tip: Can be used for pre-campaign analysis to understand your audience before launch.
- ZIP List – profile a custom set of ZIP codes with weights.
- Model learns which demographics correlate with higher-weighted ZIPs.
- Tip: Useful for profiling ZIPs based on sales, revenue, or LTV.
- Campaign – analyze ad performance based on campaign delivery.
- Choose whether the report should run once or repeat on a schedule.
- Run once builds a single report.
- Schedule re-runs it on the chosen cadence — each run retrains the model, replaces the live model in S3 when Replace the live model each run is enabled, and is saved as a new run grouped under this report.
- Rerun Interval:
- Weekly
- Every 2 Weeks
- Monthly
- Rerun Day of Week:
- Monday
- Tuesday
- Wednesday
- Thursday
- Friday
- Saturday
- Sunday
- Replace the live model each run checkbox
- On: each run’s new model overwrites the live model so it goes live automatically.
- Off: runs still produce reports and archived models, but the live model is left untouched.
- Rerun Interval:
- Click Save Report button.
Campaign Mode Example
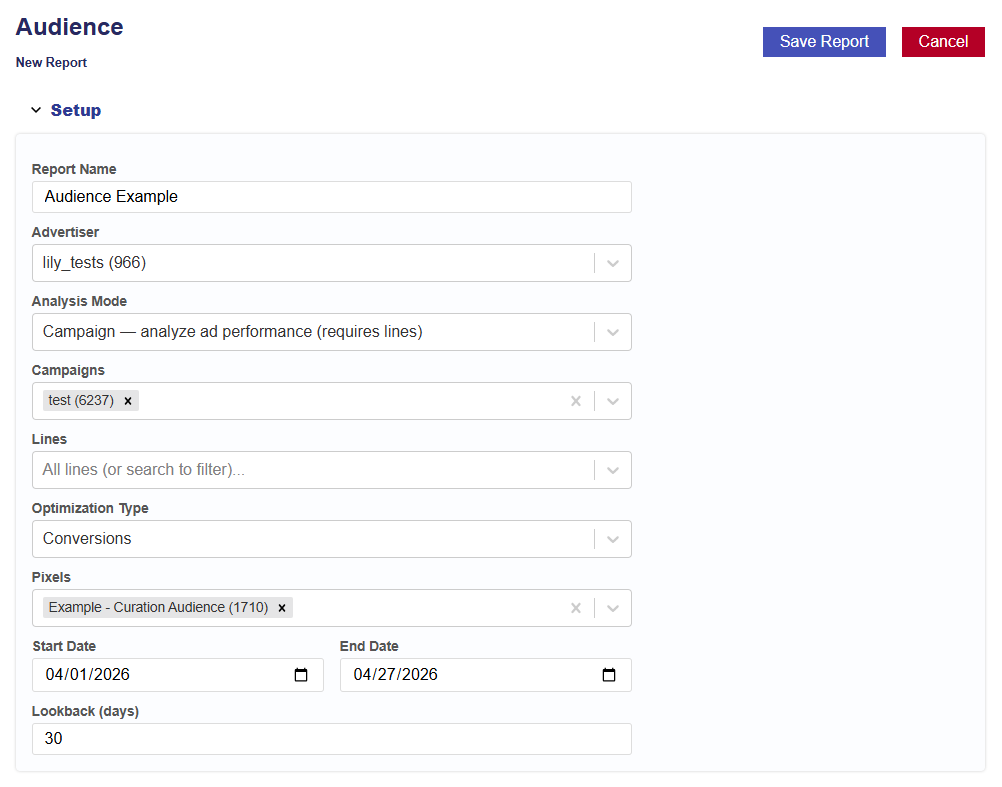
After selecting Campaign Mode, complete the following:
- Select the Campaign(s) within the chosen Advertiser.
- If no campaigns are selected, all campaigns will be included.
- Select the Line(s) within the chosen Campaign(s).
- If no lines are selected, all lines will be included.
- Optimization Type:
- Conversions: Choose the conversion pixel to be used for optimization.
- Select the analysis Start Date.
- Select the analysis End Date.
- Enter the desired lookback window (in days).
- Default is 30 days.
- This defines how far back the model will attribute conversions or clicks to ad exposure.
- Click the Save Report button.
Audience Mode Example
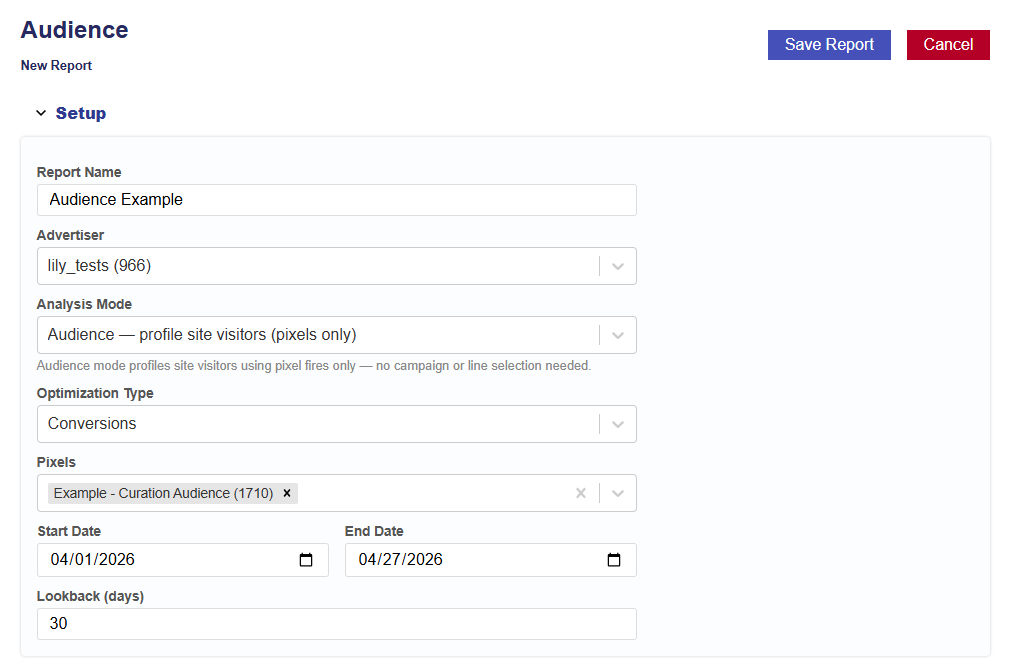
After selecting Audience Mode, complete the following:
- Select the Optimization Type:
- Conversions
- If selected, choose the conversion pixel to be used for optimization.
- Clicks
- Conversions
- Select the analysis Start Date.
- Select the analysis End Date.
- Enter the desired lookback window (in days).
- Default is 30 days.
- This defines how far back the model will attribute conversions or clicks to ad exposure.
- Click the Save Report button.
ZIP List Mode
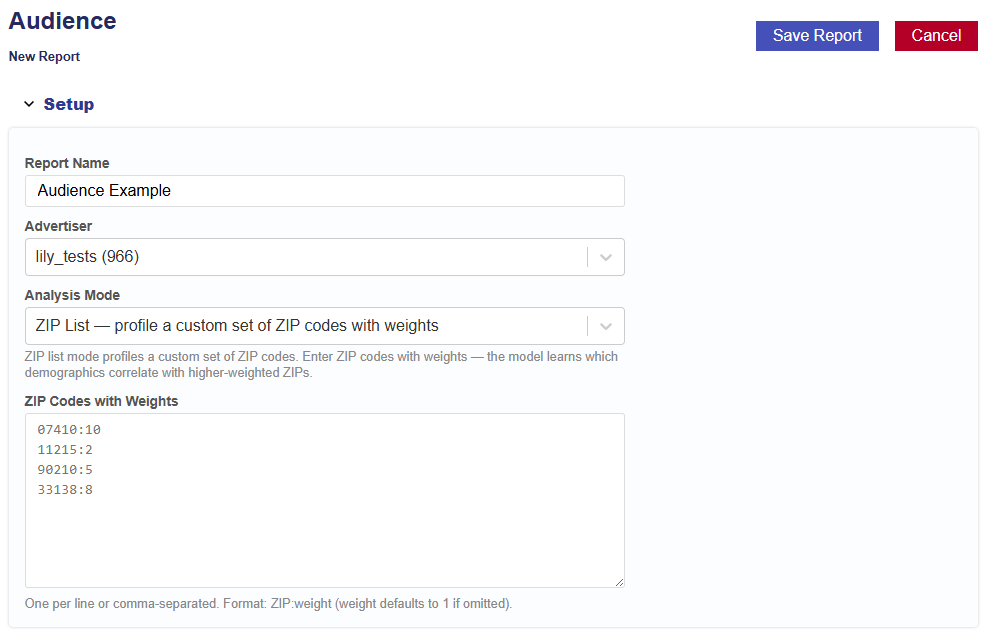
After selecting ZIP List Mode, completed the following:
- Enter ZIP codes with weights.
- One per line or comma-separated. Format: ZIP:weight (weight defaults to 1 if omitted).
- Example input: 11215:2, 33138:8
- Click the Save Report button.