On the Seat Level, navigate to the ‘Templates’ Tab to see, Edit, and Clone all Campaign and Line Templates. Templates are extremely useful to ensure you can quickly launch Campaigns and Lines with consistent settings, saving time and maintaining best practices.
Refer to the following documentation for more details on these processes, which are managed on different levels of the platform, not the Seat Level:
Navigate to the Campaign page of the Campaign you want to use as a Template or create a new Campaign.
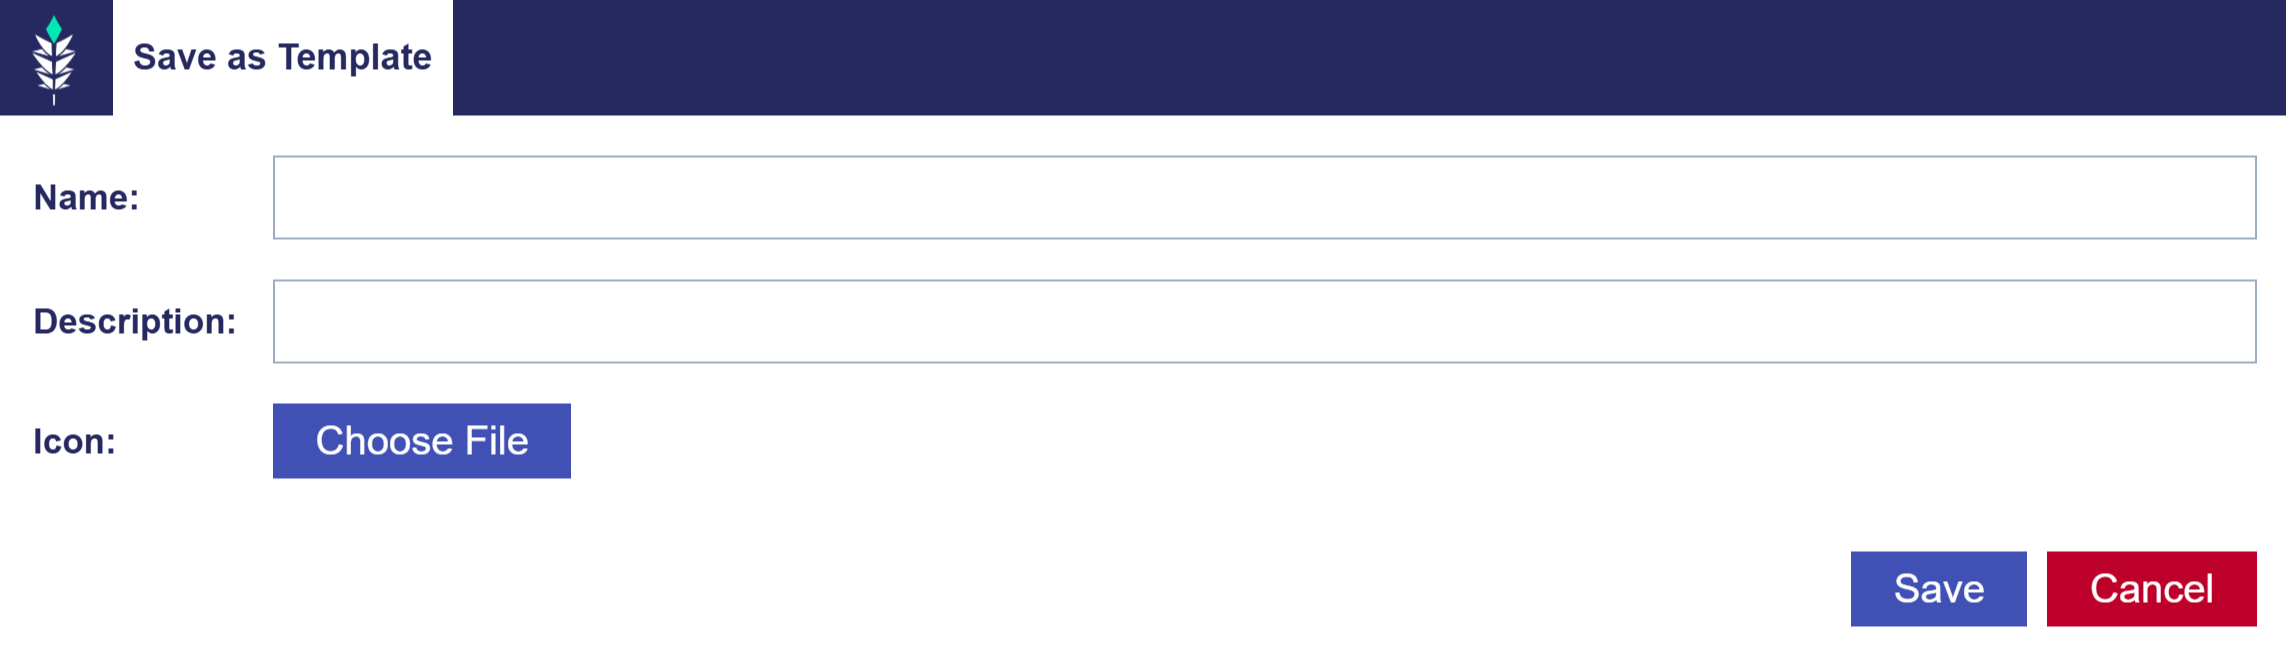
Click the ‘Save as Template’ button located at the top right corner.
Enter a Name, Description, and Icon for the Campaign Template.
Click ‘Save’ to save the Campaign as a template.
You can now use this template later to create a new Campaign with the same structure. This will help save time, reduce mistakes, and ensure consistency in Campaign setup. Manage all Campaign and Line Templates on the Seat Level in the Templates tab. For more details, refer to the Create Campaign from Template documentation.
Edit a Campaign Template
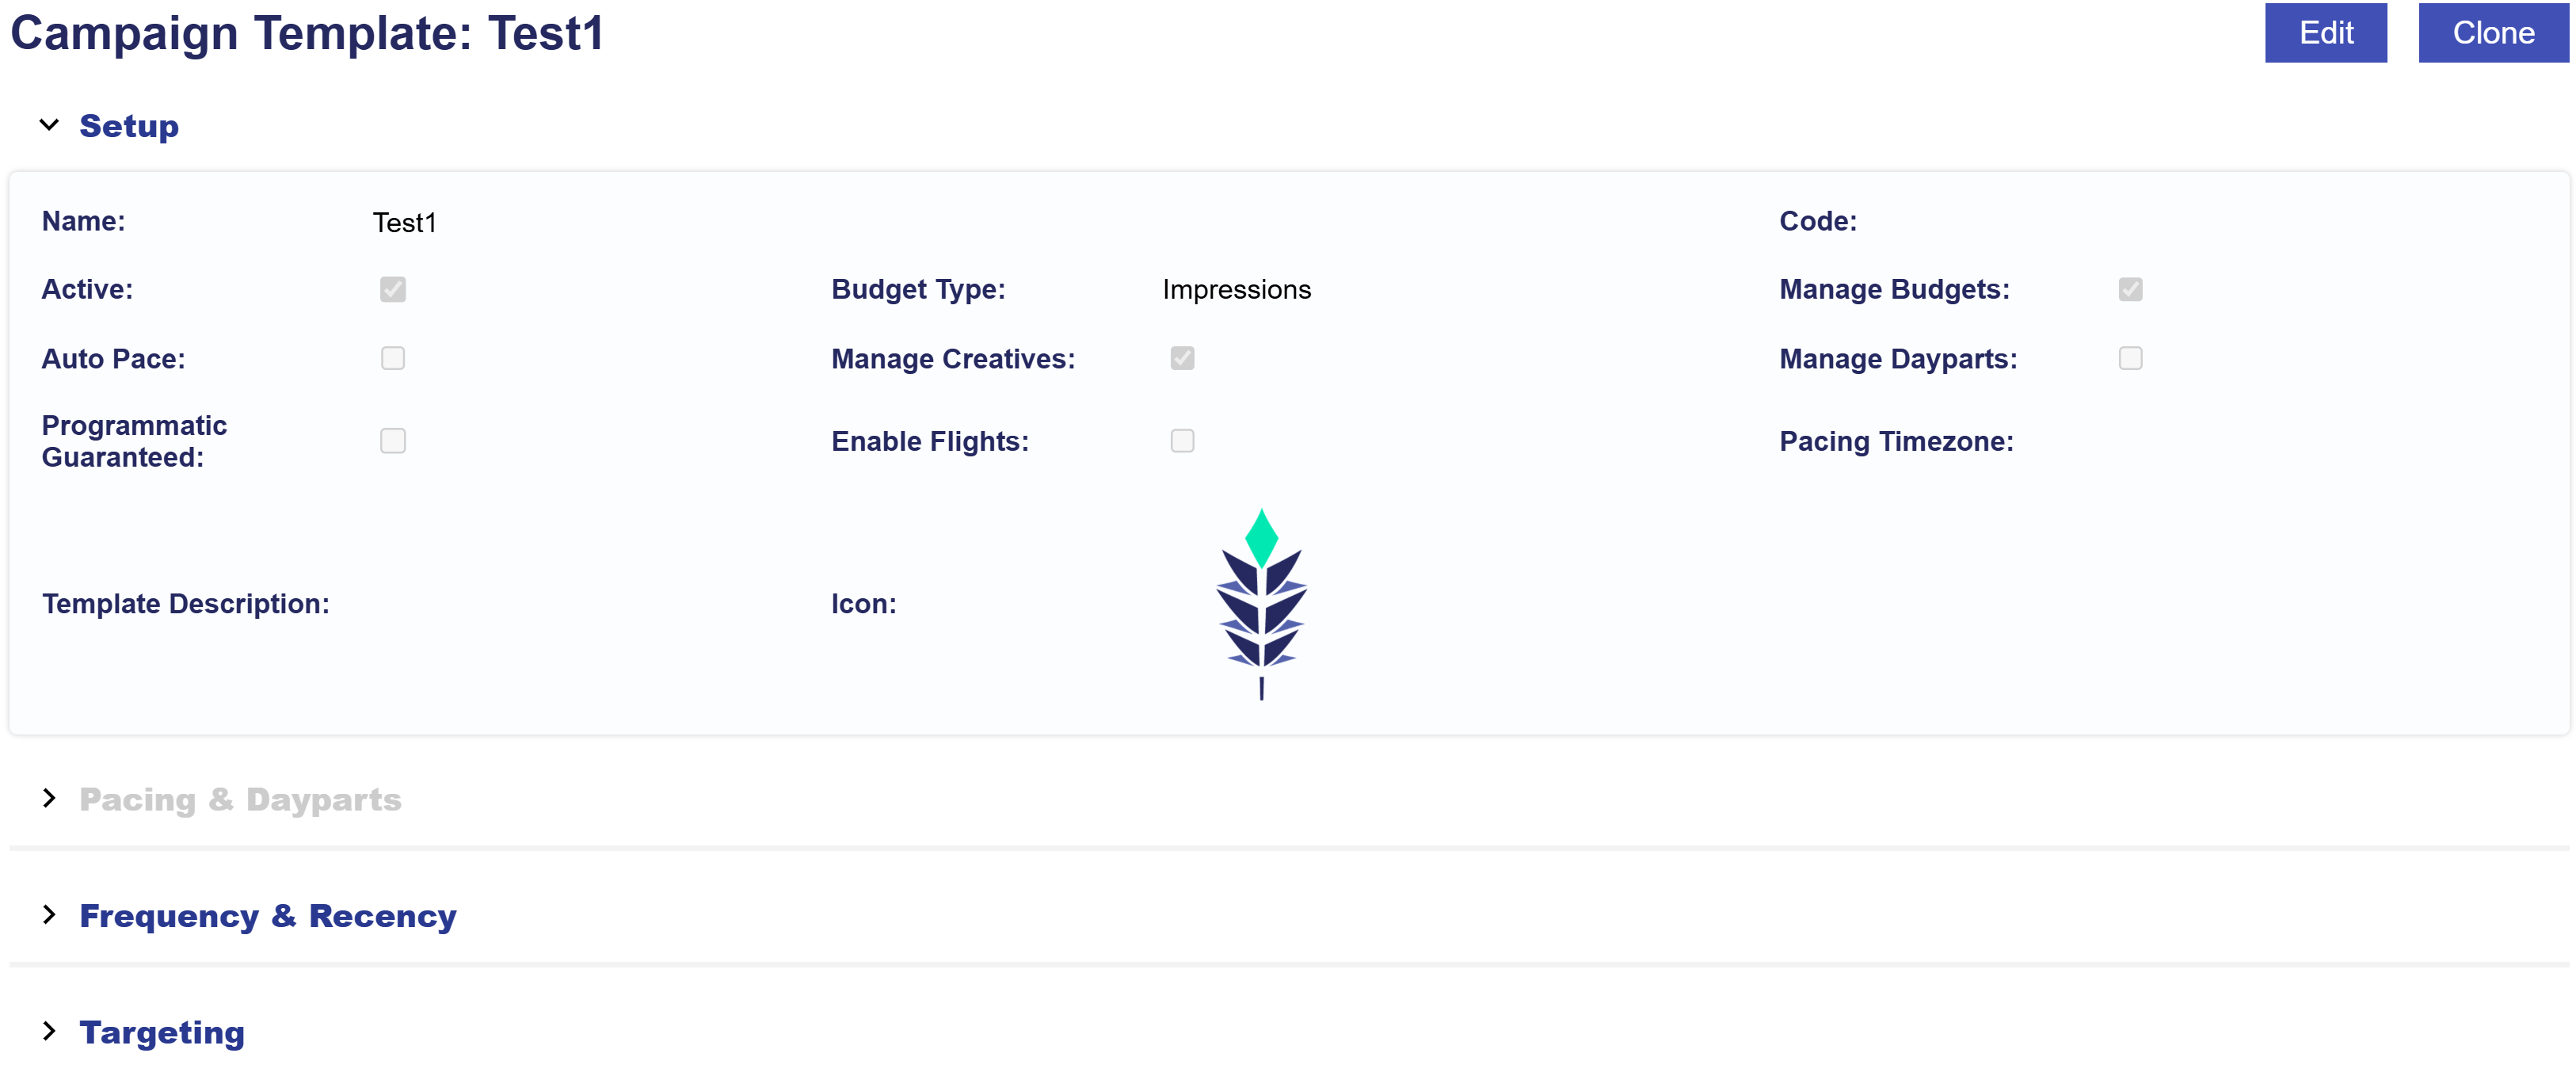
To edit a Campaign Template, navigate to the ‘Templates’ tab and expand the Campaign Templates dropdown section. Click on the name of the Campaign Template you wish to edit, and then click the ‘Edit’ button located in the top right corner. This will allow you to make the below changes to the selected Campaign Template.
Setup Section
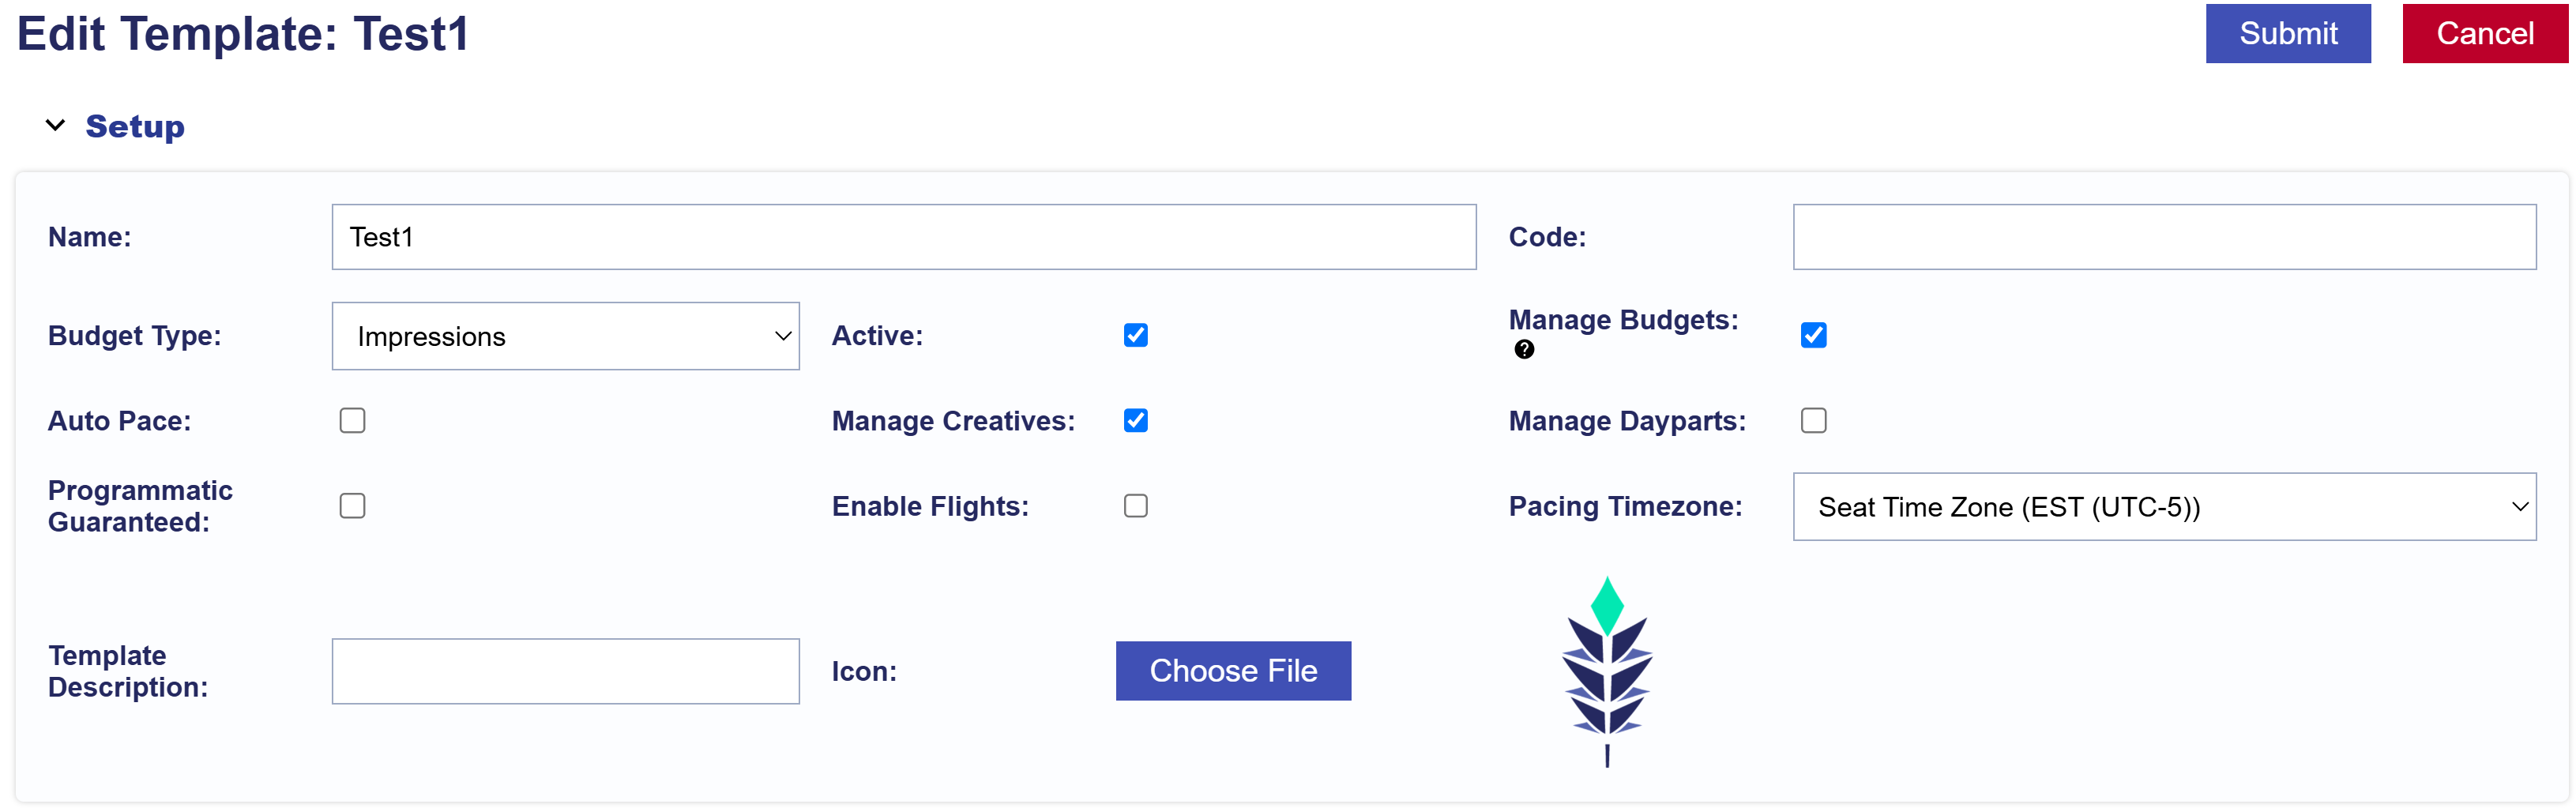
In the Setup section, edit the following fields:
Name: Enter a unique name for your new Campaign Template to identify it easily.
Code: Optional and for reporting purposes.
Budget Type: Spend or Impressions
Active Status: The ‘Active’ box is automatically checked, but uncheck it if you want to create an Inactive Campaign.
Manage Budgets: This box is automatically checked. When selected, all Lines under this Campaign will be modified to match the Start Date, End Date, and Budget Type of the Campaign. Budgets must be allocated below by percentage. Uncheck if you do not want to modify the Lines’ budgets.
Auto Pace: Select this option if you want the system to automatically pace your Campaign.
Manage Creatives: Select this option to associate creatives with the Campaign.
Manage Dayparts: This option allows you to manage pacing and dayparts at the Campaign Level.
Programmatic Guaranteed: Enabling this will erase any targeting or settings previously configured. Targeting for Programmatic Guaranteed Campaigns must be configured by the publisher on the deal. The budget and flight date fields on the Campaign and associated Line Items are for monitoring and pacing purposes only; the publisher controls flight and delivery.
Enable Flights: This option allows you to add flight dates for the Campaign. You can input a start date, end date, budget, and define whether rollover budgets will be used. If rollover is selected, you can define the rollover type: either ‘even’ or ‘next flight’.
Pacing Timezone: Select the desired seat time zone for pacing purposes.
Template Description: A brief explanation that helps you and other users understand the purpose of the Template.
Icon: An image that makes the template easily identifiable, helping users quickly recognize it.
Targeting Section
To edit the Targeting section of a Campaign, follow these steps:
Navigate to the Targeting section within the Campaign Template.
Click ‘Edit Targeting’ to modify targeting settings.
Make the necessary changes to the targeting settings. Refer to the documentation page to review available targeting options: Campaign Targeting
Click ‘Save’ in the bottom right corner of the popup window to apply all changes. To discard changes and revert to the previous settings, click ‘Cancel’.
If you have finished editing the Template, close the window and click the ‘Submit’ button in the top right corner of the page to save and apply all changes. If you do not want to apply the edits, press ‘Cancel’ to discard changes and revert the Campaign Template to its previous settings. To continue making edits, proceed to the other sections.
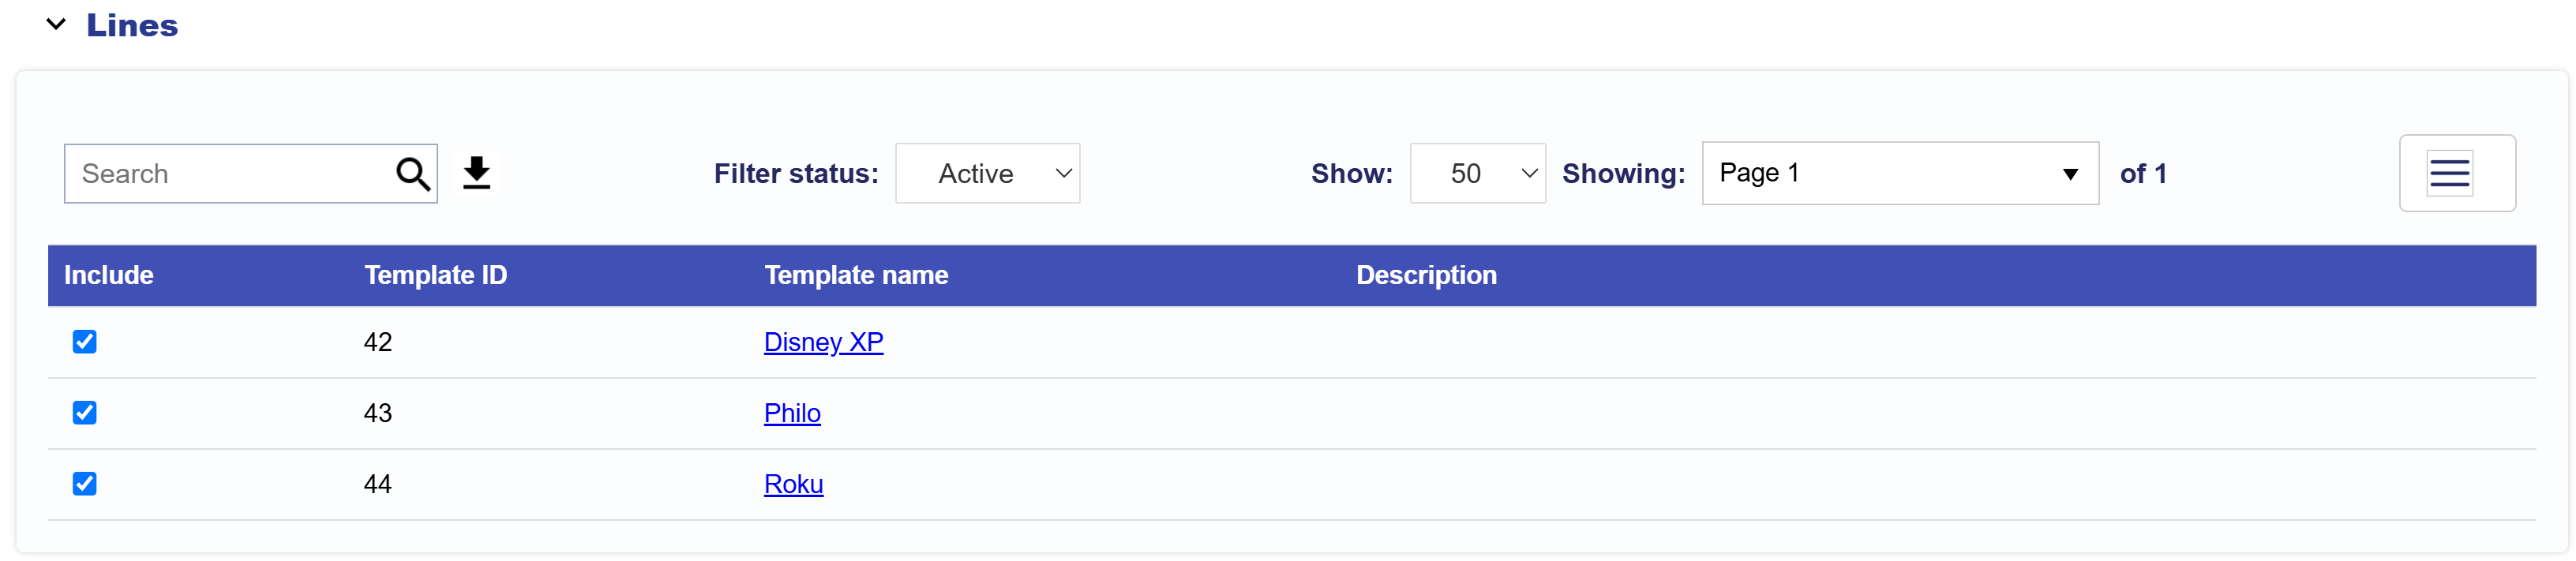
Lines Section
In the Lines section of the Campaign Template, decide which Lines should be included by checking or unchecking the corresponding Line boxes. This allows you to customize which Lines are part of the Campaign Template based on your specific needs.
Pacing & Dayparts Section
If ‘Mange Dayparts’ is enabled on the Campaign Template Setup section and you want to edit the Pacing & Dayparts section of the Campaign Template, follow these steps:
Navigate to the Pacing & Dayparts section within the Campaign Template.
Make the necessary changes to the Pacing & Dayparts settings. Refer to the documentation page to review available Pacing & Dayparts options: Campaign Pacing & Dayparts
If you have finished editing the Template, click the ‘Submit’ button in the top right corner of the page to save and apply all changes. If you do not want to apply the edits, press ‘Cancel’ to discard changes and revert the Campaign to its previous settings. To continue making edits, proceed to other sections.
Frequency & Recency Section
If the ‘Enable Campaign Frequency’ feature is checked in the Campaign Template Setup section and you want to edit the Frequency & Recency section of the Campaign Template, follow these steps:
Navigate to the Frequency & Recency section within the Campaign Template.
Make the necessary changes to the Frequency & Recency settings. Refer to the documentation page to review available Frequency & Recency options: Campaign Frequency & Recency
If you have finished editing the Template, close the window and click the ‘Submit’ button in the top right corner of the page to save and apply all changes. If you do not want to apply the edits, press ‘Cancel’ to discard changes and revert the Campaign to its previous settings. To continue making edits, proceed to other sections.
Clone a Campaign Template
To Clone a Campaign Template, follow these steps:
Navigate to the Campaign Template that you want to Clone.
Click the ‘Clone’ button located at the top right corner of the page.
Enter a New Name for the cloned Campaign Template.
Adjust the Campaign Template settings as needed to match specific needs. See the Edit a Campaign Template documentation for guidance.
Click ‘Submit’ to finalize and create the cloned Campaign Template.
The Campaign is now ready to be used when creating a new Campaign. Refer to the following documentation for more details on this process: Create Campaign from Template
Public Line Templates
Templates allow you to quickly, easily, and accurately launch Lines with consistent, preselected settings. In addition to creating your own Line templates, users can also select from our curated public Line templates that have already been built by the Pontiac team. By using these public templates you will target the category of your choice, automatically select all related deals, apply advanced bid prices, and ensure targeting is set up correctly from the start. Make adjustments as needed, or simply use the template as is and launch.
On the Line level, expand the Line templates section and select the desired icon to create a new Line using the template. For more details, refer to the following wiki documentation: Create A Line From Template.
See below for a list of all Public Line templates:
843 – Spectrum
868 – ESPN
869 – Channel-Network Targeted (Sports Streaming)
870 – NFL
871 – NBA
872 – MLB
873 – College Football 2025
874 – NFL Live
875 – Roku
876 – Fire TV
877 – Paramount
878 – Samsung
879 – Sling
880 – Pluto
881 – Tubi
882 – Fubo
883 – Philo
884 – Scripps
885 – DirectTV
895 – News & Weather
896 – Entertainment
897 – Discovery
898 – Food & Home Channel-Network
907 – Channel-Network Various
909 – High Transparency (Deals with over 80% transparency)
Create a Line Template
How to Save a Line as a Template:
Navigate to the Line page of the Line you want to use as a Template or create a new Line.
Click the ‘Save as Template’ button located at the top right corner.
Enter a Name, Description, and Icon for the Line Template.
Click ‘Save’ to save the Line as a template.
You can now use this template later to create a new Line with the same structure. This will help save time, reduce mistakes, and ensure consistency in Line setup. Manage all Campaign and Line Templates on the Seat Level in the Templates tab. For more details, refer to the Create Line from Template documentation.
Edit a Line Template
To edit a Line Template, navigate to the ‘Templates’ tab and expand the Line Templates dropdown section. Click on the name of the Line Template you wish to edit, and then click the ‘Edit’ button located in the top right corner. This will allow you to make the below changes to the selected Line Template.
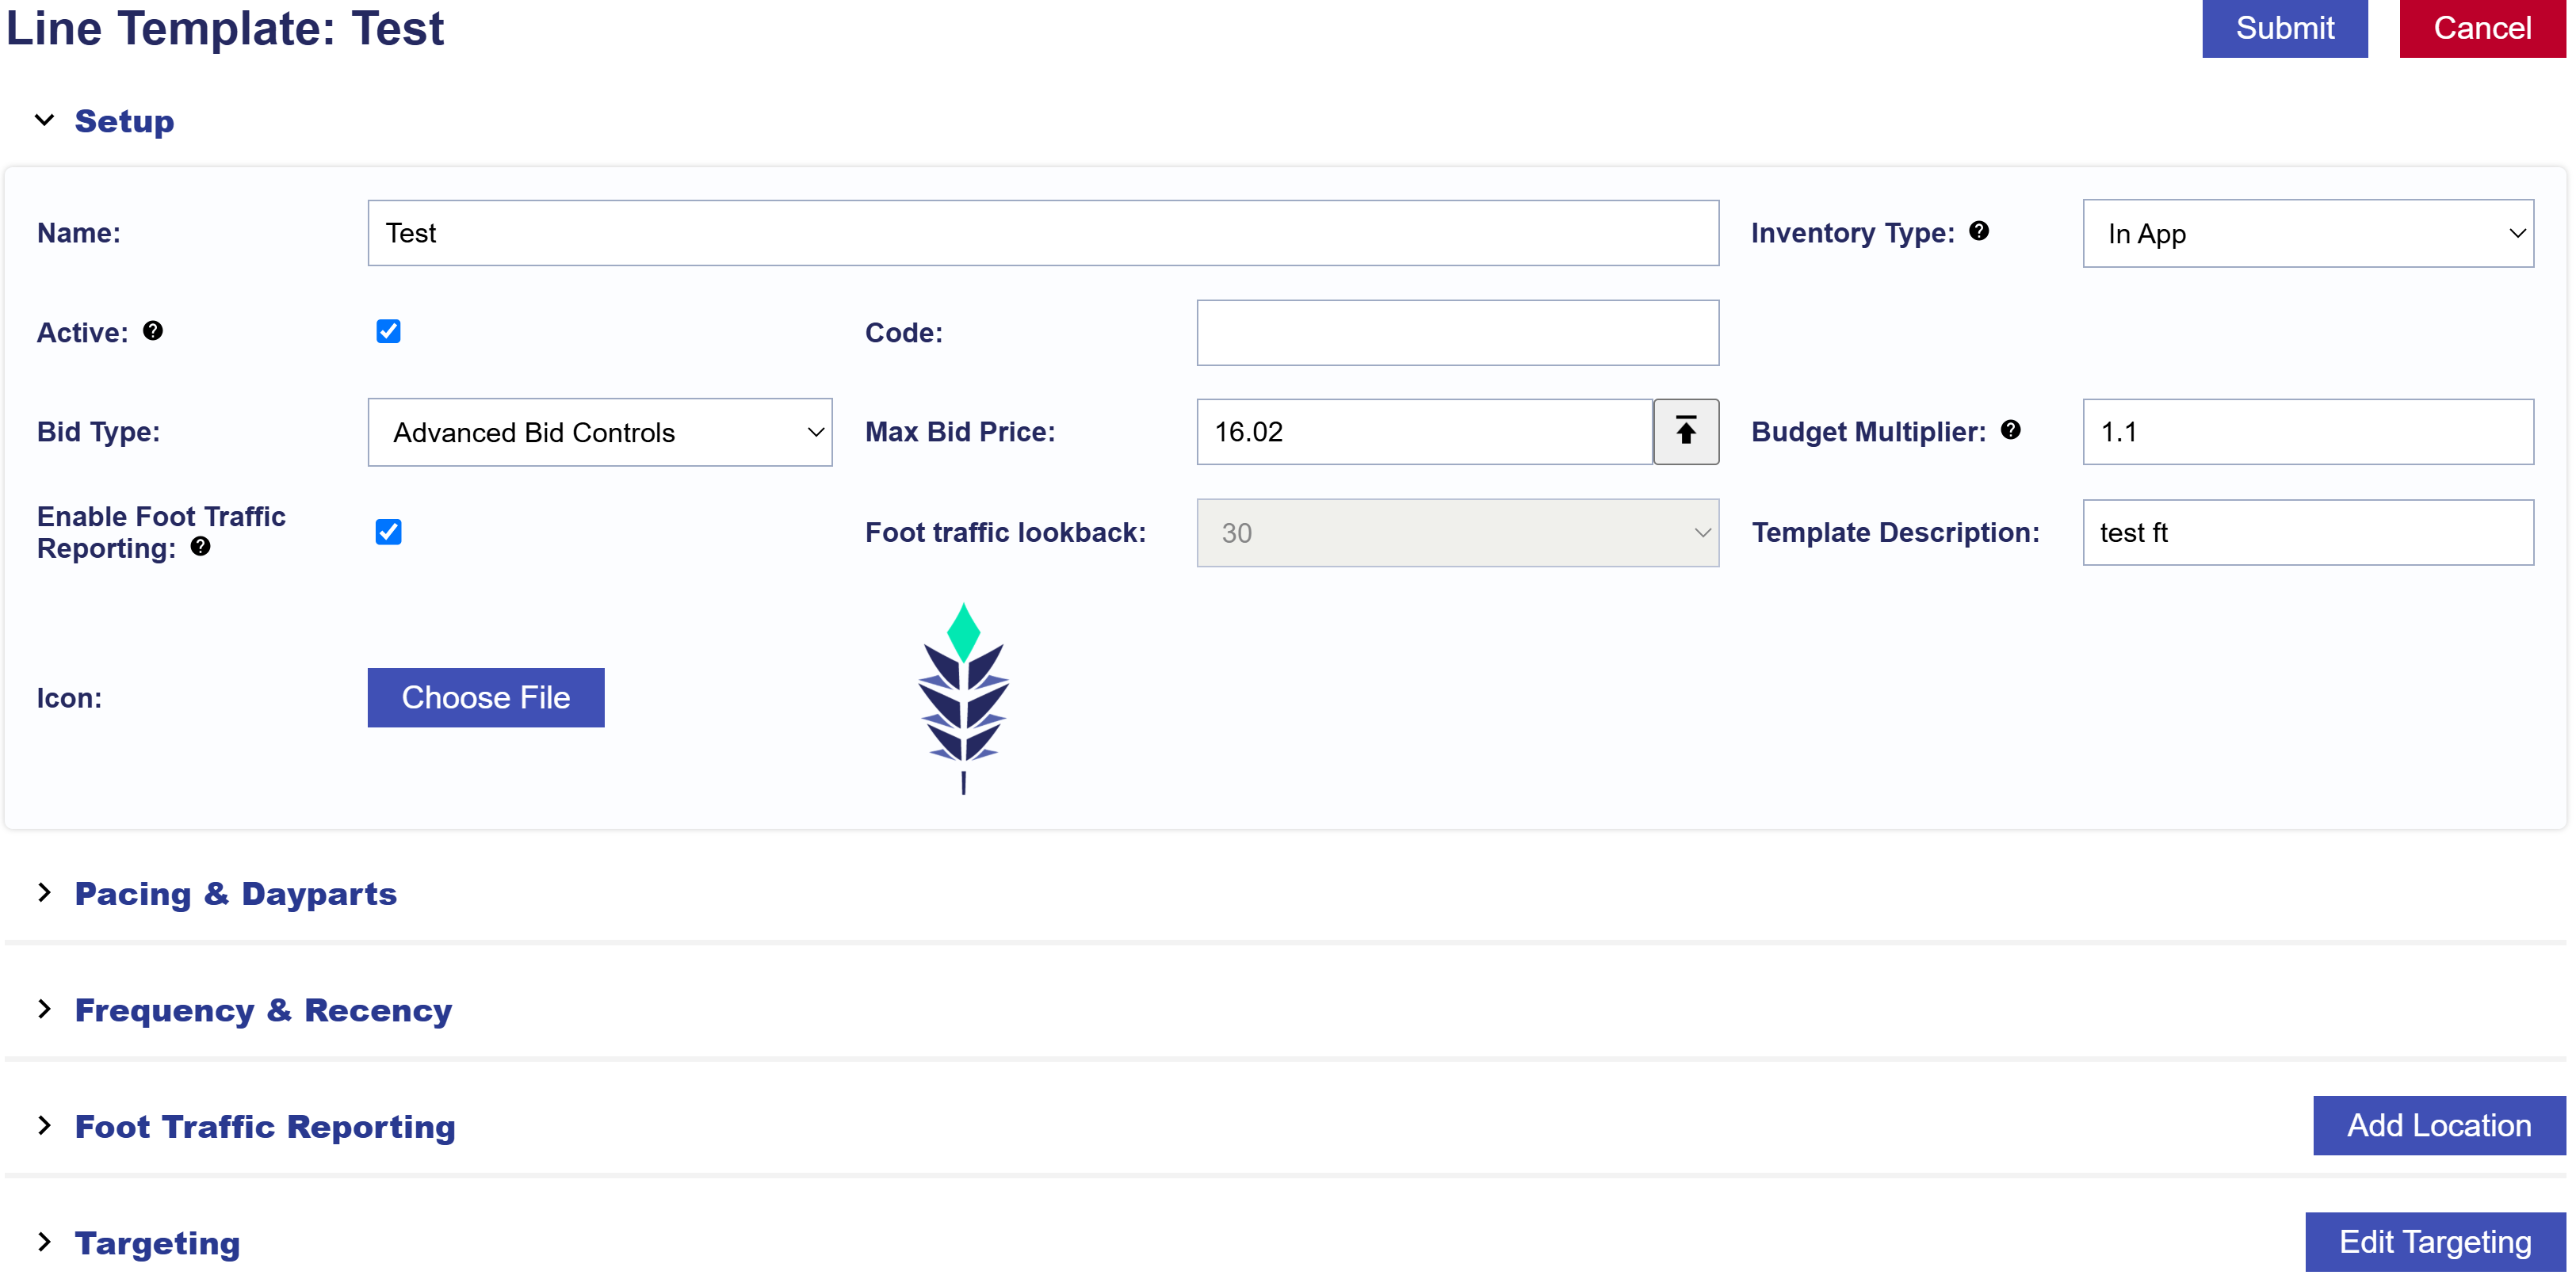
Setup Section
In the Setup section, edit the following fields:
Name: Enter a unique name for your new Line Template to identify it easily.
Inventory Type: Web, In App, Combined
Active Status: Check the ‘Active’ box if you want the Line to be live, but uncheck it if you want to create an Inactive Line or to pause the Line.
Code: Optional and for reporting purposes.
Bid Type:
Basic Bid: Standard bid price applied across all inventory of the Line.
Bid at Floor Price: The maximum bid price and CPM floor allowed for an auction.
Advanced Bid Controls: A feature that allows setting a maximum bid price for Deals, giving more control over bid adjustments and spending limits.
Bid Price: The bid price determines how much you are willing to spend based on the selected bid type. For Advanced Bid Controls, set a Default Bid Price and custom bid prices. Deals must be associated at the Campaign and Line level to allow for custom bid prices. When new Deals are added to the Line if a custom bid is not set, the bid price will default to the value set in the Default Bid Price field on the Line.
Budget Multiplier: This feature allows the user to specify a multiplier on the daily budget. For example, setting a 1.1 multiplier will allow the Line to adjust the daily budget up to 110% of its typical daily budget. The new daily spend is calculated as Budget Multiplier x Daily Budget = New Daily Spend. Keep in mind, the daily budget may adjust based on pacing, and the actual daily spend could exceed the set multiplier.
Enable Foot Traffic Reporting: Foot Traffic Reporting allows you to enter specific commercial addresses and track whether users that were served your Ads visited those locations.
Foot Traffic Lookback: Set the time window for tracking foot traffic data.
Template Description: A brief explanation that helps you and other users understand the purpose of the Template.
Icon: An image that makes the template easily identifiable, helping users quickly recognize it.
Pacing & Dayparts
If ‘Mange Dayparts’ is NOT enabled on the Campaign Template Setup section and you want to edit the Pacing & Dayparts section of the Line Template, follow these steps:
Navigate to the Pacing & Dayparts section within the Line Template.
Make the necessary changes to the Pacing & Dayparts settings. Refer to the documentation page to review available Pacing & Dayparts options: Line Pacing & Dayparts
If you have finished editing the Template, click the ‘Submit’ button in the top right corner of the page to save and apply all changes. If you do not want to apply the edits, press ‘Cancel’ to discard changes and revert the Campaign to its previous settings. To continue making edits, proceed to other sections.
If ‘Manage Dayparts’ is enabled on the Campaign Template Setup section and you want to edit the Pacing & Dayparts section of the Line Template, follow these steps:
Navigate to the Pacing & Dayparts section within the Campaign Template that the Line belongs to.
Edit the Campaign Template and uncheck the ‘Manage Dayparts’ box to enable Line Level control.
Once disabled, go to the Line Template and update the Pacing & Dayparts settings. Refer to the documentation page to review available Pacing & Dayparts options: Line Pacing & Dayparts
If you have finished editing, click the ‘Submit’ button in the top right corner of the page to save and apply all changes. If you do not want to apply the edits, press ‘Cancel’ to discard changes and revert the Line to its previous settings. To continue making edits, proceed to another section.
Frequency & Recency
If the ‘Enable Line Frequency’ feature is checked in the Line Template Setup section and you want to edit the Frequency & Recency section of the Line Template, follow these steps:
Navigate to the Frequency & Recency section within the Line Template.
Make the necessary changes to the Frequency & Recency settings. Refer to the documentation page to review available Frequency & Recency options: Line Frequency & Recency
If you have finished editing the Template, close the window and click the ‘Submit’ button in the top right corner of the page to save and apply all changes. If you do not want to apply the edits, press ‘Cancel’ to discard changes and revert the Campaign to its previous settings. To continue making edits, proceed to other sections.
Foot Traffic Reporting
If the ‘Enable Foot Traffic Reporting’ feature is checked in the Line Template Setup section and you want to edit the Locations of the Line Template, follow these steps:
Navigate to the Foot Traffic Reporting section within the Line Template.
Add or delete Locations using one of the below methods. Refer to the following documentation for instructions on setting up a new location using each method: Line Foot Traffic Reporting
Address
Latitude Longitude (Lat Long)
Geofence
Bulk Upload
If you have finished editing the Template, close the window and click the ‘Submit’ button in the top right corner of the page to save and apply all changes. If you do not want to apply the edits, press ‘Cancel’ to discard changes and revert the Campaign to its previous settings. To continue making edits, proceed to other sections.
Targeting
To edit the Targeting section of a Line, follow these steps:
Navigate to the Targeting section within the Line Template.
Click ‘Edit Targeting’ to modify targeting settings.
Make the necessary changes to the targeting settings. Refer to the documentation page to review available targeting options: Line Targeting
Click ‘Save’ in the bottom right corner of the popup window to apply all changes. To discard changes and revert to the previous settings, click ‘Cancel’.
If you have finished editing the Template, close the window and click the ‘Submit’ button in the top right corner of the page to save and apply all changes. If you do not want to apply the edits, press ‘Cancel’ to discard changes and revert the Line Template to its previous settings. To continue making edits, proceed to the other sections.
Clone a Line Template
To Clone a Line Template, follow these steps:
Navigate to the Line Template that you want to Clone.
Click the ‘Clone’ button located at the top right corner of the page.
Enter a New Name for the cloned Line Template.
Adjust the Line Template settings as needed to match specific needs. See the Edit a Line Template documentation for guidance.
Click ‘Submit’ to finalize and create the cloned Line Template.
The Line Template is now ready to be used when creating a new Line. Refer to the following documentation for more details on this process: Create Line from Template