IP Conversion Pixel: Path To Conversion
Overview
The ‘Path to Conversion’ report provides data on IP conversions and impressions served to users who later converted. It shows the complete journey from an impression view to the conversion action on your website, helping you understand how impressions influence conversions over time.
Key Columns:
- Impression Time: Indicates when the impression was served to a user who later visited or converted on the site where the pixel is placed. The total number of ‘imp_times’ shows how many impressions were served to users who then converted, corresponding to the ‘Attributed Imps’ field in the IP Conversion Pixel metrics under the Advertiser.
- Conversion Time: Shows the time the conversion or action occurred. The total number of unique ‘conv_times’ represents the total number of conversions or visits driven by the campaign, corresponding to the ‘Total Convs’ field in the IP Conversion Pixel metrics under the Advertiser.
Lookback Window:
- By default, the IP conversion pixels use a 30-day lookback window. However, if you need to pull data with a custom lookback window, you can select a value up to 30 days from the ‘Lookback Window’ dropdown.
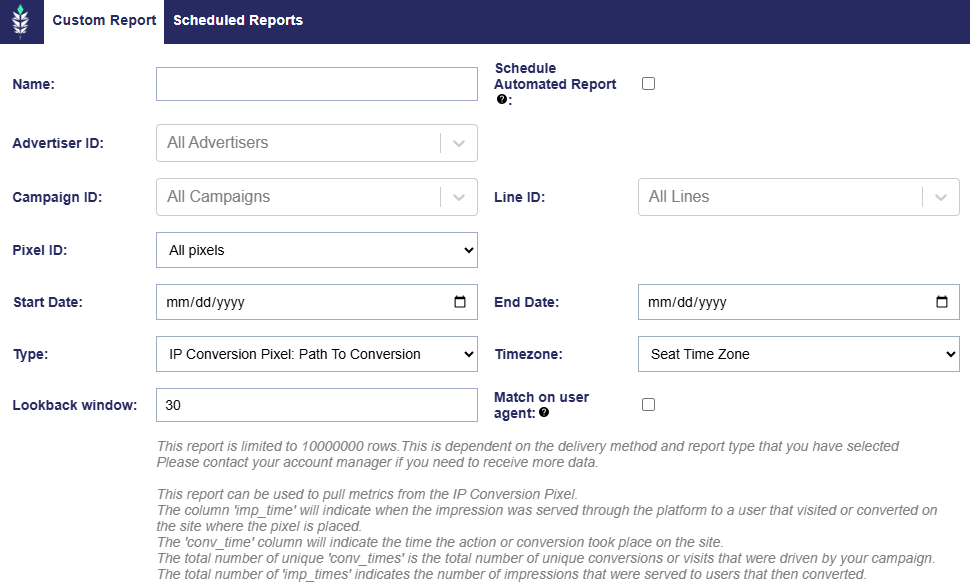
Create an IP Conversion Pixel: Path to Conversion Report
- Navigate to the Reporting tab and open the Custom Reporting dropdown section.
- Click ‘New Custom Report’.
- Select ‘IP Conversion Pixel: Path to Conversion’ as the Type.
- Fill out the required report details.
- Click ‘Save’.
- Expand the Custom Reporting dropdown section and click the ‘Download’ button next to the name of your custom report.
- If Scheduled Automated Reports were selected, the report will be delivered via your chosen delivery method.
Below are the customizations available when creating the report:
- Name: Enter a title for your report.
- Schedule Automated Report: Choose this option to have the report sent to you on regular intervals. See the section for setup details Scheduled Reports
- Advertiser ID: Select the Advertiser IDs that you would like to include in your report. By default, all Advertisers are included.
- Campaign ID: Select the Campaign IDs that you would like to include in your report. By default, all Campaigns under the selected Advertisers are included.
- Line ID: Select the Line IDs that you would like to include in your report. By default, all Lines under the selected Advertisers and Campaigns are included.
- Pixel ID: Select the Pixel IDs that you would like to include in your report. By default, all Pixels are included.
- Start Date: Define the start date for the report interval.
- End Date: Define the end date for the report interval.
- Type: Select IP Conversion Pixel: Path to Conversion
- Timezone: Select the timezone that the report will generate, such as Seat Time Zone, User Time Zone, UTC, etc.
- Lookback window: By default, the IP conversion pixels use a 30-day lookback window.
- Match on user agent: If you add this condition, conversions will be further matched by the user agent of the device. Use this only if you are running an OLV or display campaign and most conversions will happen on the same device that viewed the ad.
- Dimensions: Categorical values that define how data is grouped and segmented in reports, such as Campaign Name, Advertiser, and Impression Time.
- Metrics: Quantitative values that measure performance, such as fractional attribution.
Dimensions:
- Pixel ID
- Pixel Name
- Conversion Time
- Impression Time
- IP Address Truncated
- IP Address Hashed
- Home or Business
- Zip Code
- Site Domain
- Exchange
- Region/State Code
- User ID
- Advertiser ID
- Advertiser Name
- Line ID
- Line Name
- Device Type
- Creative ID
- Creative Name
- App Domain
- App Bundle
- App Name
- Order ID: Reporting on this field requires this value to be dynamically passed on the IP Pixel using the Order Value or Order ID parameters. Check the Order ID or Order Value boxes when creating the IP Pixel for further guidance.
- Order Value: Reporting on this field requires this value to be dynamically passed on the IP Pixel using the Order Value or Order ID parameters. Check the Order ID or Order Value boxes when creating the IP Pixel for further guidance.
- Deal Name
- Publisher Name
- Content Network
- Content Channel
- Content Series
- Content Title
- Content Genre
- Custom Variable 1
- Custom Variable 2
- Custom Variable 3
- Custom Variable 4
- Other Parameters
- Consumer ID
- Campaign ID
- Campaign Name
- Conversion Date
- Impression Date
- Operating System
- Browser
- User Agent
- Device Type Name
- Inventory Type
Metrics:
- Fractional Attribution: It represents the portion of a conversion “credited” to a particular impression. If multiple impressions contribute to the same conversion, each gets a fraction.
- For example, if two impressions contributed equally, each gets 0.5. A fractional attribution above 1 means the impression contributed to multiple conversions, and the attribution model assigns it more credit than 1 for that impression, even though each conversion itself is counted only once. If you sum fractional attributions across impressions, the total should equal the total number of conversions. So if you see values like 1.2, it can indicate overlapping contributions where this impression is “overcredited” in the attribution model for multiple conversions.
- Attributed Impressions: The number of impressions that are counted as contributing to a conversion.