Create an IP Conversion Pixel
To create an IP Conversion Pixel, follow these steps:
- Create or Open an Advertiser: Enter the Pontiac platform and either create a new Advertiser or open an existing one.
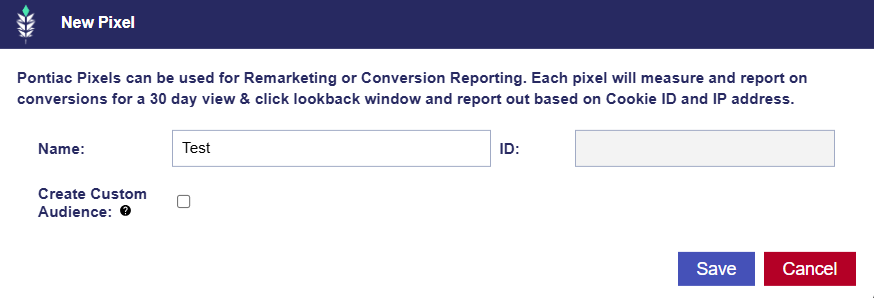
- Create a New Pixel: Inside the Advertiser, click on the ‘New Pixel’ button and enter a name for the IP Conversion Pixel.
- Create Custom Audience (Optional): Check the box if wanting to create an audience for retargeting or exclusion purposes.
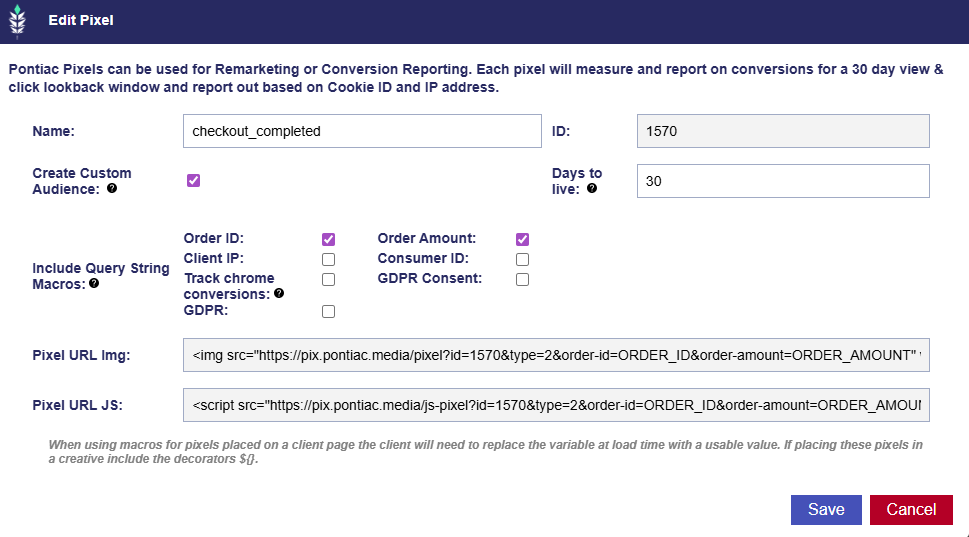
- Set Days to Live: Set to 180 days by default. Set the number of days to live. Typically 30, 60, 90 days is input here. The maximum is 180 days.
- Note that users are only added to the audience if they visit the site after the pixel is placed.
- Click Save: Save the changes.
- Wait for Pixel to Generate: Wait for 30-60 seconds for the pixel to generate.
- View the Pixel Code: After the pixel is created, click on the pixel name to view the generated code.
- Include Query String Macros (Optional):
- Adding these macros allows you to report on revenue and order ids generated from your site. After placing on your site contact your web developer to switch out the macros with the actual values you want to pass in. For example ORDER_ID must be replaced by the actual order id and ORDER_AMOUNT must be switched out with the actual value of your conversion when firing the pixel in a conversion event.
- When using macros for pixels placed on a client page the client will need to replace the variable at load time with a usable value. If placing these pixels in a creative include the decorators ${}.
- Order ID
- Order Amount
- Client IP
- Consumer ID
- Track chrome conversions: Google Privacy Sandbox conversion reporting is only available for campaigns running on the Bidder platform.
- GDPR Consent
- GDPR
- Select desired Pixel:
- Pixel URL Img: Recommended for most use cases. The image pixel is more widely supported and works reliably across environments.
Pixel URL JS: Collects additional user data and may be preferred by some publishers, but is rarely needed. Use only when enhanced tracking is required and supported.
- Pixel URL Img: Recommended for most use cases. The image pixel is more widely supported and works reliably across environments.
- Place the Pixel on Your Website: Place the pixel code on your website. To track conversions from users who see your ad and later visit your website, you can place the pixel in the header to fire on all pages or place it on a specific page you want to measure.
- Associate the Pixel with Campaign and Line Item: After placing the pixel, associate it with the appropriate Campaign and Line Item where you want to track conversions.
By following these steps, you can effectively track conversions and measure the success of your Campaigns.