Line Foot Traffic Reporting
Foot Traffic Reporting allows you to measure whether users who were served an ad later visited specified physical locations.
Foot Traffic Reporting is configured at the Line level. When enabled, a Foot Traffic Reporting section becomes available where locations can be added and managed. Foot Traffic Reports are available in the Reporting tab.
A Foot Traffic Attribution fee may apply when this feature is enabled. The fee is configured at the Seat level and may vary by account. Contact your Account Manager or reach out through the Help Center if you have questions about the applicable fee.
Enable Foot Traffic Reporting
To begin:
- Navigate to the applicable Line.
- Select Edit.
- Enable Foot Traffic Reporting in the Setup section.
- Navigate to the Foot Traffic Reporting section.
- Select Add Location.
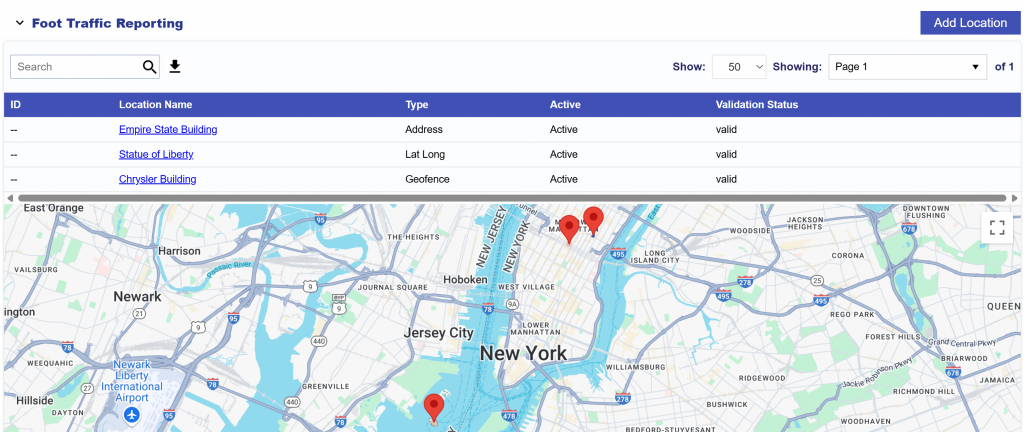
Locations can be added using one of the following methods:
- Address
- Latitude Longitude (Lat Long)
- Geofence
- Bulk Upload
Choose the method that best matches the location information available.
Address
Use the Address method when you have a standard street address.
Pontiac attempts to convert the submitted address into a Latitude / Longitude point. Address-based locations support a maximum radius of 200 meters.
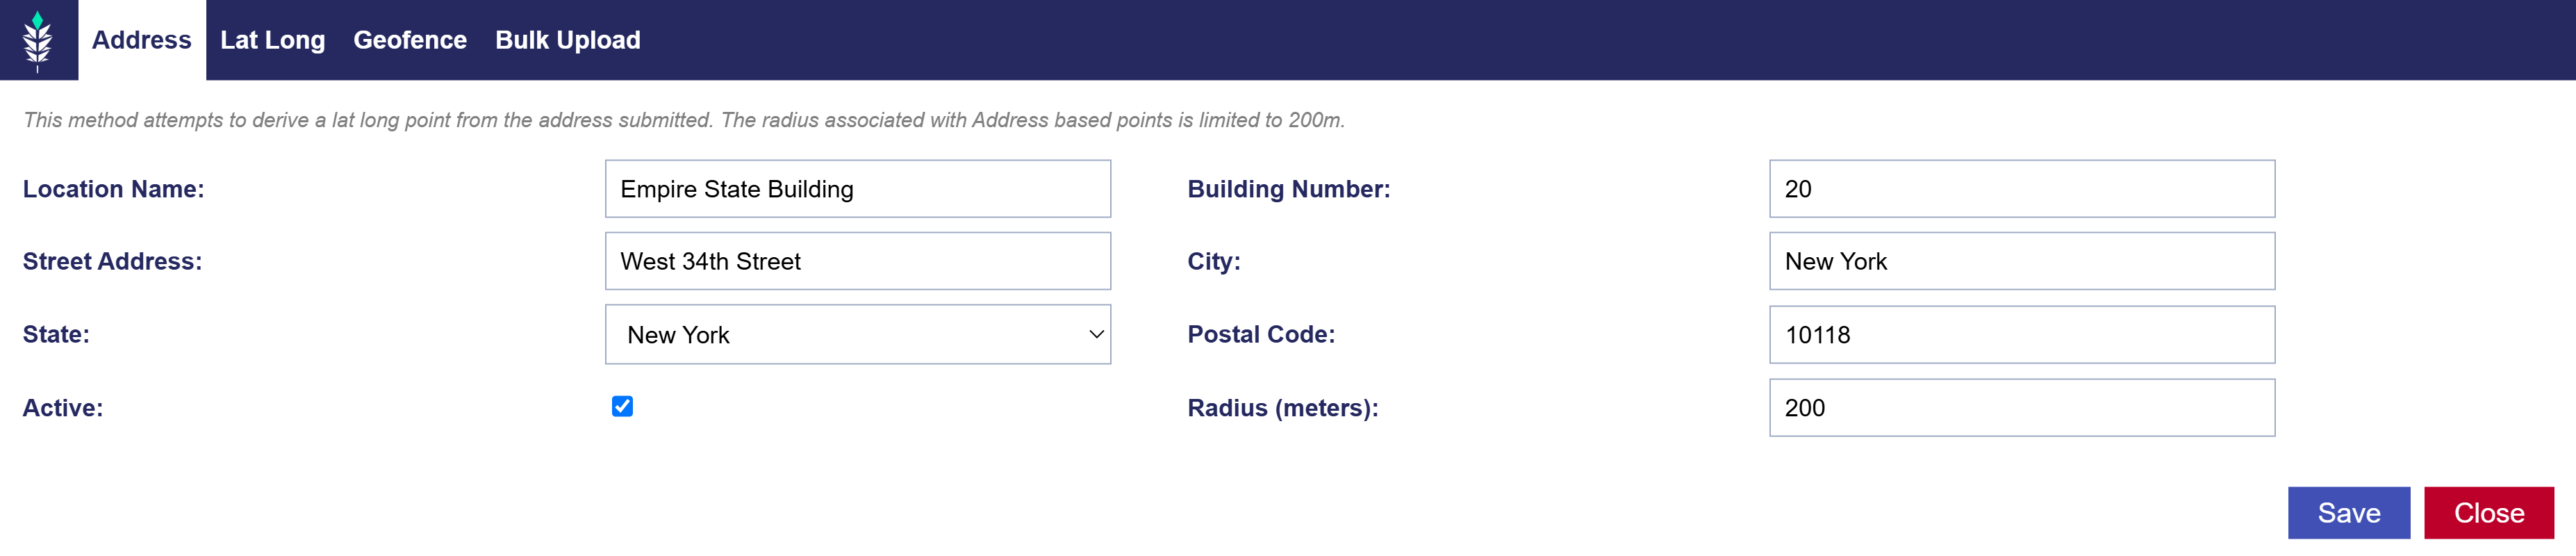
To add a location by Address:
- Select Add Location.
- Open the Address tab.
- Enter the applicable location details:
- Location Name
- Building Number
- Street Address
- City
- State
- Postal Code
- Active Status
- Radius (meters)
- Select Save.
Use the Radius field to define the area around the location that should be considered for Foot Traffic Attribution.
Latitude / Longitude (Lat Long)
Use the Lat Long method when you want to define the location using a specific geographic point.
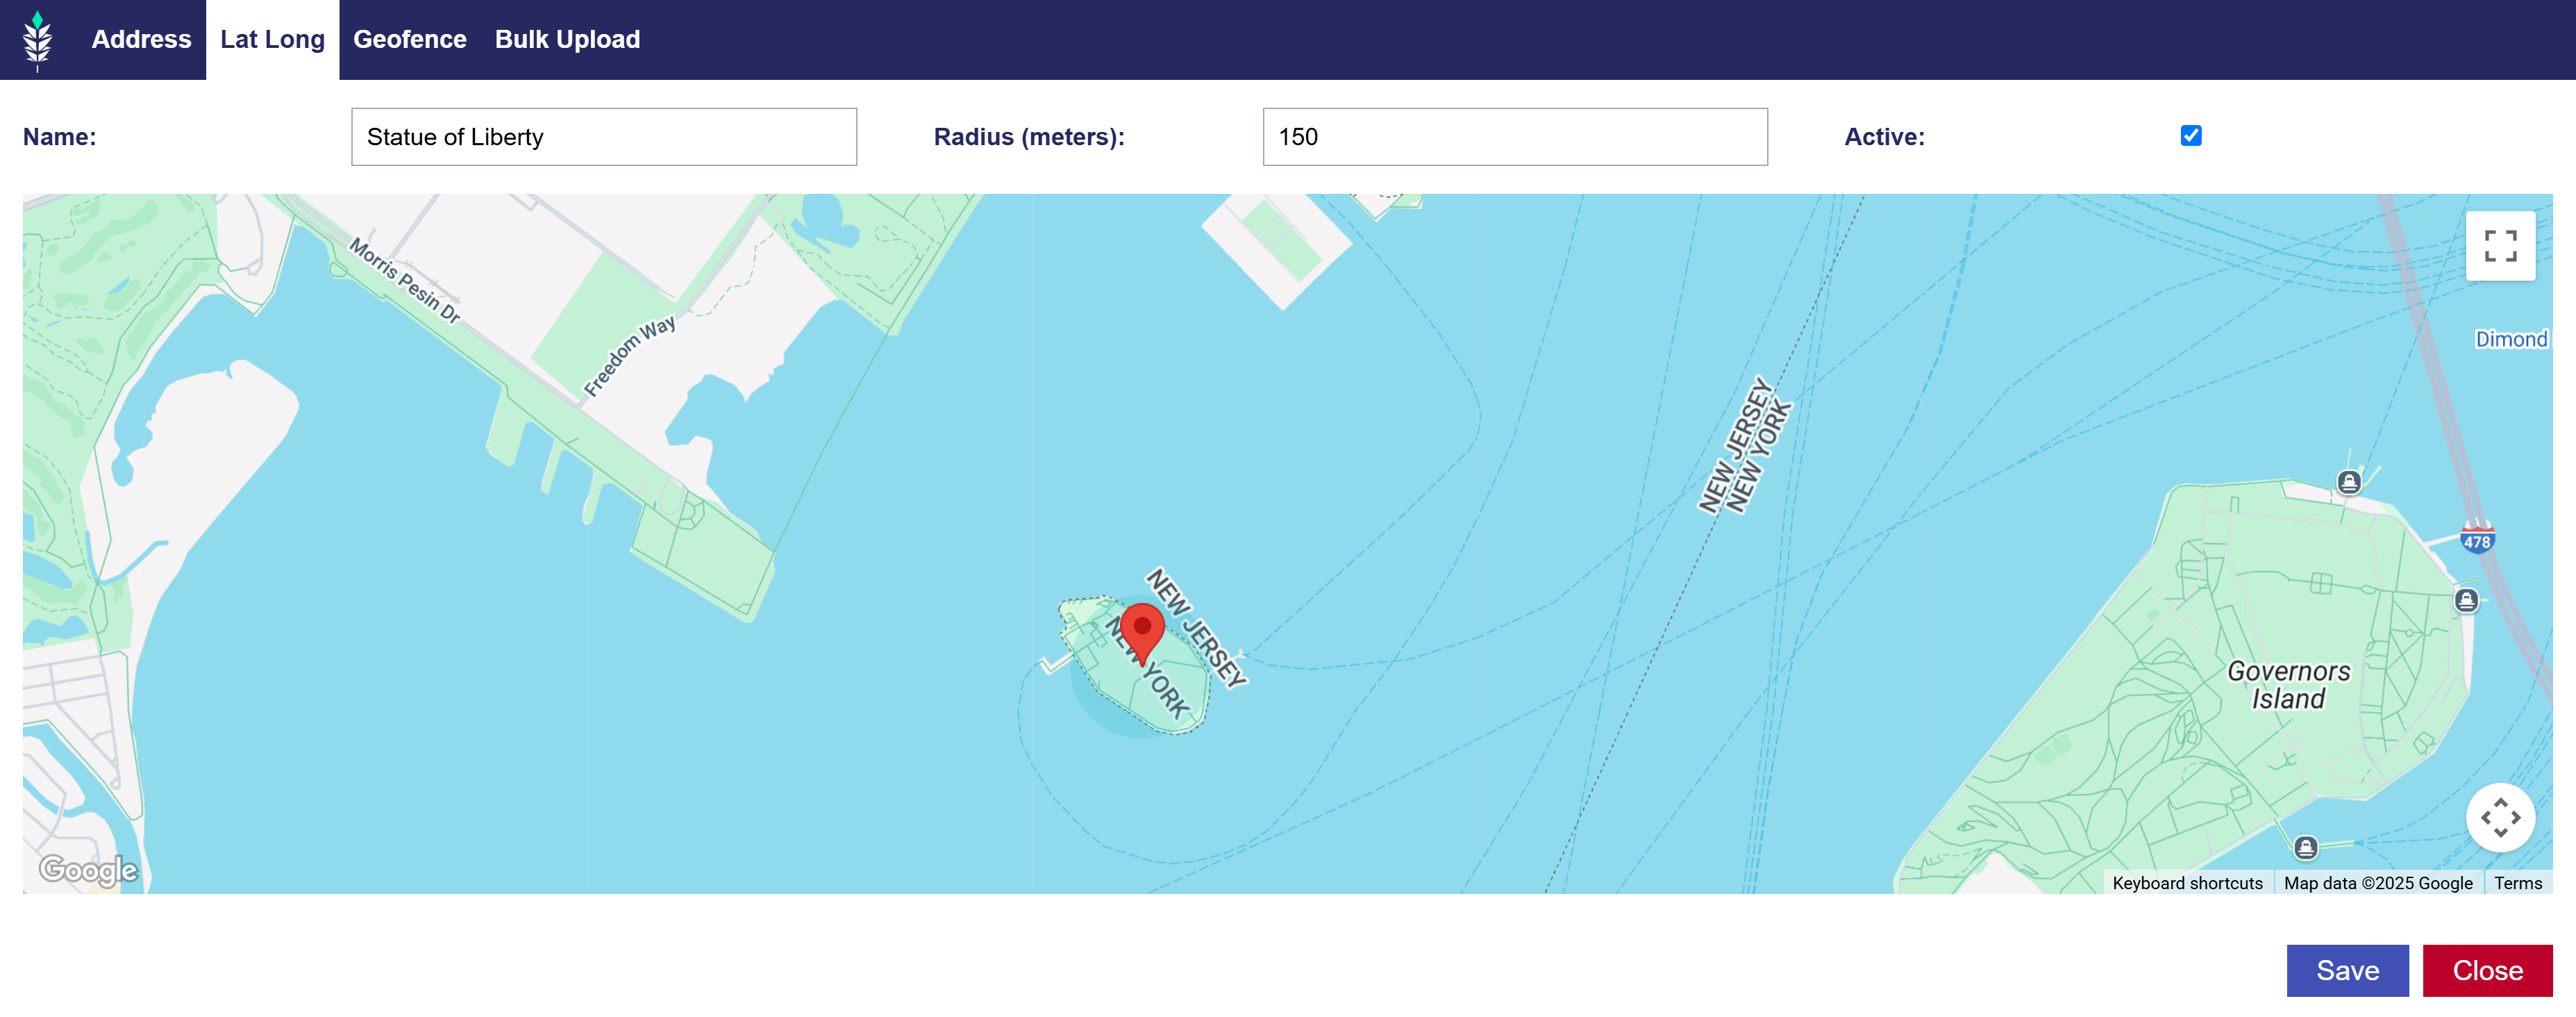
To add a location using Latitude / Longitude:
- Select Add Location.
- Open the Lat Long tab.
- Enter a name for the location.
- Use the map to select the desired Latitude / Longitude point.
- Select Save.
This method can be useful when a standard street address does not accurately represent the location you want to measure.
Geofence
Use the Geofence method when a custom geographic boundary is more appropriate than a single point and radius.
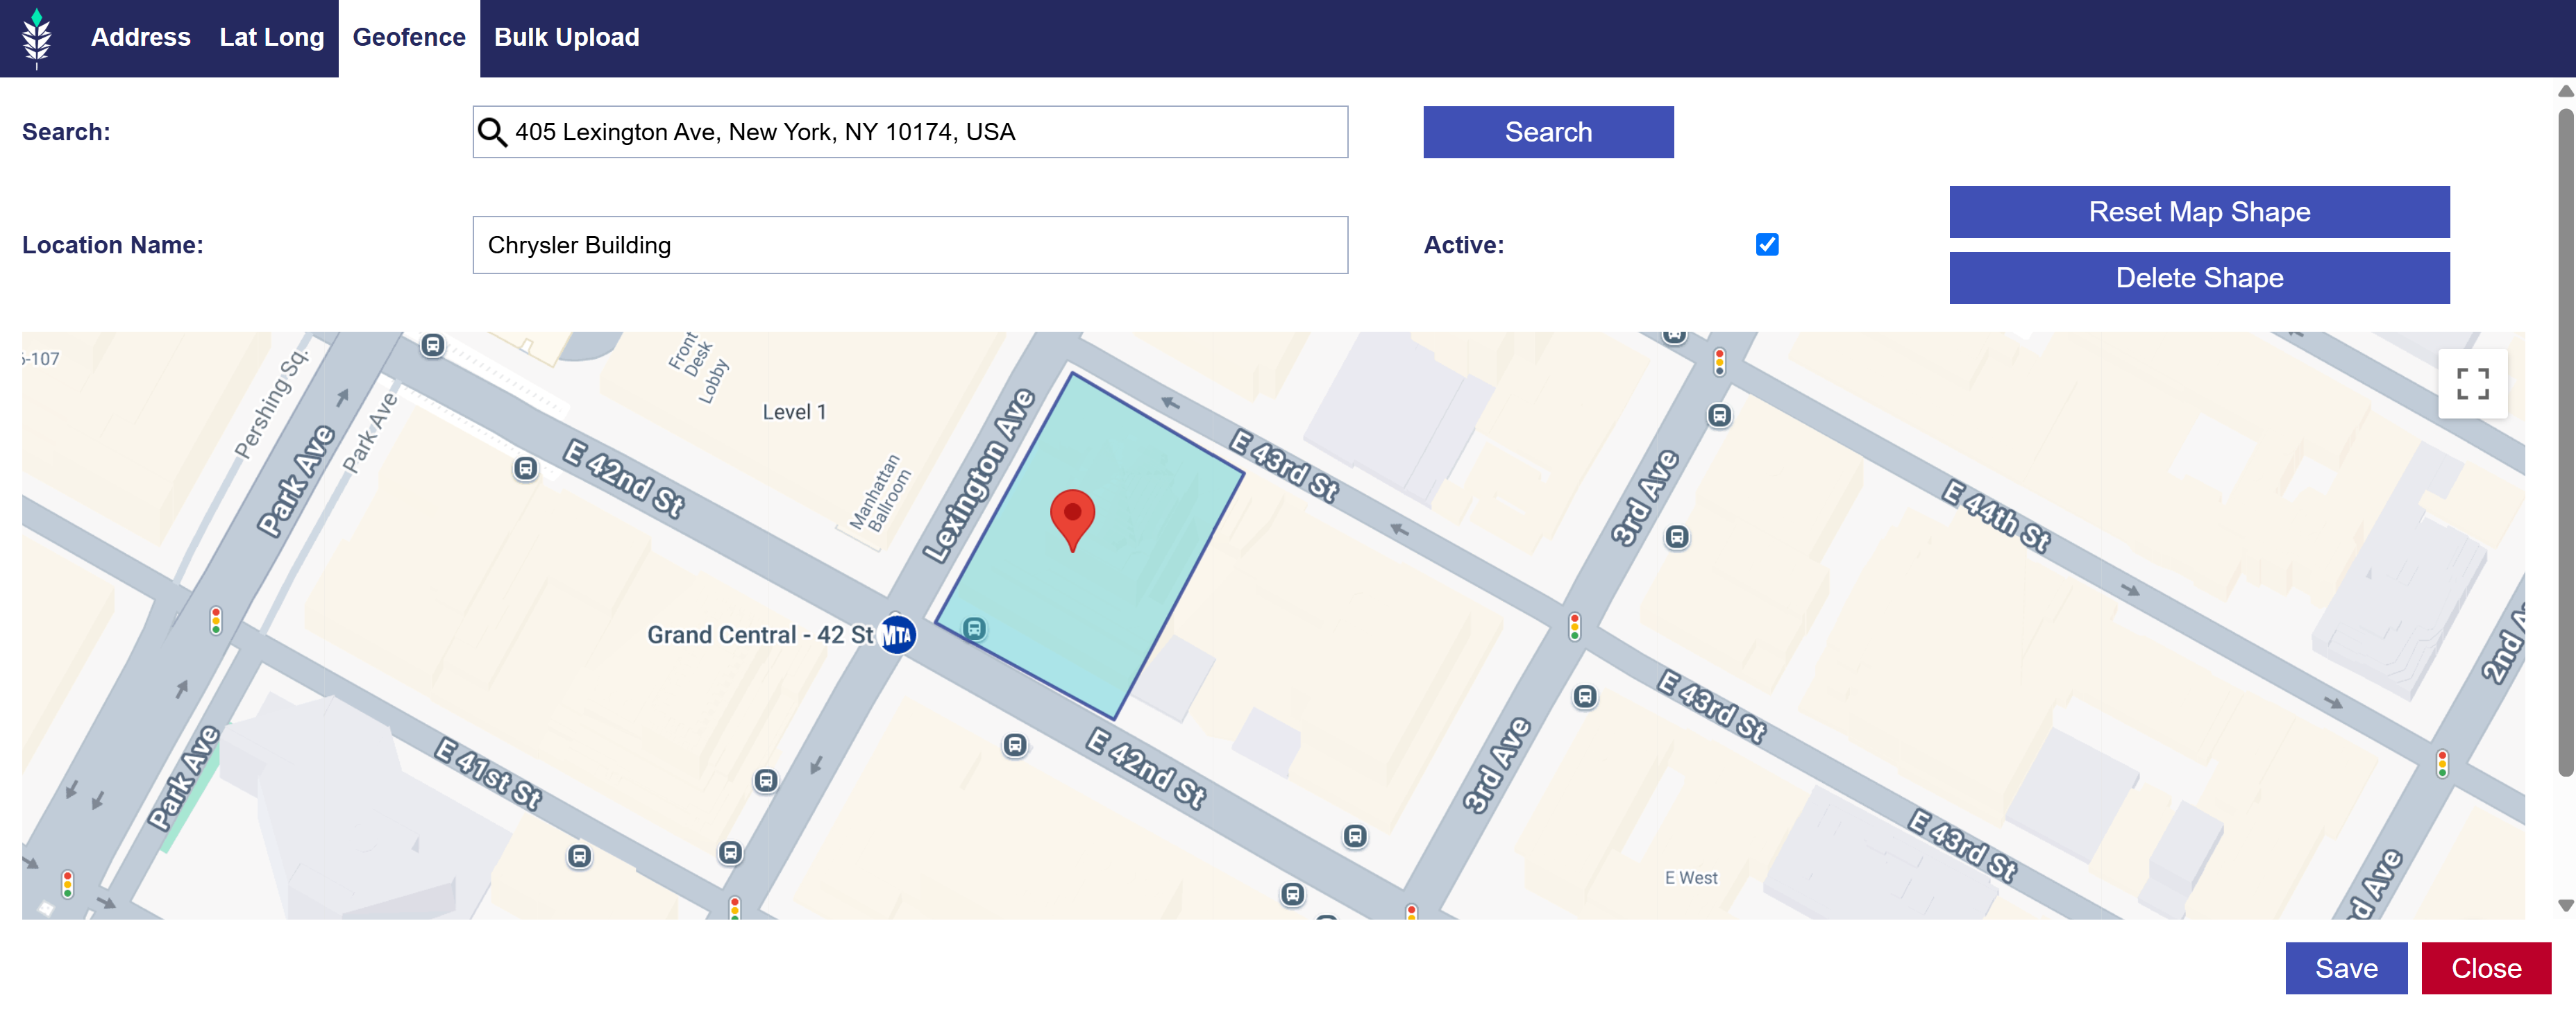
To add a Geofence:
- Select Add Location.
- Open the Geofence tab.
- Use the Search tool to locate the desired area.
- Enter a name for the location.
- Select points on the map to create the Geofence shape.
- Use Reset Map Shape or Delete Shape as needed to adjust the boundary.
- Select Save.
Use Geofences when the physical location has an irregular footprint or cannot be represented accurately by a simple radius.
Bulk Upload
Use Bulk Upload to add multiple locations at once. The Bulk Upload option supports up to 200 locations per upload.

The required format is:
- Format:
Name, Building Number, Street Address, City, State, Postal Code, Active, Radius - Example Line:
City Grill, 10701, Balls Ford Rd, Manassas, VA, 20109, 1, 117 - Each field must be separated by a comma. The header row is optional.
Download the example file here:
To upload locations in bulk:
- Select Add Location.
- Open the Bulk Upload tab.
- Format up to 200 locations using the required CSV structure.
- Upload the CSV file.
- Select Save.
Managing Foot Traffic Locations
After locations are added, review the configured locations to confirm that:
- The correct physical locations are included.
- Each location is active when it should be eligible for attribution.
- Address, point, radius, or Geofence boundaries accurately represent the intended location.
- Bulk-uploaded locations were added successfully.
Update or remove locations as needed before or during Line delivery.
Foot Traffic Attribution Reporting
Foot Traffic Reporting measures visits to the configured locations for users who were exposed to ads from the Line.
For additional information on Foot Traffic Attribution reporting and results, see Foot Traffic Studies.