Pixel IPs
When a Pixel is generated in Pontiac, there are the optional fields:
- Create CTV Audience
- Create Origin Audience
- Create Curation Audience (only enabled when Create CTV Audience is checked)
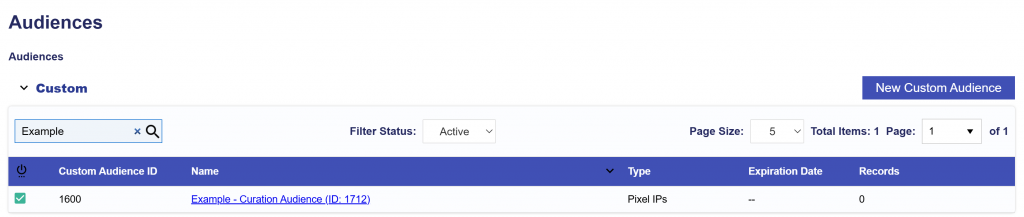
These create audiences that will appear in the Audiences tab in the Custom audience expandable section with the Type as Pixel IPs and can be associated and targeted on the Campaign/Line level.
UI walkthrough
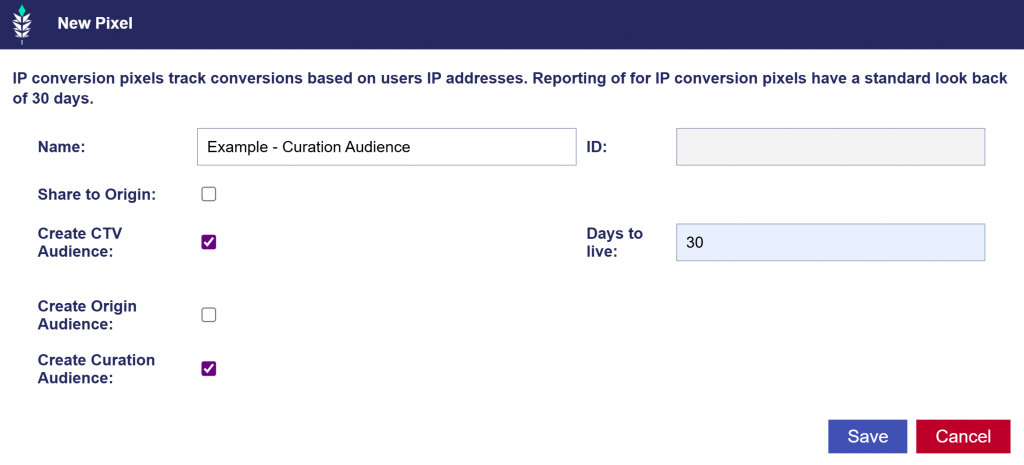
- Create a New Pixel
- On the Advertiser level, click the New Pixel button.
- Give your pixel a Name and select the Create CTV Audience.
- Once selected, the Create Curation Audience checkbox becomes available.
- Enter the desired Days to Live: This determines how many days of distinct IPs will be included when the audience is sent to Index.
- Save the pixel to generate the Img and JS pixel code.
- After saving, click into the new Curation Audience name to view details.
- Add any of the query string macros for additional tracking. Work with your web developer to ensure macros are implemented correctly and data is passed back as expected.
- Copy and paste the Pixel URL (Img or JS) code onto the desired page to begin tracking.

It will then appear in the Audience tab under the Custom expandable section automatically.
To target this audience, associate it to the Campaign or Line level depending on needed targeting layers.
Association Example
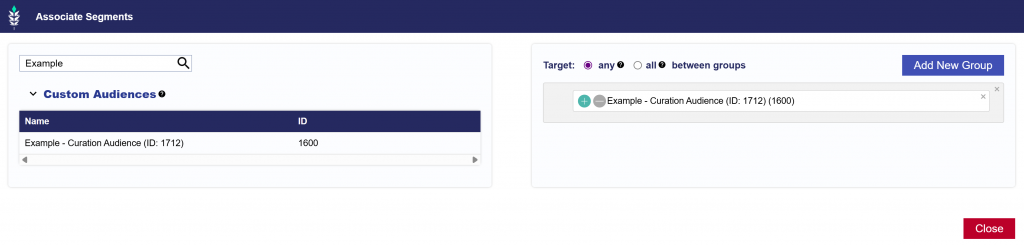
On the Campaign or Line level, click the Associate Segments button and search for the Pixel IP audience name or ID. Then click Add New Group and drag and drop the Pixel IP audience. Close the dialog and scroll to the top of the page to hit the Save button.