Geo Fencing Audiences
Geo Fencing Audiences allow users to build location-based audiences using visitation data from defined geographic areas using OnSpot data. Geo Fencing is useful for reaching users based on historical visits to real-world locations such as retail stores, dealerships, event venues, campuses, competitor locations, or other points of interest.
Geo Fencing Audiences are available under Audiences > Third Party Audiences > Geo Fencing and can be created using one of two location methods:
- Geo Fence: Draw a custom geographic shape directly on the map.
- Lat/Long: Define a location using latitude, longitude, and a radius in meters.
Both methods support Rolling and Static Audience types.
View and Manage Geo Fencing Audiences
Navigate to Audiences > Third Party Audiences > Geo Fencing to view existing Geo Fencing Audiences.
The table includes:
- Name: The name assigned to the Audience.
- Record Count: The number of qualifying records currently included in the Audience.
- Start Date: The beginning of the Audience’s applicable date range.
- End Date: The end of the applicable date range.
- Expiration Date: Displays when the Audience is scheduled to expire, when applicable.
- Type: Indicates whether the Audience is Rolling or Static.
Create a Geo Fencing Audience
- Navigate to Audiences > Third Party Audiences > Geo Fencing.
- Select New Geo Fence to create a new audience.
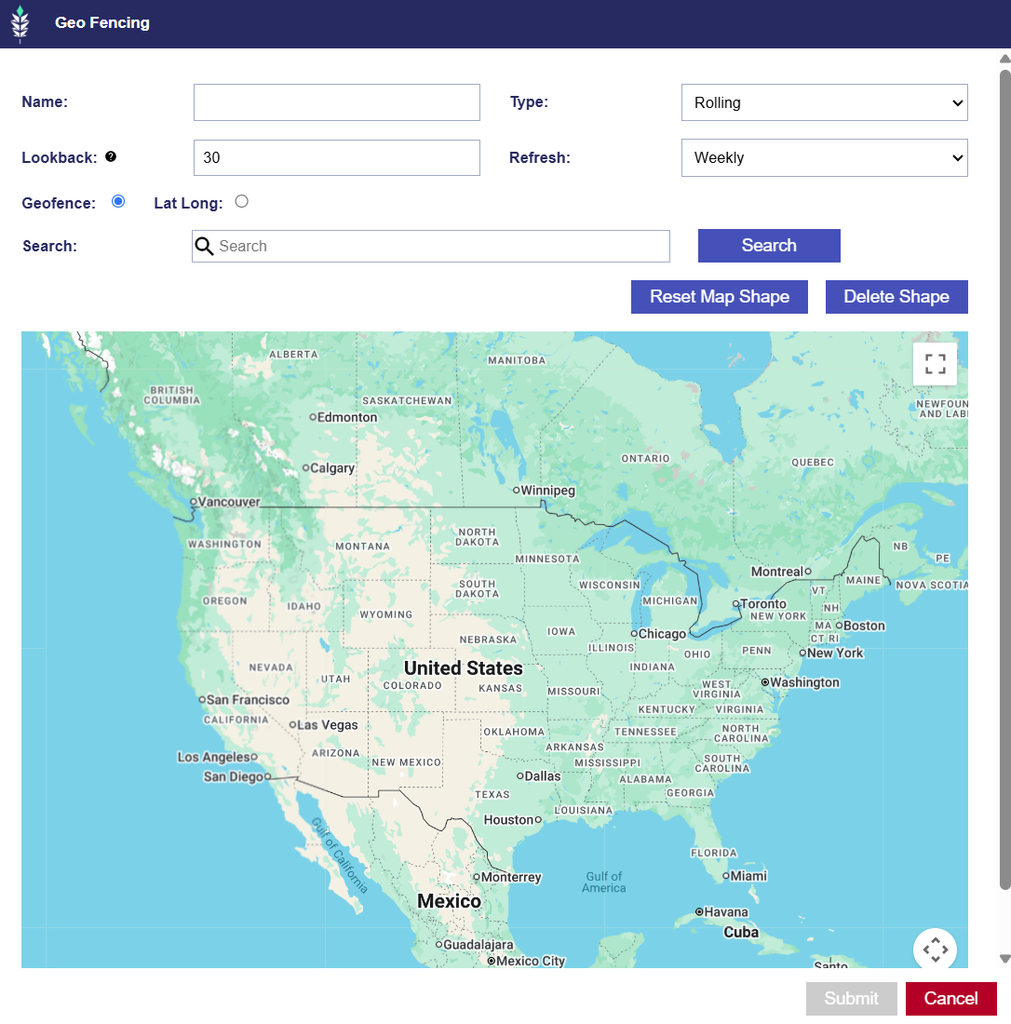
- Enter the audience Name.
- Select one of the following audience types:
- Rolling: A Rolling audience continuously refreshes based on a selected lookback period.
- Lookback: Select a lookback period of up to 90 days. The default value is 30 days.
- Refresh: Choose whether the audience should refresh weekly or monthly.
- The audience will be updated as new qualifying location data becomes available.
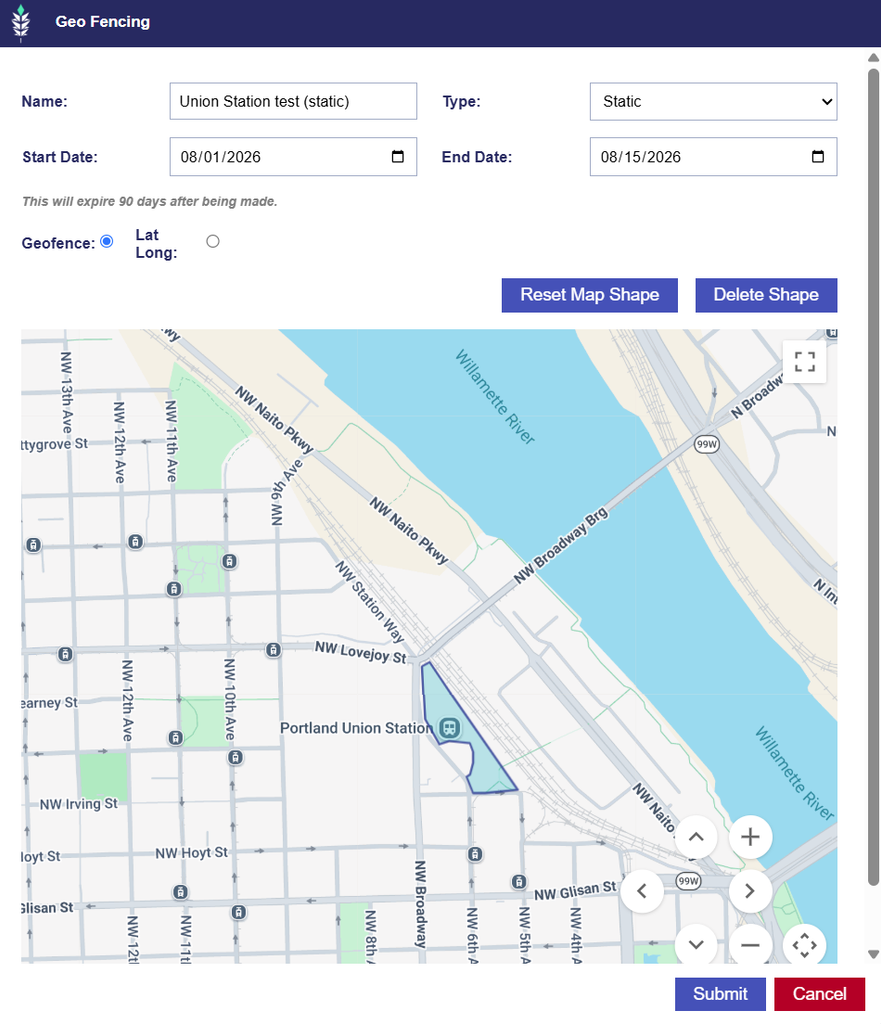
- Static: A Static audience is created using a fixed date range.
- Start Date
- End Date: Must be on or before yesterday (UTC); ex. if today is 2025-05-08 the end date must be on or before 2025-05-07.
- Static audiences expire 90 days after they are created.
- Rolling: A Rolling audience continuously refreshes based on a selected lookback period.
- Enter your Lookback window: the number of days of historical location data to include. The maximum lookback is 90 days.
- Define the Geo Fence Audience.
- Geo Fence Shape
- Lat Long
Geo Fence Shape
- Geo Fence is selected by default and allows users to define a custom geographic area by drawing a shape on the map.
- To define the Geo Fence:
- Use the Search bar to enter a location name or address.
- Use the map controls to draw the boundaries of the desired area.
- If needed, use the delete shape option to clear the current shape and start over.
- Once the desired area has been defined, select Submit.
- The Audience will then be submitted for processing using the selected shape and Rolling or Static settings.
Latitude / Longitude Radius Geo Fencing
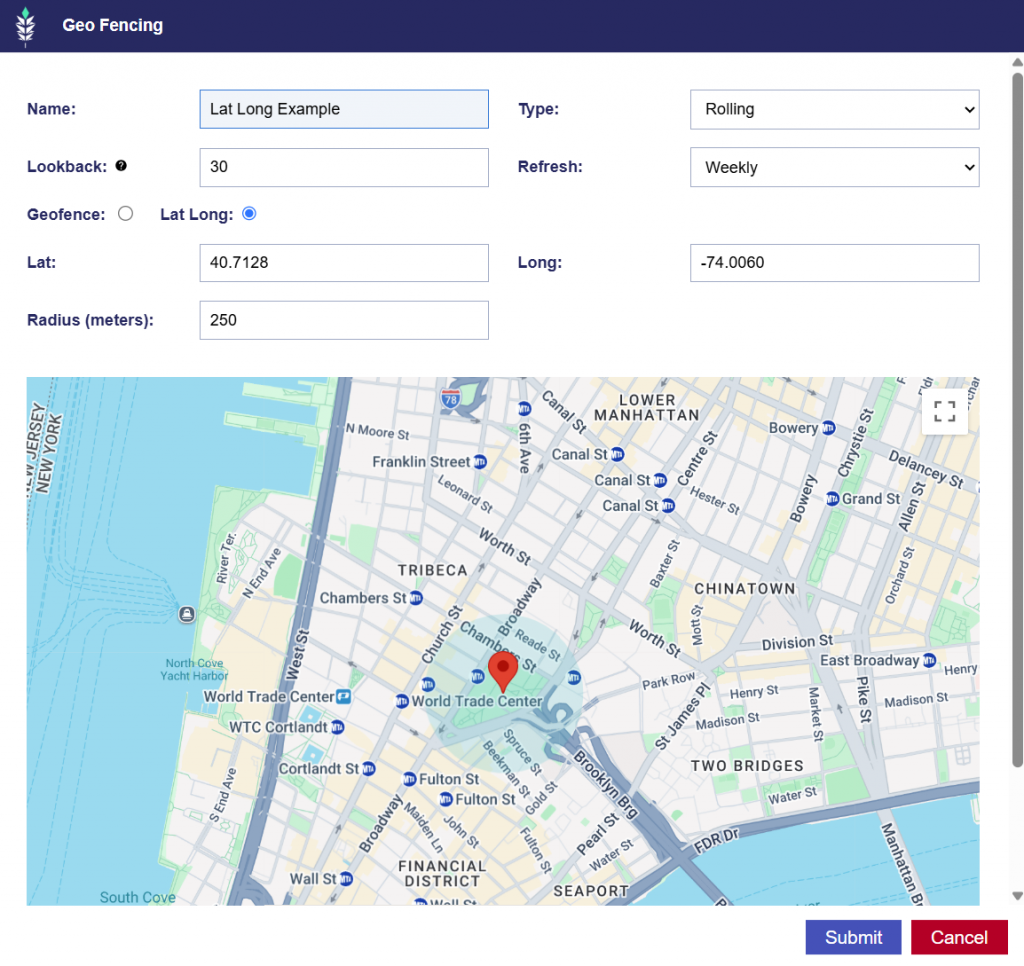
- The Lat/Long option allows users to define a geographic area using a specific latitude, longitude, and radius instead of drawing a custom shape.
- When Lat/Long is selected, the map shape controls are replaced with the following fields:
- Latitude: Decimal latitude value, for example 40.7128
- Longitude: Decimal longitude value, for example -74.0060
- Radius in Meters: The radius around the selected coordinate, for example 250
- Latitude and longitude accept decimal values, and the radius is entered in meters.
- The selected coordinates, radius, Audience type, and other settings are saved with the Audience and used when it is submitted for processing.
Edit and Manage a Geo Fencing Audience
Once created, Geo Fencing Audiences can be reviewed from Audiences > Third Party Audiences > Geo Fencing.
Use the Audience table to monitor the Audience’s:
- Record Count
- Date range
- Expiration Date
- Rolling or Static type
Associate a Geo Fencing Audience to a Campaign or Line
After the Geo Fencing Audience has been created, it becomes available for Audience targeting and can be associated.
- Navigate to the applicable Campaign or Line.
- Enter Edit mode.
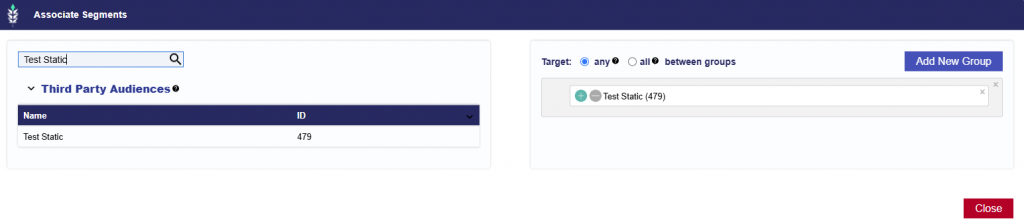
- Open Audiences and select Associate Segments.
- Select Third Party Audiences and locate the applicable Geo Fencing Audience.
- Search for the Audience by Name or ID.
- Select Add New Group and add the Audience to the desired targeting group.
- Select:
- the green plus (+) to target the Audience
- the red minus (–) to anti-target the Audience
- Configure any additional Audience or Boolean logic as needed.
- Close the dialog and select Save.
The Geo Fencing Audience is now applied to the Campaign or Line.
For additional information on combining Audiences and configuring Any / All logic, see Associate Segments, and Boolean Logic.